
Hello, everybody! With the shortage of masks I was forced to use ones that can be reused and line them with kitchen towel. It’s not the best solution, it can be quite dangerous at times because you may be inhaling germs when you thought you’re safe. Beggars can’t be choosers they say so it’s the best I can get at the moment. While masks are vital to me, cameras are considered a luxury so I can settle for less. I have always wanted to own a Leica M2 but their prices have sky-rocketed in recent years. However, since it’s a luxury I could substitute it with something that works very-much like it but it’s not a pretty camera like the Leica. Read the article to know what it is.
Introduction:
The Canon 7 debuted in 1961 in response to the Nikon SP and the Leicas. It’s an advanced camera, it has a built-in selenium meter and it has frame-lines for 35mm, 50mm, 85/90mm and 135mm, all in one view. It is also corrected for parallax which is great. The viewfinder is the real star of this camera, it was quite advanced as far as Japanese cameras are concerned in 1961. This is a glimpse of what the Japanese camera industry could’ve produced but it fell-short of many people’s expectations and I’ll show you why later.
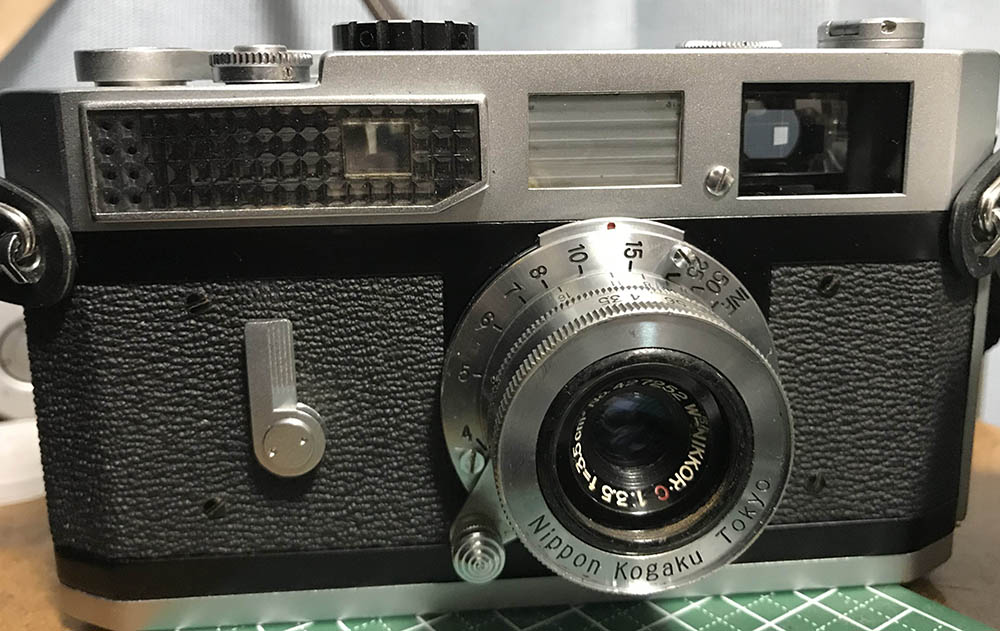
The big window houses a selenium panel for the light meter. Mine works, it isn’t super-accurate but it works well on a sunny day. You can boost it if you need to, it does it natively using a clever trick which I’ll show you in part 2. I like the design a lot, this could’ve been the perfect camera if not for some of the cost-cutting measures employed. Pictured is a W-Nikkor•C 3.5cm f/3.5, it would have been a perfect setup if the quality of the camera matches that of the lens.
The body was based from the Canon P so it inherited the stainless-steel foil curtains that were infamous for crumpling. You’re lucky if you found one in perfect condition. Mine’s in perfect condition and that’s the only reason this camera found its way into my collection.
I call this camera the “poor-man’s Leica M2“, in many respects this matches the Leica and it even surpassed it by having a built-in meter. I like shooting with this camera a lot, it handles very much like a “tin-Leica” and it should be treated as such.
The Canon 7 has an M39 screw-mount which is useful since you can mount a lot of lenses with it. I said “a lot” because not all M39 or L39 lenses can be used with it. It has a quasi-bayonet mount for the Canon 50mm f/0.95 which can interfere with the infinity lock of many older lenses. I have no use for it so I filed mine away.
The viewfinder is bright, it’s not life-size but it’s decent-enough. I thinks it’s around 0.8x magnification. The rangefinder patch is bright when you view it straight-on but it looks weak when you view it off-axis. This is because its “beam-splitter” is merely a mirror instead of a real prism.
The speed-selector dial does not spin just like the Canon P’s which the body was based from. You can also select the film-sensitivity using the same dial which was fancy back in its day.
One feature that I liked about this is the swing-open door which my Nikons don’t have. This makes it easier to access the film chamber but makes it a lot weaker structurally.
I know that some of my statements will raise eyebrows but I will back what I said in the coming repair section and you will soon see where I’m coming from. It’s such a shame since this could’ve been a real formidable camera.
Before We Begin:
If this is your first attempt at repairing a lens then I suggest that you check my previous posts regarding screws & drivers, grease and other things. Also read what I wrote about the tools that you’ll need to fix your Nikkors.
I suggest that you read these primers before you begin (for beginners):
Reading these primers should lessen the chance of ruining your lens if you are a novice. Before opening up any lens, always look for other people who have done so in Youtube or the internet. Information is scarce, vague and scattered (that is why I started this) but you can still find some information if you search carefully.
I highly recommend that you read my working with helicoids post because this is very important and getting it wrong can ruin your day. If I can force you to read this, I would. It is that important!
For more advanced topics, you can read my fungus removal post as a start. This post has a lot of useful information and it will be beneficial for you to read this.
Disassembly (Body Covering):
The Canon 7 was built for mass-production so things can be taken-apart in a quick manner for quick assembly and servicing if ever something needs to be readjusted before going out of the production line. Unlike Nikons, this is a lot easier to open and it only takes a few minutes to access what’s inside of the body’s shell. This is probably because the Canon 7 has a simple design, it has a screw-mount instead of the complicated bayonet mount found on the Nikons which are a pain to service.
Before you dive-in, make sure that you have all the proper tools for this job. You will need special openers and a couple of rubber cups to open some of the parts here. Do not use too much force or pressure, the camera is flimsy. I refuse to call it delicate since delicate doesn’t necessarily mean cheap. You’ll need to cover the aperture with a piece of cardboard to prevent your hands from accidentally crumpling the delicate stainless-steel foil of the curtains. I always do that as a standard procedure with every camera I repair.
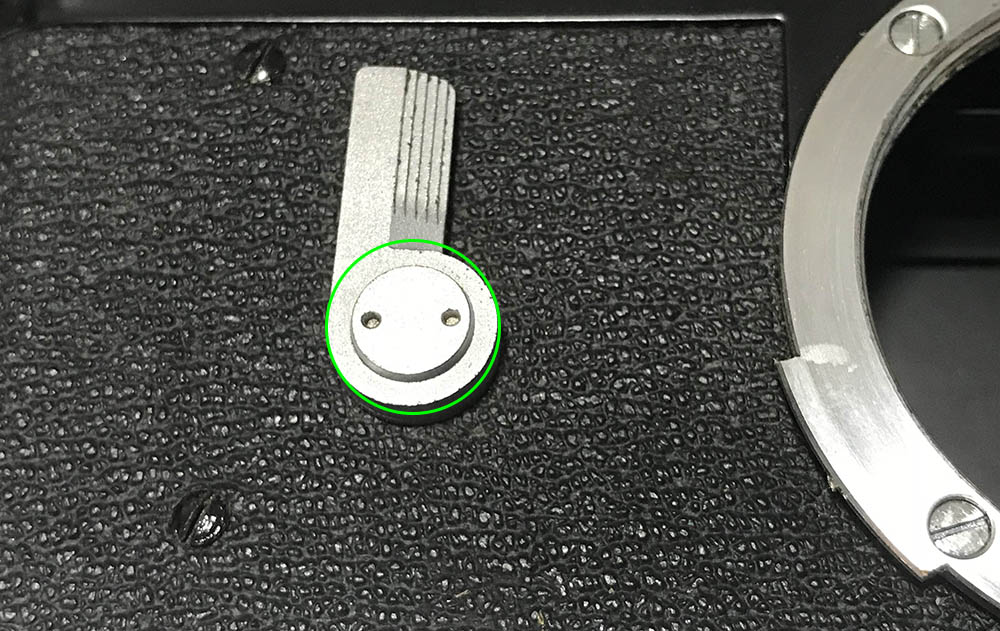
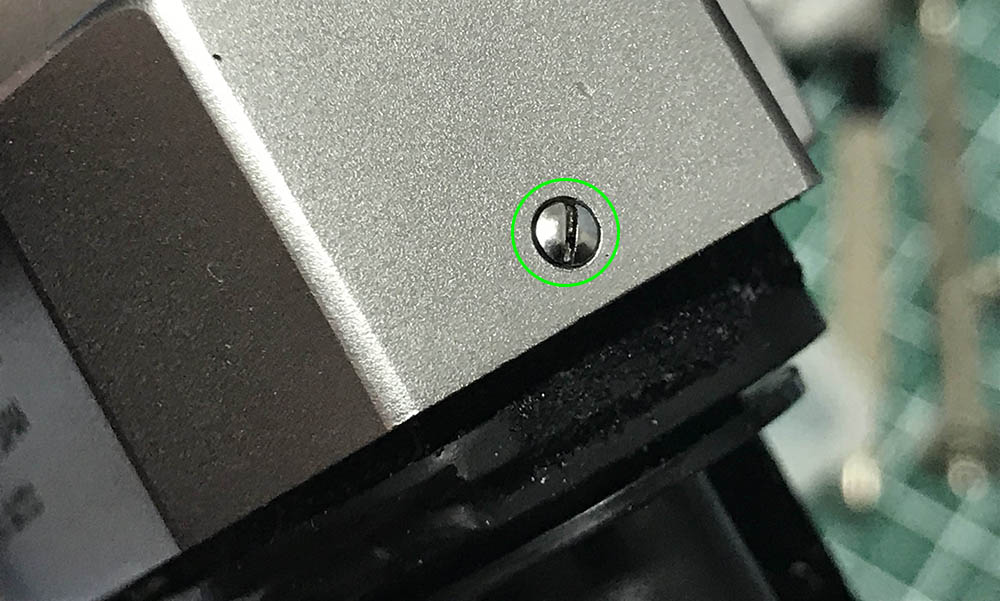
Carefully remove the cover of the self-time lever. Make sure that you do not scar the holes or it will become unsightly, I use a special tool to prevent this from happening but that’s not the focus of this article.

You can remove the self-timer lever once the cover is gone.
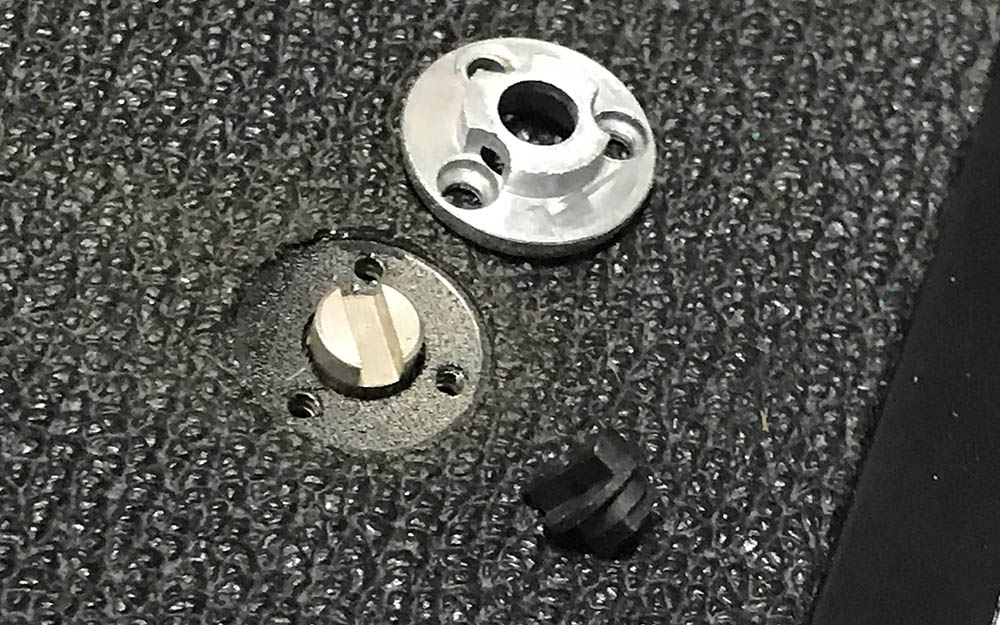
Carefully extract all of the screws of the self-timer lever’s plate. You’ll find a small coupler underneath it, make sure not to lose it.
Remove the head of the self-timer but don’t forget about this spring. Store it in a safe place so it won’t get lost.
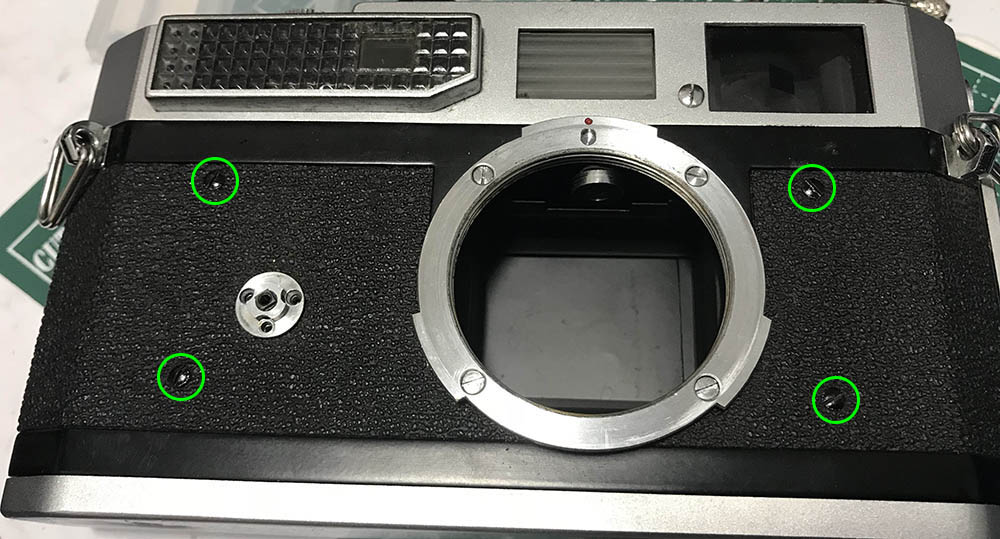
Carefully extract these screws on the face of the camera. The lower shell of the Canon 7 can be removed as a single assembly, it forms a skirt around its lower-half to protect what’s inside. It’s merely made of thin metal pressings.

Extract these screw, make sure that your drivers will fit the slots perfectly.
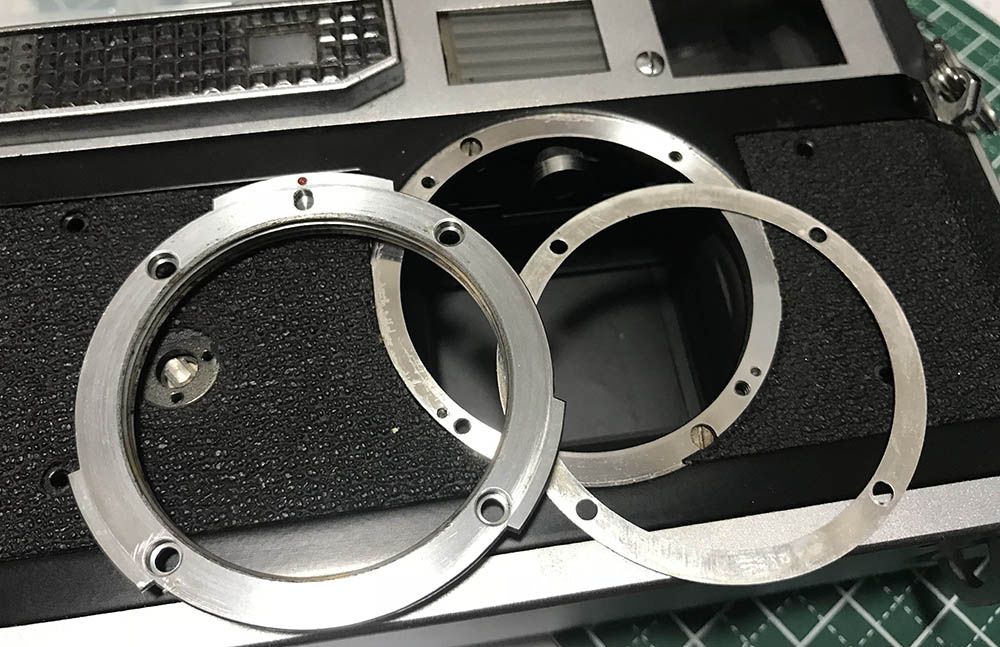
Don’t damage this shim underneath the lens mount.

Removing the lens mount will give you access to these. Extract these and do not forget to note which screw should go where.
The skirt can now be removed. See how cheap-looking the parts are?
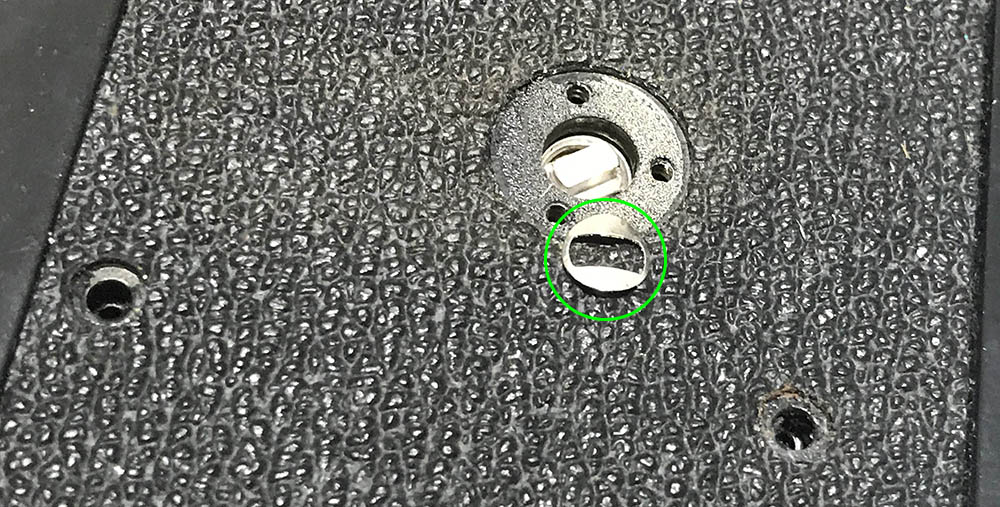
Extract these screws near the back cover’s lock.
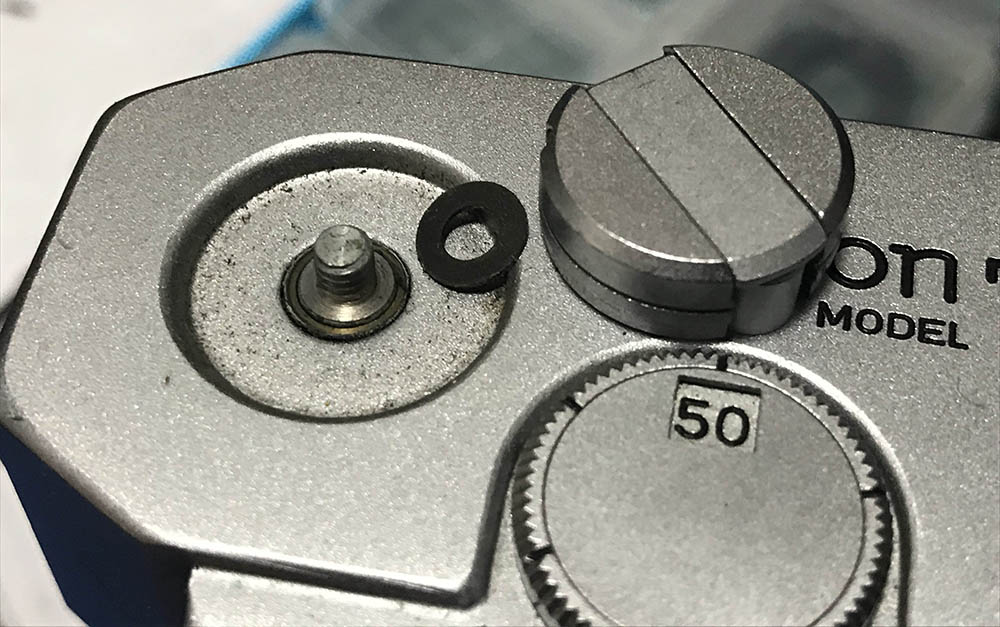
Carefully extract this plate around the tripod mounting hole.
You can now remove the bottom panel.

Make sure that you don’t lose this shim.
Carefully clean the body shell, scrub the old rubber with warm water and a mild detergent. Blow-away any water to prevent the metal parts from rust. I use pressurized air to make sure that it’s bone-dry. The bottom cover won’t have to be disassembled further unless the lock is damaged. Be careful with it, it’s made from poor-quality alloys not unlike the ones used on children’s coin banks from the same period. I had toys from the 1960s as a child and it certainly reminds me of them, like biscuit-tins from the 1950s.
Disassembly (Top Panel):
The top panel can be easily removed once you get some of the parts off. You won’t take a long time since the construction is quite simple. This was made with plenty of thought given to mass-production and you’ll appreciate some of that effort in this section. Like the body shell, the top panel was mode of a cheap alloy that could be bent quite easily so be careful when removing it. I cringed after opening the top panel because I found that some of the wires, levers and other stuff were simple taped-into-place, some were slipped into crevices and other dodgy gimmicks of the same kind. I wasn’t expecting this so please pardon me if you’re a Canon enthusiast, I’m used to Nikons, Leicas and Zeiss cameras.
Without the need to explain, you’ll have to be careful handling anything. It’s easy to bend some of the parts here, that’s something that you have to know and see for yourself if you don’t believe me.
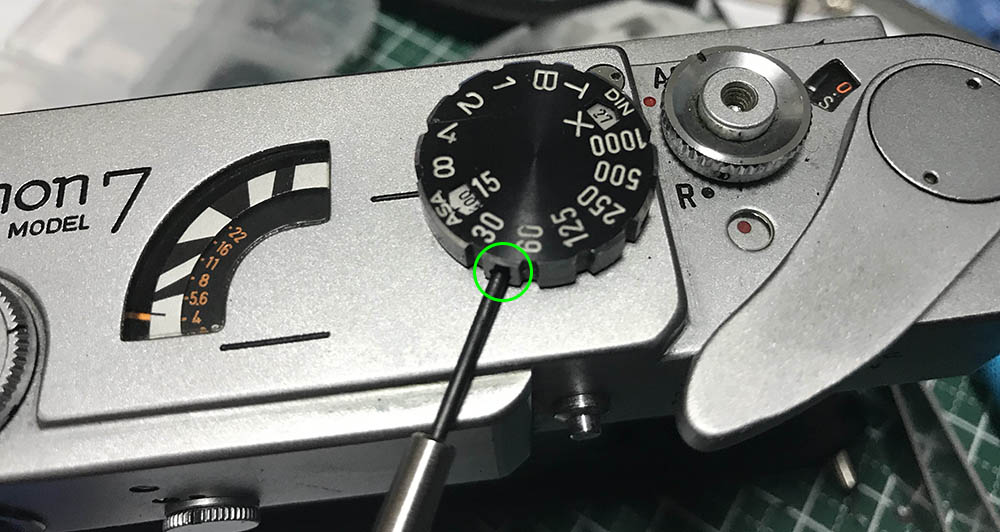
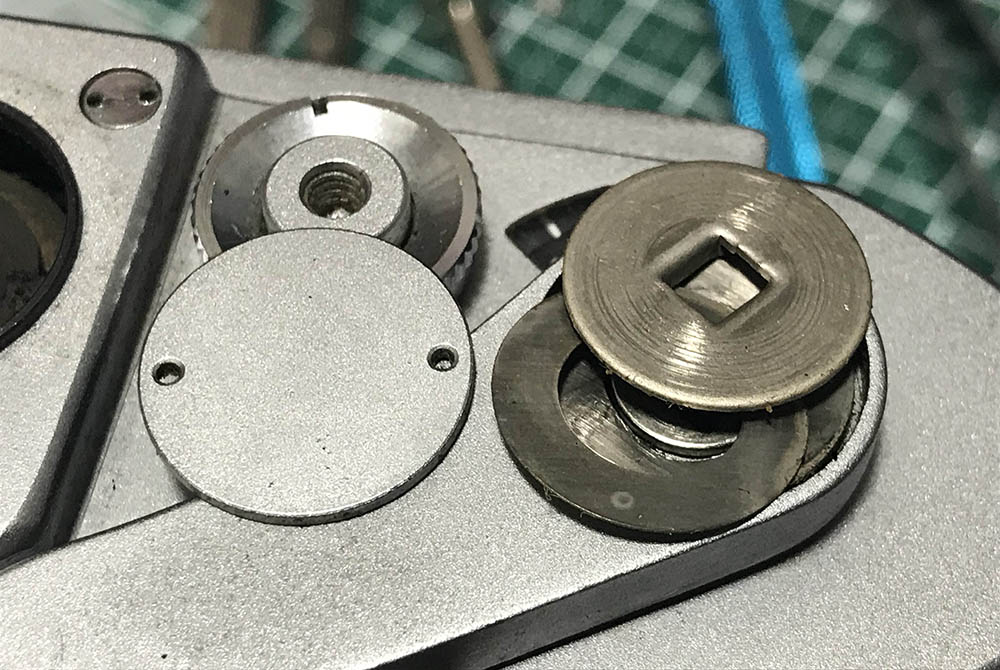
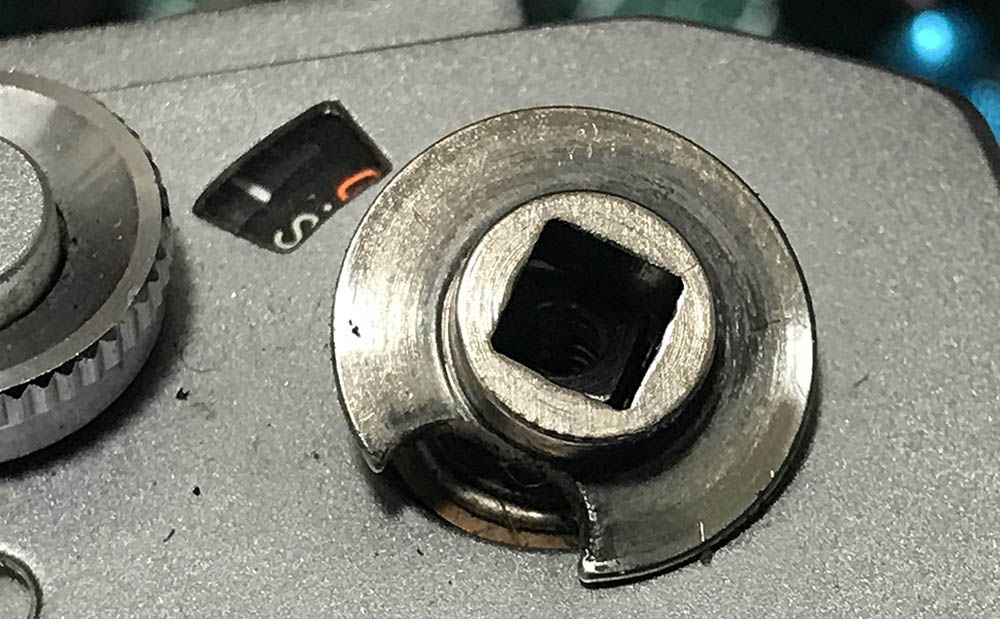
Locate and extract the screw for removing the speed-selector dial. This is a flimsy part so be careful not to damage in, you’ll soon see why I said that.
The speed-selector dial can be pulled from the main spigot of the assembly. Be very careful not to warp the thin ring that shows the film speeds.

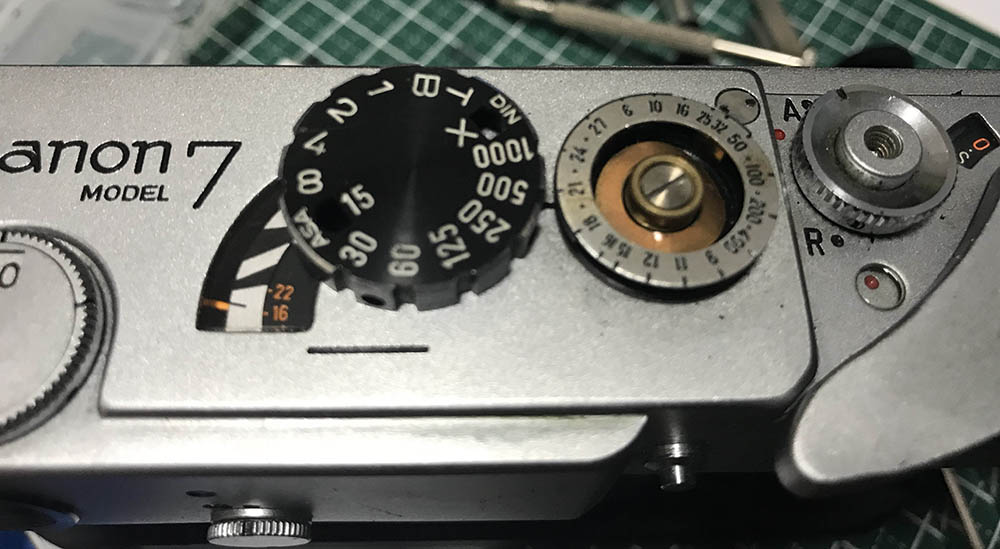
Carefully remove the film-selector dial, make sure not to warp it since it’s a thin sheet of metal. There is a ring-spring at the center which you should be careful not to lose.
Remove the rewind crank by jamming the rewind fork with a chopstick and unscrew the rewind crank until it’s removed. Do note that there’s a washer underneath it so don’t lose.
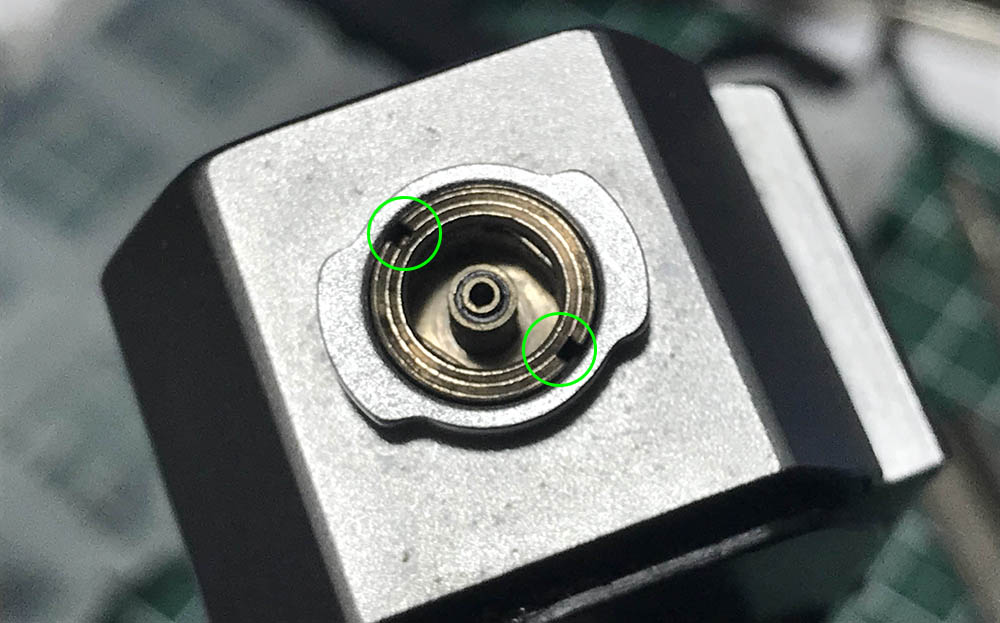
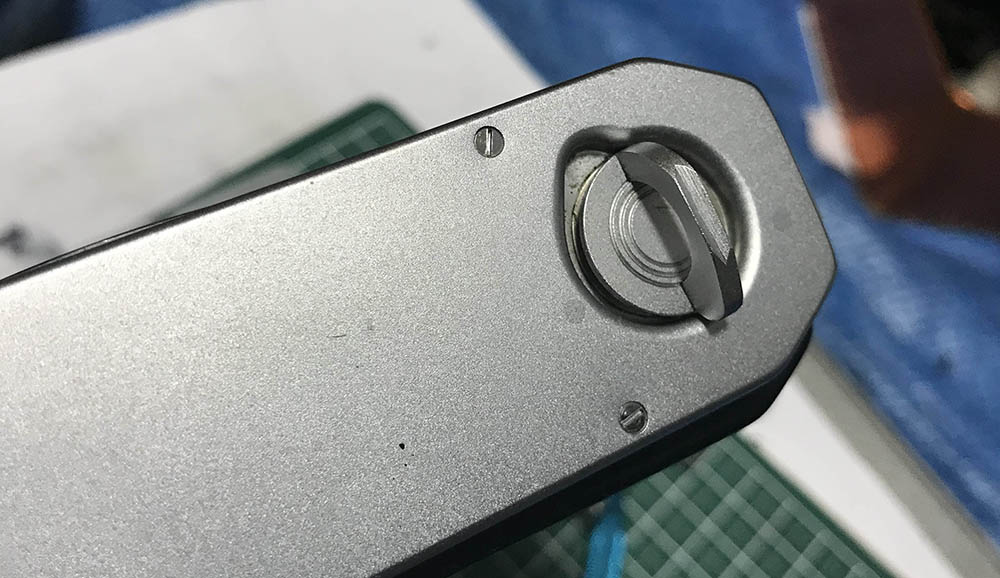
Carefully remove the flash-sync connector by using a special tool. Be really careful not to strip the slots or you’ll never be able to remove it.
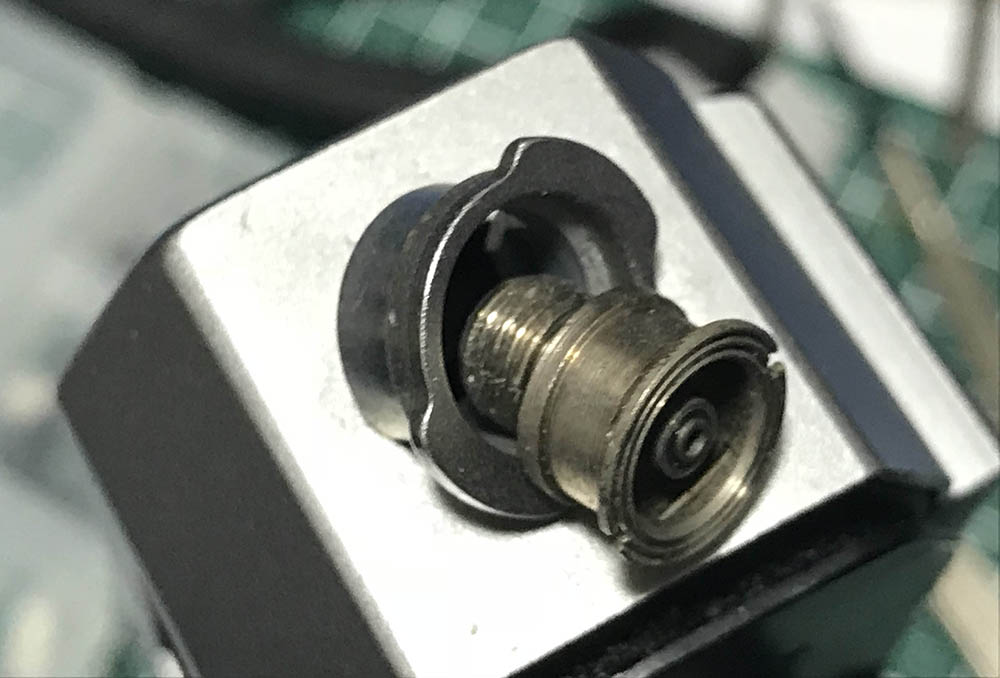
This is how it is removed. It consists of 2 parts, a socket that serves as a lock and the unorthodox flash-mount. Canon knew how to screw photographers this early into the game with proprietary gear. Well, you can say the same about Nikon as well when it comes to the non-standard hot-shoes.
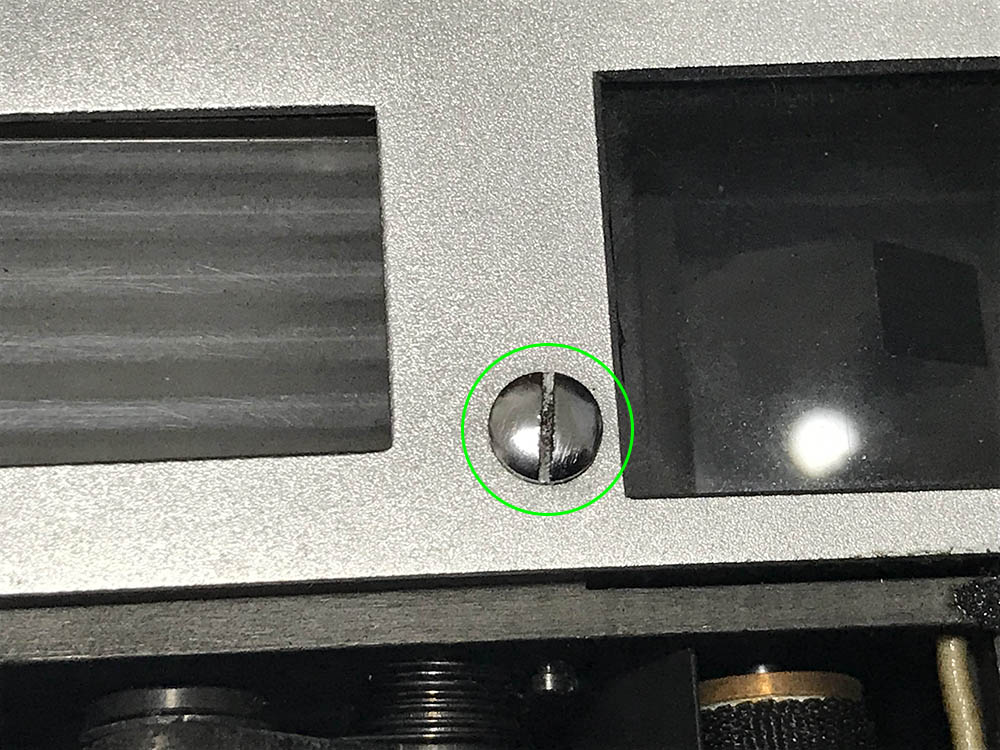
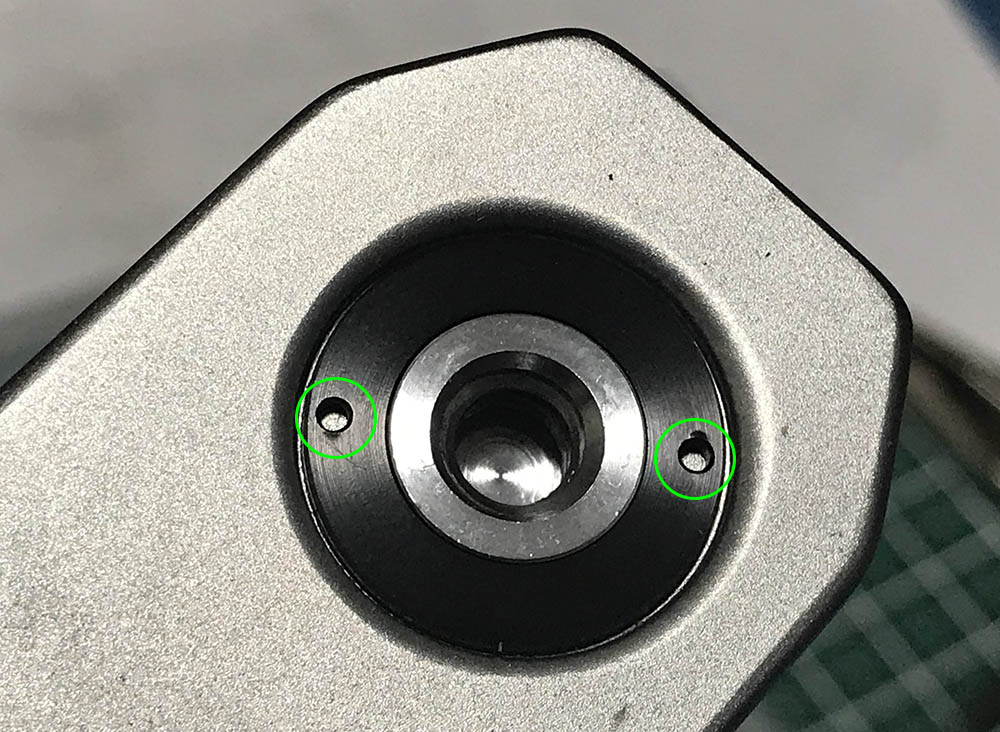
Carefully extract and keep this. Not only does this secure the top-panel, this is also the cover for the adjustment point of the rangefinder assembly.
This should be extracted, too.
Carefully remove the cover of the film-advance lever and make sure not to damage the cover. You can then proceed to remove the other parts.
Pull this part off, it couples the film-advance lever to the spigot of the film-advance mechanism.

Remove the plunger-button assembly by extracting this. The assembly also houses the advance-rewind ring very much like what you see on a Nikon S3.
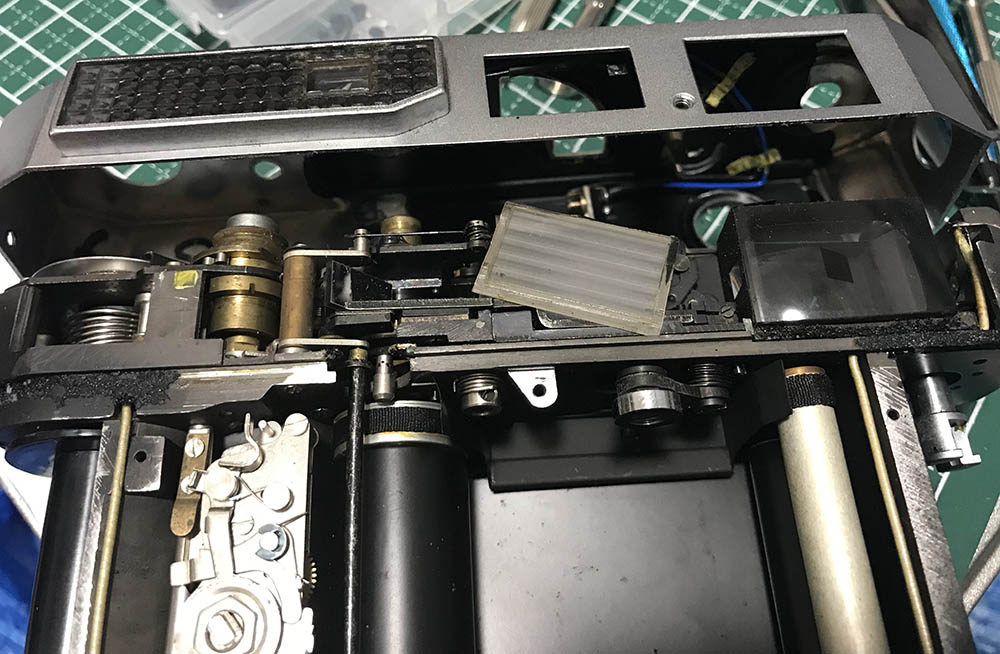
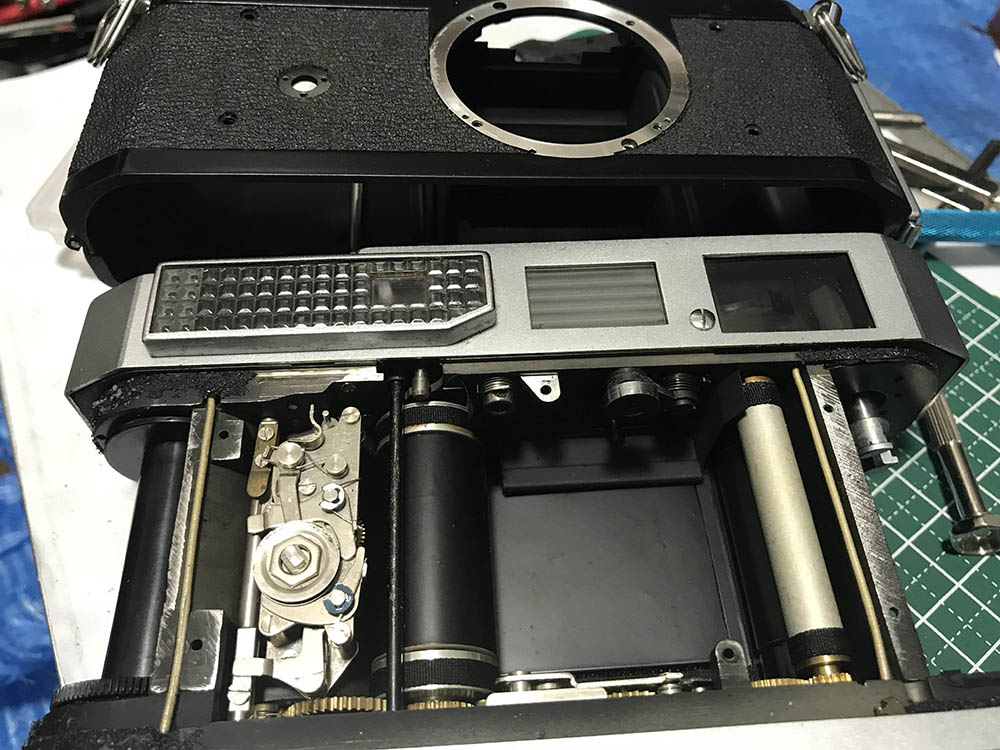
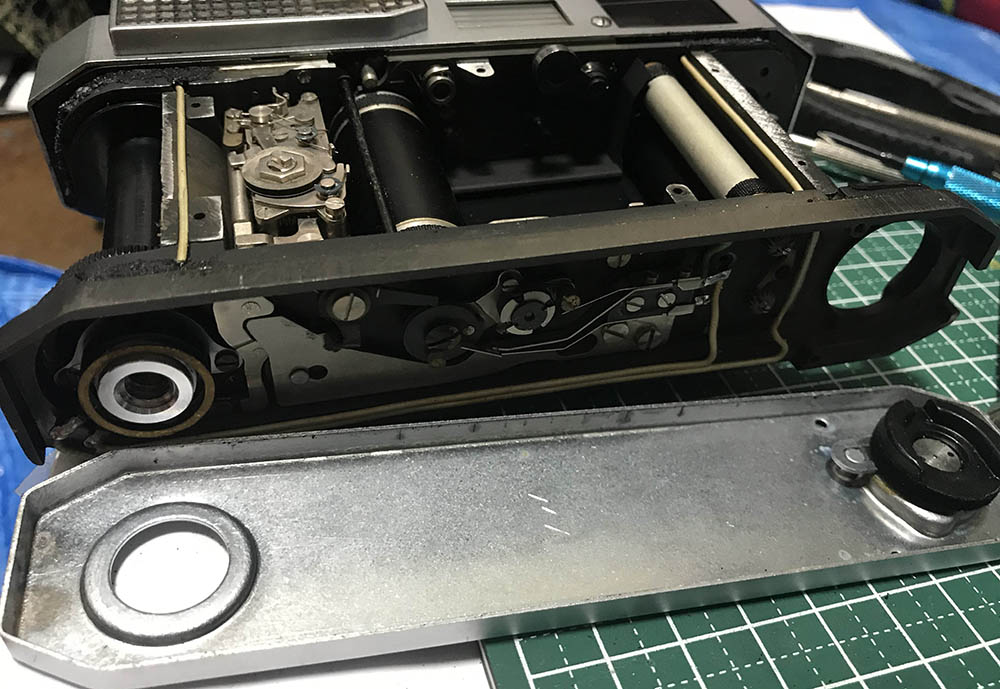
The top panel can now be safely removed. Be very careful as there are lots of parts that can come-loose such as the frosted acrylic window. Don’t press the viewfinder prism block as it’s only glued at the base. This thing doesn’t even have a proper protective glass window, how crude.
That was easy, it doesn’t take plenty of effort to open-up a Canon 7 down to this state. Most, if not all of the important mechanisms are accessible now. Be careful with your fingers, you may bend or dislodge something without even noticing it. I’m sure that the older Canons were built better than this.
Conclusion:
Canon sure knew how to cut-corners and produce a nice camera that’s not going to cost you a kidney. However, I think that they could’ve made this an even better camera if they charged a bit more but gave the design a tougher body, this could have been a masterpiece.
I hope that this article helped give you an idea of how things were shaping-up at the other back in the 1960s. I know that most of my readers come for my Nikon-related stuff but this has been requested to me for some time and I think that it’s about time that I made this. While this article sounds biased, I do back what I said with commentaries and photos. Despite its cheap build I’ll admit that I enjoyed using this camera a lot so I hope the Canon fans will forgive me for trampling on their brand.
Thank you very much for following this blog. It was my pleasure to present you this article so I hope that this helped somebody with their repairs. This is not a repair manual, it’s only for your entertainment. If you enjoyed this article, please share this with your friends. I get a few cents after a hundred or so clicks. You can also consider supporting my work, your support helps me offset the cost of maintaining this site and it also helps me purchase and develop film for the reviews. Without your support, this site would not have lasted this long. Stay home and stay safe, Ric.
Help Support this Blog:
Maintaining this blog requires money to operate. If you think that this site has helped you or you want to show your support by helping with the site’s upkeep, you can make a small donation to my paypal.com (richardHaw888@gmail.com). Money is not my prime motivation for this blog and I believe that I have enough to run this but you can help me make this site (and the companion facebook page) grow.
Leave me some tip?
Thank you very much for your continued support!
$2.00
Helping support this site will ensure that this will be kept going as long as I have the time and energy for this. I would appreciate it if you just leave out your name or details like your country’s name or other information so that the donations will totally be anonymous. This is a labor of love and I intend to keep it that way for as long as I can. Ric.

Sep 22, 2024 @ 22:52:43
There are many things you get wrong about Canon 7 in your two articles.
This is false. There actually two beam splitters in a Canon 7 and they are made of solid glass prisms. One prism is for the rangefinder and the other prism is for the projected fame lines. The coated, front silvered mirror you refer to directs the rangefinder patch image TO the front beam splitter.
2. your wrote: The Canon 7 was built for mass-production
This is false. The Canon 7 (and the V, VI, P and 7 series) were built for easy repair – not mass production. You note it was ‘easy’ to repair a Canon 7. This shows Canon’s excellent forward thinking design to repair these cameras with ease.
3. you wrote: The lower shell of the Canon 7 can be removed as a single assembly, it forms a skirt around its lower-half to protect what’s inside. It’s merely made of thin metal pressings.
This is false. The camera’s shell is sturdy aluminum and is not ‘merely’ made of thin metal.
4. You wrote: The skirt can now be removed. See how cheap-looking the parts are?
This is quite false. The parts are well made and neatly arranged.
5. You wrote: The bottom cover won’t have to be disassembled further unless the lock is damaged. Be careful with it, it’s made from poor-quality alloys not unlike the ones used on children’s coin banks from the same period.
This is completely false. The bottom cover is made from solid brass that is chrome plated as are it’s components, other than the black tripod socket ring, which is made from aluminum.
6. You wrote: Like the body shell, the top panel was mode of a cheap alloy that could be bent quite easily so be careful when removing it.
This is completely false. The top cover is made from chrome plated solid brass.
7. You wrote: I cringed after opening the top panel because I found that some of the wires, levers and other stuff were simple taped-into-place, some were slipped into crevices and other dodgy gimmicks of the same kind. I wasn’t expecting this so please pardon me if you’re a Canon enthusiast, I’m used to Nikons, Leicas and Zeiss cameras.
Mostly false. While some of the wires are indeed taped into place, show where levers are taped into place. And the wires are not slipped into crevices – there are specific routing areas for the wires – so no – you are not pardoned for disseminating lies.
8. You wrote: Locate and extract the screw for removing the speed-selector dial. This is a flimsy part so be careful not to damage in, you’ll soon see why I said that.
False. It is not flimsy in the least. In this particular case you have to know what you are doing to extract the speed dial easily, efficiently and safely. It seems you do not.
9. Your wrote: Carefully remove the flash-sync connector by using a special tool. Be really careful not to strip the slots or you’ll never be able to remove it.
Strip it? Really? I have repaired many, many Canon 7 camera and never encountered a problem removing the flash sync socket. This same thing could apply to any screw. Very weird advice.
10. You wrote: It consists of 2 parts, a socket that serves as a lock and the unorthodox flash-mount. Canon knew how to screw photographers this early into the game with proprietary gear. Well, you can say the same about Nikon as well when it comes to the non-standard hot-shoes.
A very odd comment because electronic flash was somewhat new at the time these cameras were being produced and the industry was still to standardize. Canon was now ‘screwing’ anyone. It is the reason Nikon had their own flash sync mount. You should know this and not make off-hand, biased and disparaging comments.
11. You wrote: Don’t press the viewfinder prism block as it’s only glued at the base. This thing doesn’t even have a proper protective glass window, how crude.
And yet, I have not come across a Canon 7 beam splitter that has come loose. Canon rangefinders and many other rangefinders do not have a protective glass because every piece of glass you put into an optical path reduces light transfer efficiency and every addition decreases contrast. It was still somewhat early days for consumer, single coated optics.
I know you say you stand by your comments – but they are highly biased and uniformed about Canon rangefinders (and their history) in particular. I won’t bother with your second article because it too is filled with bias and inaccurate opinions and I don’t want to spend more time on this.
Oct 06, 2025 @ 20:18:35
You aare absolutely right with everything you said about these classes of Canon rangefinders. Nothing in the least bit flimsy about them and actually of better materials and build quality than equivalent leicas.
Oct 21, 2025 @ 13:23:18
It’s pretty funny that he sniffs at the quality of Canon materials, then talks about how he is used to working on Nikon gear, which is itself notorious for having the worst quality/softest screws of any of the Japanese OEMs of the period, and dear lord, do their lens helicals suuuuuuuuck. And that great “Zeiss quality” he cites brought us the infamously overengineered and fragile Contax RF slat-type shutter curtains, which are far less reliable than the foil design used in this Canon model.
The fact is that all camera manufacturers (even Leica!) had to constantly make cost-benefit decisions as to what components of their cameras and lenses they would invest more or less in. The Canon 7 is a nice balance of quality and affordability, hardly the cheap trash he seems to make it out to be.
This article reeks of needless Nikon fanboyism at the expense of a Canon product that does not deserve the amount of unwarranted and often entirely baseless criticism he levels against it.