
Hello, everybody! There are rumors about an upcoming King Kong movie where he gets to fight with Godzilla. I would like to see that happen not only because I am a fan of Kong but I’m curious to see how this classic will be remade. Speaking of Kong, I will show you something big, long and dark. It’s not what you think because it is not Kong or Godzilla but a lens that’s just as monstrous.
Introduction:
The Zoom-Nikkor 50-300mm f/4.5 Auto was made from 1967 to 1975. This is the first high-power zoom for the 35mm format. It was difficult to design specially considering what was available to the engineers. They didn’t have the advanced raytracing software that lens designers take for granted today. Needless to say, this took a long time to develop but the result was astonishing, it cemented its place as the King-of-Zooms for years and it also has a non-variable maximum aperture as a bonus, too. Another highlight is it won’t change its focus as it is zoomed, your subjects remains sharp. This made it ideal for other applications such as videography.
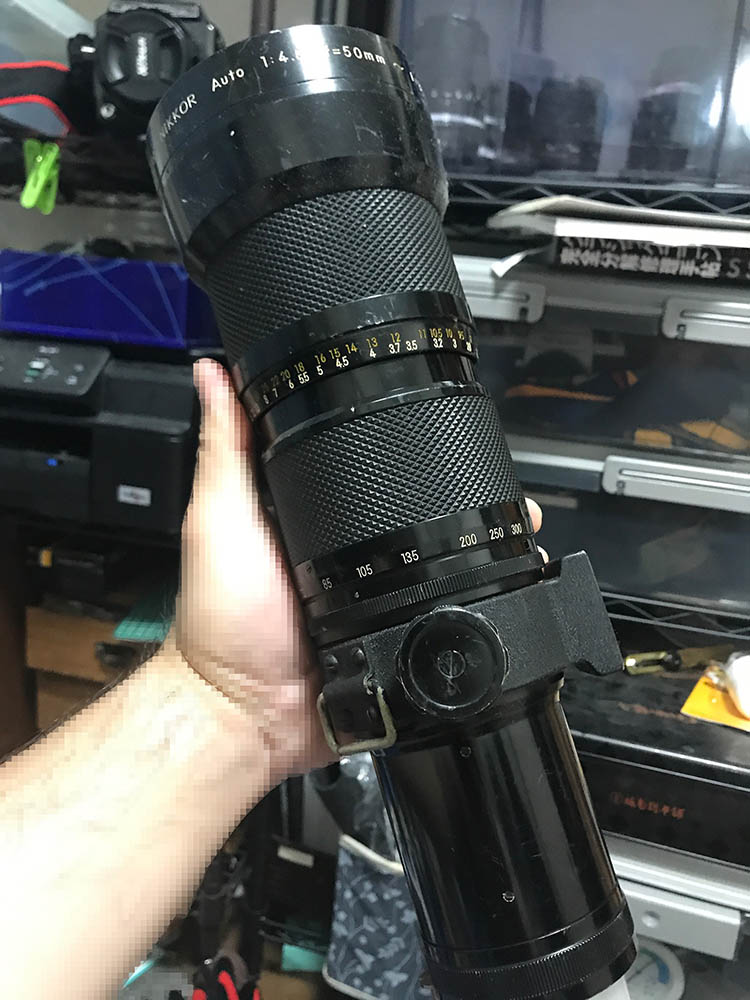
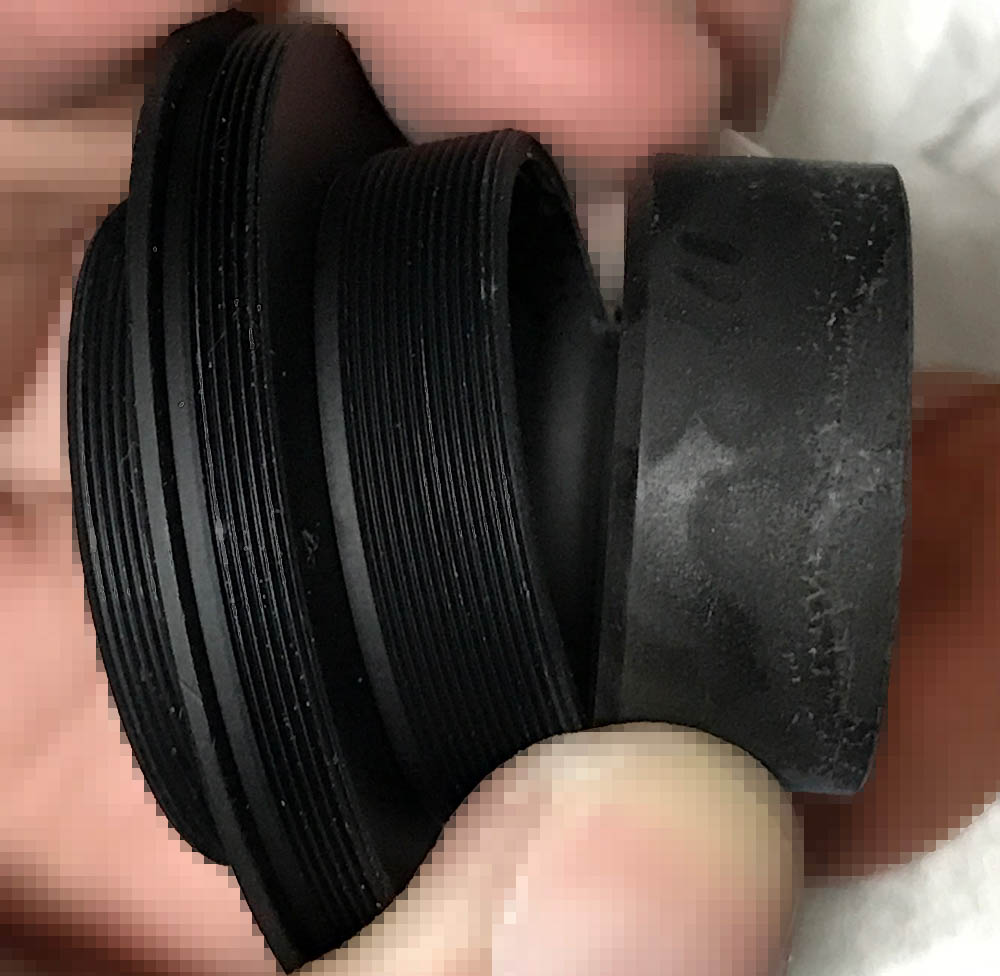
Unlike many zooms of its time it has a 2-ring setup instead of the “pumper-zoom” layout that was common for its era. It’s a very heavy lens, certainly not something that you’d want to handhold all-day. Handling isn’t good at all because of its scale. Shown here is the later version with the black-nose, earlier ones have a silver-nose.
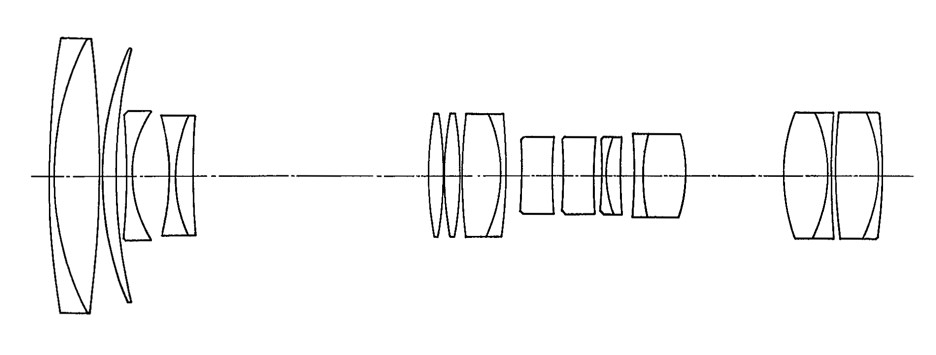
It has a complicated 20-elements-in13-groups design, something to show the world that Nikon could make any lens it could with what was possible at that time. It has an amazing 6x zoom ratio, something that made this a marvel of its time. Its origin began as a zoom for the 8mm format for movie cameras which was the adapted for use with 35mm film, that’s where the basis for this lens came from. It was designed by the same engineer, its story is covered in this Nikon article by Mr. Oshita.
This is a very useful lens, it was a favorite of many journalists and sports shooters due to its zoom-ratio. It was in-demand that you’d need to wait for one after you paid for it but I think that has more to do with how hard it was to manufacture these.
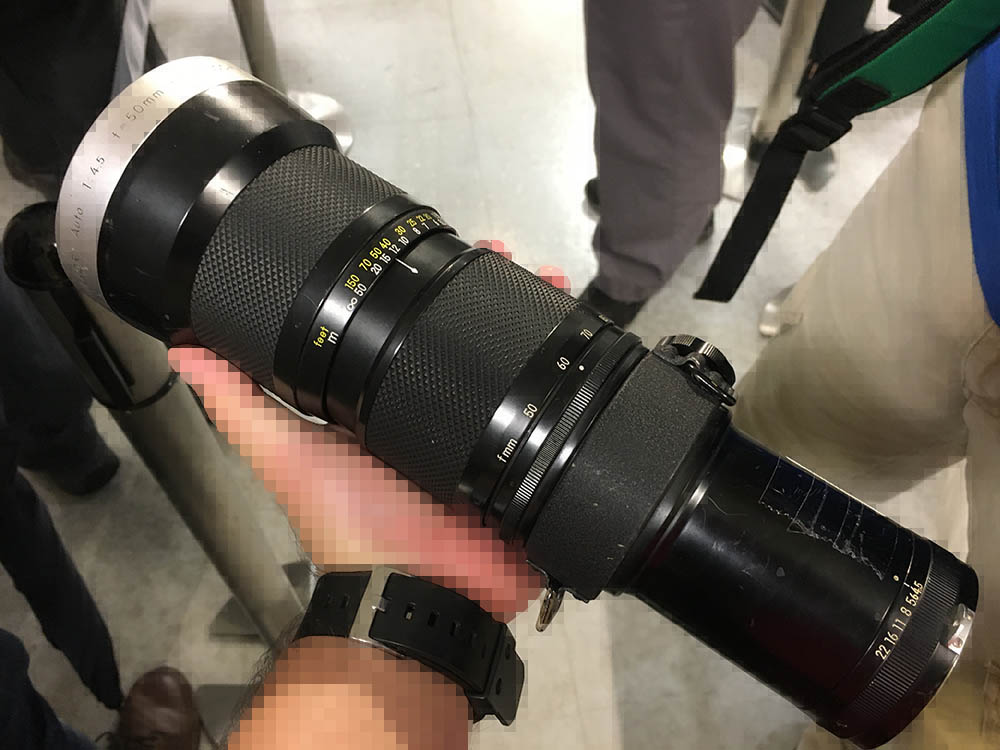
This is how the earlier version looks like. It’s basically the same except for the color of the tip. This is heavy, it is best used with a monopod. There’s a photo online showing Bruce Lee using of of these. I’m no superman so I won’t have the stamina to carry it all-day. Because of its weight it needed carrying-lugs for a strap and a collar for you to mount it on a tripod, too. It has a massive 95mm filter-ring size and Nikon made special ones for its use. Even the front cap is a special item, too. Its dedicated-hood is rare, they could cost you $60.00 a pop.

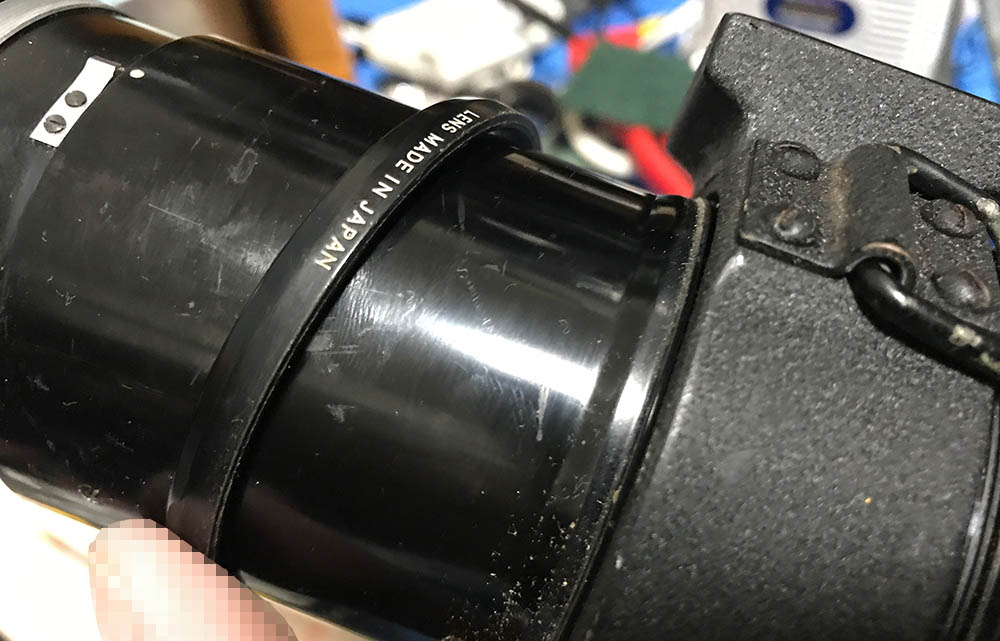
You should mount it with a bigger camera for better balance. A Nikon Df isn’t the best camera to use this with but it’s the only digital SLR from Nikon that’s capable of using it safely since I don’t recall any of these coming with the factory Ai-ring. Visible here is the lock for the tripod collar, it’s huge. The strap lugs are heavy-duty, I would advise you to attach clipped-on straps to it for carrying.
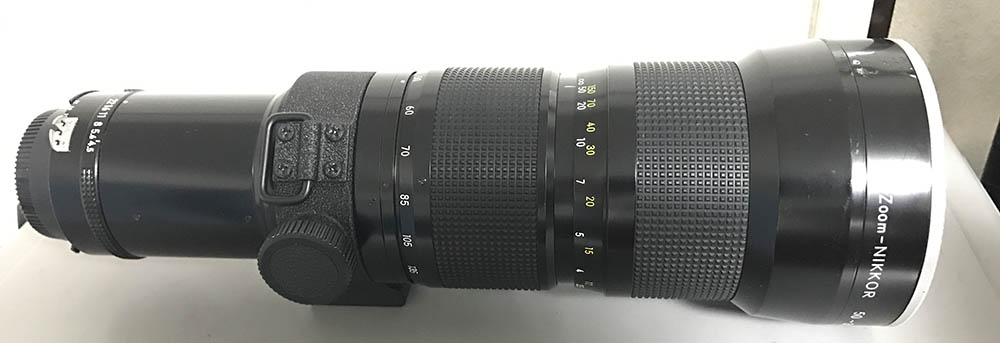
This is how long it could get if focused to its minimum focusing distance. It focuses down to 2.5m which is not unusual for a telephoto zoom of its day this is pointless when shooting it below 135mm. It becomes limited in use, just treat it as a telephoto lens that could get to 50mm instead of thinking of it as a general-purpose zoom.
I’m not sure if this is the Zoom-Nikkor 50-300mm f/4.5K or the first version of the Zoom-Nikkor 50-300mm f/4.5 Ai from this angle since they both look similar. If you want to use these with most modern Nikons be sure that you get one with the factory Ai-ring like the one you see here so you could mount them safely.

It inherited its optical formula from the Zoom-Nikkor 50-300mm f/4.5 Auto. Designing a new barrel for it is not an economical solution so Nikon mostly used the same design from the older lens. Note that the pattern of the rubber parts are different, they’re not of the older diamond-shaped pattern of the older ones.
Let’s now see how this lens performs. It’s important to know how it performs so we’ll know its strengths and weaknesses. This lens’ rear element is in such a poor state that what you’re about to see here means nothing but you could at least use them to study characteristics that aren’t affected by sharpness and contrast such as its bokeh quality, vignetting and distortion. This is pretty decent from what I could see from the pictures taken by other people. I will update this once I get the chance to find a donor lens for the problematic part. I used a Nikon Df to shoot these.

(Click to enlarge)
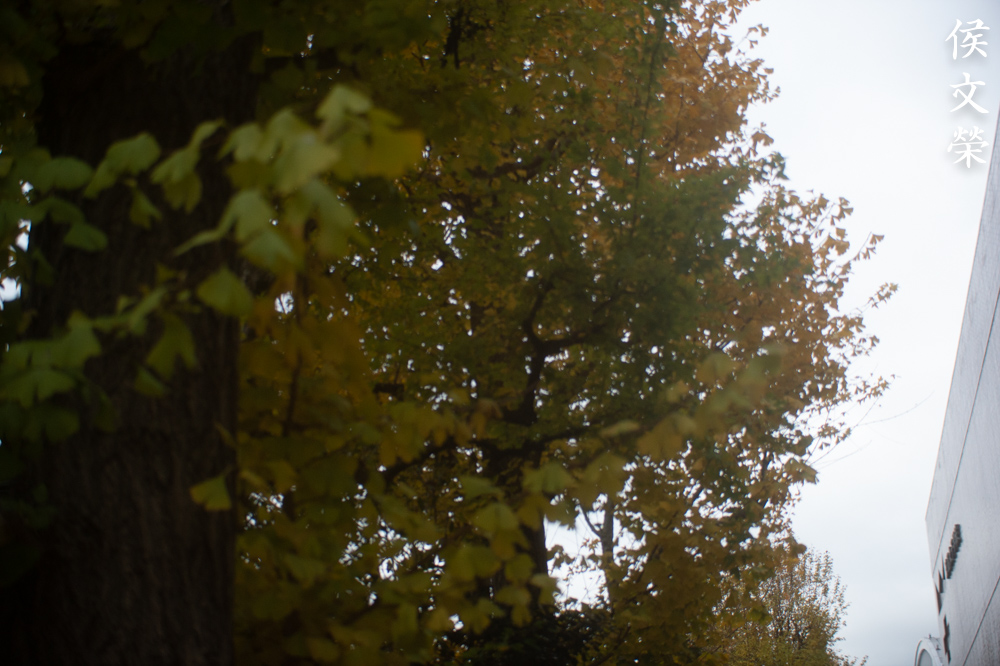
Distortion is kind of high at the wide-end but it’s not as bad as what I was expecting. The same couldn’t be said for the long-end, the distortion amount is hideous. Avoid shooting with it if you intend to keep lines straight.


(Click to enlarge)
Vignetting is quite heavy and reaches the center of the frame wide-open which will result 2/3 of a stop’s worth of light in some cases. It gets better at f/5.6 but it’s still dark near the center and the corners still look the same but just a stop brighter. The frame looks brighter by f/8 but the corners remain dark specially at the long-end. This is going to be troublesome when you’re metering with it, it’s either you overexpose it by a bit wide-open or underexpose it when you stop it down.


(Click to enlarge)
Since this lens is in terrible shape it has a permanent flare applied to all of its photos. The issue that I shown in the previous part is illustrated here. It meters properly wide-open but overexposes the scene when its shot at smaller apertures since the vignetting is preventing it from metering properly. This won’t be a problem for mirrorless cameras but SLR cameras won’t have a way to do this conveniently since you’ll have to depress the aperture-preview button while you meter your scene.


(Click to enlarge)
The character of the bokeh is mediocre but it’s above-average in certain situations where it amazes it to think how smooth it renders the blur. I have yet to see terrible bokeh quality from it but it’s not the best either.
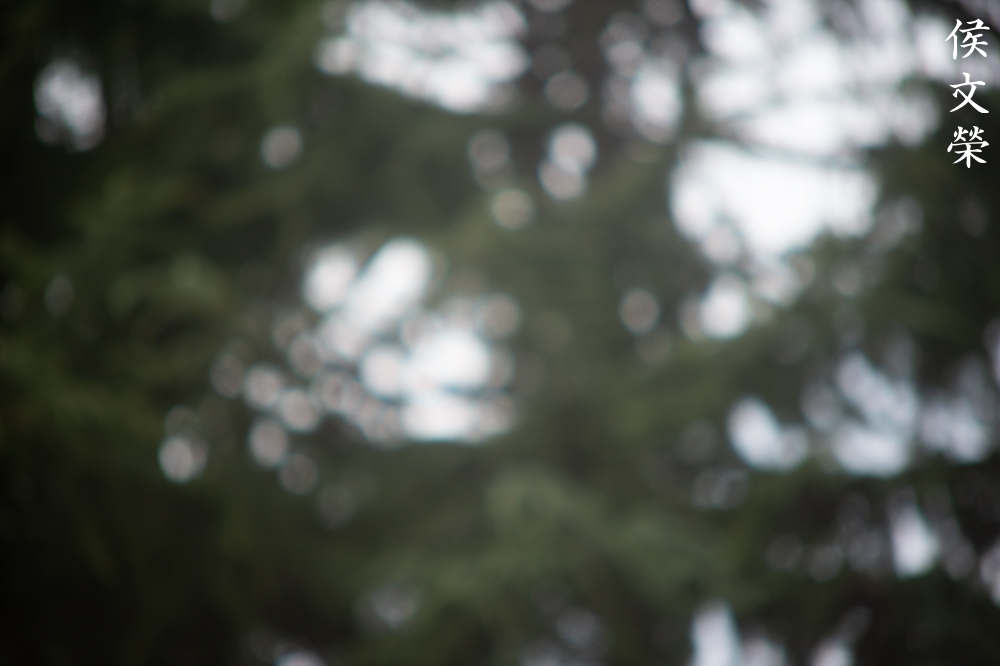
The bokeh quality isn’t the cleanest wide-open, you’ll see outlines and other artifacts.

Stopping it down a bit helps as it removes the outlines and the look is a bit cleaner.


(Click to enlarge)
Spherical aberration and flare is quite high wide-open and will subdue the contrast, veiling the whole frame with a delicate-looking softness. Sharpness is not bad at all for such a lens designed in its time, at least at the parts where you won’t see the drop in sharpness happening. Stopping the iris down helps a lot and you’ll get decent photos from it at f/8.

The terrible halation you see here near the center is caused by bad coatings damage in combination with the haze at the rear element. It looks terrible, I think my smart phone can take a better photo than this. Sharpness is poor, I don’t think this lens can be this bad if not for the damaged elements.

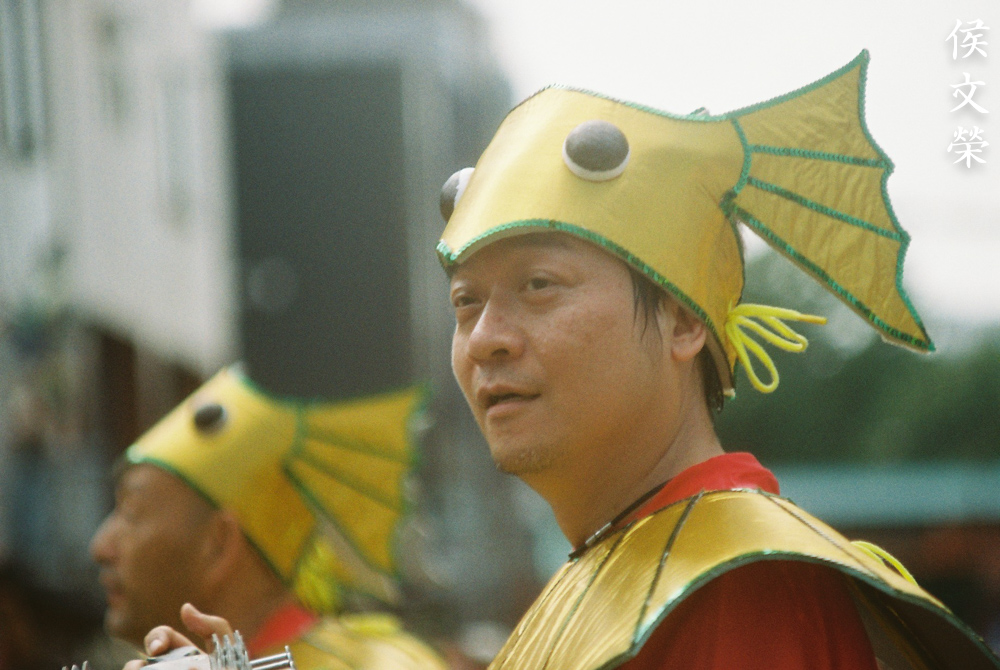
There’s terrible chromatic aberration around the hat. That is not caused by lens damage, it’s inherent to this lens. The veiling flare on the other hand is caused by this lens’ poor condition.

Even when you’re not shooting against a light source you’ll get veiling flare, this is something that makes this specimen useless.

This is a “sharp” sample from my set. You can see that it’s clear but contrast is poor, a sure sign of damaged coatings. I can only imagine how useful this can be if the coatings are good and there’s no balsam separation in the rear elements.

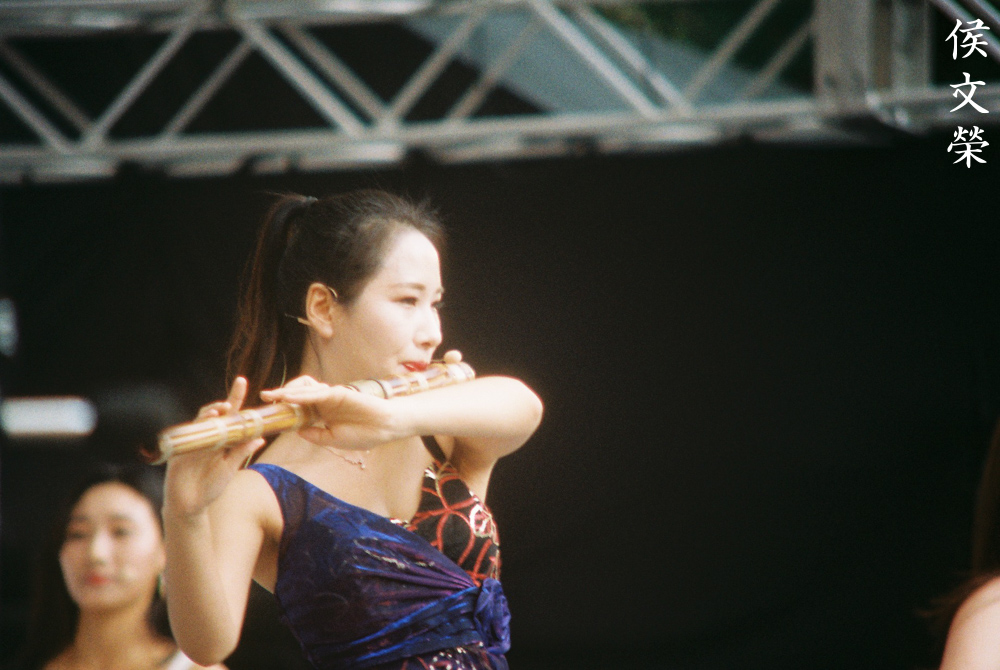
Well, this isn’t so bad, at least for this. There’s chromatic aberration in her bandana which can be distracting if you zoom-into it. It’s difficult to use this for focusing with moving subjects, the focus throw is rather long. It is something that’s common with many older zooms and you’ll just have to deal with it.

It does seem to have above-average bokeh quality, it won’t give you that ugly, smeared look when shooting a background with high detail frequency.

The character of the bokeh isn’t “clumpy” at all. I was expecting to see more of it but it seems to be decent. It’s also a nice photo for inspecting optical aberrations such as sphero-chromatic aberration.

Well, this doesn’t look so bad at all at least when viewed as a small print. It’s fine for newsprint, specially with the quality of those days but it won’t be a useful tool today. If I were an editor, an un-sharp photo of something important is better than a sharp photo of something useless.


(Click to enlarge)
Here are some more photos that I took that afternoon. Some of them are OK while most of them are terrible, stopping the iris down is useless if the glass and coatings are damaged. I don’t believe that Nikon would make this as-is and sell this to the public knowing that it’s less-than-mediocre. If I have a chance to shoot with a nice sample I will update this blog with better photos taken with that lens.
Let’s now see some photos that were taken with film. Film has a unique and endearing look, this is because film grain looks different from noise. This is the reason why it’s so difficult to replicate its look with a digital camera. It also helps conceal a lens’ flaws or it can amplify them, too. This lens was made for use with film so we should judge it with its intended medium. I took the photos with Fujifilm Industrial 100 using my Nikon F3.
As with my previous photos, don’t use my photos to judge this lens since my copy is defective so you won’t see how it really performs when the lens is in decent state.

This shot is useless but at least it shows us how smooth the bokeh quality is. This is quite pleasing considering that it’s a slow lens. The cloudiness in the picture is caused by the deteriorated state of the lens.

Chromatic aberration is terrible, this is as bad as it gets.

This would have been a good photo if my lens is in decent state. Even if this photo is useless you can see that this lens is good at the center wide-open. I’d know if a lens has potential just by looking at the photos it took despite the poor quality. In this case I can say that this lens is better than usual only if I had used a good copy.

Focusing with it can be tricky due to its long focus-throw. It may be acceptable on the longer-end but it’s not a good thing to have at the wider-end. Either way you will have to get used to it specially for moving subjects.

The less-than-optimal f/4.5 maximum aperture speed means that you won’t get a shallow depth-of-field to help you focus with it. A split-screen is useful on a sunny day but it’s going to be problematic when it’s dark since it has the tendency to black-out at the center. A coarse-matte screen is the best one to use with it.

The bokeh quality isn’t so bad but that will depend more on which focal length you’re using it with. The longer focal lengths will help give you a smoother result since the background will be blurrier.

I love its utility as a lens for use in event photography. People who shoot sports will also like it a lot because it offers you the reach and the flexibility to go to 50mm if the action demands it. Shooting motor sports is a nice example, it doesn’t change its focus as you zoom with it so it’s handy for tracking a car from the wider-end to the long-end when the car is moving horizontally in your frame.

It renders skin nicely but that may have more to do with the low-contrast look that we get from this sample.

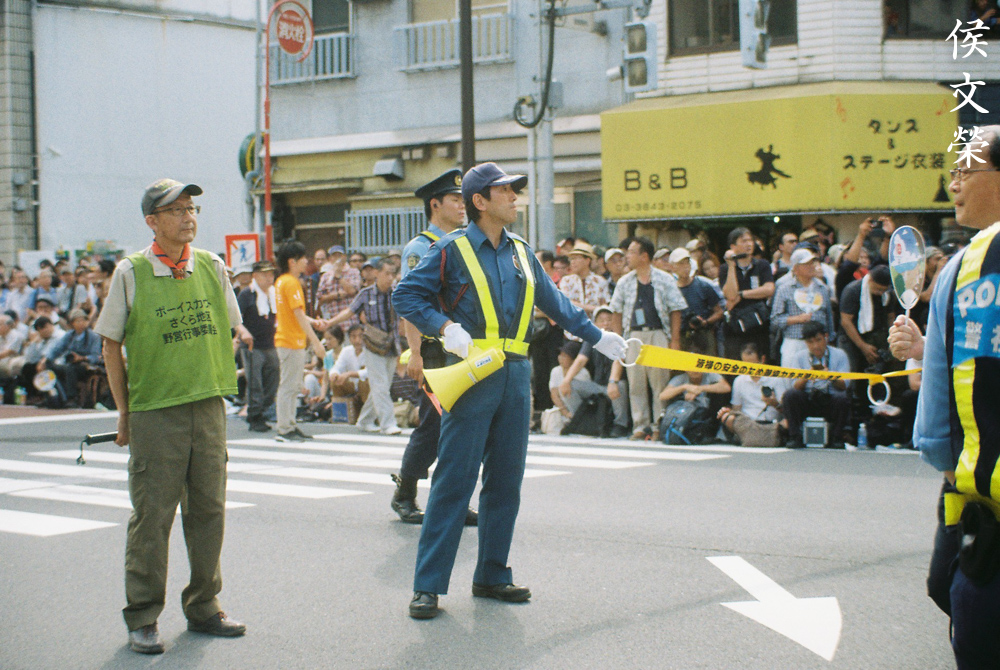
Despite having challenging details in the background such as the guy wearing stripes it managed to render it in a smooth manner.

I can see a lot of potential for its use as a portrait lens since it covers most, if not all of the focal lengths needed in your kit for shooting people and f/4.5 is quite decent, too. It’s probably going to be a nice lens for use inside a studio where you could carefully focus with it.


(Click to enlarge)
Here are my photos from that afternoon. It’s a very handy lens, this covers everything that a journalist would need to shoot at event. I learned that day that it sometimes pays to bring a huge, heavy lens to an event if that means you’d get more usable photos. Changing lenses or switching bodies means lost opportunities, this lens enables you to forget about that and just focus on your job. Despite the poor performance of my sample I got to see this lens in a new light and I now understand why this was such a big hit in its day.
I won’t recommend this to anyone, it’s something that’s best left to the collector. There’s no point in using the lens these days since you could get better performance from many alternatives that are lighter and smaller. I enjoyed using it despite its heft but this is not something that I would want to do often. It’s impractical and it is best remembered as an amazing lens for its time when there were not a lot of alternatives to it. If you’re set in looking for one of these, be sure that the glass is clear and clean, the coatings have to be great, too. Make sure that the iris is dry and snappy when actuated. Operate it and make sure all is smooth. These don’t cost much, I often see these being sold for less than $100.00 in decent condition just because nobody wants them. I got this for $15.00 because it was sold-for-parts as you will soon see. They’re huge so shipping will be expensive and it will also require space to store them. This makes the unpopular and hence, their cheap price. Happy hunting.
Before We Begin:
If this is your first attempt at repairing a lens then I suggest that you check my previous posts regarding screws & drivers, grease and other things. Also read what I wrote about the tools that you’ll need to fix your Nikkors.
I suggest that you read these primers before you begin (for beginners):
Reading these primers should lessen the chance of ruining your lens if you are a novice. Before opening up any lens, always look for other people who have done so in YouTube or the internet. Information is scarce, vague and scattered (that is why I started this) but you can still find some information if you search carefully.
I highly recommend that you read my working with helicoids post because this is very important and getting it wrong can ruin your day. If I can force you to read this, I would. It is that important!
For more advanced topics, you can read my fungus removal post as a start. This post has a lot of useful information and it will be beneficial for you to read this.
Disassembly (Lens Barrel):
This is a complicated lens to dismantle, not only are there many parts but they’re big, too. That means that it will require more torque to unscrew anything and many parts were sealed with cement or lacquer. You will occasionally need to heat some of the parts in order to remove them safely and a soldering bolt will help a lot since they won’t damage anything. Avoid using torches as you couldn’t control its flame at times. Simply using alcohol and solvents is mostly enough for rings and collars. Repeated application is required at times. Using a pair of rubber gloves will help you grip things better.
Since it’s a zoom you couldn’t remove the optics as a single assembly so you’ll have to extract them separately. It can be tedious but there’s no other way around it.
As with all lenses, always document everything before you remove it. Marking adjustable parts will help you put them back correctly when it’s time to reassemble it.
This is not a lens for a beginner to tackle, you’ll require special tools, experience and skill in order to repair it successfully. If your lens needs to be serviced send it to a qualified repairman.
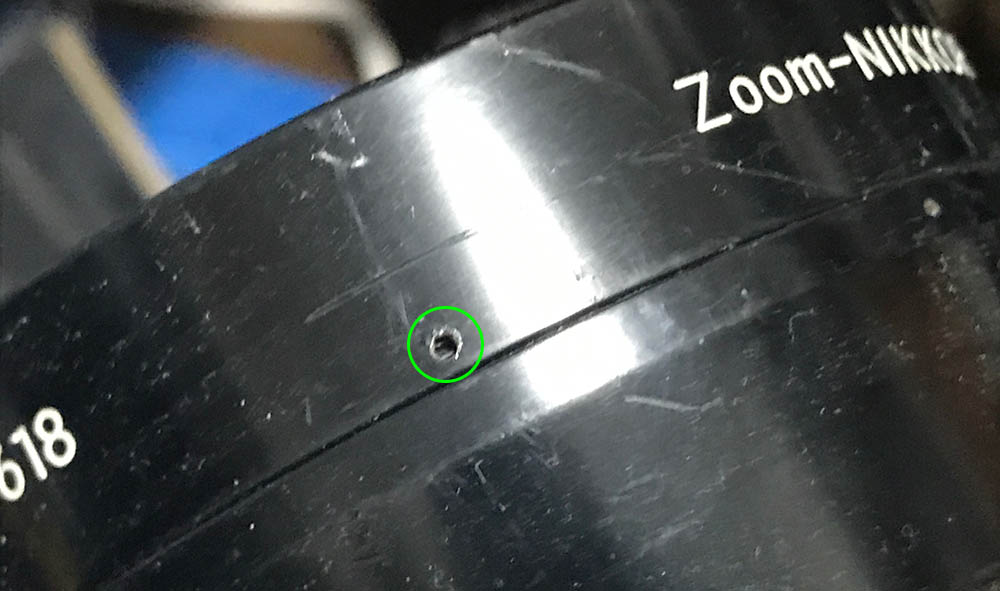
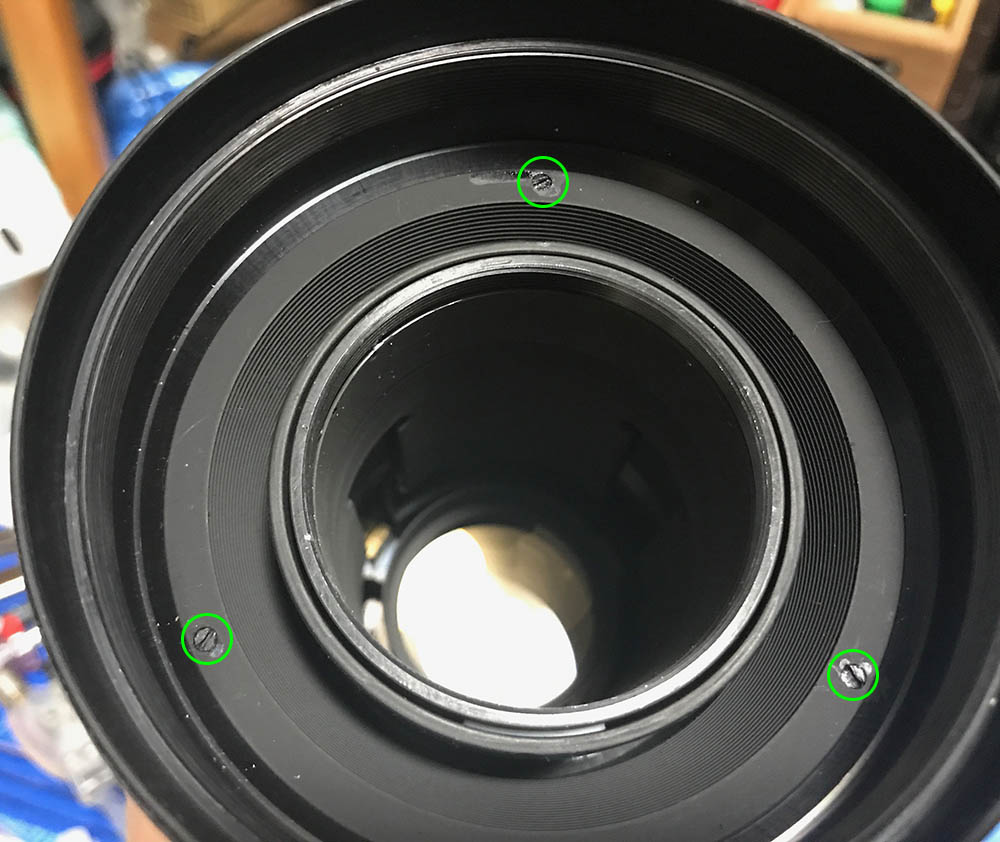
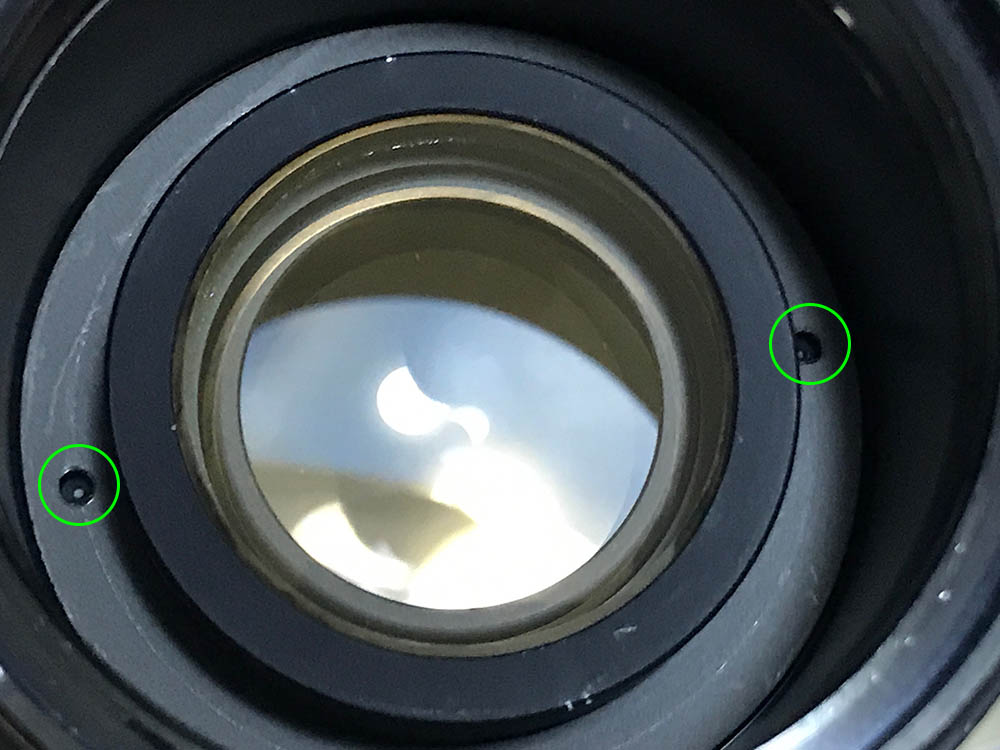
Remove this set screw from the front ring. Mine’s long-gone so I didn’t have to do this.

The front ring should be easy to remove once the screw is gone. If this feels stuck, a pair of rubber gloves will be helpful.
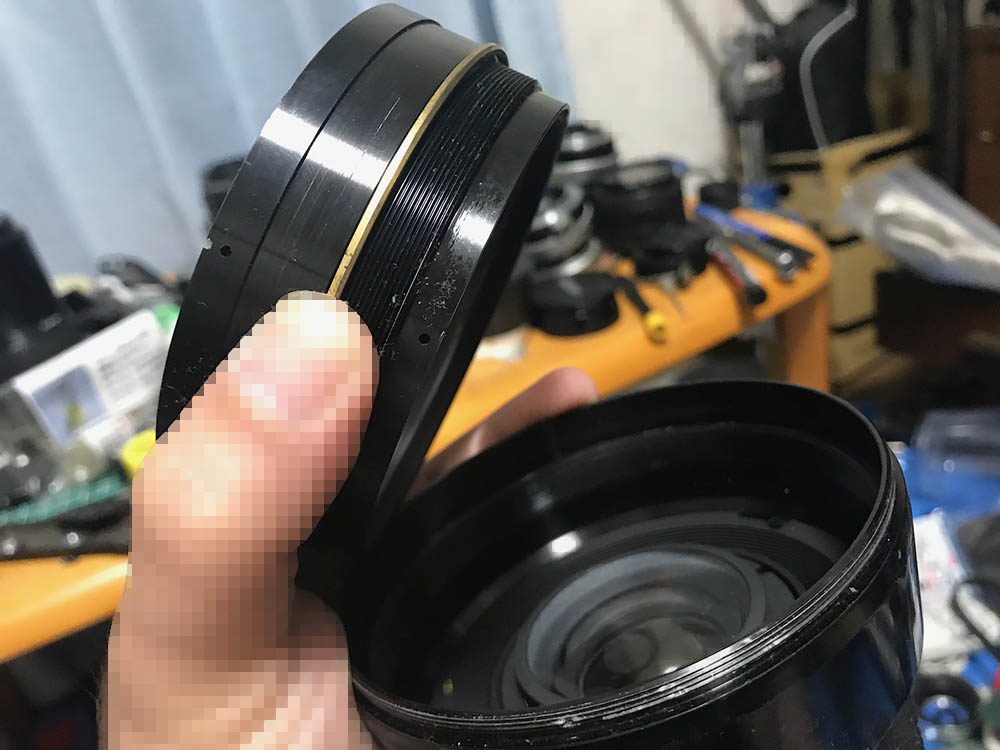
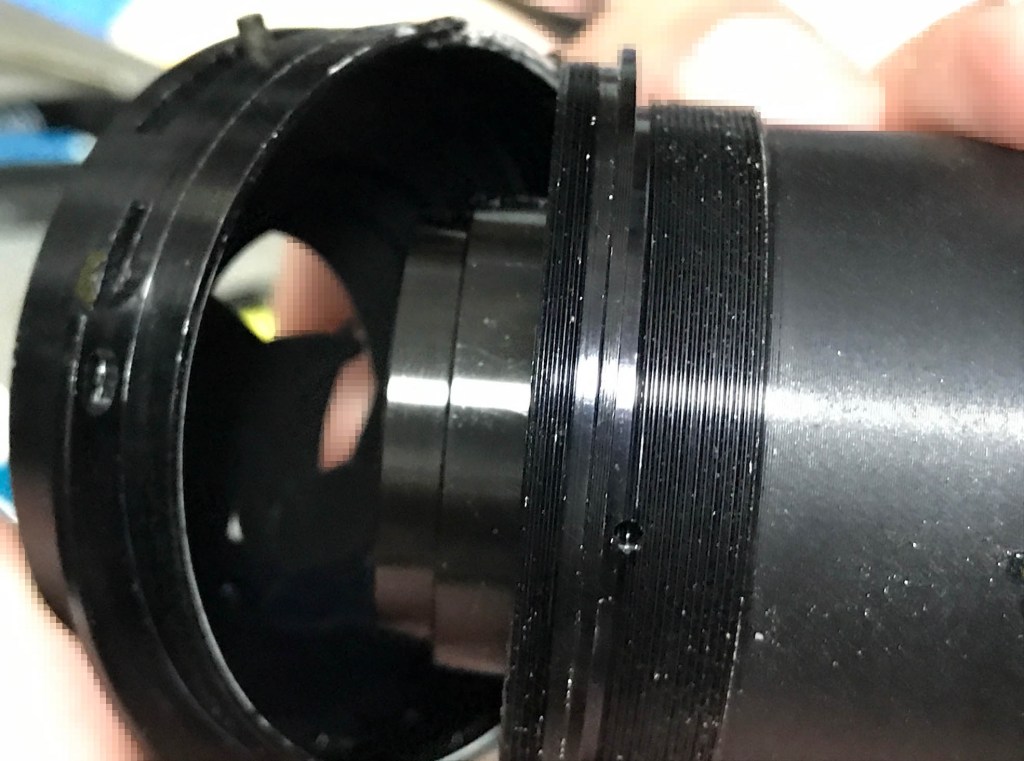
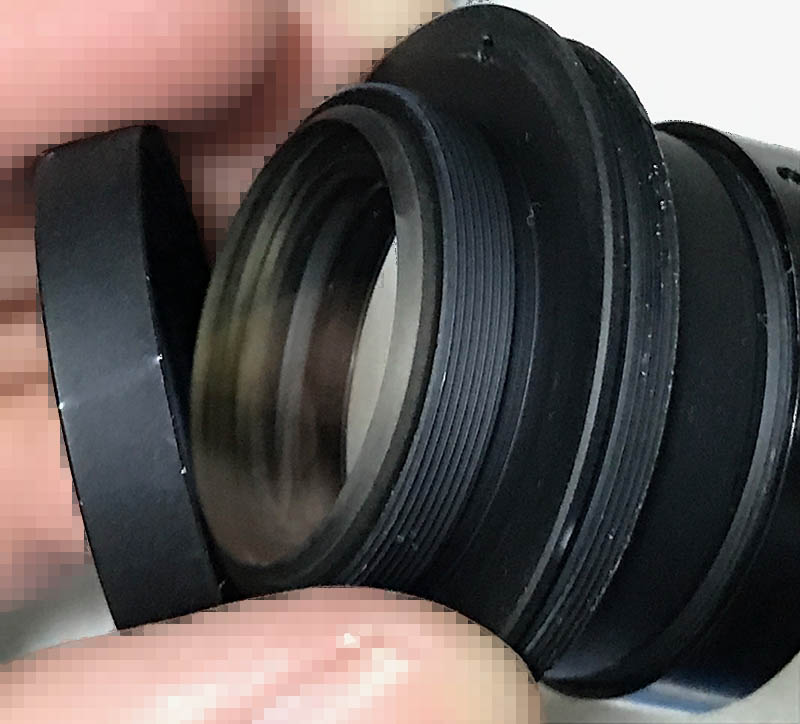
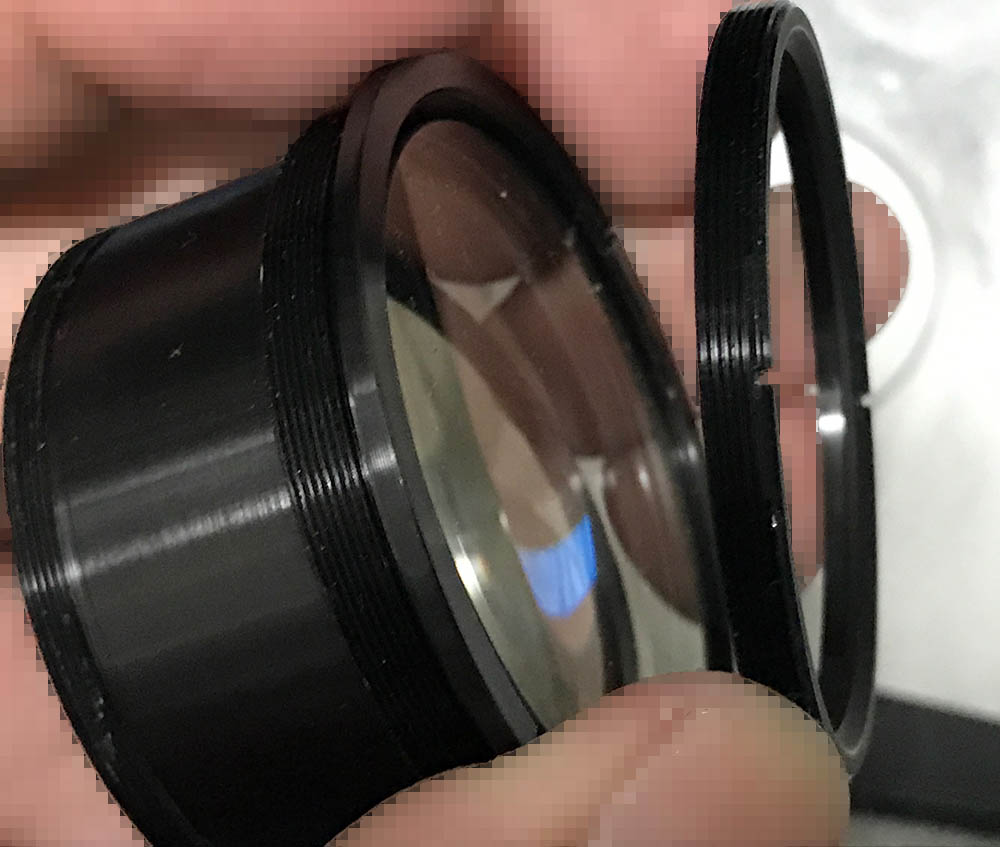
The front elements assembly should be easy to unscrew from the barrel.
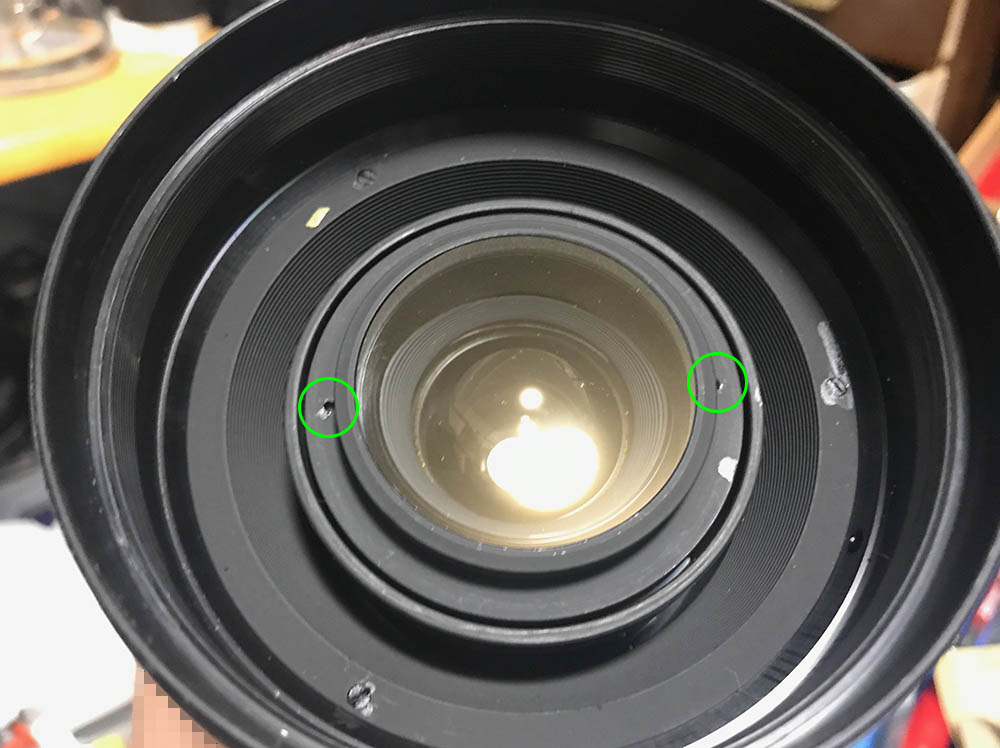
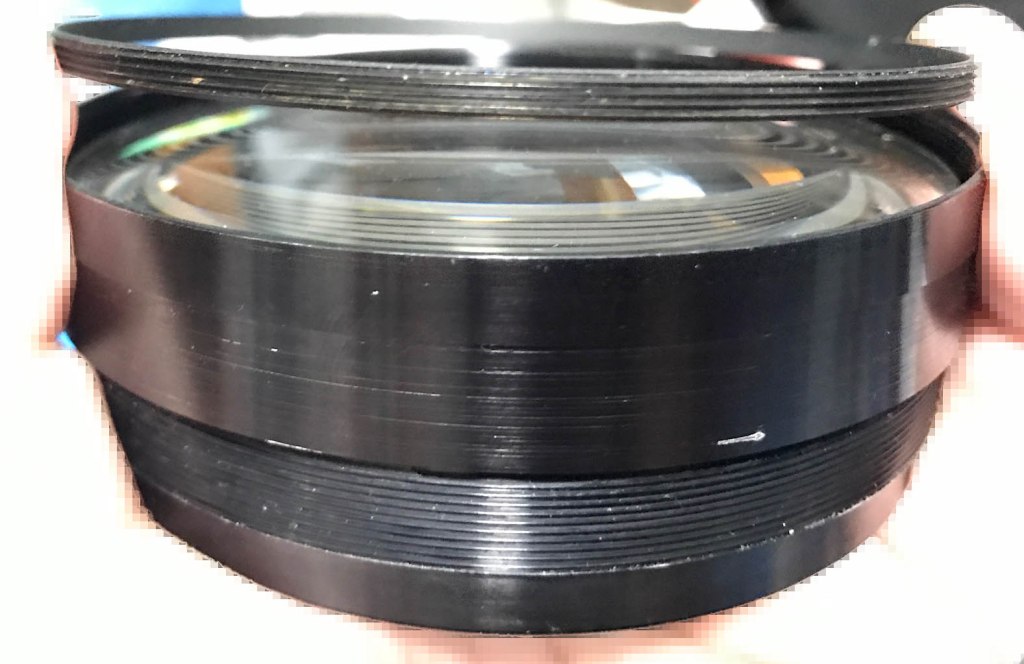
Remove this optics assembly with a lens spanner.

Note that there’s a shim underneath it. Never lose or damage this, these are unique and you won’t be able to source one.
The front baffle can be removed after extracting these screws.

Note that there’s a stop at the front baffle to prevent it from focusing past its range, you should note the baffles alignment before you remove it.
Extract this screw.

Carefully extract these to separate the front part of the barrel.
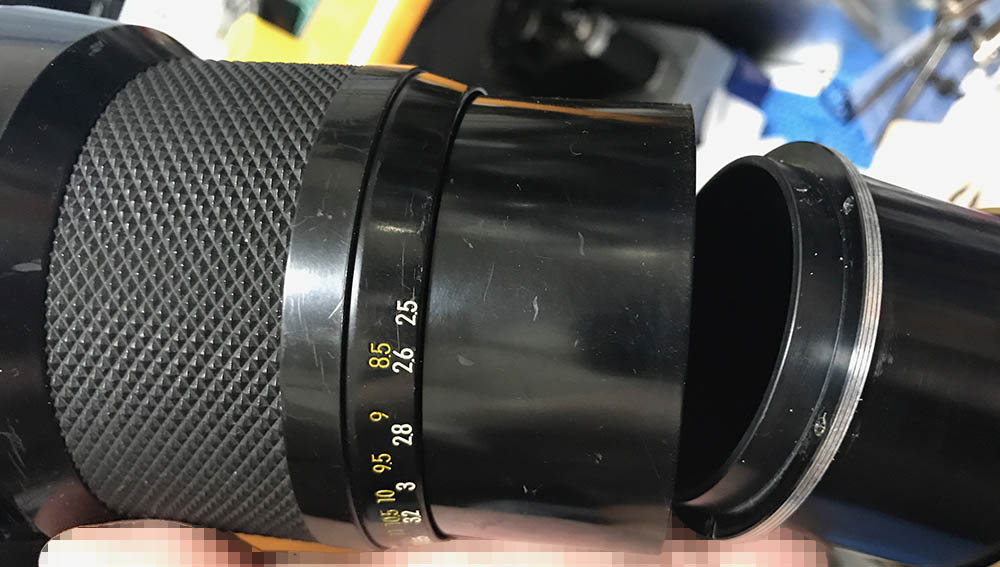
Take note of the front barrel’s relative position with what’s underneath it. If you’re satisfied with your notes, unscrew the front barrel.

The huge helicoid can be removed just like this. Don’t forget to note the spot where they parted, many people forget to do this so they get stuck. If you’re new to lens repair, read my article on how to work with helicoids and you should be able to gain the knowledge on how to work with one properly.
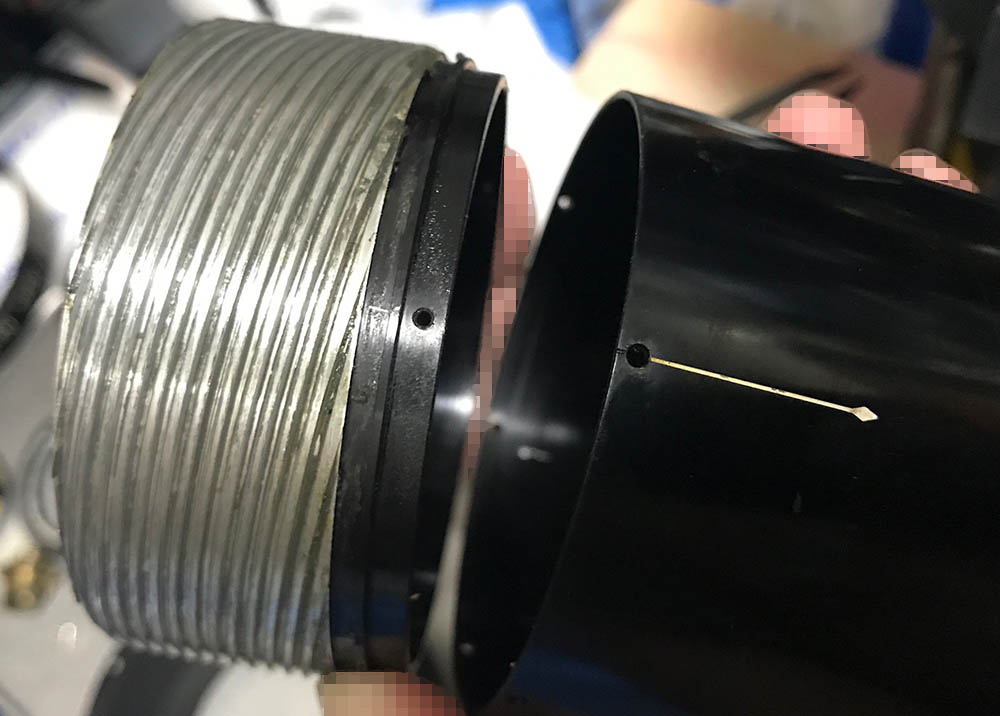
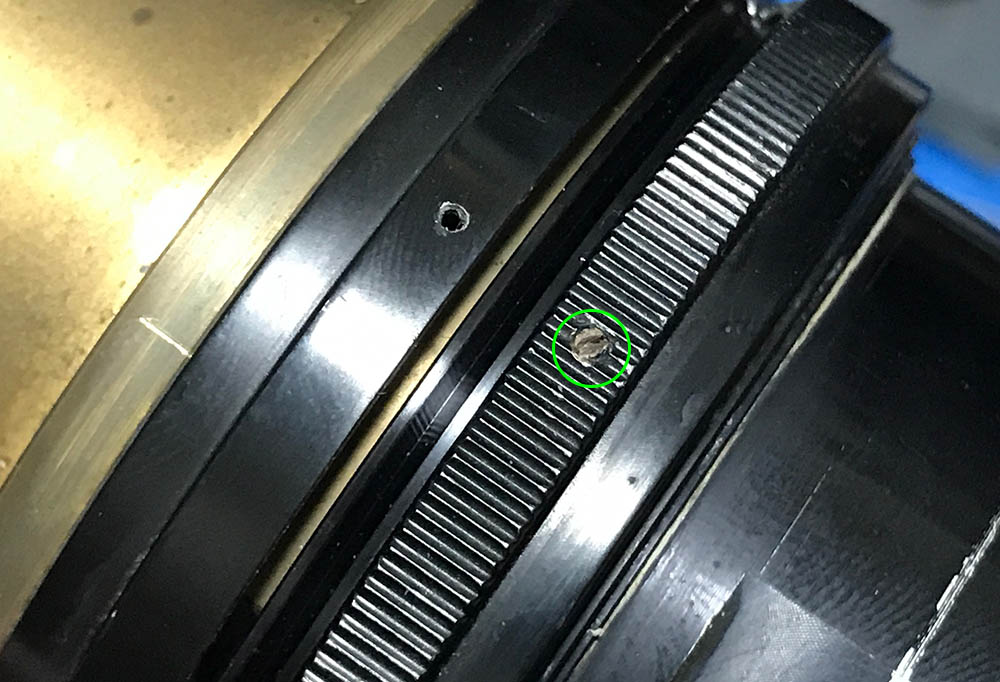
Remove the screws securing the helicoid to separate it. note that I made the small scratch to help me know how this should align with the barrel.

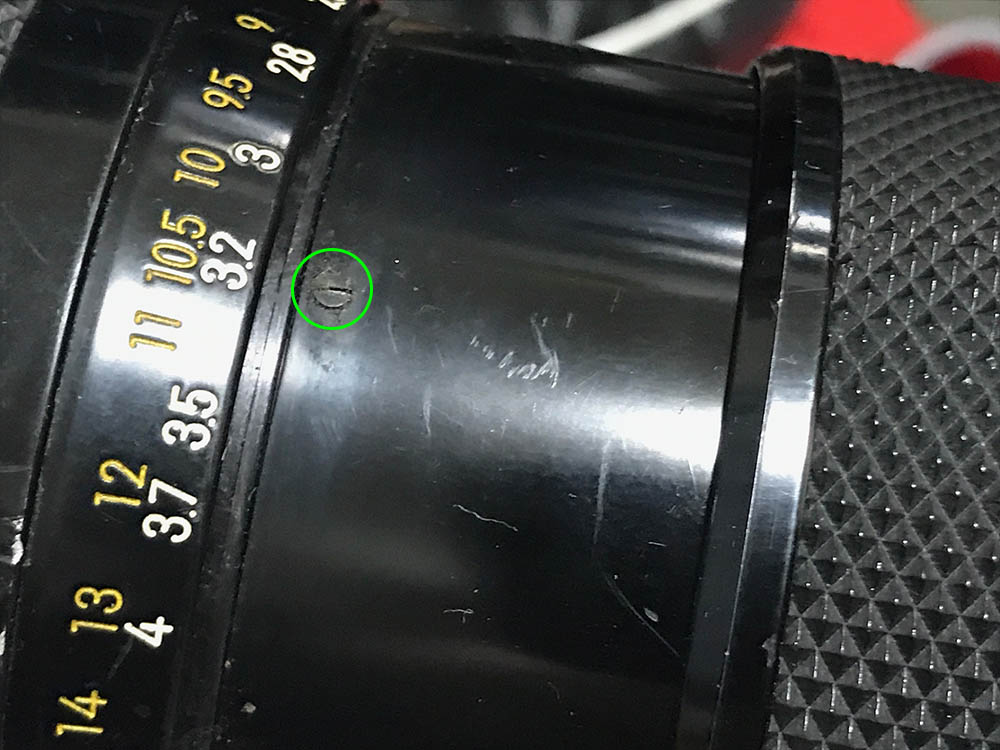
Remove this set screw so you can remove the distance scale.

It’s screwed to the focusing ring so be careful not to damage the threads.

The zoom ring is held by these screws.

Extract those screws and you can remove the zoom ring.

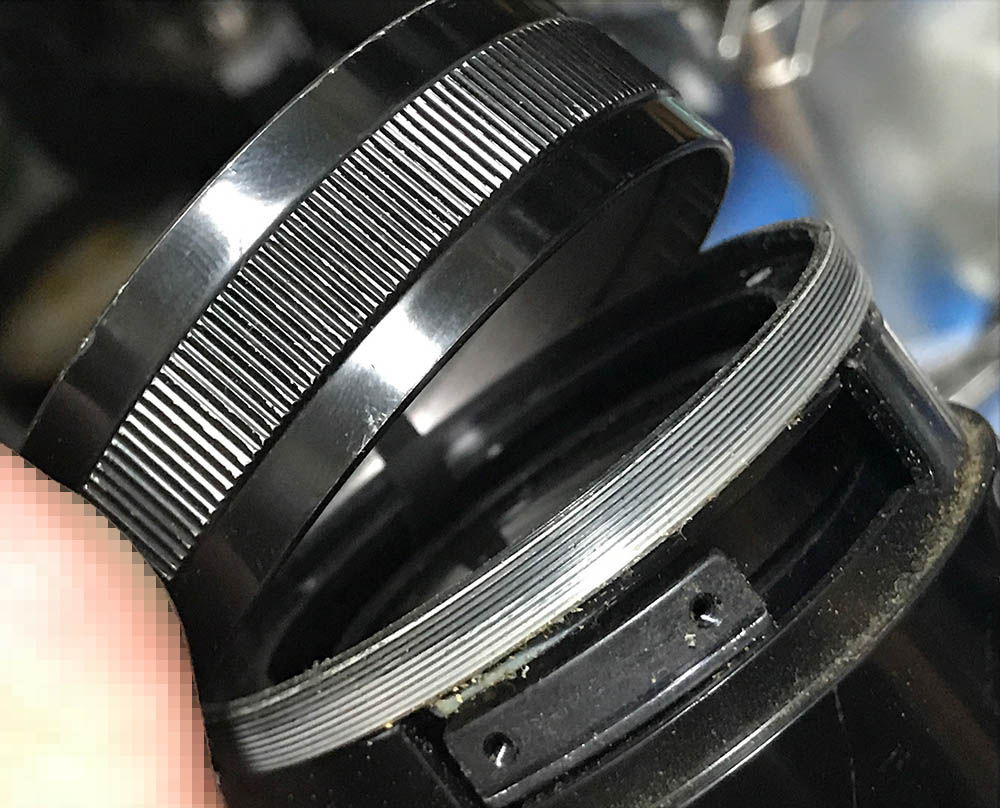
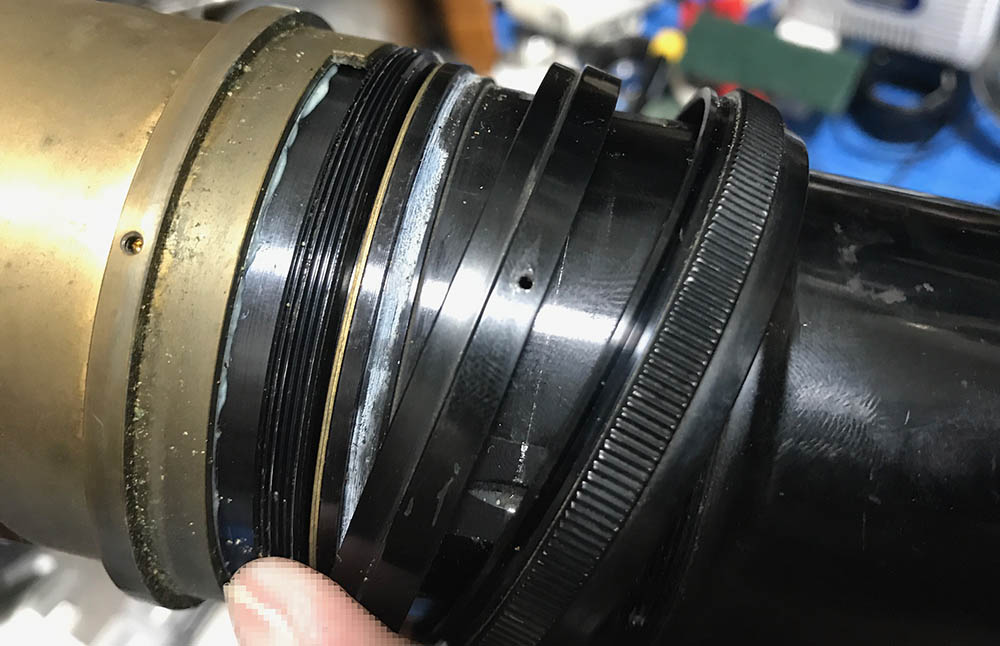
Carefully extract these screws. Many people strip the heads of these screws by using the wrong techniques and tools, to prevent that from happening it is best to read and follow my guide on how to extract bayonet screws. These should be treated with care and my guide should help you with the process. Notice that the rear group has a terrible case of balsam separation. This is a common problem with this lens.

The bayonet is just a plate screwed to the barrel.

Never lose this shim, it’s there for adjusting the lens’ focus. Lose this and it’s not going to be a happy task trying to fabricate another one.

Extract these so you can remove the aperture ring.

It’s hard to see in this picture but the aperture fork is secured by the screws that we just extracted in the step prior to this.
Unscrew the aperture ring. That part with the holes is the part that connects to the aperture ring.

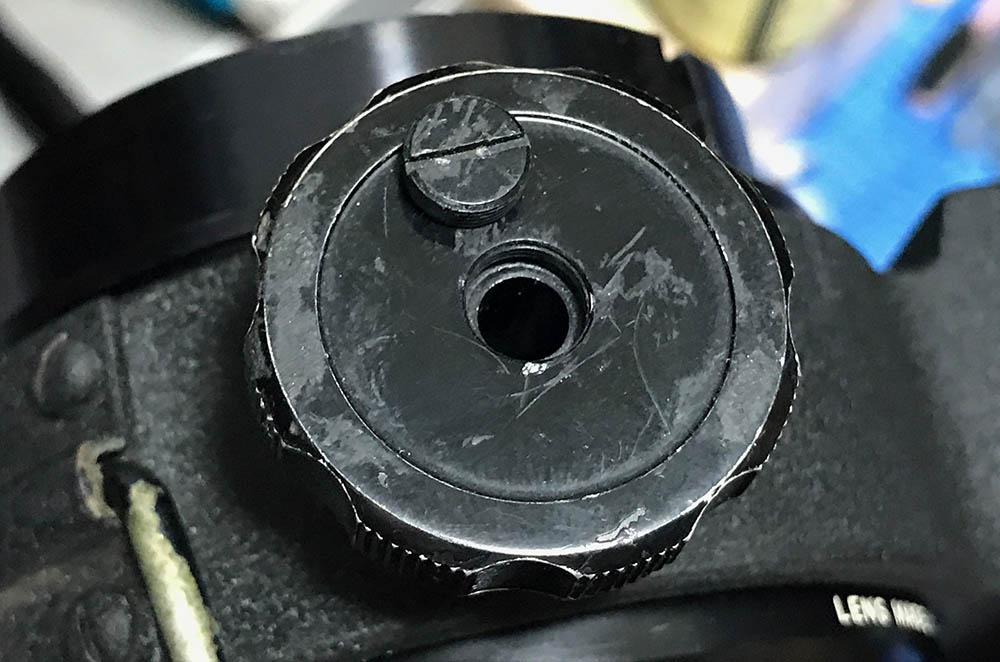
Extract these set screws so you can remove the collar, I think there’s 3 here in this lens.
This can be tough to turn but you should be able to remove it with the help of some alcohol.

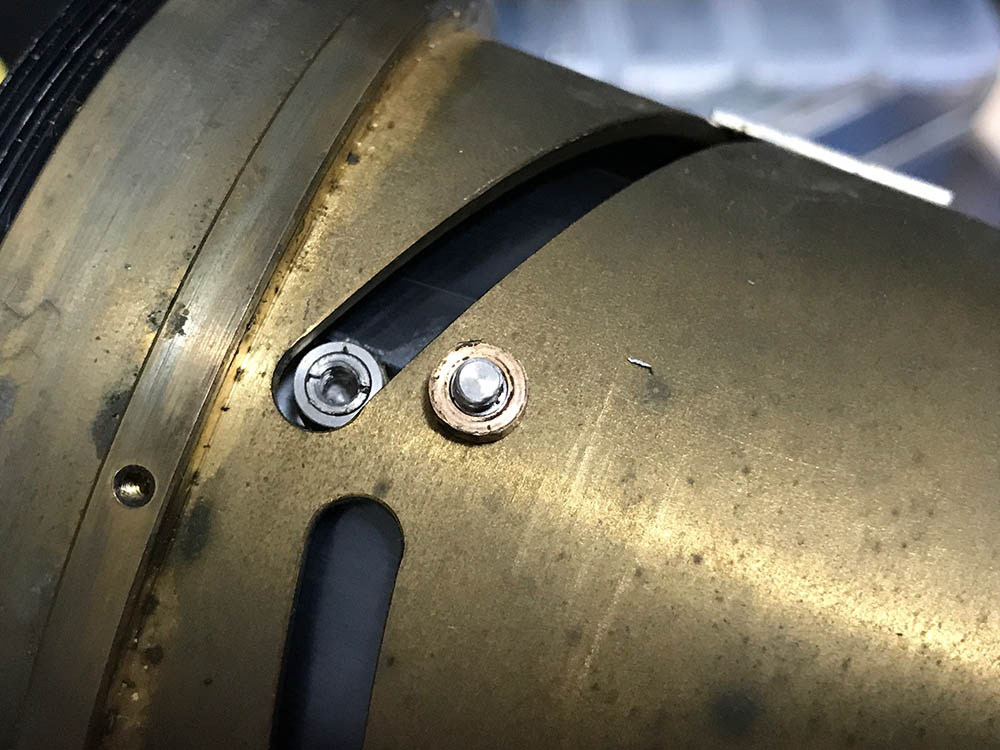
That secures the huge tripod collar, carefully remove it so you won’t trigger the spring-loaded ball underneath it.

This ball enables the tripod collar to click-into place. There’s 3 parts, a ball, a spring and a crucible.
Alternatively, you can unscrew this to remove the spring-ball mechanism.

The spring should come out first.

The crucible next.

And the ball last.

Extract this set screw.
And these ones, too.
Removing these collars enable you to separate the main barrel into two.

You’re now able to reach deep-within the barrel. The iris mechanism is easy to access once you’ve separated the main barrel into its basic tubes.

The rear optics assembly can be removed by unscrewing it.

There’s a shim here again, too. Be sure that you don’t get confused and mix the shims up.
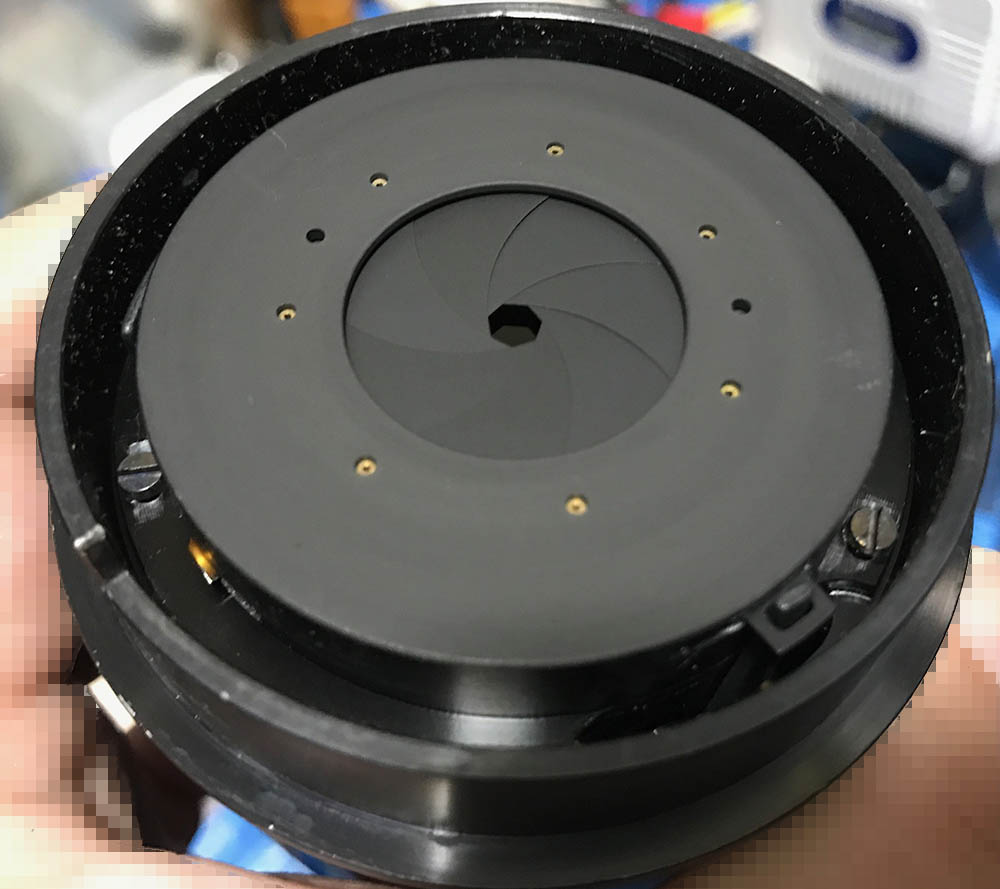
The iris mechanism is housed with some other parts. Extract its screws and you can remove it. Note that this is an adjustable part so mark it before you remove it.

Carefully pull the whole thing off.
Unscrew the cover to access this optics assembly.

This is the aperture fork, it’s a long piece of metal and it has to be. The iris is deep-within the lens and this thing has to reach it.

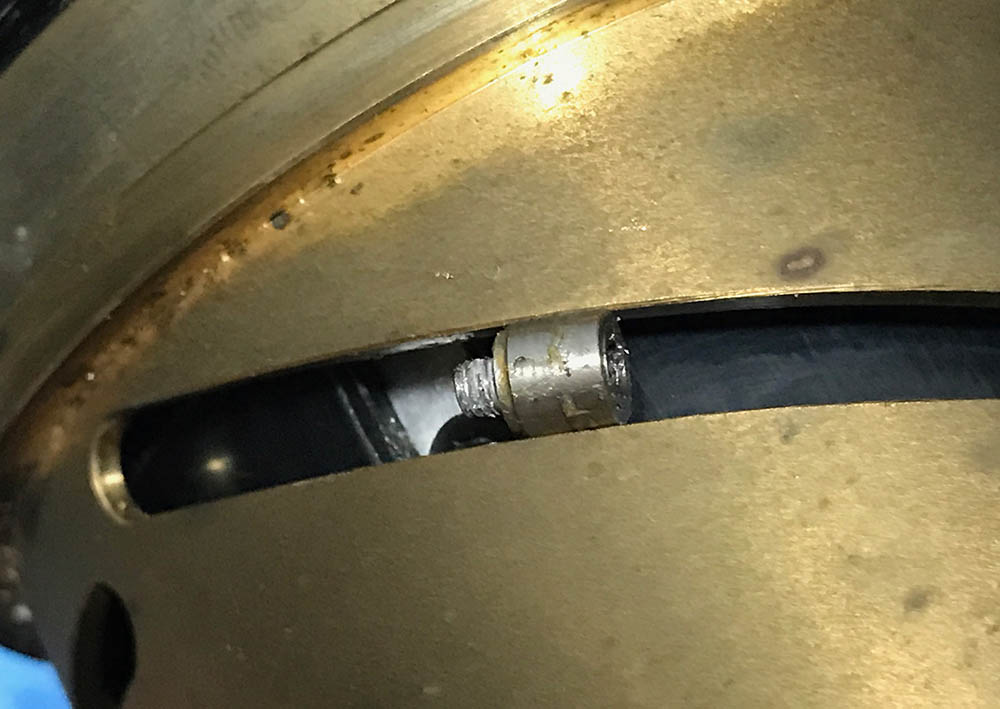
Carefully extract this cam guide. It’s made of good-quality brass, something that you won’t see anymore since these were replaced with nylon in newer lenses. These are usually sealed at the threads so you must carefully extract it by heating the base of its screw.
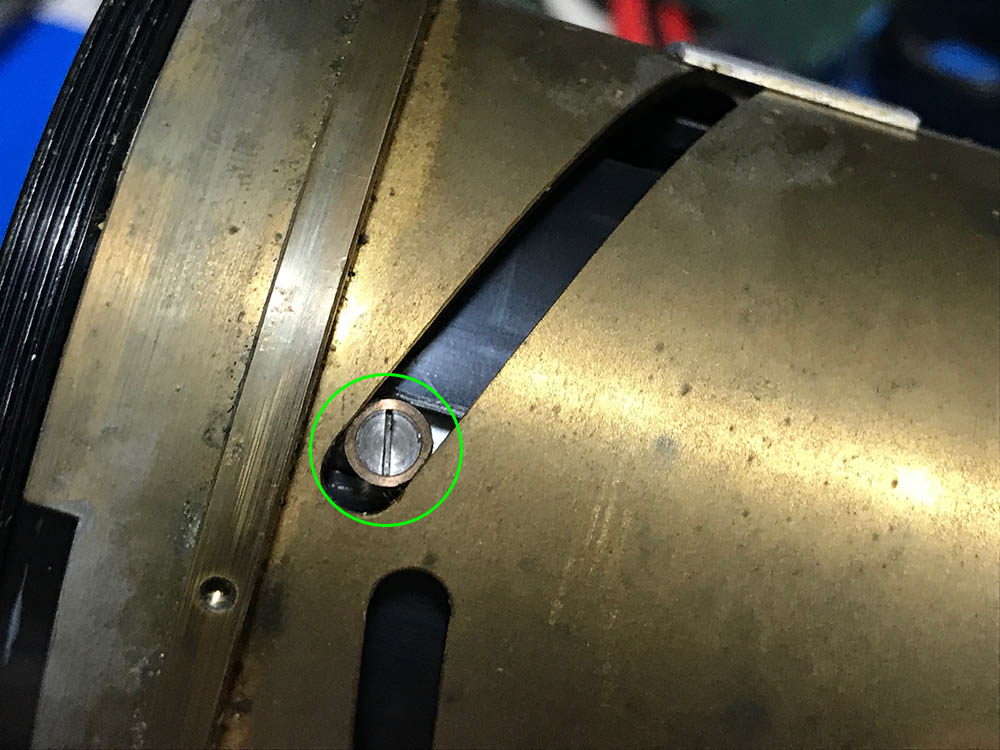
Here’s another one.

It’s very well-made. It consists of a screw, a bush and an abutment. Extract the abutment carefully with a wide screwdriver.
This is how the other one looks like, this one’s round so it’s a roller.
Look at the white stuff at the base of the abutment, that’s the adhesive used to secure this thing. You should be careful when removing it so you will not snap the necks of these things.

This one has a nut at the other side to secure it, this lens was built for war!

You can now remove the inner cam from the whole assembly. Make sure to mark its alignment so you’ll know how the tubes should align.

The cradle for the floating element looks solid, I have never seen anything as well-made as this on any zoom lens.

Extract this screw to remove the cradle.
Here’s another one.

Be sure to note its alignment before you remove it.

Remove this tube.

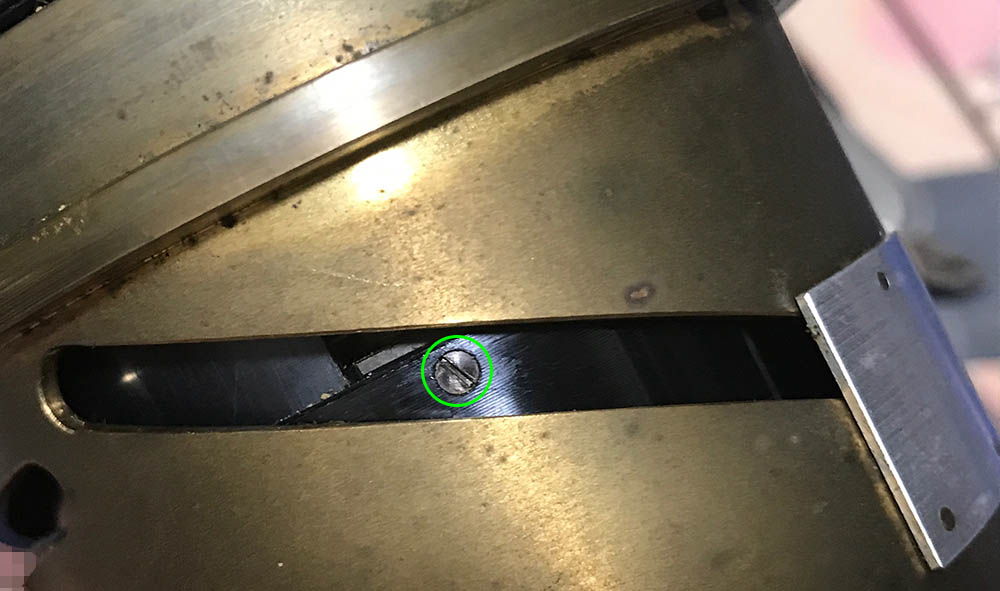
To separate the zoom mechanism, carefully extract this screw. This keeps it from turning beyond its range.

Unscrew the huge zoom cam to separate it from the lower barrel.
Clean everything really well and don’t leave any residue. The grease used on this tends to be thick, scrub-away the old grease with a stiff brush and strong detergent. Pickle the parts in alcohol to remove any residue. Using a toothpick to remove any hardened dirt helps, too. Apply a thin film of grease to the helicoids and some of its threads, never apply too much. Some of the parts that slide or come into contact with each other will benefit from a thin film of grease, too. Never apply grease to anywhere near the optics or the iris mechanism. The oil will eventually move to the optics and iris mechanism eventually.
Disassembly (Iris Mechanism):
You won’t have to service the iris in most occasions but there will be times when you’ll have to dismantle this in order to clean it thoroughly if it’s oily or filthy. Its assembly is not complicated but you’ll have to mark the alignment of some things so you could put them back correctly.

Carefully extract this screw, it couples the iris mechanism to the iris fork. It is a delicate part so take care not to snap it.

Here it is, see how short the neck is?

These screws secure the the iris mechanism, it’s an adjustable part so take a lot of notes so you can put this back properly later. Once you’re happy with your notes, remove the iris mechanism and start working on it.

It’s easy to remove this regulator ring once the coupling screw is gone. Do not attempt to remove this without extracting that screw, you’ll just ruin this. It is used for regulating the iris size and to keep the whole assembly together.

The rotator plate can be easily removed.

The iris blades can easily be removed but you should be careful not to warp or damage them. The pegs are delicate and they can easily snap, they’re just pressed-fit into place.
Clean the blades carefully, wipe them clean with naphtha and lens tissue. The parts have to be cleaned well, a night in an alcohol bath will help clean the parts well. Carefully put everything back and make sure that they operate properly.
Disassembly (Optics):
Only clean what you have to. This lens was dirty so I had to clean everything well. The construction is simple and easy to take-apart but you’ll need special tools to access some of them. Most, if not all of them were sealed so you’ll have to dissolve their seals with alcohol. Never flood them, that may damage the cemented groups. A rubber band will help you grip things better, don’t use any metal tools to grip any rings.

Use a lens spanner to remove this.

You can use your hands to extract this from its barrel.

You can unscrew this collar to access this element.

It’s easy to extract with your fingers. Note which side should be facing front so you’ll know which side should face where later.

Do the same for the other side, unscrew the collar with your hands. If this is stuck, a drop of alcohol to the threads will help soften the seal.
Extract this element carefully. Note that I drew several lines on the walls of the element so I will know which side should face the front.
You’ll need a lens spanner with long bits to reach this.

Pick this up with your fingers if you can reach it.
This group can be accessed after removing its collar.

Do the same for this one.

Note that this is a cemented group so don’t use alcohol with it.

Carefully remove this with a lens sucker.

This cemented group can be gently pushed from the other side to get it out.

Carefully remove this with a lens sucker. Note which side should be facing the front as it looks symmetrical.

You can remove this after removing its collar.

Removing this ring will allow you to access this element.

Carefully remove it with a lens sucker.

There’s a spacer here. As with lens groups, note which side should be facing the front as these things are never symmetrical.
Unscrew this collar to access this group.

Unscrew this collar to get to this element.

It’s quite big and the curvature is ambiguous so marking the front-edge will be useful as it helps us determine which side should be facing the front.
The front group is secured by this huge retainer. I had to use a special tool, I made it with a piece of scrap brass.

The front group can now be removed. Be careful not to drop this thing, it is a massive chunk of optical glass which is obviously heavy.
The 3rd element can be removed after unscrewing this retainer.

Carefully extract it with your fingers, a lens sucker won’t be enough. There’s not enough pressure to secure this.
Clean the glass carefully. If your lens has fungus, read my article on how to clean lens fungus. Do not use the solution at full-strength, thin it with distilled water. Don’t soak the elements in the solution for too long or it will dissolve the coatings. The cemented group is fragile so handle it with a lot of care.
Conclusion:
It took me several nights to clean this due to the amount of parts. Their sizes also meant that cleaning them is going to be quite a chore, I spent a whole night just scrubbing-off dirt. Putting everything back takes time, too. It’s good that I took plenty of notes to help guide me through the whole process.

This is a sad little thing, the cement had deteriorated, this will surely affect the image quality in one way or another.
Thanks for following my work, if you liked this article please share this with your friends so it will get more views. This site earns around $0.30 a day, it’s totally reliant on views. You can also support this site, it helps me offset the cost of maintenance and hosting. You are also helping me purchase, process and scan film. This site promotes the use of film so we’re all in this together. See you again in the next article, Ric.
Help Support this Blog:
Maintaining this blog requires money to operate. If you think that this site has helped you or you want to show your support by helping with the site’s upkeep, you can make a small donation to my paypal.com (richardHaw888@gmail.com). Money is not my prime motivation for this blog and I believe that I have enough to run this but you can help me make this site (and the companion facebook page) grow.
Buy me a roll of film or a burger?
Thank you very much for your continued support!
$2.00
Helping support this site will ensure that this will be kept going as long as I have the time and energy for this. I would appreciate it if you just leave out your name or details like your country’s name or other information so that the donations will totally be anonymous. This is a labor of love and I intend to keep it that way for as long as I can. Ric.

Dec 09, 2020 @ 06:34:17
Wow! Impressive number of operations done for this lens maintenance, thank you for sharing it with tons of useful tips! Great job done.
Dec 07, 2022 @ 15:00:14
hey Richard, your tutorial was very useful (as usual). Just one detail. in my model (s/n 753298) there is also a small set screw that blocks the front elements assembly. Smaller in diameter but longer than the one which blocks the front ring.
Nov 29, 2023 @ 04:24:37
I am very thankful for your detailed guides to disassembling lenses and cleaning them. I am not yet skillful but have been able to clean a few lenses. At the moment I am in the middle of trying to swap a 50-300mm f4.5 ai mount to a 50-300mm f4.5 mount. Disassembly was not too much of a problem but I cannot get the aperture fork to re-engage. How did you do it? By trial and error?
Mar 24, 2024 @ 03:19:06
Hello Richard. Are any of these lenses radioactive with thorium?