
Hello, everybody! How are you this weekend? I’m currently happy playing with my Nikon rangefinder cameras. They’re very fun to use and while they are not as accurate and as precise as the F-mount SLR cameras, they win in the fun department with many intangible qualities that make them worth using despite all the hassle and quirks of the Nikon S-mount camera system. Like what I told my friend yesterday, you must follow your heart because it can detect the intangibles of life. Today, we’ll talk about a lens that adds an intangible quality to its pictures, making them look exquisite.
Introduction:
Today, I will introduce to you the venerable Nikkor-P 180mm f/2.8 Auto! This lens is really good that many people still shoot with it. It’s considered to be a hidden gem of some sort these days because many tend to ignore its modest specs and the f/2.8 maximum aperture doesn’t appeal much to many people these days but I will show you in this blog post why this lens is still relevant today as a professional lens for portraiture and fashion if focus speed is not much of a concern (you focus it manually).
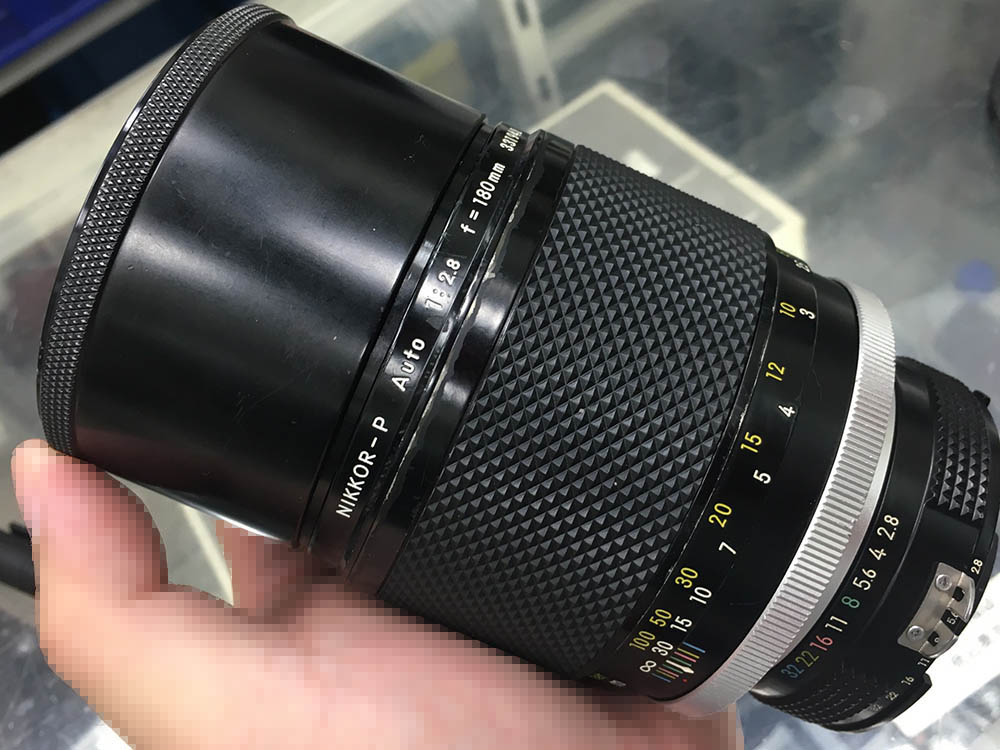
The lens is so dense that it feels like holding something from the gym. Let us see if the flimsy new electronic lenses for mirrorless cameras can survive a direct collision with this. It feels like it was built to survive a nuclear war in the Cold War. Everything about its build is professional and there’s nothing I can think of that can easily break in this lens.

Despite the size and weight of the lens, it is perfectly balanced so carrying it with a small camera like the Nikon Df or Nikon F2 is not a problem. It can be front-heavy obviously but I don’t feel the strain at all. Balance is also a very important aspect of a lens.
The lens was introduced in 1970 for the press but sold to the general public only in 1971. The lens has a simple formula of 5-elements-in-4-groups and hence the P in Nikkor-P which stands for penta, it’s an Ernostar-type lens, its optical formula remained mostly the same to the last manual version of the lens, the Nikkor 180mm f/2.8 ED Ai-S with ED glass. The optics had to be revised a bit in order to account for the ED glass’ different refractive index but the general schematic didn’t change much.
This is the fastest Nikkor in its class when it debuted and it quickly acquired a following in sports, fashion and stage photography. You can say that it was the equivalent of the modern monster Nikkors like the 200mm f/2 family of lenses. The f/2.8 speed was considered to be pretty fast for its time as far as telephoto 35mm lenses go.
This was the lens to have back in the day but will it still be relevant today? I will say yes. The simple 5-element design enables this lens to outperform its modern rivals in the intangible qualities of the photos it takes like character and color rendition, both are very subjective.
This lens is also the first lens in the venerable 180/2.8 family of lenses and was produced in a variety of iterations beginning with this lens to the now-legendary ED version that followed this one in the early ’80s and finally by the several autofocus versions that only ended production recently in the 2000s because Nikon and us consumers all thought that the 70-200/2.8 zoom lenses are just as good. Maybe they are but these lenses have their own little way to stay comepitive.
The focus throw of this lens can be long and it was only improved on later iterations of the manual focus versions. This can be a problem for shooting sports as you need to be fast and precise with your focusing but is not much of an issue for studio and general portraiture. You’ll soon get used to it and learn how to anticipate your subjects’ movement.
Learning how a lens works is key to maximizing its use. You will learn how to avoid its flaws or use them to your creative advantage. You’ll also learn how to exploit its strengths, knowing these will help you take better photos.
The following pictures were taken with a Nikon Df, I took these photos from f/2.8, f/4 and f/5.6 from left-to-right. These apertures show the most changes in terms of character and is the most common apertures that this lens will be used for available-light photos.


(Click to enlarge)
Vignetting can be on the heavy-side at f/2.8 but it’s really not so bad in real-world use. It improves considerably by f/4 and is gone by f/5.6 on. This isn’t an issue unless you’re shooting a bride or something with the sky as your background.

Pin-cushion distortion can be observed and is a bit high for a prime lens. It’s not too bad because the curve is rather shallow and not complicated. It can be easily fixed in post if you’re worried about it.


(Click to enlarge)
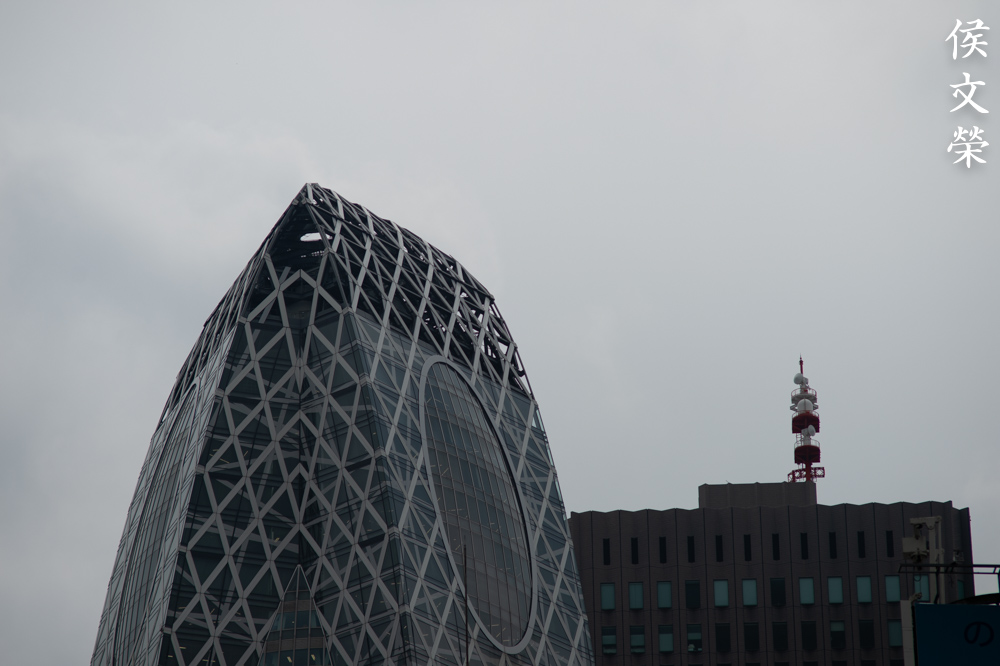
I imagine that this lens will be mostly used to shoot distant objects. It isn’t as sharp wide-open compared to closer distances but it gets really sharp by f/4. It improves some more by f/5.6 and is near-perfect by f/8. You will also see a lot of sphero-chromatic aberration wide-open but it’s mostly gone by f/4 but it can be observed in extreme cases with really bright things such as the sky. The bad news is there’s still traces of it at f/5.6 in really bad cases. You won’t see this normally in normal pictures where a scene is properly exposed.


(Click to enlarge)
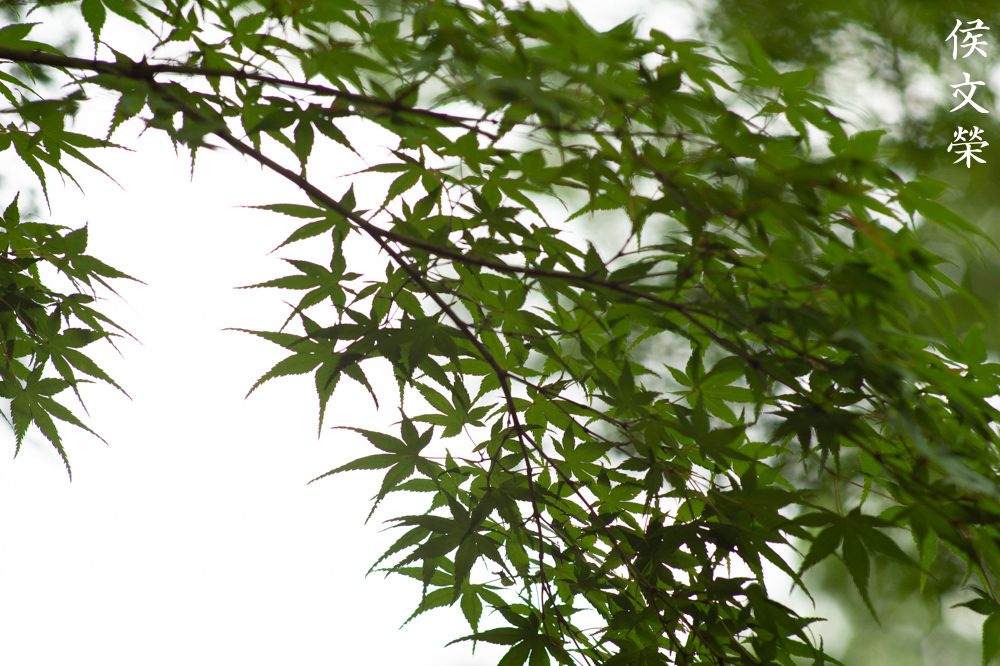
While the performance at infinity or close to it is kind of lacking wide-open, this lens is exceptional at closer distances. Resolution and sharpness is very good wide-open and gets even better by f/4 and it’s at its peak performance by f/5.6. The bad news is chromatic aberration is kind of high in areas with very high contrast like the one you see in the pictures of the leaves. You can see it even by f/5.6 but this is an extreme case and I don’t think anybody will take these kinds of photos on a regular basis.


(Click to enlarge)
The performace near its closest focus distance is even better. It’s sharp and amazing wide-open and just gets better when you stop the iris down. This is a really good lens for things like this.


(Click to enlarge)
The quality of the bokeh is excellent at every distance. There’s no harshness or weird lines when shooting at foliage and twigs. A lesser lens will show an ugly effect when rendering twigs, they look smeared and “dirty”. You don’t get any of that with this lens.
Chromatic aberration is going to be your main concern with this lens but it is easy to avoid if you know how to. This is the reason why its successor, the legendary Nikkor 180mm f/2.8 ED Ai-S uses a special ED glass. It performs a lot better when countering chromatic aberration while retaining the great rendering characteristics of this lens.
I took these photos with a Nikon D750 if I’m not mistaken. I was really glad to see that the photos were sharp when viewed at 1:1, the individual lashes retained their details and you can even count the strands. The bokeh quality exquisite, subject isolation and flattening is really good as expected from a 180mm lens. Great for details and tighter portrait framing. The compression you get from a longer lens enables you to “flatten” your perspective with the effects of foreshortening. This is great for making models look taller and it’s also good for making faces look a bit thinner, too.


(Click to enlarge)
As you can see from the photos above this lens is well-corrected and sharp but not too-sharp like much of the modern lenses coming out these days. It still retains the aberrations and flaws that are a signature of classic lenses. Instead of taking away from the images it produce, it adds this “intangible” quality to it and you end up with an image that is unique, it’s sharp where it matters but creamy and soft on the out-of-focus areas.
Flare resistance isn’t perfect but not too bad when you compare it to other lenses made in its day, the good thing is it the flare and ghosts don’t bother me at all as it looks pleasant. This is just one advantage of having less glass in your lens. You get less glass surfaces for light to reflect and it doesn’t get filtered too much before it reaches the sensor or film. Lenses these days are over-corrected because of people who shoot charts and brick walls instead of taking real-world photos. Nikon knew about this so the current/new AF-S NIKKOR 58mm f/1.4G and the Nikon AF-S NIKKOR 105mm f/1.4E ED will not really top the chart tests because they were designed to produce photos that look natural like the lenses from the old days. I went to a talk sponsored by Nikon about their current lenses and the philosophy behind them and this was indeed part of the consideration so they try to balance correction and rendition. This is why I love Nikon.

Time for some animal pictures! These were taken at f/2.8, look at how good this lens is at isolating your subjects. I love the rendering a lot since it looks very natural and not over-corrected like most modern lenses tend to be and add the fact that this lens has a low element count count of just 5 elements and you get this. More glass means more glass-to-air surfaces and it causes image degradation since light gets filtered. The easiest way to explain this is it’s like adding a lens protector to your lens and you end up with less sharp photos or more ghosts. The really expensive ones don’t affect your pictures as much as the cheap ones but it’s still an additional element in your lens in the literal sense even if it doesn’t have any refractive qualities.

Stopped-down to f/4, this lens is capable of very sharp images. Wide-open at f/2.8, it’s already capable of giving you a very sharp center but just stopping it down by a stop will give you even better results! Some lenses do not pick up until you stop it down by 2 stops and that’s normal but this is even better since you achieve it with just one stop.
Let’s now see some pictures that were taken with film. This lens was made for shooting film originally so it’s good to see some photos that were taken using it in order to better assess its performance with its intended medium. Film has a distinct look that’s difficult to emulate digitally because of grain and how light works with emulsion. Some “flaws” won’t show up with film and it’s best to judge this lens with it. I took these with my Nikon F6 loaded with Fujifilm Industrial 400. All of the pictures were taken wide-open.

Beautiful, that’s the only word to describe the bokeh quality of this lens. You won’t appreciate how smooth it is until you have shot with this lens and see it using a large monitor. The colors look great, rich and natural at the same time, it’s the perfect portrait lens with film.

Sharpness is exceptional even wide-open with film. Chromatic abberation is not as obvious with film compared to digital. You’ll be able to see it but not much unless you look for it. The thin depth-of-field make this lens difficult to use wide-open when your subjects’ faces aren’t on the same plane. Even a small difference in distance is enough to blur the other person’s face like in this photo.

Taken close to its minimum focusing distance, the lens is able to render the background smoothly without any harshness or artifacts. Details look great, the resolution is perfect with film where things are less perfect compared to digital because the structure of film grain is more organic.


(Click to enlarge)
Here are some more pictures from this roll. This is one of Nikon’s best ever lenses from the golden age and these photos show you why. I can’t see any point in buying a more expensive equivalent apart from autofocus and VR which isn’t essential for taking these kinds of photos.
This lens is one of the best deals today, they sell for less than $200 used and so long as you get the ones with the Ai-ring you can use them on your Nikon cameras that has the Ai-coupling tab like most newer Nikons. This is a great lens for those who want to save money yet still own one of Nikon’s best and you can use that extra money to buy yourself a flash. Do not be afraid to use manual focus lenses, it will help you gain plenty of skills and your pictures will be better because your clicks will be more deliberate. Autofocus lenses are convenient and VR may even be a requirement these days for lenses of this class but not having them isn’t a handicap at all. Photographer took lots of great photos without them back then. The only exceptions are news and sports where responsiveness is key to catching the perfect photo. This is an excellent lens in the studio and for subjects that won’t require you to track them. My pictures should show you how good this lens is even today and I can highly recommend this lens to those who appreciate the finer details of using classic lenses. If you can spend around $60 more you can get the even better Nikkor 180mm f/2.8 ED Ai-S. That lens performs better than this wide-open and is optically superior in most cases at wider apertures. If you plan on using this lens professionally then consider the Nikkor 180mm f/2.8 ED Ai-S instead. I am not saying that this lens is poor compared to it, it’s just as good in most cases but there will be times when extra performance will be appreciated despite the added cost. Either lenses are great and they are the best in their class during their respective era, they’re real game-changers. I hope my pictures helped convince you. It’s now time for the main article.
Before We Begin:
If this is your first attempt at repairing a lens then I suggest that you check my previous posts regarding screws & drivers, grease and other things. Also read what I wrote about the tools that you’ll need to fix your Nikkors.
I suggest that you read these primers before you begin (for beginners):
Reading these primers should lessen the chance of ruining your lens if you are a novice. Before opening up any lens, always look for other people who have done so in YouTube or the internet. Information is scarce, vague and scattered (that is why I started this) but you can still find some information if you search carefully.
I highly recommend that you read my working with helicoids post because this is very important and getting it wrong can ruin your day. If I can force you to read this, I would. It is that important!
For more advanced topics, you can read my fungus removal post as a start. It has lots of useful information, it will be beneficial for you to read this.
Disassembly (Lens Barrel):
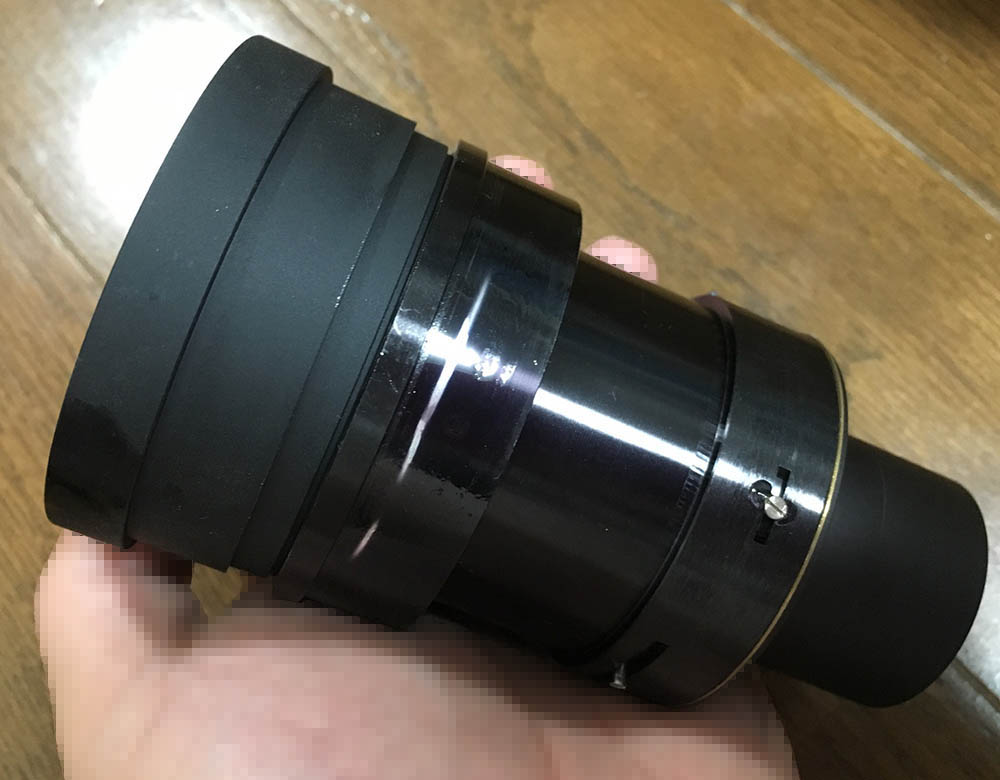
Just like most Nikkors with built-in hoods, you will have to remove the front barrel along with its hood just to access the objective. We have to extract the objective so that we can work on the lens barrel while the objective is safely stored somewhere else. This is also a classic Nikkor from ye olden times so it typically has to be opened from the front. I won’t be showing you anything about the objective and its repair because this lens is clean, a sign that it was a lens that was loved by its previous owner who’s probably a professional. I will caution you about repairing this because many of the parts were sealed at the factory and you will need plenty of solvents and heat just to open the lens up. The screws tend to be bigger and you must use the correct ones so you won’t scar or strip the slots. Make sure that your drivers fit perfectly, if you don’t have any then buy or grind some of your old ones to fit.
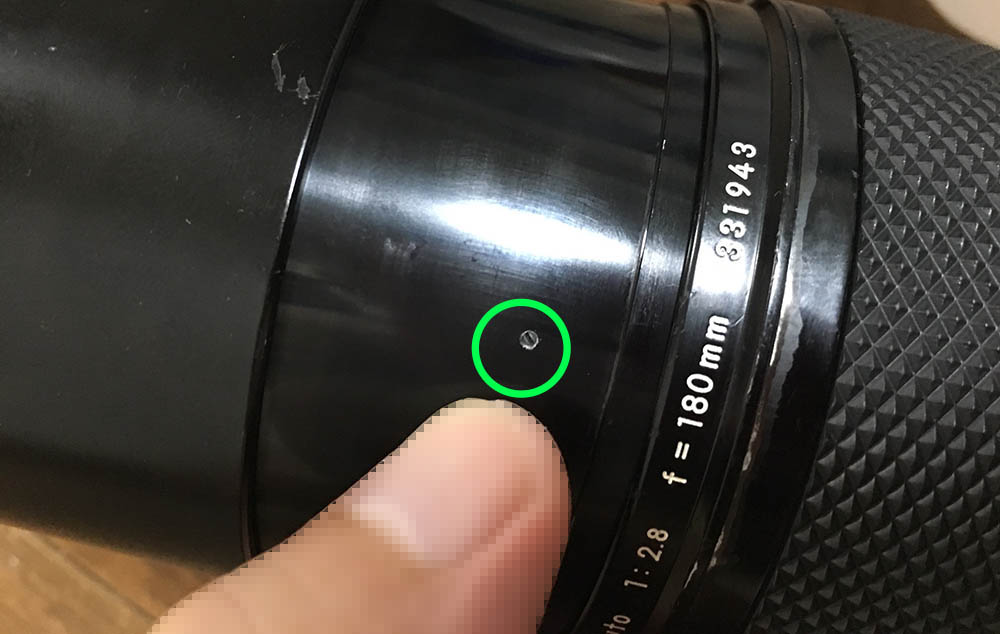
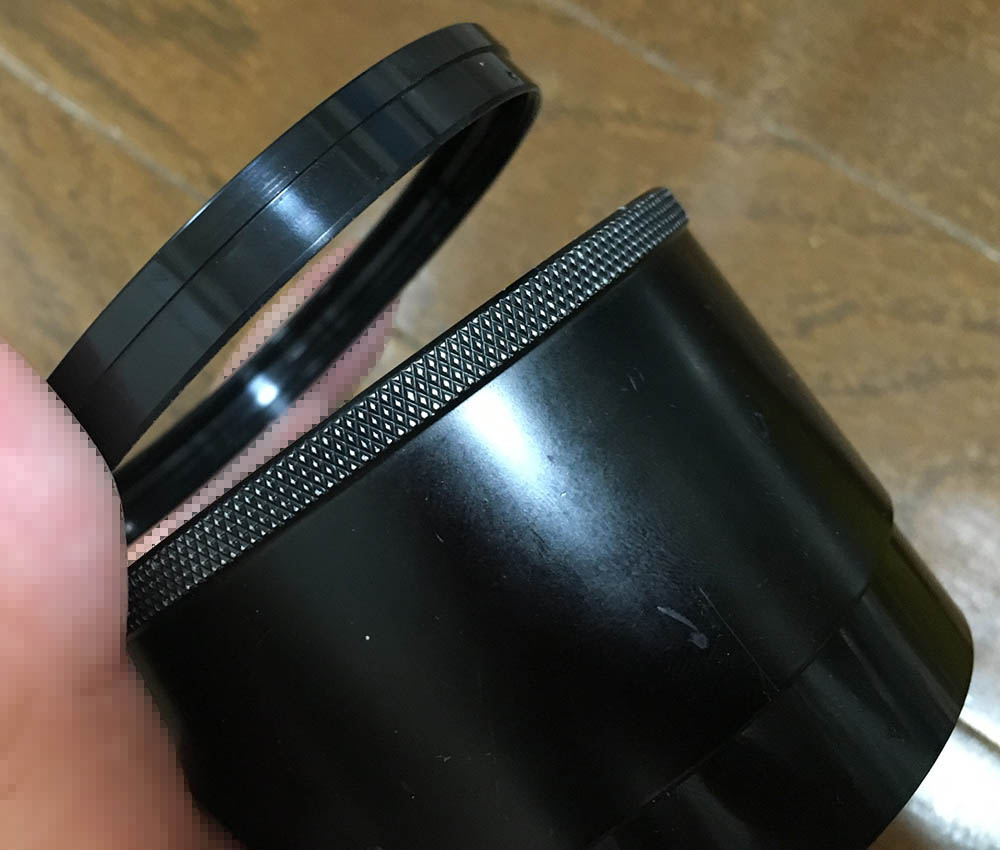
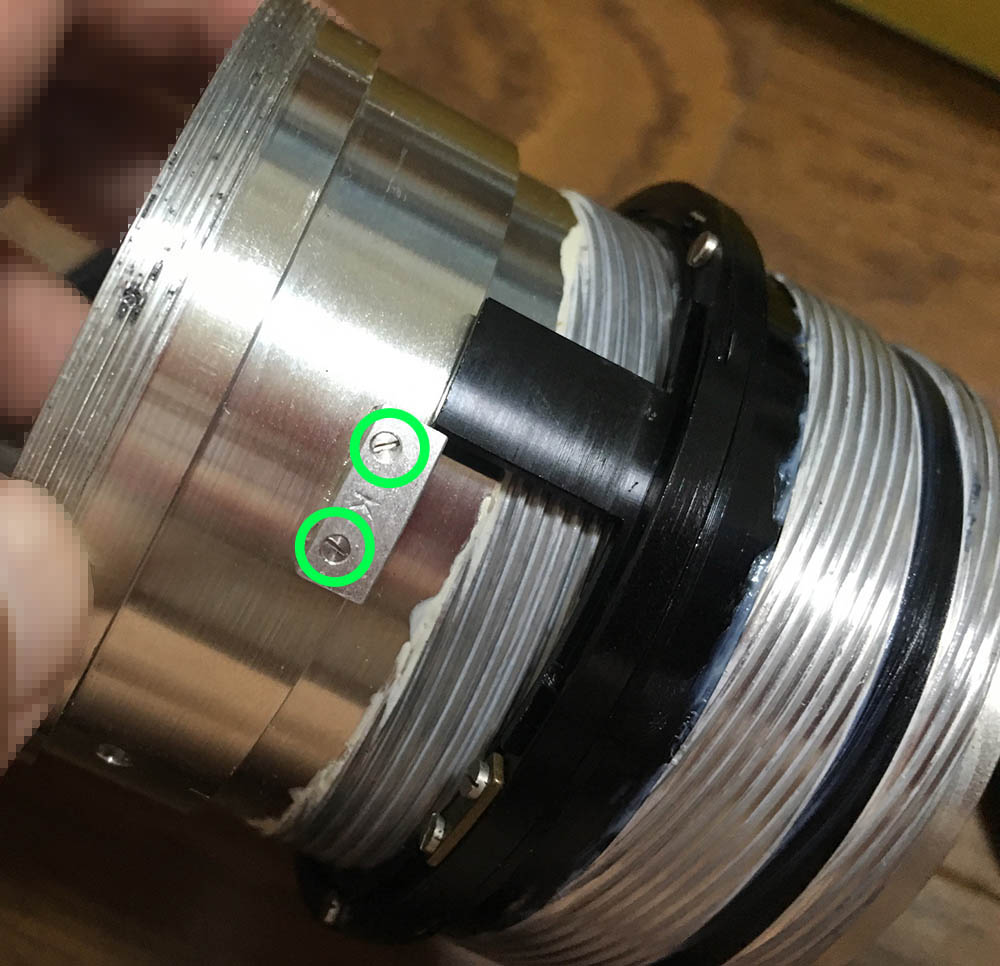
We must remove the hood and the front barrel. To do this, you will need to extract this set screw that is securing it to the rest of the barrel.

The front barrel can then be unscrewed off with your bare-hands. If yours is not moving, I suggest that you place a drop of solvent into the hole of the set screw and allow capillary action to take it throughout the thread, let that sit for a while to give it time to work on the cement and then attempt doing it again. Repeat the whole process if it is still stuck.

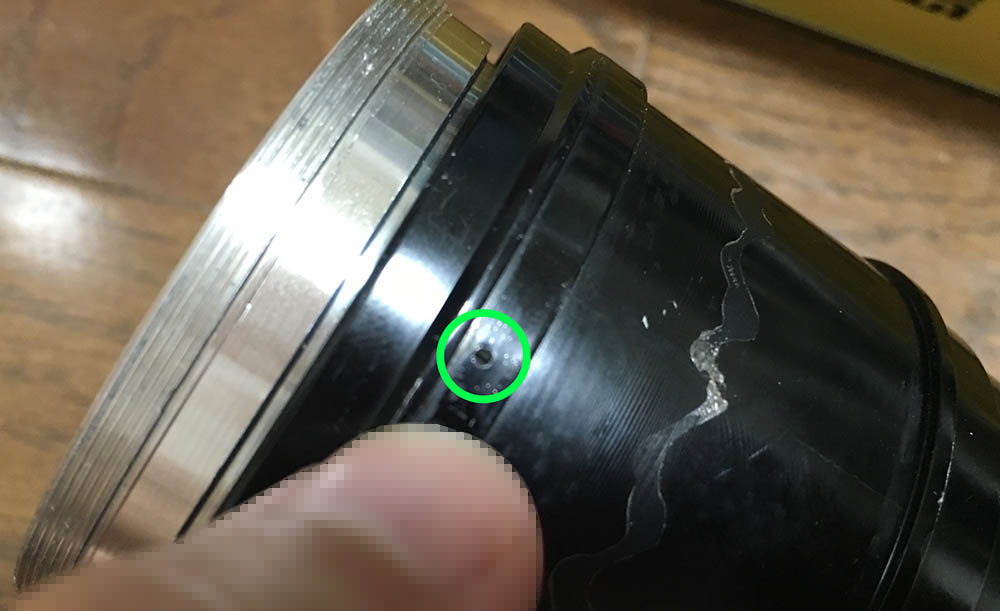
This is optional but I I had to do this since I really wanted to clean this very well. In the picture above, I have encircled the position of a screw that you have to remove so you can unscrew the front ring off. It can take some time to locate this screw with the hole on the hood.
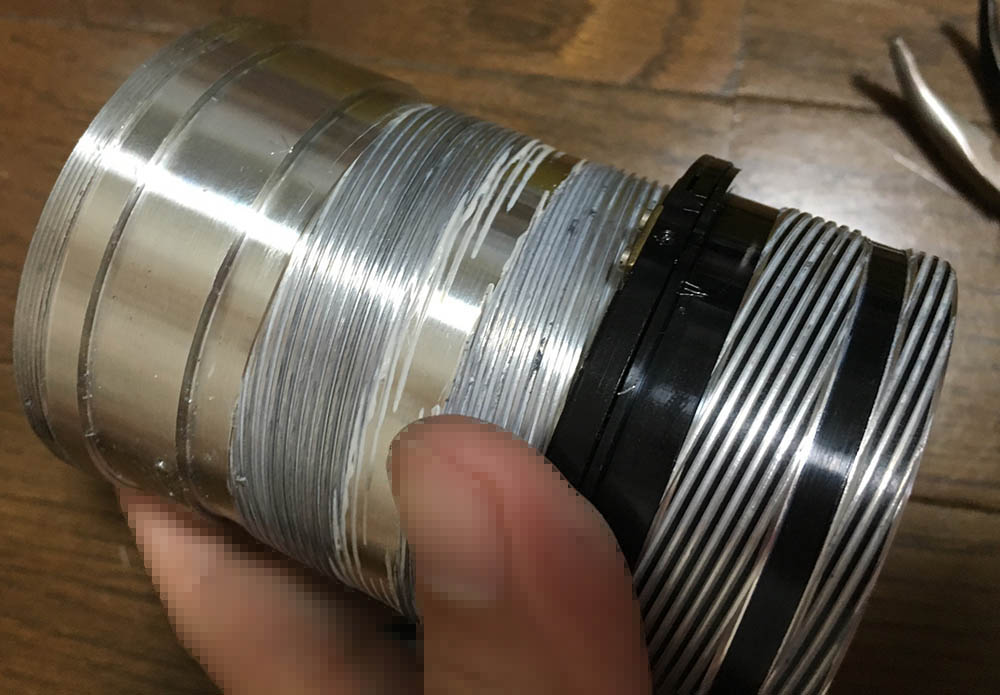
Just like the front barrel assembly, this part is usually cemented. If yours is stuck then you should do the solvent routine again. The front ring is easy to remove by unscrewing it using a rubber pad. Some people even use an old mouse pad to remove rings like.
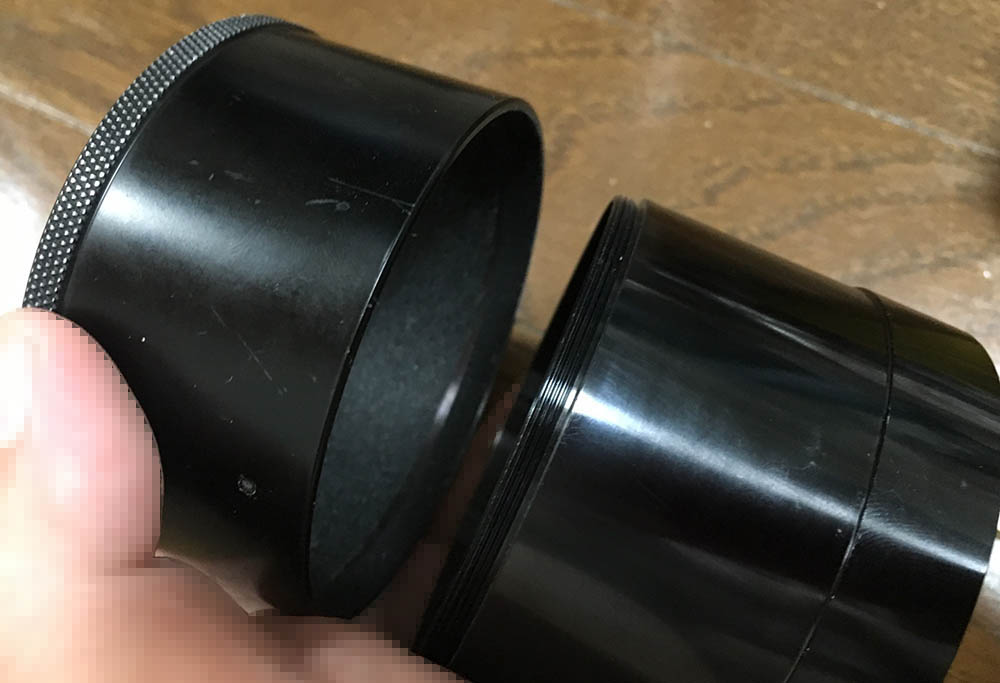
The hood can then be pulled-off from the front barrel. Notice the felt lining found on the inner surface of the hood? Be sure not to damage it.
The objective can now be pulled-off once the front barrel is gone. Unscrew the front elements assembly and be careful not to damage it. Store this big chunk of glass in a safe place where it will not roll-off the edge of something or get scratched.
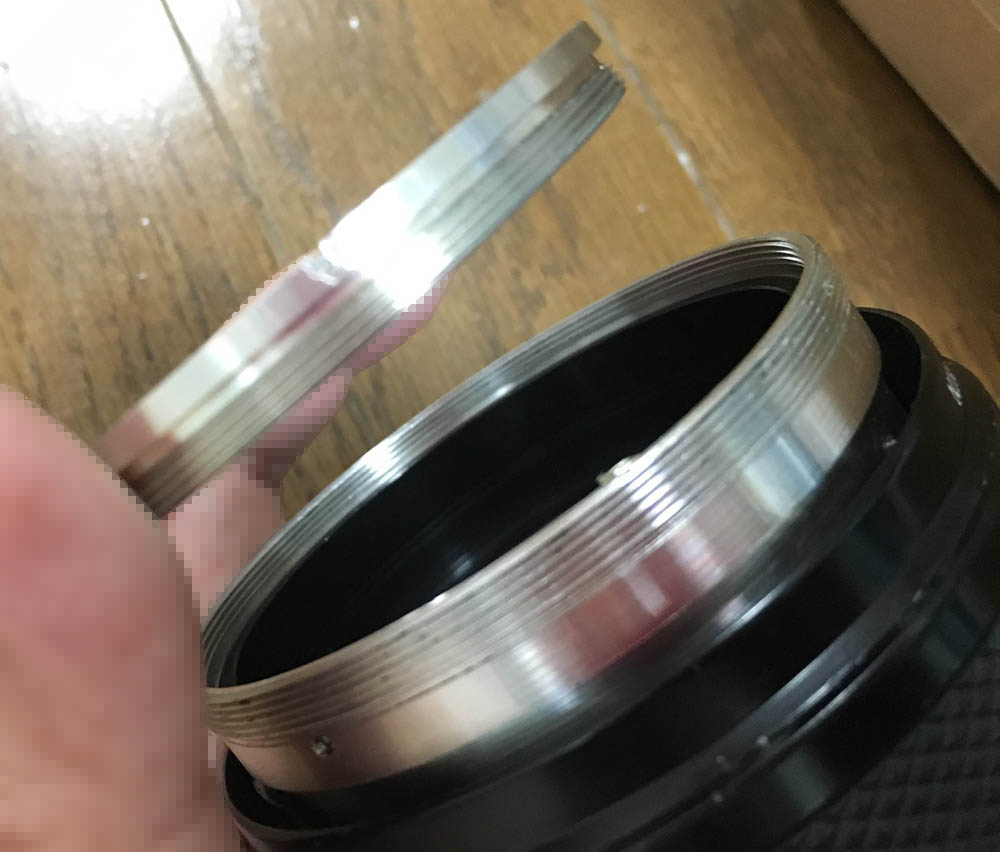
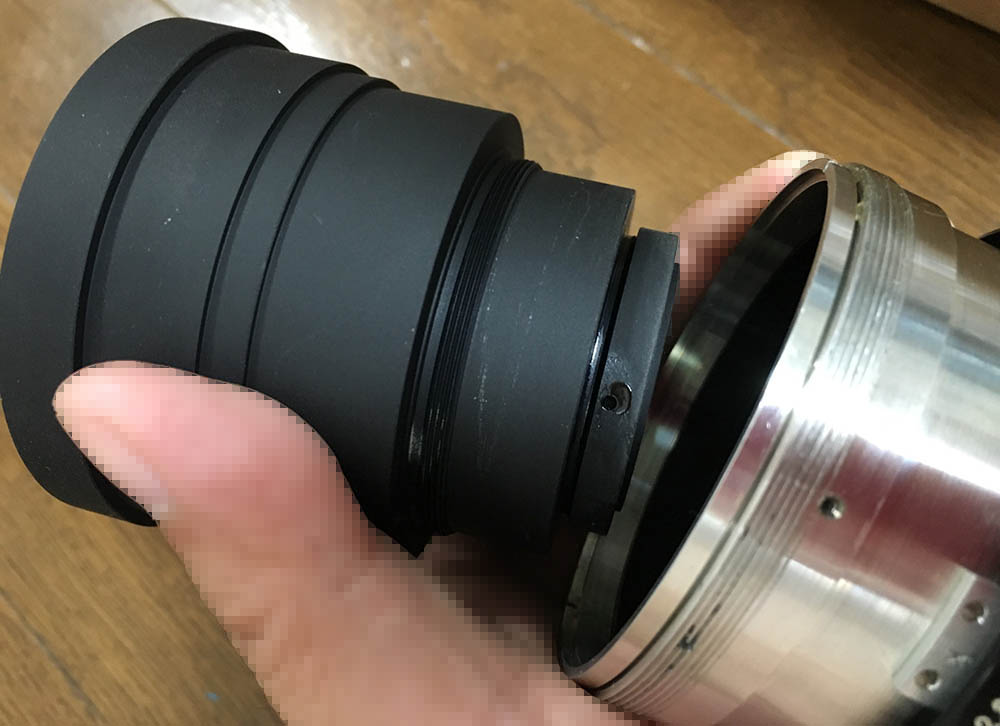
If I recall, you can only access this ring once the front elements cell is out of the way. This ring can simply be unscrewed by using a lens spanner. If you are good at observing things then you probably noticed that mine was glued from the picture before this step. This retention ring is very important so it had to be secured by glue. Be careful with this because this was made from a soft aluminium alloy and it is easy to warp it.

The retention ring secures the lower half of the objective which houses the iris assembly and the rear elements assembly. If the housing of the objective is oily, use naphtha to clean it together with a lint-free tissue or else the oil will migrate to the iris assembly.
For safety’s sake, I combined the front and rear assemblies of the objective and kept it in a safe place where there is no danger of it rolling-off an edge. It is very heavy and is easily almost a kilogram in weight. It felt dense, this is one of the reasons why this is so pricey.
Now that the objective is stored safely somewhere, we can now work on the rest of the lens barrel without worrying about the glass. This is just a part of best practices and I’m strict about this. I will usually separate the objective from the lens barrel whenever possible.

The bayonet screws have to be removed in order to extract the bayonet. The screws were sealed with some kind of epoxy-like substance and one of them is usually glued with something stronger. Read my article on how to remove bayonet screws to prevent damaging these. Many people damage these and get stuck so be careful. Ignore the fact the objective is still in the lens barrel on this picture.

The bayonet plate can be picked-off just like that after the screws are gone. Don’t worry about anything getting snagged because nothing is connected to this (like a spring).

The aperture ring also came-off easily without any issues.

By the way, in one of my journeys to the junk shops I happened to find this aperture ring for the Nikkor-P 180mm f/2.8 Auto. It isn’t Ai’d but I bought it anyway just for collection’s sake.

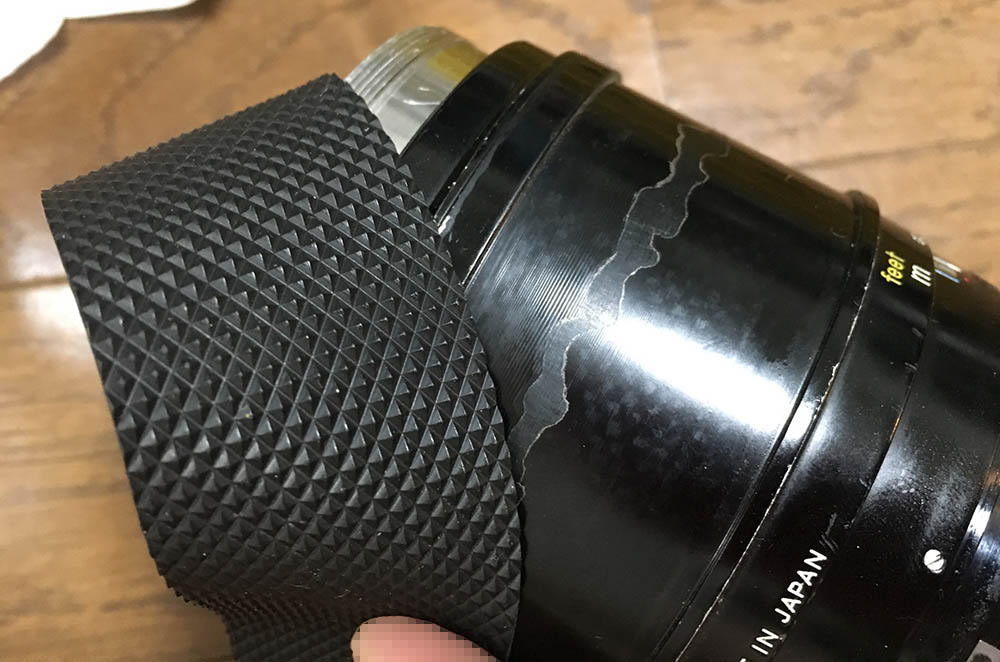
This grip has to be removed and to do that you will have to remove these 3 screws. As with all external screws, be careful not to damage them by using a driver that will fit perfectly with the slot. One of my screw snapped into 2 pieces just because they are old. I advise you to be careful with the screws on these old lenses because they deteriorate as the decades go by. I had to use my handy screw extractor bit for this.

The grip comes off easily. Do the solvent trick on this if yours was sealed. At this point in Nikon’s lens production history, the management decided that it was good to use plenty of glue on Nikon’s lenses. Good thing that stopped.
This part is optional since there is nothing underneath the rubber grip that you have to get to in order to strip the lens down. I removed this because I just wanted to clean what is underneath it and also to give the rubber a nice scrub with soap and water. You can remove the broad rubber grip from the focusing ring by running a thin rod underneath its whole circumference to detach the old contact cement from it and slowly but carefully pulling it off from the focusing ring.
But,wait! Stop! There’s a better way to remove this without stressing the old rubber part too much! Just follow the next step and see how and why.
You can remove the rubber grip in a safer manner by removing the bezel at the front of the focusing ring. Simply extract this set screw and unscrew the name ring off. This part might also be glued. Talk about substance abuse in the ’70s!

And off it goes! The old rubber grip does not need to flex as much after this thing is gone. It really isn’t much but it still helps a lot. Again, removing the rubber grip is totally optional.
Time to remove the focusing ring. Unscrew these big screws underneath the bezel to free it from the central helicoid but before doing so, do not forget to take notes or make a small mark near one of the screws to serve as a key or reference later on when it’s time to re-assemble your lens. This ring can be adjusted so that the lens can properly focus all-the-way to infinity. Making a mark ensures that you’ll be able to know how to adjust it back to the factory spec later.

The focusing ring should come off easily. This part is usually glued in-place by the way.

You can remove this decorative sheath with the scale after getting rid of the shiny grip. It is not important whether you remove it earlier or later while but you need to remove this to access the helicoid key. Simply remove these screws to remove the sheath from the main lens barrel. Again, this part is sometimes glued. The gunk or dried grease underneath it can also make it stuck.

The sheath can be pulled off from the main lens barrel just like this.

Once the sheath is gone you can now access the helicoid key. It is secured by no less than 4 screws, it makes sense since it is a big lens anyway and all the torque will stress the helicoid key. The helicoid key keeps all the helicoids in sync as you rotate the central helicoid. It also constrains them so they won’t over-extend or turn beyond their range.

Once the helicoid key is removed, you are now able to separate the central helicoid from the outer helicoid. Be sure to mark where these separated or else you will waste plenty of time guessing where they should mate later on. Read my helicoid guide just in case, many people didn’t which resulted in a lot of frustration and butchered lenses.
At this point you would want to separate the inner helicoid from the central helicoid but it is impossible because this helicoid stop is preventing it. This prevents the lens from focusing past its focusing range. carefully remove it and remember which side faces up.
As with the central helicoid, you will want to mark where these separated.

This is also another optional thing but since old grease tend to accumulate under this, you will want to clean this part thoroughly. This ring is another part of the focusing ring that lets you adjust the lens’ focus. Again, carefully mark its original position before you remove it because it is an adjustment point. These rings are usually cemented and the only way to remove them is to soak them first in alcohol for a day to dissolve the cement.

It’s time to remove the rest of the parts connected to the main barrel/outer helicoid. Just like the grip and the sheath, you can remove this at any point during disassembly as soon as you are able to access them. Remove these 3 screws to extract the rear baffle from the main lens barrel. This is in charge of keeping stray light and dirt from entering the lens. Make sure to note this part’s orientation before removing it.

The baffle assembly also houses the stop-down lever spring and bearings. Don’t bother with these unless you really had to. I rarely have to clean these unless they are fouled with old or bad lubricant that is preventing it from operating smoothly. Wipe off any oil/grime that you see with naphtha using a lint-free tissue.

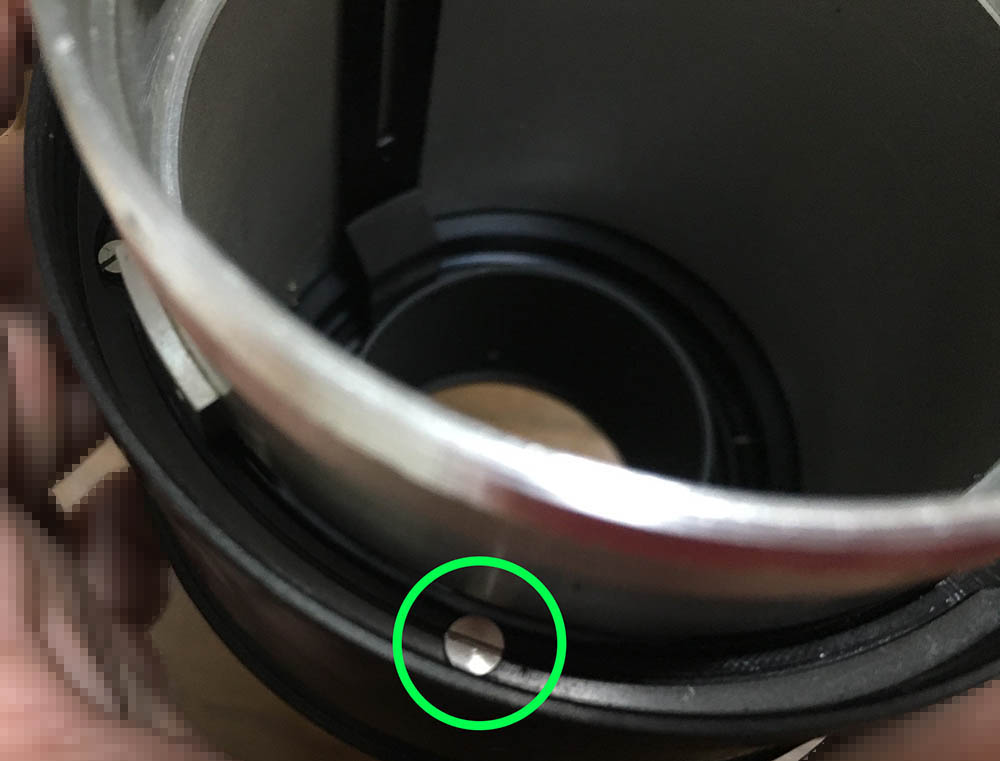
Back to our barrel. Before you proceed, you have to remove this tall-headed screw in order to free the aperture coupling fork and its ring. These screws were custom-made so be careful not to lose or damage them because they can be delicate and irreplaceable.

To remove the aperture coupling fork mechanism, you will have to remove this set screw so that you will be able to unscrew its retainer ring.

The retention ring can be delicate so be careful while you unscrew it. Never lubricate the aperture-coupling fork or the stop-down lever.
Conclusion:
That was certainly a chore. Bigger lenses take more time to rebuild even if they are made simpler than a smaller lens because you will have to clean a bigger area. This is a simple lens to work with but I will not encourage any new-comers to work on this as their first or second lens. Bigger lenses will require different tools and techniques. They also require more strength and stamina to work on, trust me.
Be sure to use a lighter grease for this lens because of the long focus throw. Also keep the grease on the thin side because this lens can be prone to the oily iris syndrome. Just put a reasonable amount just enough for a smooth-feeling focus ring but not so much to leave a pile of goo at either ends of the helicoids. It may be fantastic at the start but it will soon develop into some oil-related problems later.
I don’t make reassembly portions since most of it is common sense and all you need to do is back-track but this lens can be difficult to put back since the objective is huge and the barrel is deep. One of our readers asked how to put the objective into the barrel easily and the answer is to simply put back the lens barrel together first and then align the slugs (screw heads) from the iris mechanism found on the objective to their corresponding slots found on the aperture coupling fork and stop-down lever.
Once they are aligned, carefully lower the objective and make sure that it is also aligned to where it should be. I did all of this while the bayonet wasn’t installed so that I can peek at it from under the barrel if I had to.
Use your senses and feel for the clicks and listen for anything that engages. This will be helpful until you are sure that things are where they should be. Once the whole thing is inside the barrel, flick the stop-down lever, rotate the aperture ring to see if they’re working properly and the iris is opening-up or stopping-down while you do it.

Reassemble the lens up to this point where the objective is safely secured in its final position and leaving-out the bezel of the focusing ring. You’ll have to adjust your infinity focusing while the lens is in this state. Read my work on how to adjust your lens’ focus to help you calibrate your lens.

That was certainly a lot of effort just to fix the infinity focus of this lens but it was all worth it because this lens is now perfect. The pictures this makes are exceptional, I sometimes wondered how this lens got a cult following because quite frankly, a zoom is much more convenient than this and also not any slower but having used this lens on a portrait shoot I can only say that this lens deserves to be hailed as one of Nikon’s best legendary lenses for portraiture. It is heavy but at the end of the day I was very happy with the results and I’m ready for the consequences. Both the results from film and digital showed creamy background and amazing subject isolation. This lens will never be for sale and will always be part of my kit for portraiture or fashion as long as focusing speed is not a problem.
I hope that you liked this. I am sorry for not showing you how to work with the objective because I didn’t have to clean mine. This lens had been worked on by somebody else as evident by the clean but dry grease and the pristine state of the glass. I was lucky to find this and of course, I’ll always select the cleaner one over the dirtier ones in a shop. Thank you for supporting and following this blog, we’re getting around 30,000-36,000 visitors a month and I was told that it is not a shabby number for a blog that is maintained by a busy person with no production value. I will try my best to always give you the best content possible. See you again next post, Ric.
Help Support this Blog:
Maintaining this blog requires money to operate. If you think that this site has helped you or you want to show your support by helping with the site’s upkeep, you can make a small donation to my paypal.com (richardHaw888@gmail.com). Money is not my prime motivation for this blog and I believe that I have enough to run this but you can help me make this site (and the companion facebook page) grow.
Buy me a roll of film or a burger?
Thank you very much for your continued support!
$2.00
Helping support this site will ensure that this will be kept going as long as I have the time and energy for this. I would appreciate it if you just leave out your name or details like your country’s name or other information so that the donations will totally be anonymous. This is a labor of love and I intend to keep it that way for as long as I can. Ric.

May 21, 2017 @ 20:46:29
This is not good …
Now I want one. 🙂
Good post, Very good post.
May 22, 2017 @ 02:19:13
Hi, Carlos!
They are reasonably priced so no worries 🙂
May 28, 2017 @ 15:30:26
Incredibly useful article clearly written to show all the issues involved in servicing this lens. Have waited a long time for such info, now I have the confidence to tackle my 180mm with stiff focus ring.
Great work hugely appreciated!
May 28, 2017 @ 15:35:22
Thanks! Be careful with it so it doesn’t end up being bricked! When in doubt, as me first! Ric.
Jun 11, 2017 @ 17:58:33
Hi Richard, I’m really impressed by your work and commitment! I was doing some maintenance and repair of old Nikkors more than 15 years ago and I remember how difficult was to find relevant information and materials. Unfortunately, a nature of my work – I need to travel a lot, doesn’t let me keep my hobby running, but from time to time I like to pick up a broken or just not in a good condition lens and clean it or fix it. Lately I got a Ais version of 50/1.2 one with stuck iris (according to the seller). Optically it is in good condition (not counting a bit of fungus) but in reality, inside there were no iris blades at all…anyway, now I’m thinking how to fix it and whether worth trying this, because I cant find any source of parts for 50/1.2. There is not much of use for it without iris and I’m wondering if there any other model of a manual Nikkor with 9 blades iris is compatible with 50/1.2?? And, sorry, I apologize for off-topic…
Jun 13, 2017 @ 05:08:59
Hello, Andrey.
I would skip that lens if I were you. Now, the Ai-S version is a current lens so the factory still have the parts in their inventory. I am not sure if they are willing to sell them but you can try.
If it is the Ai version, then good luck! Iris blades are rarely interchangeable and you will want to stop this lens down a bit as f/1.2 isn’t very useful for practical things.
Glad that you liked the blog. Ric.
Jun 17, 2017 @ 16:04:13
Hi Richard,
Thank you for you opinion! I’m not going to put much efforts in this one, unless a possible donor with damaged optics will pop up. My version is Ai-S, but I’m quite sceptical about possibility to get parts via official channels from Nikon )).
Thanks again!
Regards,
Andrii
Feb 01, 2018 @ 00:11:13
I purchased one of these Nikkor-P 180mm f/2.8 lenses on eBay recently. The seller described the glass as “clean”. The lens seems to be in good shape with exception of the rear element which has a nasty spot of fungus right in the middle. It looks like it might be possible to just remove the rear element for cleaning with a lens wrench. Is that possible?
Jul 20, 2020 @ 18:12:13
Hello Richard Thank you for all your posts which have sustained me during CORONA. Have restored my 50 f2 20 f4 24 f2 28 f2.8ais (challenging) several 50 1.4 and 105 f2.5 based upon your posts and KENNETH
Found the 302th 180 f 2.8 ai at aperture photographic (riding house street london) a few months ago and it was still there post covid. Mine has good glass but dust around the aperture and dry helicoids, and i am half way through opening and renovating. Mine required loads of acetone and some mek but now objective out. Mine would NOT separate so the retaining ring had to be loosened first requiring lots of patience and the use of my lens spanner in a vice to angle it in to avoid the front lens group which would NOT shift. Yours did i think because it had been opened before.
My retaining ring is black and the screws are all jis. Can send photos if you wish..
Just wanted to thank you and best wishes
Mark..
Nov 23, 2020 @ 19:45:23
Hey man, Thanks for the detailed instructions on the Nikkor-P 180mm. Gives me the confidence to tackle a clean and lube project for this lens and resurrect it. Much thanks!
Jul 07, 2021 @ 19:40:57
Hello, I got completely stuck after removing the Hood and could Not remove the Objective – the first big section of glass. Is it Glued or have some set screws Im not seeing? Trying to be careful so I dont damage anything. thank you so much.
-Eduardo
Sep 08, 2022 @ 21:07:55
Thank you for this post! Inspired me to get what looks to be almost exactly the same lens — it has the small secondary aperture ring so maybe it was factory serviced for AI?
Learning the nuances of manual focus, but was still able to take a lot of keepers in a short walk-around this afternoon. It’s just a beautiful work of art by the old Nikon engineers and workers.
Thank you again!
Jun 14, 2023 @ 12:51:25
This article will be very useful in disassembling my 180 f2.8 which has a slow moving sticky diaphragm (no visible oil and does move fully closed but too slowly)
Can you point me to an article of yours which deals with sticky diaphragms.
Thanks hot your help.