
Hello, everybody! Have you seen the art of Chen Shu-Fen (陳淑芬) and Ping Fan (平凡)? They’re a couple from Taiwan, a country filled with many amazing artists and artisans. The couple are known for making amazing illustrations and the art they produce as a team are known for having a soft, dream-like quality thanks to the use of “mix-media”, it’s a term used in art circles to define something that was made using several different mediums. The art they make exhibits soft tonality that’s only possible with the use of watercolor, pastels or aquarels but the lines are bold so they juxtapose well with the softness. The lines were drawn with pencil or crayons which adds another interesting layer to the final result. I am a big fan of their work so I encourage you to check what they do. I will introduce to you something today that has the ability to render something with a painterly-look, it can both render soft and bold details quite well but it has some flaws so I won’t call it perfect. Whatever the case is this is still something interesting and I encourage you to read what I have to say about this little gem.
Introduction:
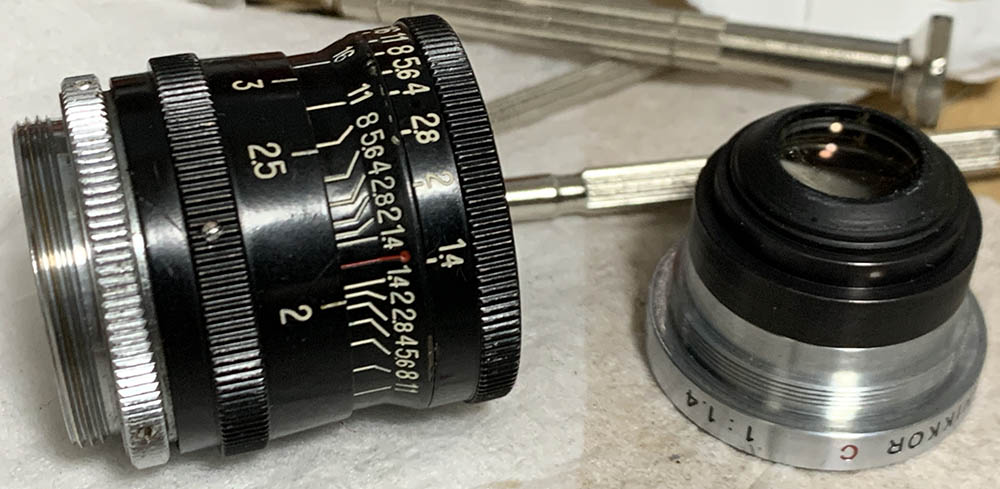
The Cine-Nikkor 25mm f/1.4 is presumed to be the first Nikkor made for the C-mount. I have no data as to when it was made but I assume that it’s around the later 1950s judging from the design of the barrel and its construction. This little lens was updated later with a larger barrel that’s more in-line with the rest of the Cine-Nikkors that were made for the standard 16mm format. The latter lens may have been made up until the late 1970s judging from the boxes that they came with. These lenses sort of function like “standard” lenses for the standard 16mm format akin to the 13mm lenses that were made for the smaller standard 8mm format which uses the D-mount.

It feels quite dense despite being the smallest C-mount Nikkor thanks to its brass barrel. It’s merely painted so you will have to be careful when cleaning it. It resembles the smaller D-mount Nikkors such as the Cine-Nikkor 13mm f/1.8 and you could accidentally look-past one because of the resemblance. If that’s not confusing enough there’s an even faster model called the Cine-Nikkor 25mm f/1.2 which is considered rare, that one looks nearly-identical to this lens except it has f/1.2 engraved on it. The differences are so subtle but an expert could tell them apart by looking at how the barrel looks because the slope of the rings look different.
It has a 6-elements-in-4-groups design and is of the Double-Gauss-type. The objective itself is small so it could fit inside the tiny barrel and still give you a slightly-recessed front element. I mentioned that a later one exists that has a bigger barrel, that lens has a different optical design and should never be confused with this one.
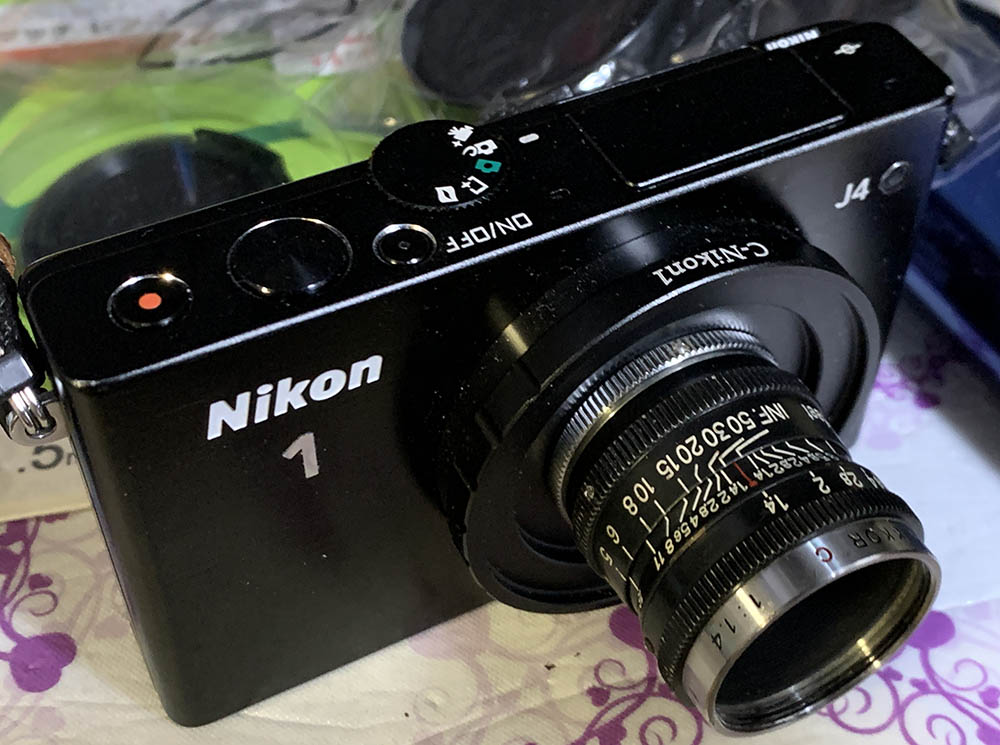
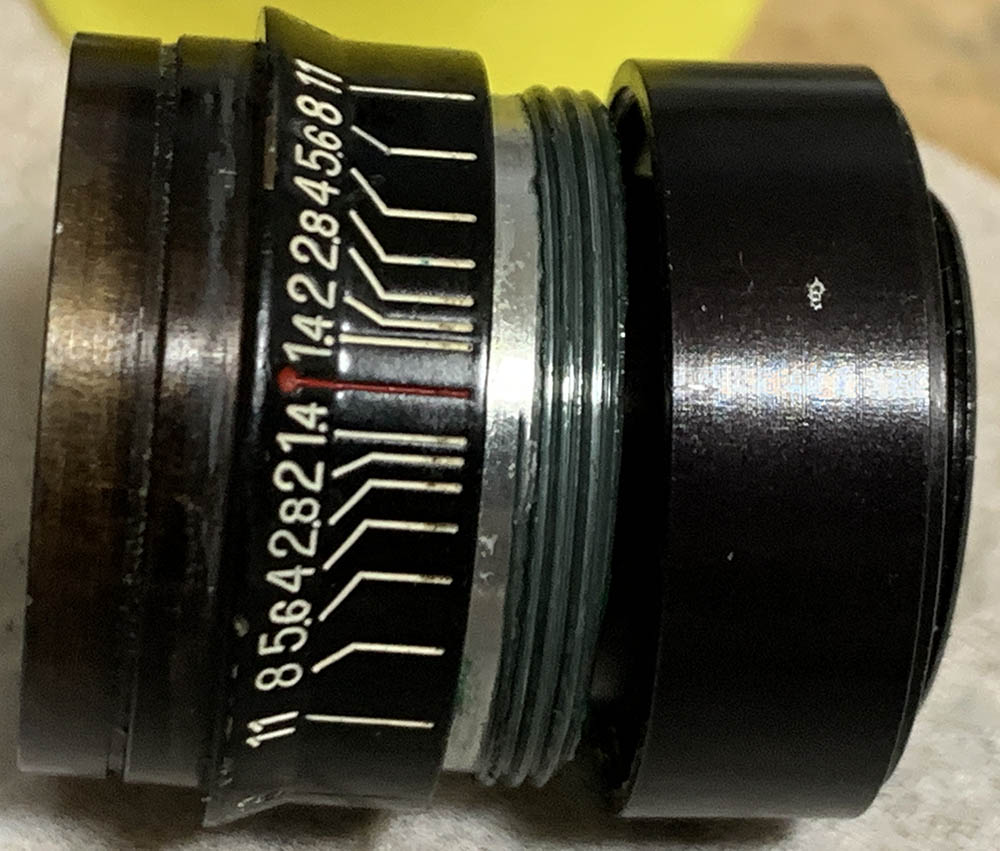
This is tiny, the little Nikon 1 J4 dwarfs it. Handling can be difficult, the focusing ring is obstructed by the adapter’s rim. It’s also confusing to-the-touch since the focusing ring is situated close to the aperture ring and the knurling is similar along with the dimensions of the rings.
One word about crop-factor and cine-lenses, it’s said that a 25mm cine-lens will have an equivalent field-of-view of a 70mm on the 35mm format, about 2.7x. This means that this functions like a 70/3.5 when it comes to photography. I’d also like to mention that crop-factor as a concept is quite recent and cinematographers never even thought about this when filming, 25mm on standard 16mm will always be 25mm. Having said that, I am merely using this concept to help you understand this lens better from a photographer’s point-of-view and how it fits in your kit. A cinematographer will not even bother to think about this as it’s nonsense in that context.
Learning how a lens performs is key to maximizing it. You’ll learn how to utilize its strengths and avoid its weaknesses. This knowledge helps in determining which lens to bring on an assignment. I shot these from f/1.4, f/2, f/2.8 and f/4 since these are the most common values that people would want to use this and we’ll see the most changes happen within these apertures. These were shot with my Nikon 1 J4, some of the photos were cropped close to 1:1 so we can see the details better. You’ll need to understand that the sensor’s usable area is actually a bit bigger compared to that of 16mm so the areas closer to the edges look terrible since this lens is rendering beyond its intended image-circle.


(Click to enlarge)
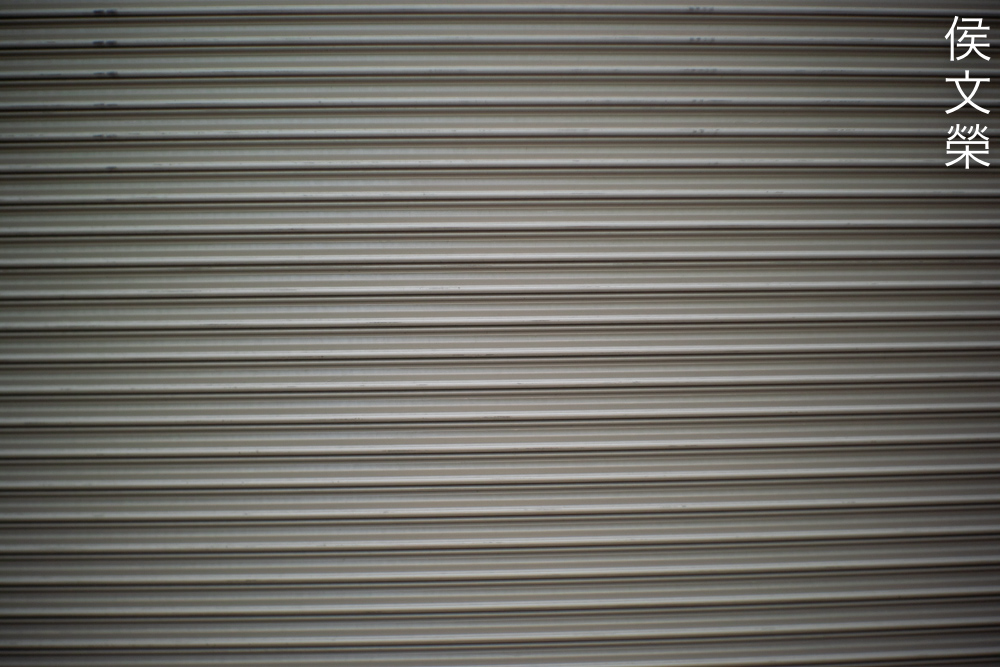
The corners are rather dark when shooting wide-open, it improves significantly by f/2 and you’ll only see traces of it by f/2.8. You won’t notice anything from f/4 and beyond, this suggests that the corners look pretty nice at this aperture.
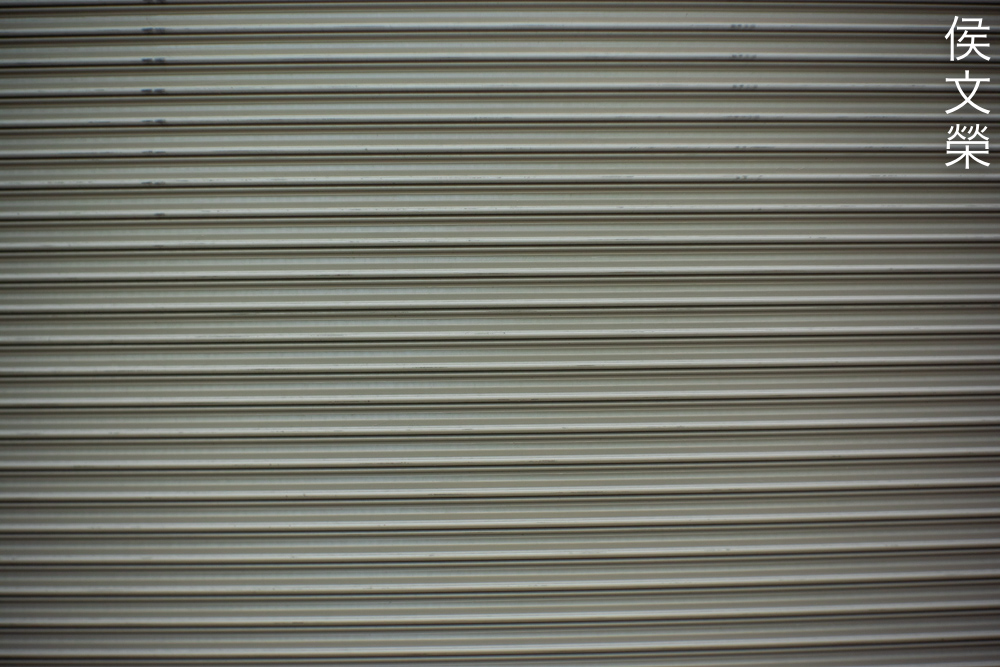
You will see some barrel-type distortion which is typical for a lens of this class and it’s rather high. The profile isn’t what I would call simple but it’s not going to be difficult to process either. Having said that I won’t use this for shooting any photos or movies that require lines to be straight. I used to be a professional camera-tracker, this amount is quite high and I will undistort the footage first before tracking it in order to get a nice solution from the software.


(Click to enlarge)
It flares terribly and you’ll get plenty of blobs when you have bright sources of light within the frame or even anywhere close to it. What’s surprising is there’s a long, thin artifact when the iris is stopped-down, that may have come from an element that’s damaged or a cemented element exhibiting signs of balsam-separation.


(Click to enlarge)
Since the iris is angular you’ll get hexagonal-discs when rendering point-lights. Some people like this while some folks don’t. Despite looking polygonal it’s not what I would call “distracting” but it will surely affect how smoothly it renders blurs specially when there are things in the background that could trigger rough-looking artifacts.


(Click to enlarge)
These examples show some characteristics of its bokeh rendering. It has a tendency to render swirly-looking blurs that some people call “soap-bubbles” which is caused by astigmatism. Some parts of the blurry parts also looks smeared, it is something that I won’t consider if smooth blurs are mandatory.

While not severe it’s susceptible to rendering what some people call “double-line-bokeh“, this happens when you shoot long, thin lines, twigs or grass. While not as bad as some other artifacts this is something that can be distracting if you have them in your photos.


(Click to enlarge)
Sphero-chromatic aberration can be observed when shooting wide-open and it’s rather high specially when shooting a scene that has overblown areas. Chromatic aberration will appear as color-shifts and spherical aberration makes these bloom specially when compounded with flare which you could easily be mistaken for it. You’ll see a huge improvement by f/2 and it improves even more by f/2.8. You won’t notice much by f/4 but it’s still observable in extreme cases.


(Click to enlarge)
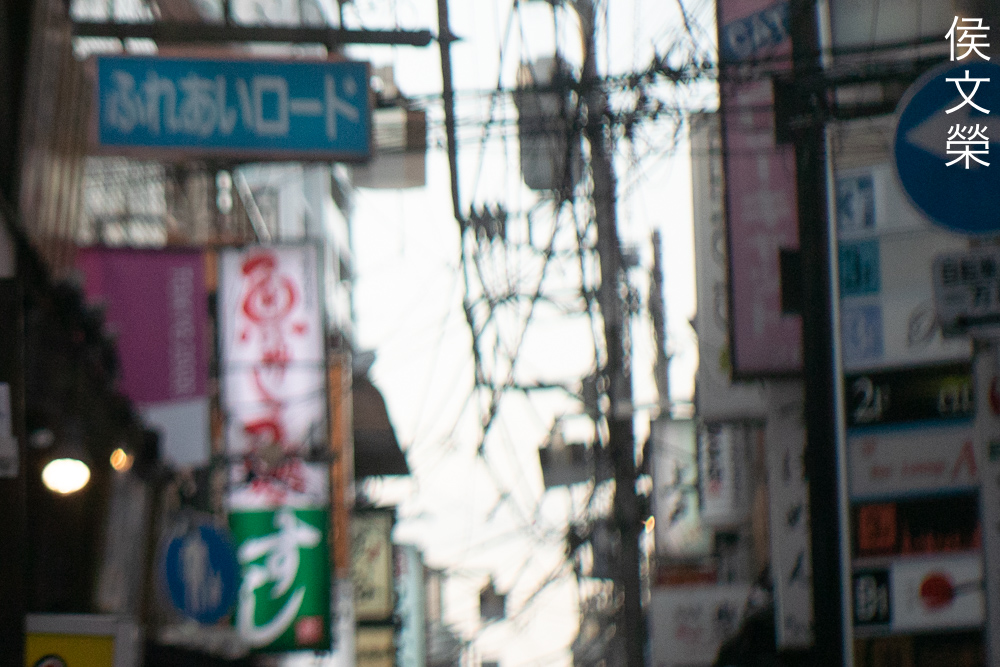
It’s a different story when shooting against-the-sky or any backlit scenes, it looks hideous and it will only look usable if you’ve stopped the iris down from f/4 and beyond. Even at smaller apertures you won’t eliminate this completely, you’ll have to be aware of this.

This is how it looks like when shooting in a real-world scenario, look at the cables to the left of the frame and you’ll see what I mean. This situation is difficult to avoid so you’ll just have to accept it. On the other hand, it can also be used for portraying a hot, sunny day.


(Click to enlarge)
Coma is severe when shooting wide-open which is expected. I believe it looks best at f/4 where the point-lights start to look like proper stars which makes things look “magical”. What I just mentioned is important for a cine-lens, at least it’s able to show some promise at smaller apertures. I won’t shoot this wide-open if there are point-lights at the corners.

This is how nice the sun-stars look like, do you think it looks “magical”? It’s like going to the “happiest place on earth“.


(Click to enlarge)
It’s soft wide-open, caused by the general lack-of-resolution and aberrations. Despite that you could see that it’s quite sharp when you stop it down because it’s just there waiting to be resolved properly. Stop this down to f/2 and you will notice a huge jump in resolution which you’ll notice at the center. The “dreamy-look” is now mostly gone but it’s still a nice aperture for rendering delicate details so they won’t look too-hard. The center looks a lot better by f/2.8 where the improved resolution enables this lens to render fine details even if you zoom-in. I think the center reaches its peak by f/4, this is the best resolution to use when you need the center to look absolutely sharp. The biggest change you’ll see is how the corners look a lot better now. It’s usable at f/2.8 but it’s definitely much better at f/4 even if you look at the corners.
It appears that my lens performs better as it gets closer to infinity but it’s not bad at all when focusing close. I do not think it’s bad at all in terms of sharpness and resolution but it’s certainly not a match for newer lenses.
It won’t focus really close and this is what you’re able to get. I do not think focusing really-close is what the engineers had in their minds when they calculated this. It does a decent job at it which is fine for most cases. The character of the bokeh isn’t outstanding by any means but it’s not offensive either, I’ve seen worse.

It’s not a sharp lens when shooting at wider apertures but nobody pixel-peeps movies anyway. Standard 16mm format is rather small, I don’t expect people using it to resolve finer details. The point of using it is for portability and it offers much better resolution compared to standard 8mm which is considered to be an amateur or budget format.
Used correctly this lens is capable of rendering really well, it renders blurs rather well if you don’t have things that will trigger any artifacts in the background.
It’s great for shooting-tight, something that’s indispensable for documentaries. I like this one a lot since the picture is rendered in a painterly-way.

In order to prevent this lens from rendering an ugly-looking background the best way is to stop the iris down, it should make the background look cleaner. Remember this when it’s impossible to avoid some elements in the background.

It’s also a nice portraiture lens, it functions as a short-telephoto equivalent due to its field-of-view. It’s like a 70mm lens on the 35mm format which is just-right for full-body portraits and at times, face-shots.

Tonality is nice, you won’t get clamped-tones with it so it’s a great lens for shooting at the “blue hour”. The maximum aperture of f/1.4 is good for shooting at night but it really functions more like an f/3.5 lens in actual practice because of the crop-factor.

It’s a big long but it’s nice for environmental portraits since you’re still able to get some parts of the background in the frame. Foreshortening is not as strong so you’re able to frame your subjects in a more candid manner.

It’s sharp when stopped-down from f/4 and smaller as evident in this photo but what ruins this is how high chromatic aberration is and you could see it easily at the branches to the left of the frame. This is such a shame because it would otherwise be such a good lens if not for that flaw. It’s easier to correct compared to the rather ugly-looking bokeh but it’s still worth mentioning here.

Confucius say: “Person who complains about chromatic aberration don’t shoot monochrome.”, that statement could not be refuted easily. With the wisdom imparted by that message I think it’s fair that we should consider that it was actually made to be used with black-and-white film so chromatic aberration won’t be as obvious.

This photo shows the utility of this lens as a “standard” kit for shooting with the 16mm format. A 10mm will give you a wide-angle lens, a 25mm one for shots like this and a 50mm one completes the kit so you’ll have a telephoto. Many, if not all serious 16mm movie cameras of its time have built-in carousels that houses at least 3 lenses and their finders. It slowly got obsolete as zooms become more popular.


(Click to enlarge)
Here are more photos that should give you a better idea as to what sort of photos this lens takes. This lens is meant for shooting movies and not stills so always be aware of this fact. Despite what I just said it’s nice as a walkaround lens, it’s not as wide but it’s not too-long either so it’s able to cover a lot of ground in terms of utility.
This is a nice lens, I’m sure that people who love shooting with a Nikon 1 camera will enjoy this a lot for still or movies. It’s rather practical and the maximum-aperture of f/1.4 is useful for use in lowlight situations. It has some flaws but it’s not something that I’d call useless, most of the issues that I mentioned could be circumvented and that is why I always encourage you to learn more about your lens. These aren’t common at all but I won’t consider these as “unicorns”, it’s sometimes even possible to find several of these for sale at a given time but those times are rare. Prices vary a lot but I usually see them being sold from $100.00 up to $250.00 for a nice example. If you’re looking for one be sure that all of its rings turn properly and the glass is clean. The iris should be perfect and it should not be oily. Just keep checking the used gear shops, you may be lucky to find one in great shape, happy hunting.
Before We Begin:
If this is your first attempt at repairing a lens then I suggest that you see my previous posts regarding screws & drivers, grease and other things. Also read what I wrote about the tools that you’ll need to fix your Nikkors.
I suggest that you read these primers before you begin (for beginners):
Reading these should lessen the chance of ruining your lens if you are a novice. Before opening up anything, always look for other people who have done so in YouTube or the internet. Information is scarce, vague and scattered (that is why I started this) but you can still find some information if you search carefully.
I highly recommend that you read my working with helicoids post because this is very important and getting it wrong can ruin your day. If I can force you to read this, I would. It is that important!
For more advanced topics, you can read my fungus removal post as a start. It has a lot of useful information, it will be beneficial for you to read this.
Disassembly:
Its construction differs from all C-mount Cine-Nikkors that I know of but it has a lot in common with the small D-mount ones that I’ve covered previously. Like all lenses you will want to separate the optics as quick as possible so you can fix the barrel without worrying about damaging the optics. It’s not difficult to do so with this lens and I’ll show you show it could be done safely in this article. It’s not difficult to service this if you know where to start but I won’t recommend it to beginners. If your lens has to be serviced be sure to send it to a professional.
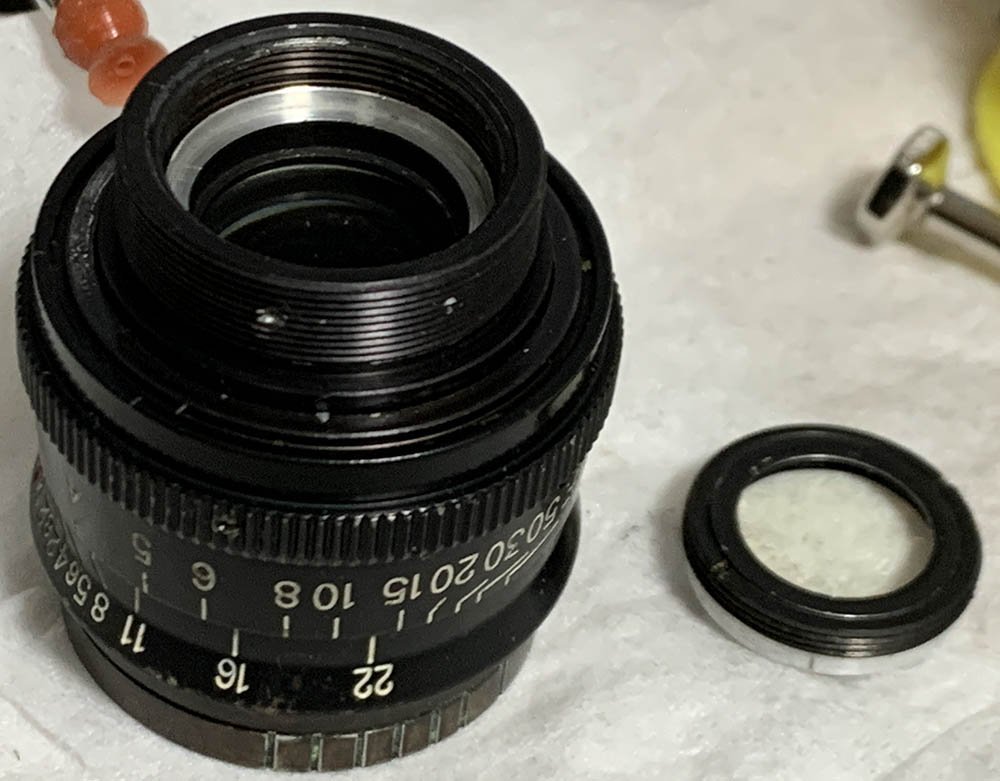
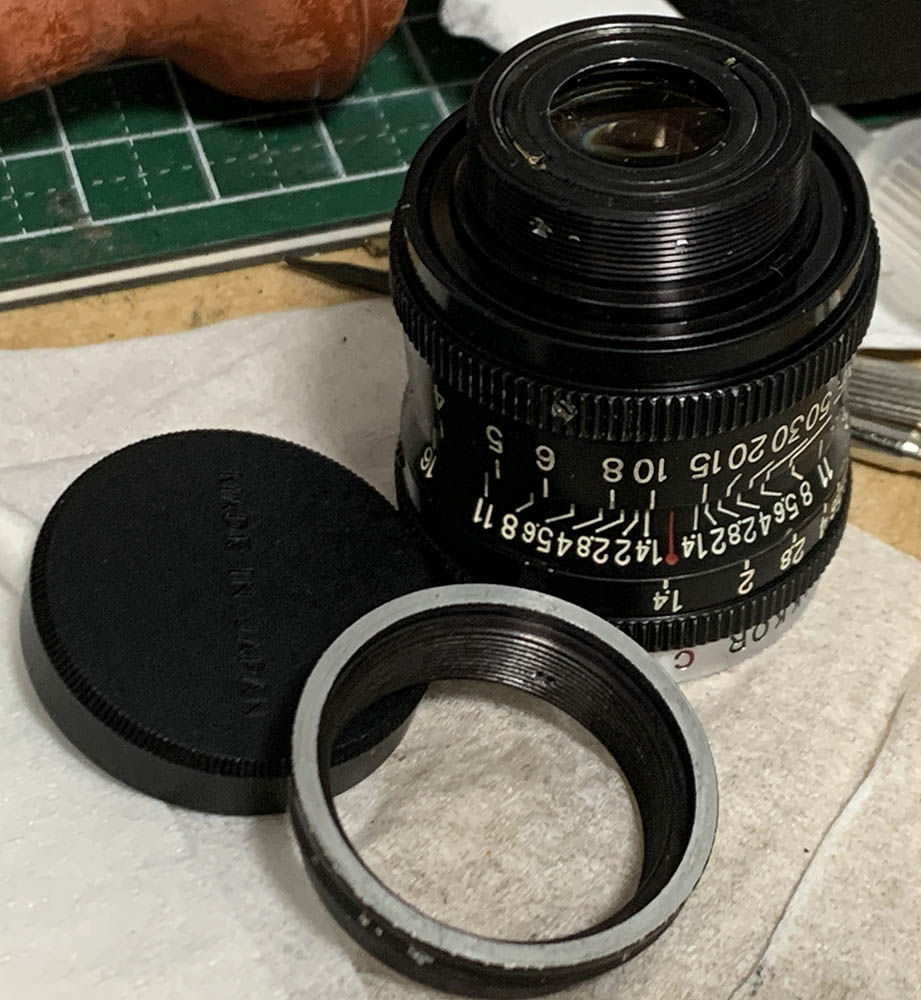
Unscrew the front barrel to remove the front optics assembly from the rest of the barrel. This may be sealed, applying a few drops of alcohol will help soften the seal so you can unscrew this easier.
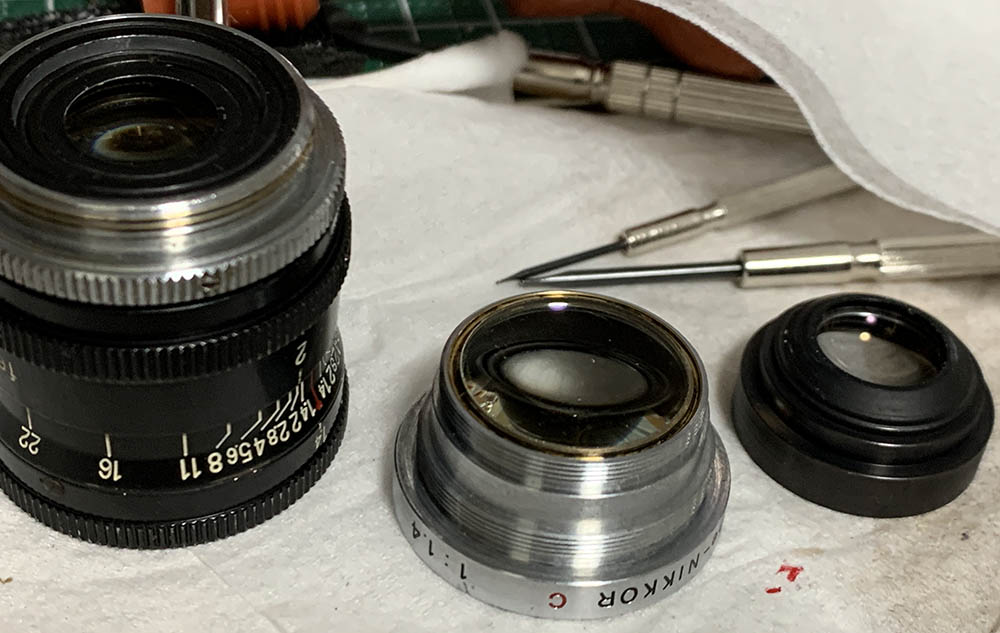
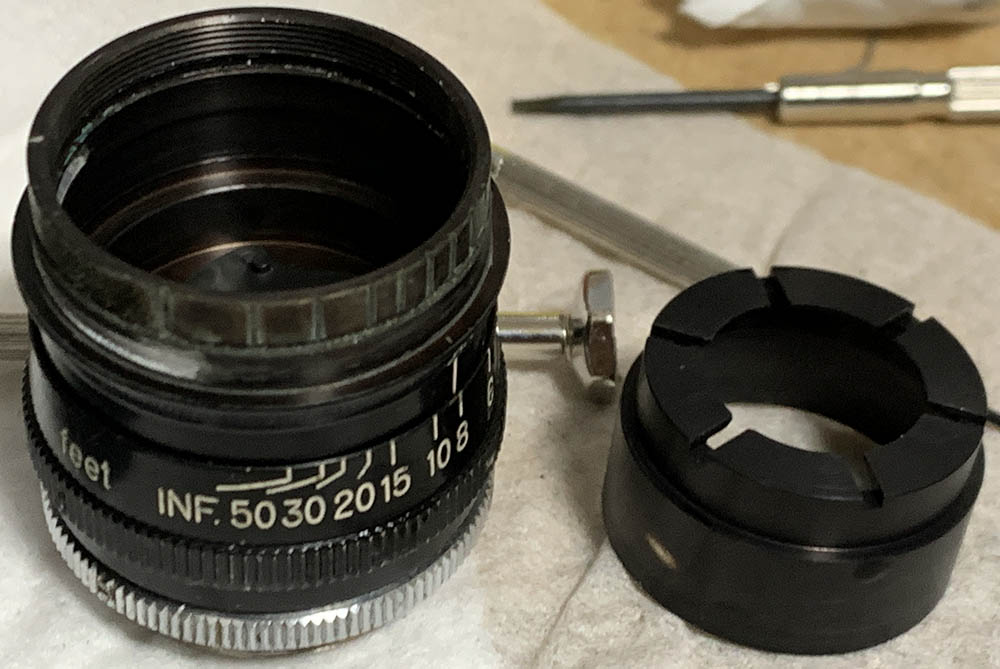
Dismantle the front optics assembly further by unscrewing this collar.
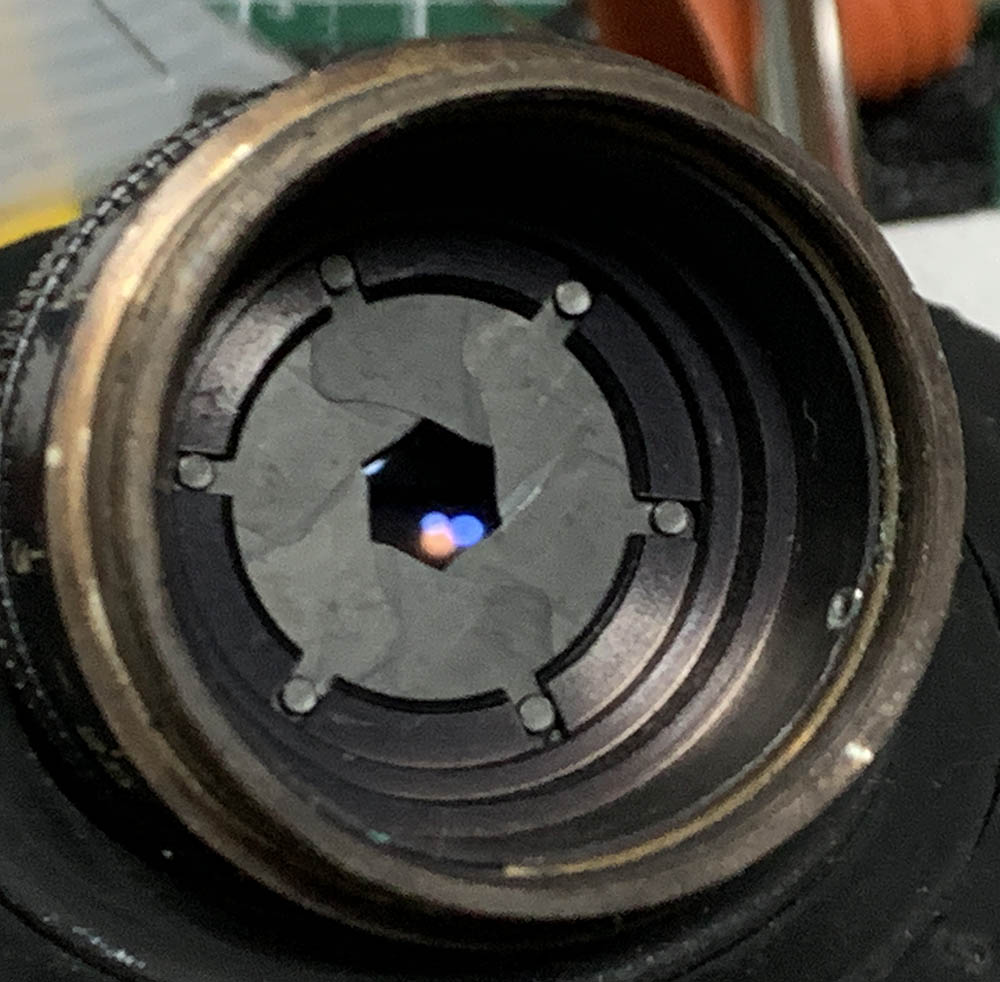
Locate and extract this screw so you can remove the aperture ring. It couples it to the iris mechanism inside. Once this is gone you will have to be careful when handling the iris because there’s nothing that will constrain the movement of the iris mechanism and you can easily damage it by rotating the diaphragm cup too much.

Pull the aperture ring off. Note that there’s a spring in the inner-wall of the aperture ring, you can see it here, it’s a thin brass spring plastered on the inner wall of the aperture ring.
The aperture ring is secured by a brass ring, carefully pick it off to dismantle the iris mechanism.
Pull the diaphragm cup off with your fingers and be careful not to damage anything.
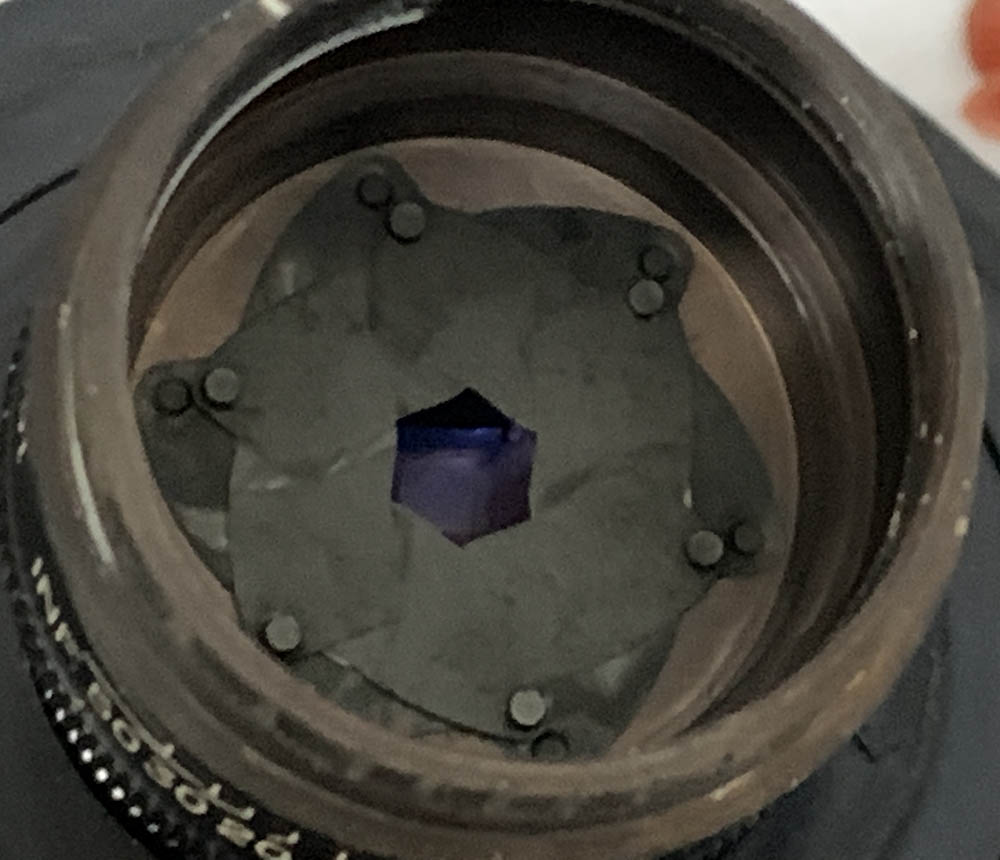
Be sure to carefully observe the direction of the iris and the shape of the leaves because they appear to be symmetrical but they aren’t, you can easily put the leaves back facing in the wrong direction, this could damage them all when you turn the aperture ring.
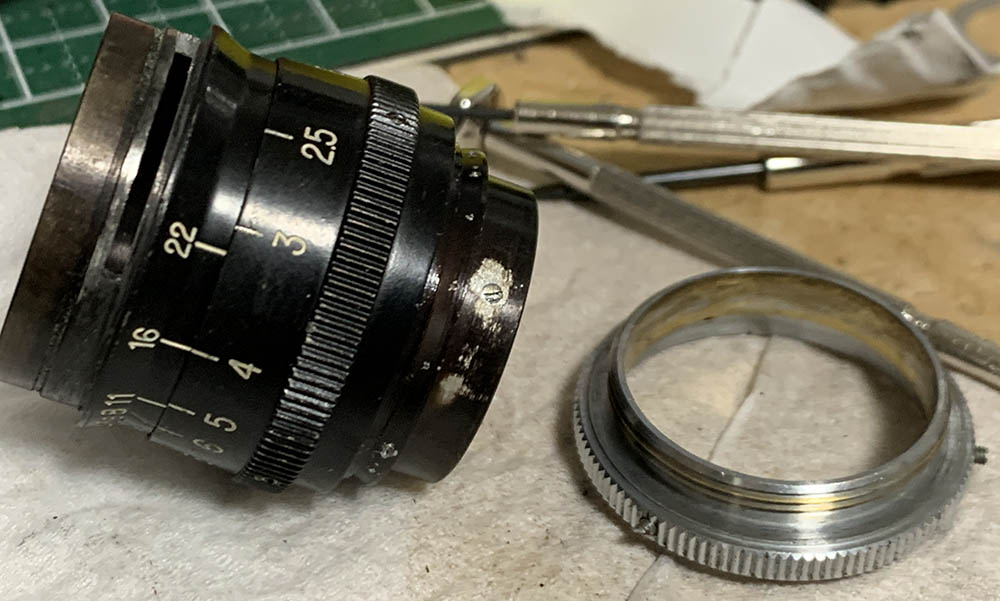
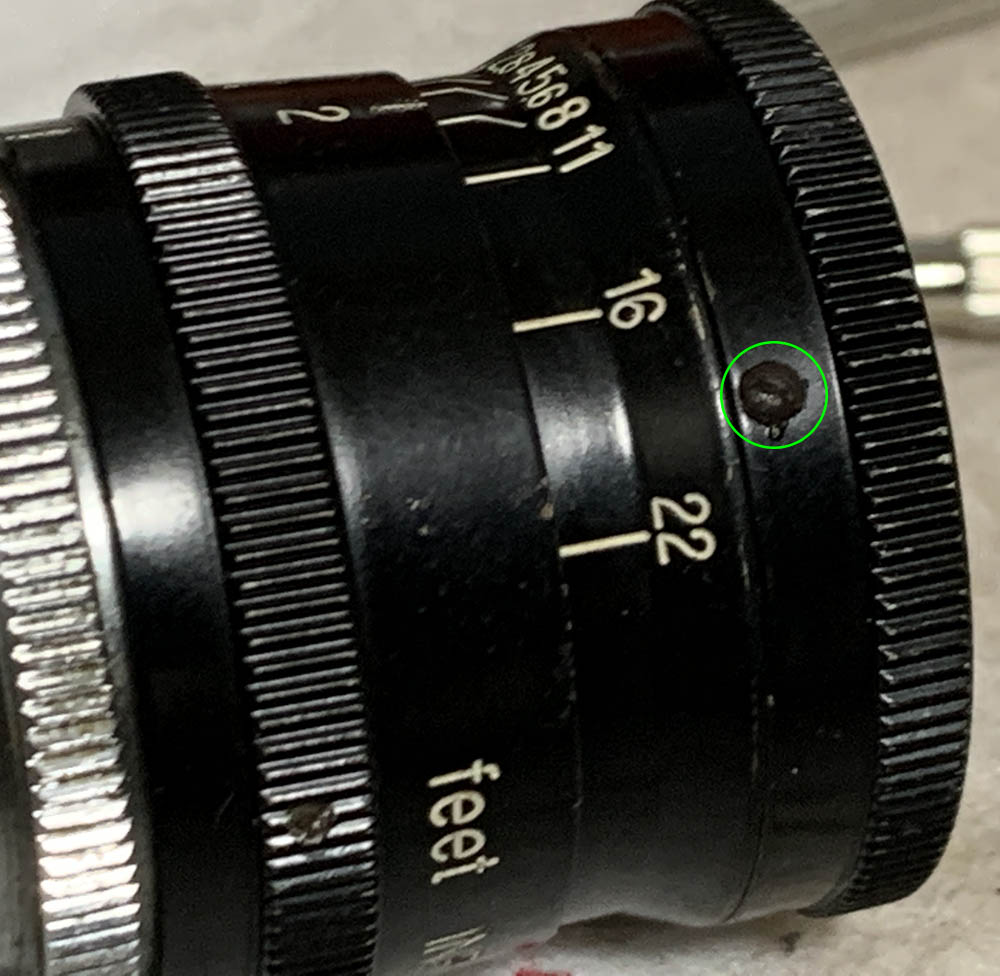
Loosen the screws of mount and pull it off from the rest of the barrel.
Loosen the screws of the base then unscrew it off from the inner barrel.
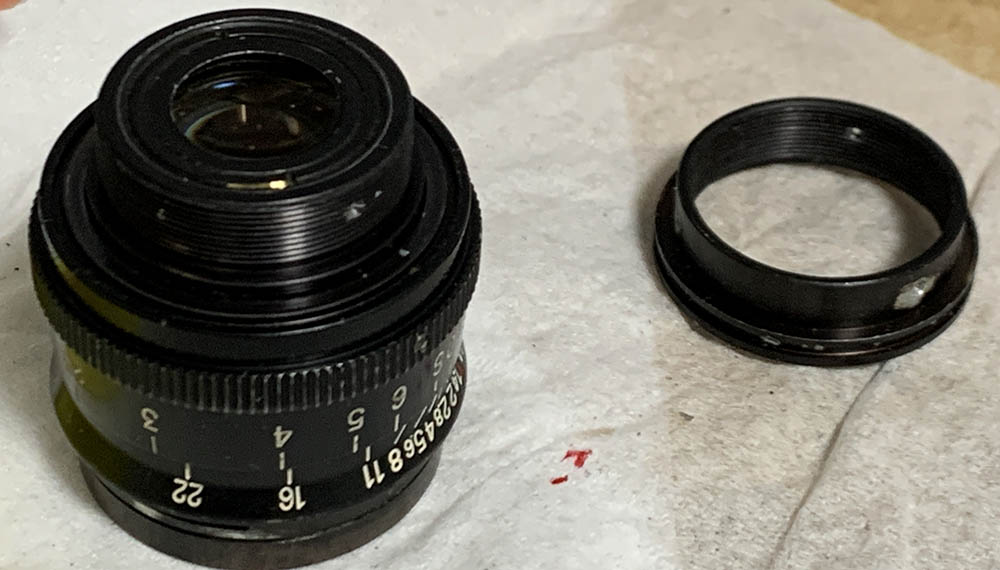
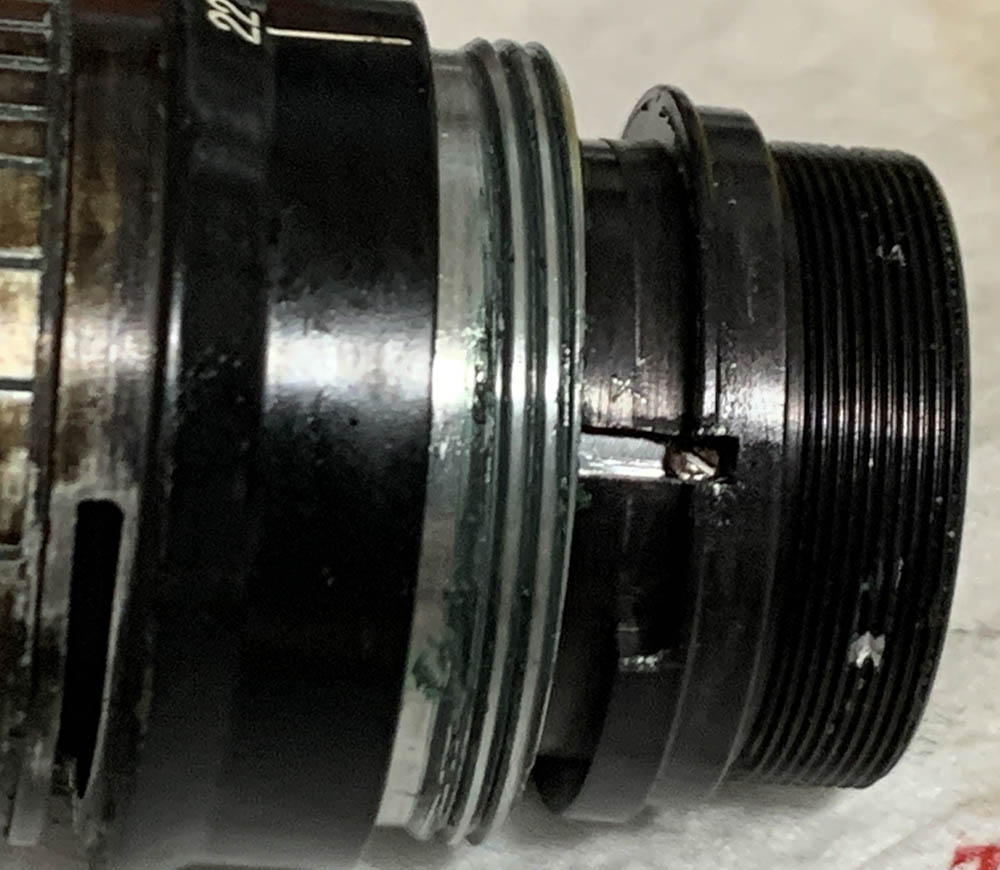
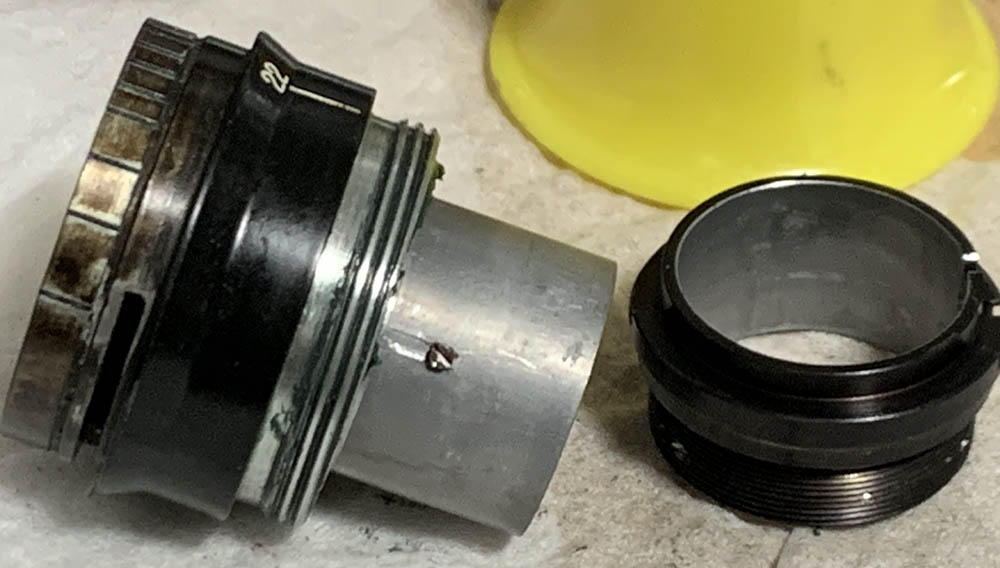
Unscrew the rear group’s housing off from, be careful not to scratch anything by using a proper pipe-key for this.
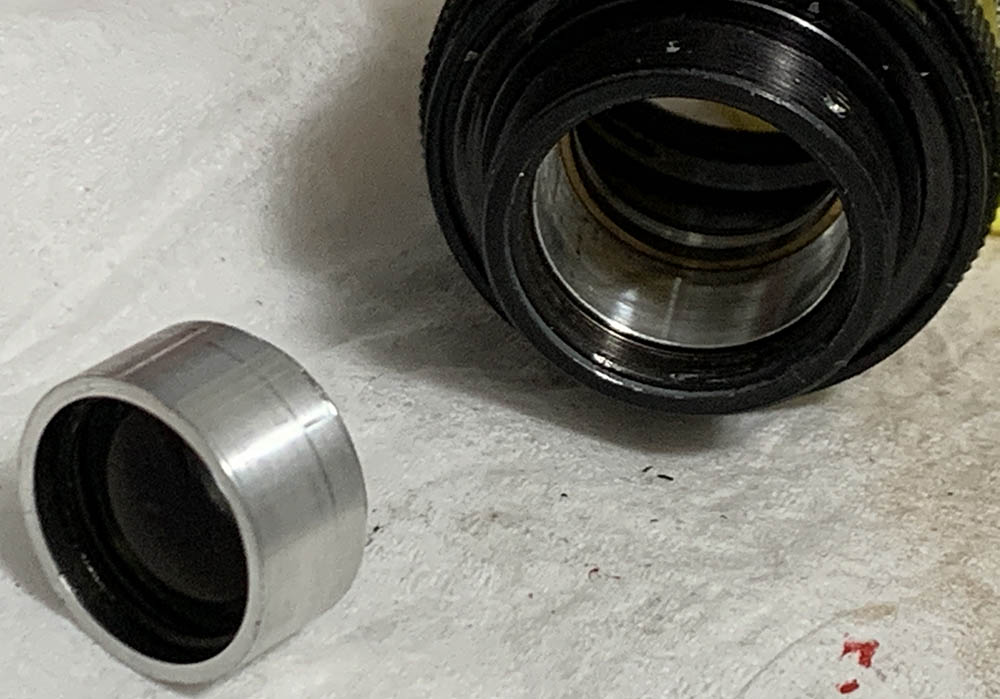
Unscrew this optical block, do not dismantle it further as it will be difficult to put it back. There’s a brass shim here, you can see it in this photo. I wasn’t able to remove it at this point as it’s stuck.
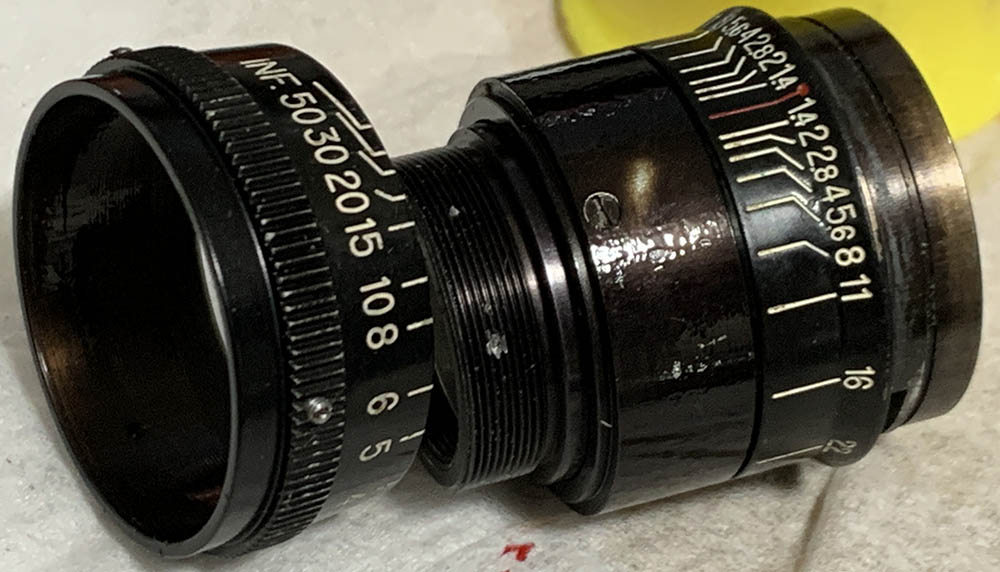
Loosen the screws of the focusing ring and pull it off.
Unscrew this screw so you could separate the helicoids. It constrains the range of the helicoids so they won’t turn-past the focusing range of the lens.
Separate the helicoids and never forget to note where they parted. Many people get stuck here because they forgot to do this. Read my article on working with helicoids to prevent this from happening to you.
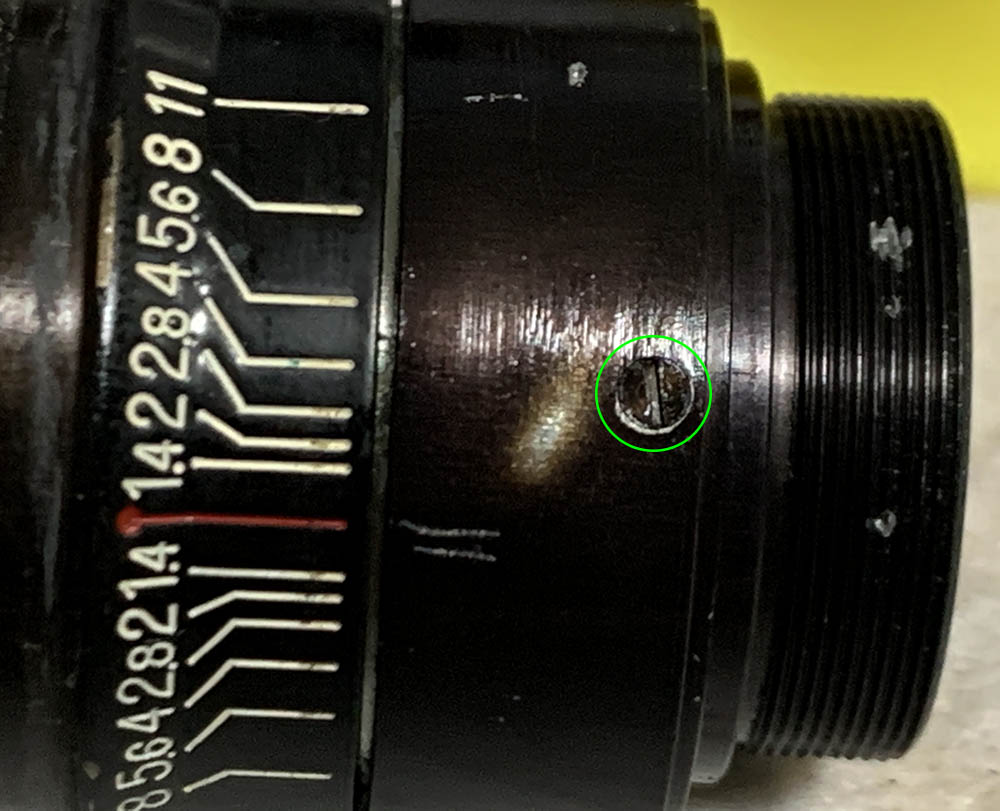
There’s a screw here that serves as a guide-key, do not extract it.
Pull the cam off, the inner barrel slides-through it when you turn the focusing ring.
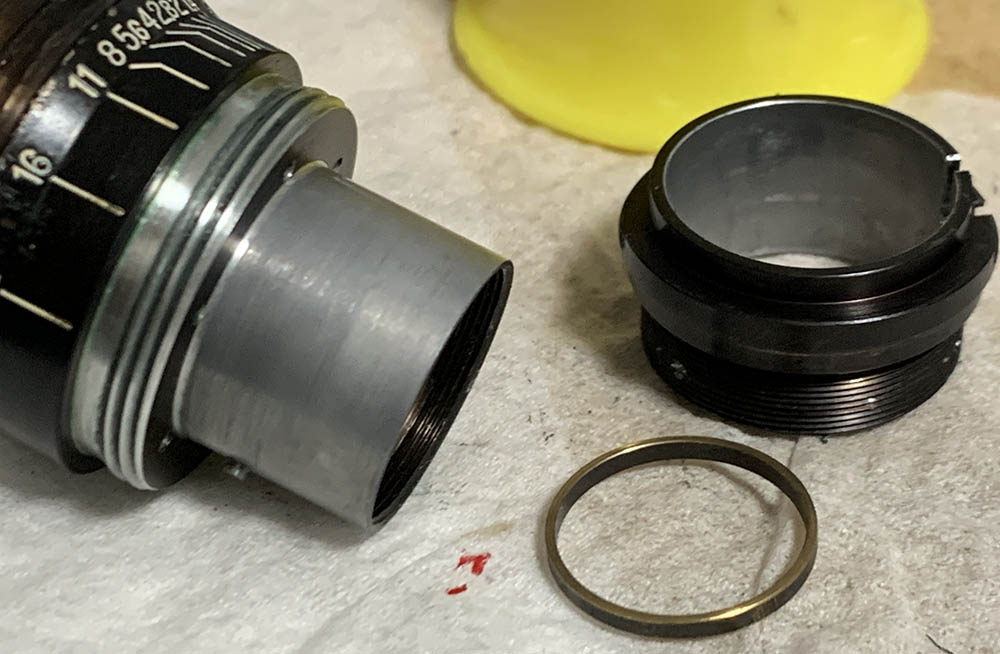
I was finally able to remove the shim of the inner optical block.
Clean the helicoids really well by scrubbing them with a strong toilet cleanser and cleaning them with alcohol very well in order to remove residues. The optics should be wiped-clean and reinstalled carefully so you won’t damage them. It’s important to put them back at the same order and direction or you’ll damage the optics. It’s not easy to put them back and you will need a small lens sucker with a long neck so you could reach deep-within the housing. This benefits from a grease with a little bit of resistance. If it’s too-thin the focusing won’t be damped and it’s going to be difficult to turn if the grease has too much resistance. Never apply too much or the excess grease will migrate to the iris.
Conclusion:
I learned a lot from this and I’m glad to share with you my experience. This one took me a whole night to service and I spent most of that time adjusting the focus. It’s not possible to adjust this lens in the way that we’re all familiar with, it could only be done by offsetting the range of the focusing ring, I did so by shifting the position of the screw for that. I won’t show you how I did that here since it’s not reversible.
It’s now so clean you wouldn’t think that it’s the same lens at the beginning of the article.
There’s no information about this lens anywhere on the net so I hope that you’ve enjoyed this article. I try to bring you the best content, things that you wouldn’t find anywhere else, that motivation is fueled by your enthusiasm.
Thanks for following my work, if you liked this article please share this with your friends so it will get more views. This site earns around $0.40 a day, we are totally reliant on views. You can also support this site, it helps me offset the cost of maintenance and hosting. You’re also helping me purchase, process and scan film. This site promotes the use of film so we are all in this together. See you again in the next article, Ric.
Help Support this Blog:
Maintaining this requires resources and a lot of time. If you think that it has helped you or you want to show your support by helping with the site’s upkeep, you can make a small donation to my paypal.com at richardHaw888@gmail.com. Money isn’t my prime motivation for this blog and I believe that I have enough to run this but you can help me make this site (and the companion facebook page) grow.
Buy me a roll of film or a burger?
Thank you very much for your continued support!
$2.00
Helping support this site will ensure that this will be kept going as long as I have the time and energy for this. I would appreciate it if you just leave out your name or details like your country’s name or other information so that the donations will totally be anonymous. This is a labor of love and I intend to keep it that way for as long as I can. Ric.

3 Comments (+add yours?)