
Hello, everybody! Do you remember Sony’s tagline back in the day? If “It’s a Sony” doesn’t sound familiar to you then you must be younger than 35. It’s effective branding, it’s catchy and easy-to-mention. It’s an effective way to drill into your potential customers’ minds about your brand’s image and what that stands for. You’ll have to keep it short, simple and direct. Just repeat it like a jingle and it’s certainly going to stick to their head the next time they buy an electronic device. I will play on that slogan today but this time it’s not a Sony but “It’s a Sonnar“, a Tele-Sonnar to be precise if I’m not mistaken.
Introduction:
The Cine-Nikkor 75mm f/2 was made from an unknown date, nobody knew when it ended production. I suspect it was made from the mid-1960s up until around the 1970s. I was told that Nikon does not really document anything that’s not a consumer product so precise information about these can be scarce and inaccurate. These are specialty lenses so I guess they were made in low-volume which are spread across a long production time. This lens is the second-longest in the Cine-Nikkor portfolio for the C-mount, it filled the gap between 50mm and 100mm. It’s rather useful for wildlife, sports, news or just about anything that requires a bit more reach. You could think of it as the 200/3.5 equivalent for a standard 16mm camera as it gives the same field-of-view and depth-of-field characteristics of a 200/3.5 lens for 35mm. Crop-factor is a recent concept that’s not really relevant in the context of shooting movies but since we are interested in using this for stills you should always be aware of this.

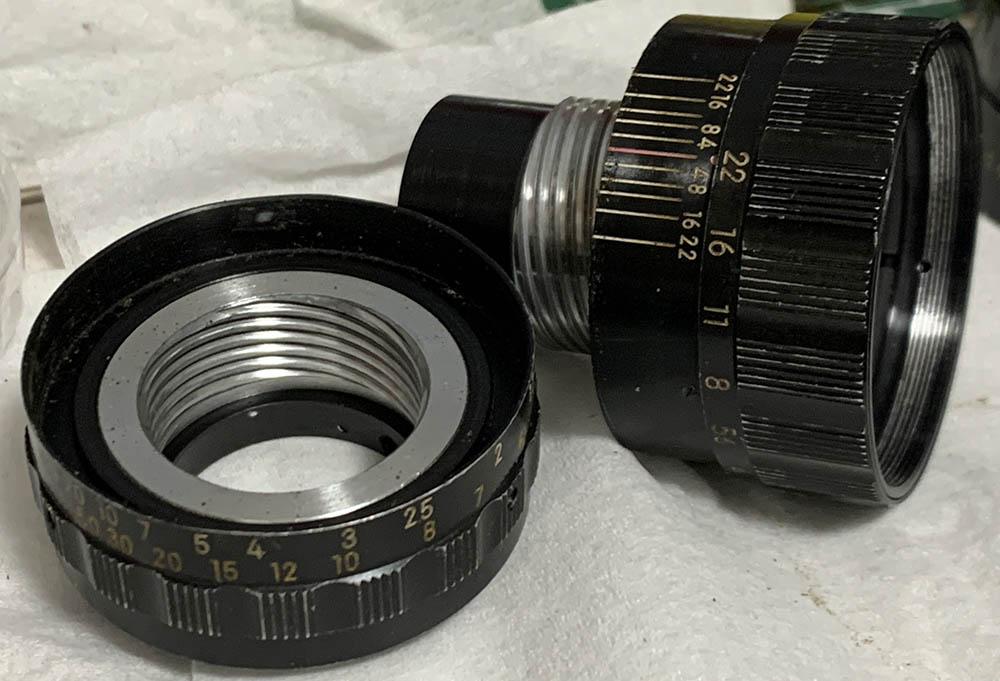
Despite its focal length and speed it managed to remain quite compact, this isn’t larger-nor-thinner than the other ones except for the early version of the Cine-Nikkor 25mm f/1.4 which is an oddity. Keeping the size of the barrel uniform is essential so you could use your custom-made attachments. Its mount could be repositioned by depressing the thread and rotating it, allowing you to view the scales no matter which orientation it ended up in the camera. This is a nice touch, I am not aware of any other manufacturer that did this.
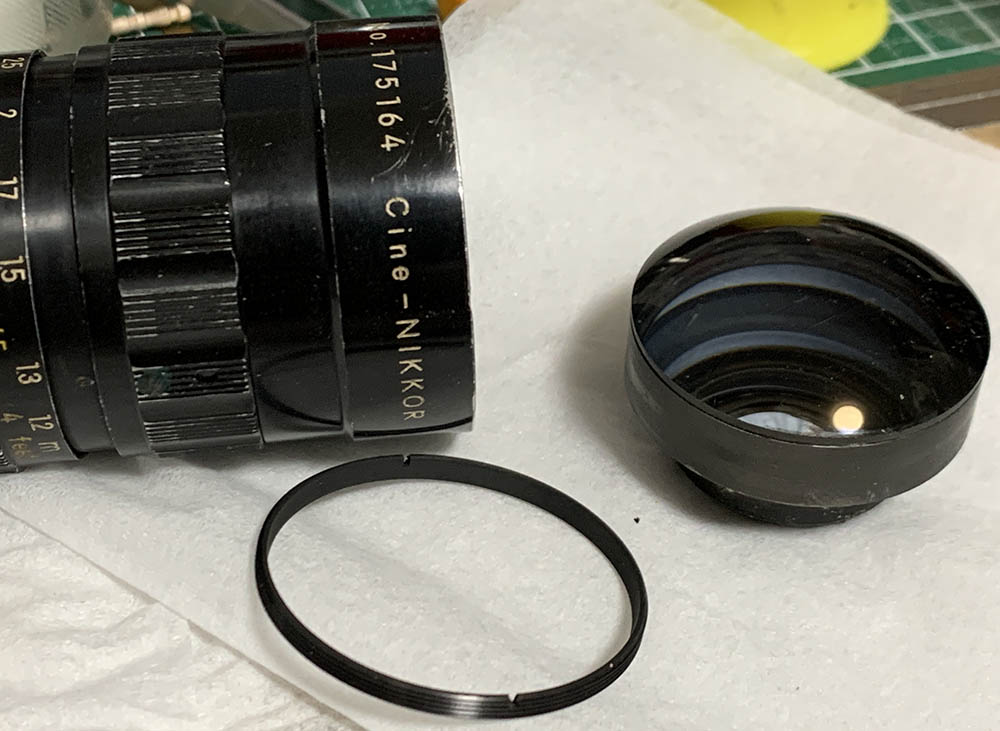
It has a 5-elements-in-3-groups design and is of the Tele-Sonnar lineage. The 2nd group is composed of the 2nd, 3rd and 4th elements cemented into a large, single unit, very typical of a Sonnar. The 3rd one is the largest, heaviest of them all and it reminds me of the Nikkor-P 105mm f/2.5 Auto more than the huge and legendary Carl Zeiss Jena Olympia Sonnar 180mm f/2.8. In those days its design should be an obvious choice for a long lens, Nikon loved using it as many older Nikkors show a strong link to the Tele-Sonnar. It is good-and-bad with the good part being the ability to render nice, smooth blurs in my experience while shooting with lenses of similar design and we’ll find out what it’s capable of later in this article.
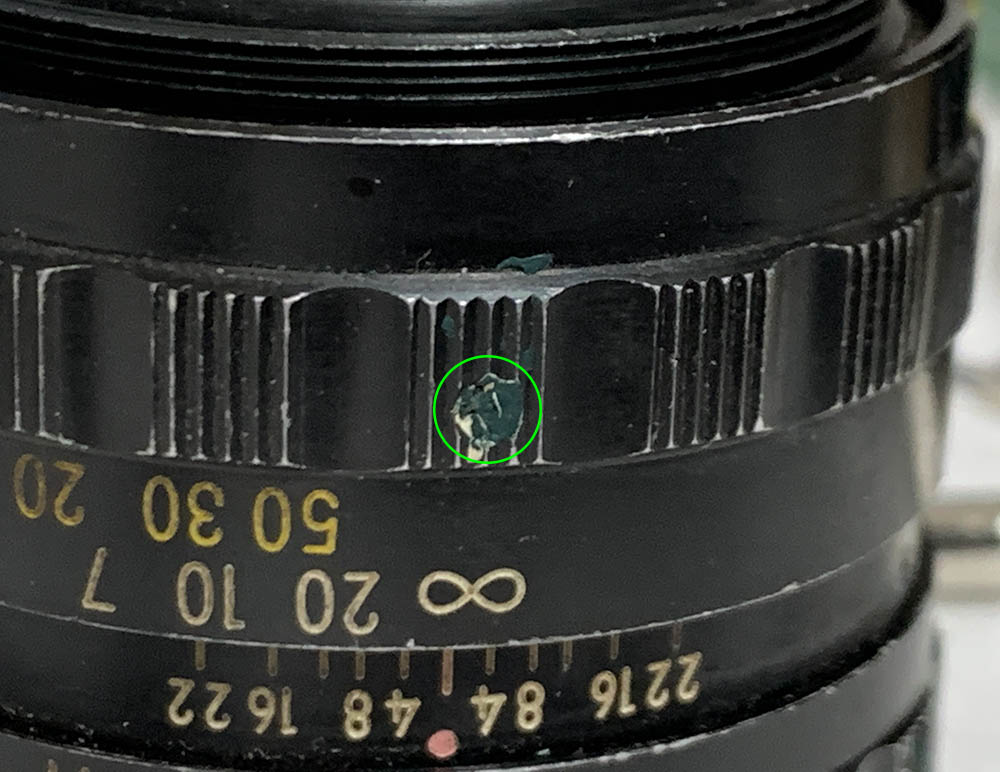
This is a rare lens, I’d imagine that these were only sold at specialty shops catering to movie-makers. They were also used for scientific purposes, documenting things with a high-speed camera or similar gadgets. Its rarity dictates its price but I found one for next-to-nothing because of the poor state it was in, its front barrel was deformed hinting some abuse in the hands of the previous guy who have used it. Don’t worry, I will take good care of you from now on, you’re safe here in “Nikkor Hospital“.
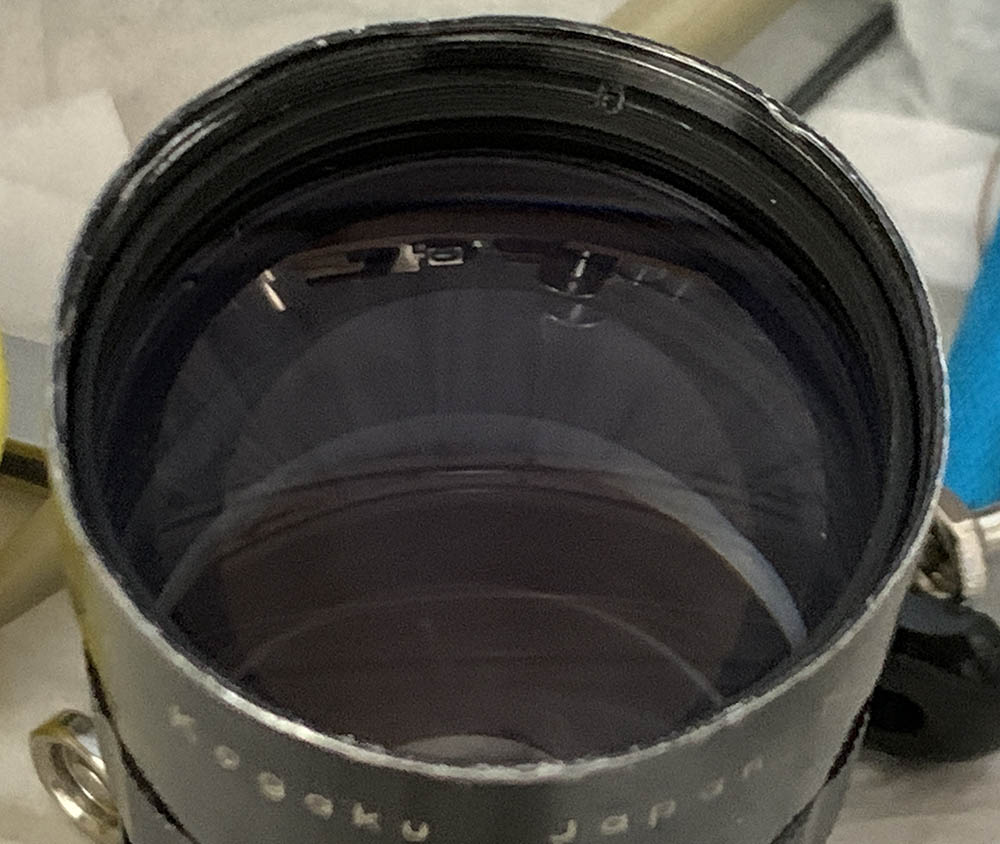
It appears to be multi-coated as evidenced by the bluish-tint when looking at the glass. It’s more-obvious when you’re looking-through the rear-element where that bluish-tint is the deepest. Typical with Sonnars the front is quite big and the rear is a lot smaller.

Handling is excellent. This balances very well with my Nikon 1 V3. The rings are broad and the engravings are easy-to-see. It also has a dedicated hood which is rare, I’ve misplaced it so I’ll try to look for it later. It benefits from using a camera with an optical-viewfinder because nailing your focus with the LCD will be quite frustrating, even with that things won’t be easy because no Nikon 1 camera to date has any built-in stabilization.
Knowing how your lens performs is important, this will give you the knowledge needed when choosing a lens for the job. You’ll also get more familiar with it, enabling you to work around its weaknesses and also to exploit its strengths. I took these photos from f/2, f/2.8, f/4 and f/5.6, from left-to-right. We’ll see a lot of changes happening within these apertures and people will tend to use them in practical situations, too.


(Click to enlarge)
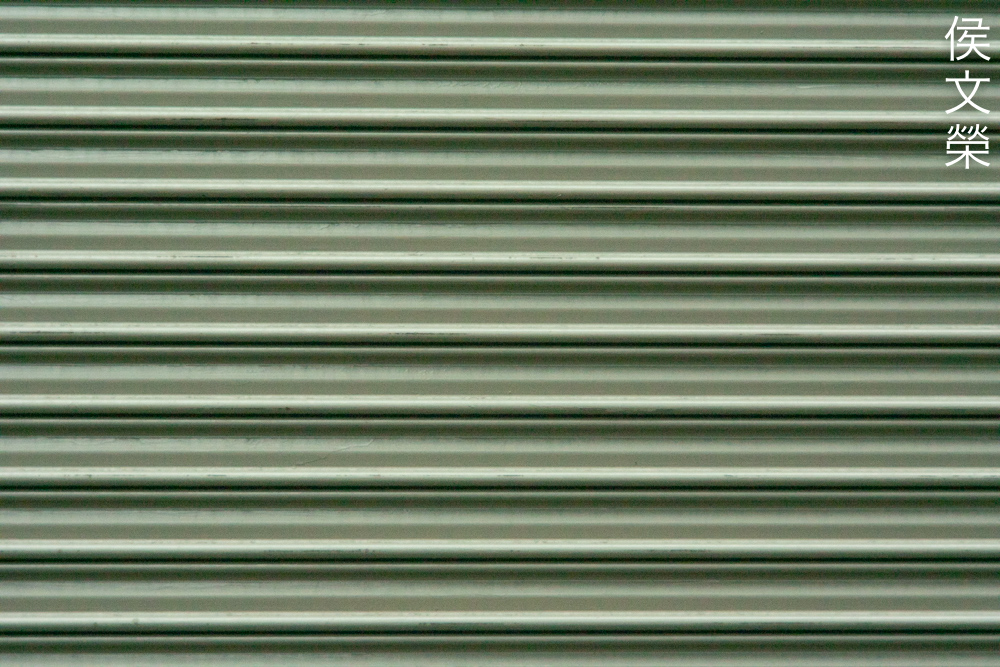
The level of distortion is quite low that you can consider it almost non-existent. You can see a little bit of pincushion-type distortion at the horizontal plane near the edges but it’s not even significant enough to mention, this is very impressive.
I can’t find any noticeable amounts of vignetting even if I tried. There may be some small traces of it at f/2 but that’s it. I can’t name any other lens that performs like this, it’s unique not only amongst Cine-Nikkors.


(Click to enlarge)
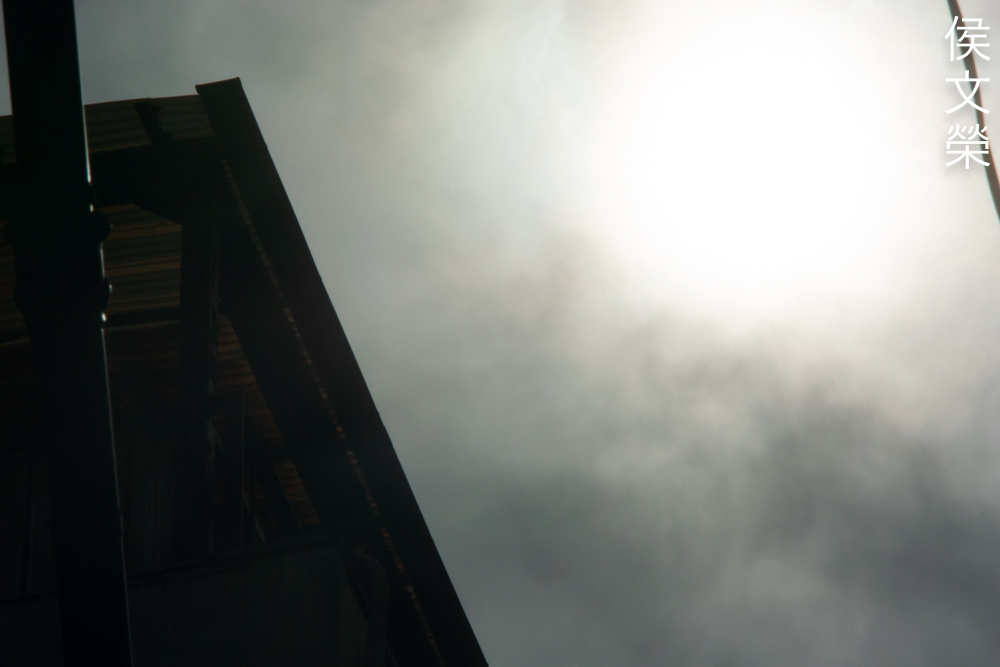
These aren’t good examples for showing how it fares against flaring but these are all I have. It appears to be quite resistant to ghosts but it flares terribly in certain situations.


(Click to enlarge)
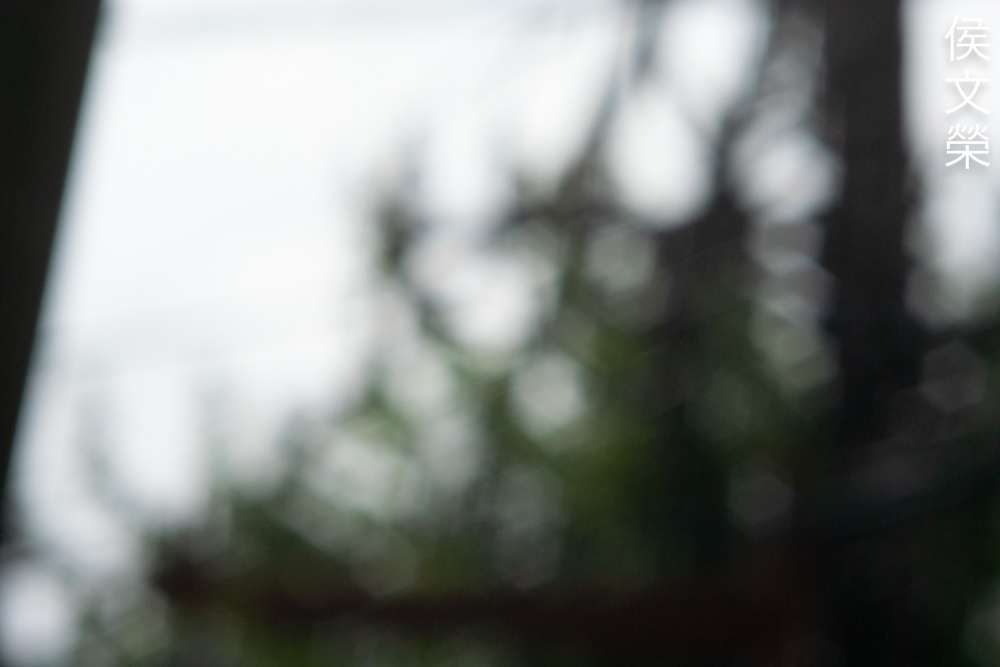
The character of the bokeh is smooth in general but it’s susceptible to rendering rough-looking artifacts if you’re not careful. This is not the fault of the optics itself, it’s the shape of the iris that’s to be blamed here because it merely has 6-sides which results in unnatural-looking blurs. This is subpar performance but it’s something that you can workaround when needed.


(Click to enlarge)
This is how it looks like at its worst, I don’t think anyone will consider this pretty by any stretch. Imagine watching your movie with this kind of background-blur, you’ll probably develop a migraine by staring at this for a few seconds.


(Click to enlarge)
The discs have outlines and a core when shooting wide-open but they’re mostly clean and even in most cases. Stop this down to f/2.8 and the discs turn into rounded-hexagons. It still doesn’t look bad at this point until you have stopped it down to f/4 where they begin to resemble stars-of-David which results in cheap-looking blurs because of the rough-looking artifacts associated with this. Things look much better at f/5.6 as they look like hexagons again with defined edges. While this is not ideal for rendering smooth blurs it’s something that you’ll have to accept.


(Click to enlarge)
Chromatic aberration is quite high when shooting wide-open and you’ll also see spherical aberration, too. The latter is responsible for subduing the contrast of your photos and adding a surreal-looking “bloom” to your highlights. It’s tolerable in moderate cases but not so much in extreme situations. Stop it down to f/2.8 eliminates most of the chromatic aberration and spherical aberration is now at lower levels. Things look a lot cleaner at f/4 except for cases when you’re shooting against-the-sky and even stopping the iris down to f/5.6 won’t help much so you should be very careful when shooting in contra-light.
It’s not a bad lens at all, I’ve seen worse and I’ve definitely seen better. I’d consider this to be a mediocre lens in handling chromatic aberration with a slight bias towards “poor” in difficult cases.


(Click to enlarge)
This is how chromatic aberration can impact your photos when shooting with the sky in the background. This is not the worst example yet and it doesn’t take much to trigger it so I’m quite disappointed.


(Click to enlarge)
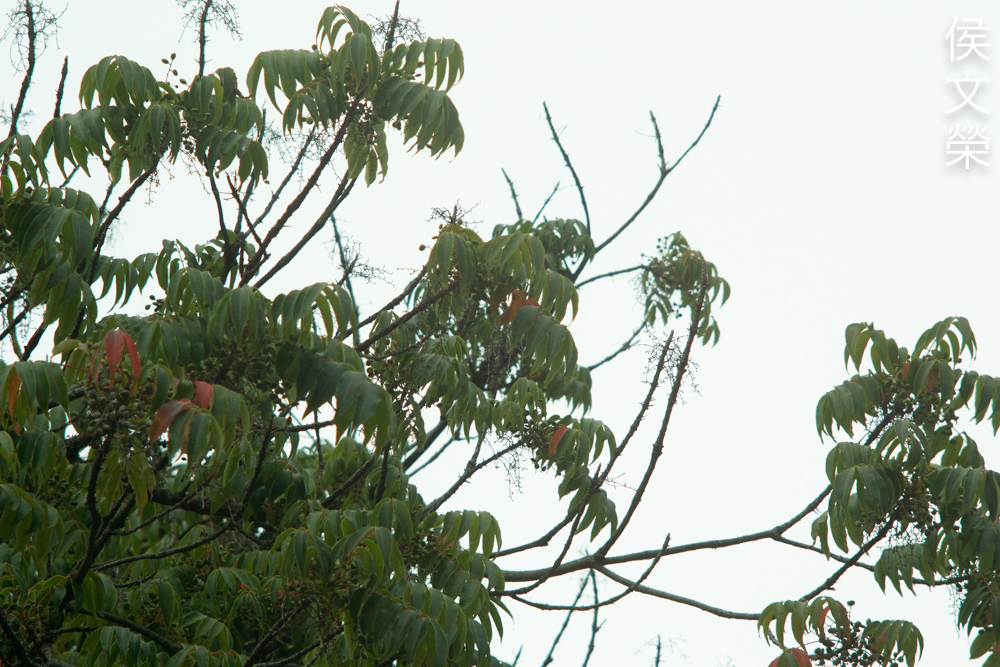
Sharpness seems to be quite good at f/2, the center looks nice and the corners aren’t bad either despite not rendering as sharp as the center. Resolution seems adequate for most cases. Stopping it down to f/2.8 improves the resolution at the center and the corners look a bit better, too. The center shows a little bit of improvement by f/4 but the corners show the most improvement which reminds me of how the center looks like at f/2. The center will improve even more by f/5.6, the corners now look a lot better even down to the extremities.
It performs better than average in terms of sharpness. The biggest problem you’ll face is how to maintain a faster shutter speed because the slightest amount of shake will result in blurry photos. This limits its use to a great degree, even the slightest amount of amount of movement will get registered.

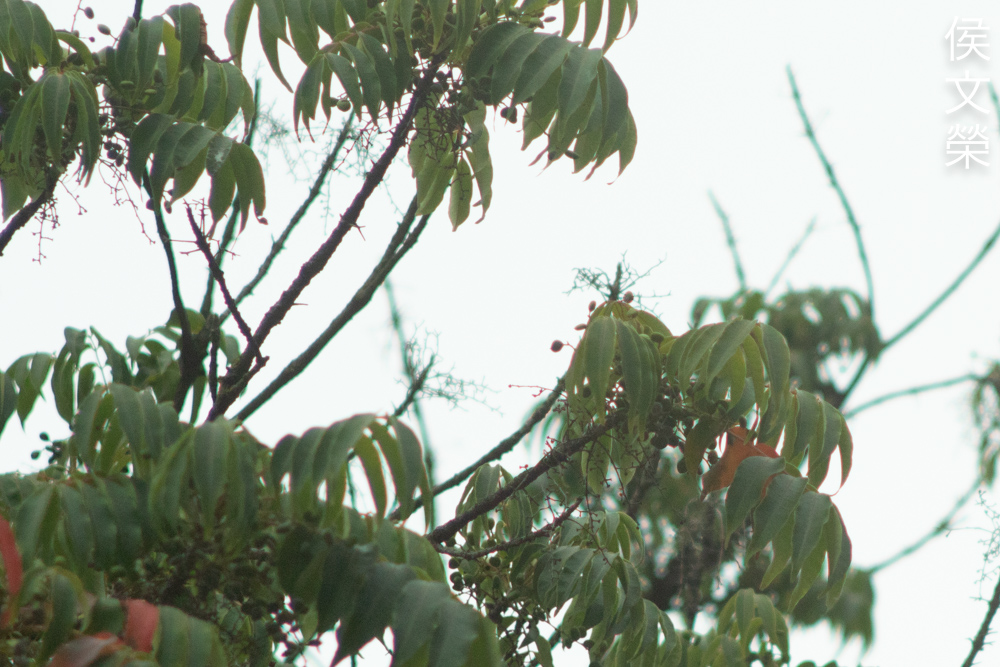
Even the slightest breeze is enough to throw your focus off even if you’ve managed to use a fast shutter-speed. This is something that you should be aware of specially when shooting at closer distances.
You’re rewarded with sharp photos if your subject is stationary. You should also keep yourself steady since even the smallest movement in the Z-axis will be enough to mess with your focus.

You’ll have to use a higher ISO when shooting indoors just to keep your shutter-speeds above 1/150s at the very least.

Flare will ruin the contrast of your photos which gives you an impression that it’s not a sharp lens. This is a common occurrence with many older lenses, some people just learned to live with this or incorporate this flaw to make the images look “dreamy” as if a filter was attached to the front of the lens.

Nailing your focus can be rather difficult even with an electronic viewfinder, I find this very frustrating for shooting events. It requires a lot of practice, patience and luck to use this lens in this capacity.

Since it performs like a 203mm lens this is perfect for tightly-framed portraits. The slight softness at f/2 is beneficial for rendering soft, healthy skin. Spherical aberration helps make the skin “glow”, making it look supple. It’s sharp where it needs to be but it’s not so-sharp as to make your subject’s skin look like stucco.

It’s ability to turn the background into a smooth wash-of-colors is remarkable and you’ll be able to hide any distracting details by using this technique. Of course, it’s always best to stop the iris down whenever possible.

It certainly renders with a “vintage-look” specially when shooting wide-open because of the subdued look and the cool colors. Like many lenses that were made in this era it has a cool-cast which helps a lot when shooting with black-and-white film.


(Click to enlarge)
Here are more photos for you to inspect. I think the biggest concern that I have when using this is how to keep my photos sharp, avoiding contra-light and shooting with the fastest speed available to me helps a lot but even while being careful it’s not an easy lens to shoot with. Despite that it’s the only Nikkor of this type so there’s no other alternatives to compare this with.
I can only recommend this to those who are knowledgeable enough to appreciate shooting with old and rare Cine-Nikkors. This is more of a collectors’ item than a lens for practical use. I suppose this is still an interesting lens for shooting movies with a 16mm camera, this is going to be great for sports and news. I don’t think this is a good option for professional use but a hobbyist will certainly find this rather fun and refreshing since you don’t get to shoot with something like this all the time. Regarding the price, I don’t think it’s fair for me to give it one since these are rare. I got mine for almost nothing because it was sold as junk and I had to spend a lot of effort just to make it usable again. When looking for one be sure that the iris works, do not turn the aperture ring too much since the iris is delicate. Also make sure that all the rings turn properly and you’re able to focus with it just a bit beyond infinity. Of course, the optics should be clean and clear, too. This is a rare piece of Nikon’s history and if you’re an avid collector then this lens should be part of your collection. Happy hunting.
Before We Begin:
If this is your first attempt at repairing a lens then I suggest that you see my previous posts regarding screws & drivers, grease and other things. Also read what I wrote about the tools that you’ll need to fix your Nikkors.
I suggest that you read these primers before you begin (for beginners):
Reading these should lessen the chance of ruining your lens if you are a novice. Before opening up anything, always look for other people who have done so in YouTube or the internet. Information is scarce, vague and scattered (that is why I started this) but you can still find some information if you search carefully.
I highly recommend that you read my working with helicoids post because this is very important and getting it wrong can ruin your day. If I can force you to read this, I would. It is that important!
For more advanced topics, you can read my fungus removal post. It has a lot of useful information, it will be beneficial for you to read this.
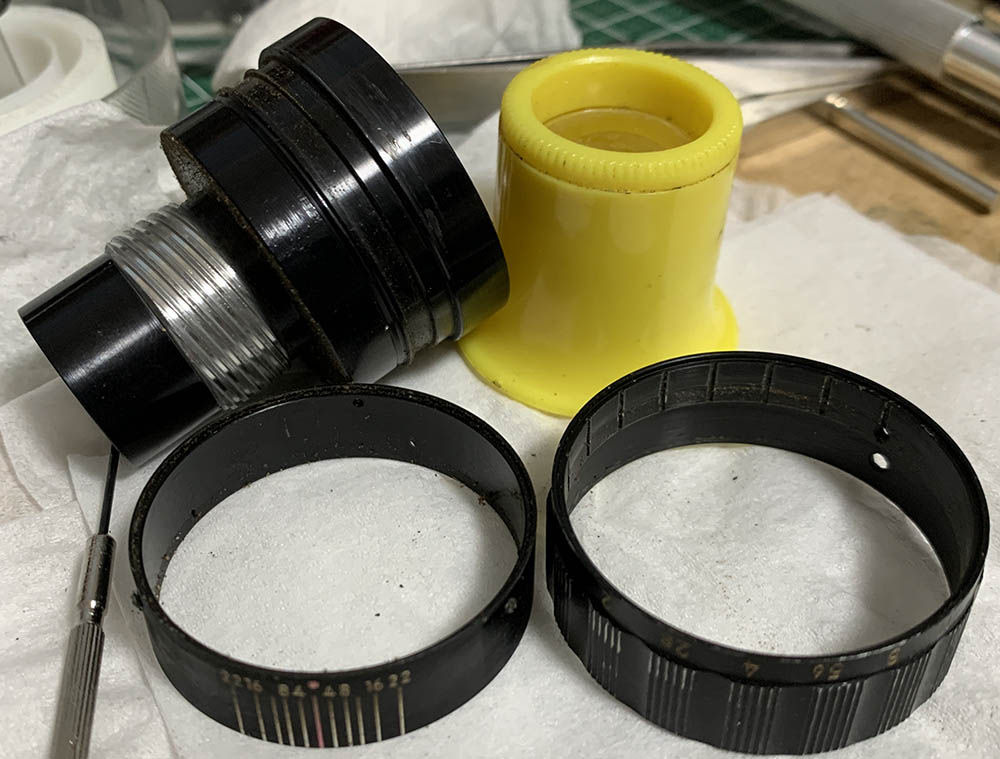
Disassembly:
Compared to most larger Nikkors this lens is rather simple to service so long as you know where to start. I didn’t have a hard time with it since I am now familiar with Cine-Nikkors. Despite that I won’t recommend this to a beginner because you will need special tools just to open it. Not only that but this lens is rare, a lens of this rarity deserves to be serviced by somebody competent.
Since there’s not a lot of steps involved I will condense this section and show you the right sequence, just follow my steps to help you understand how this lens can be taken apart.
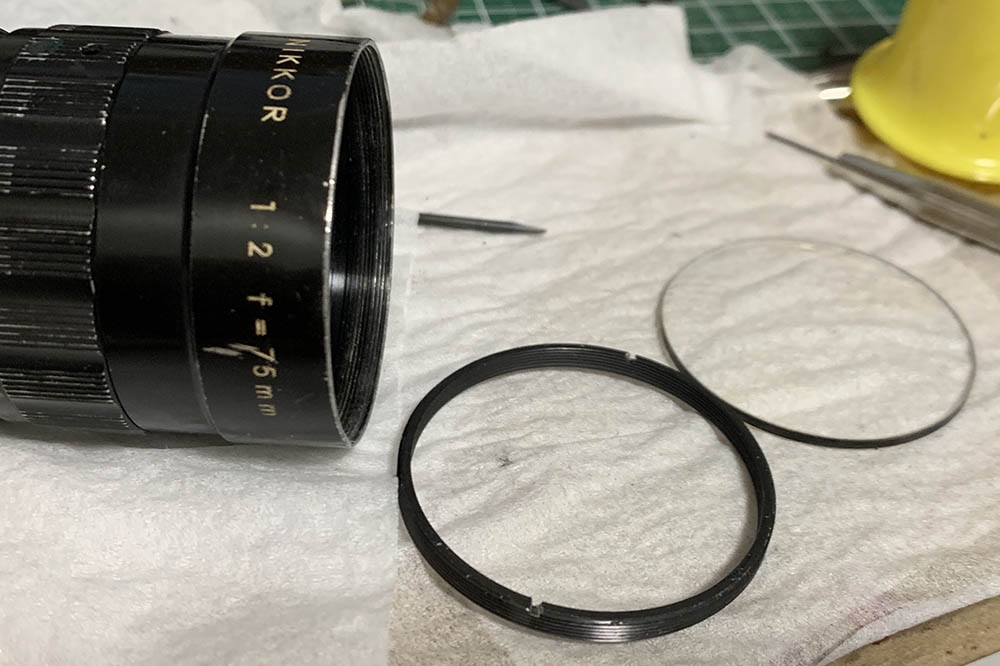
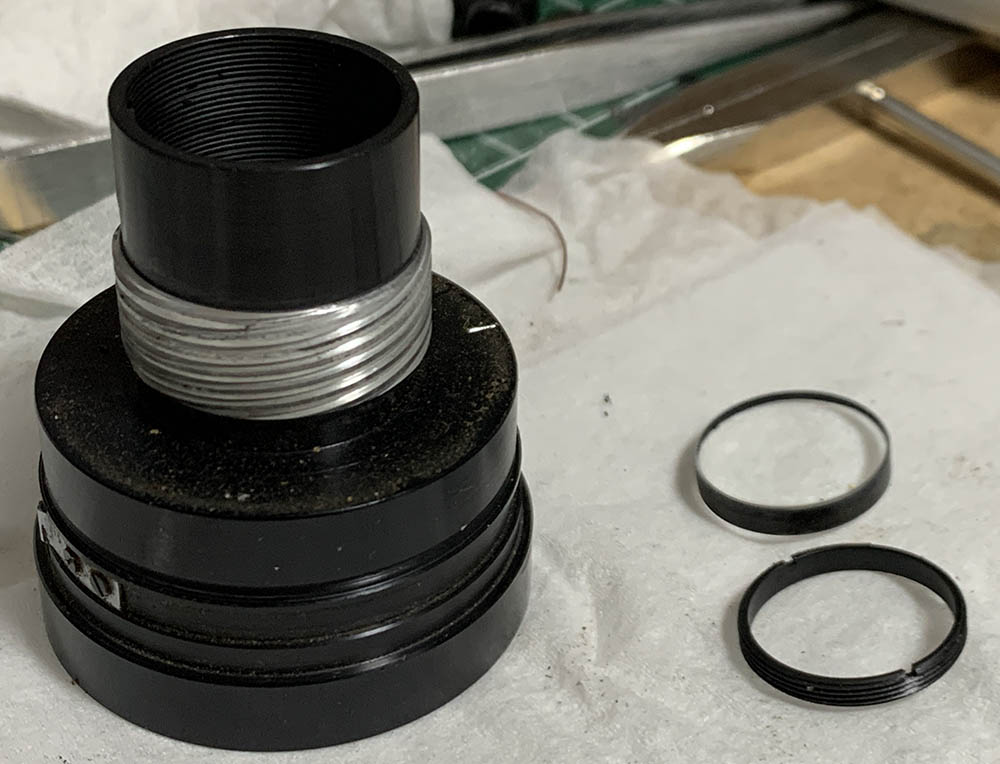
Carefully unscrew the retainer of the front group, never scratch the glass while you do this. This may be stuck at times so you should apply a drop of alcohol to its threads in order to loosen the seal if any was applied at the factory.
Extract the 2nd group after unscrewing its retainer. Again, never damage the glass.

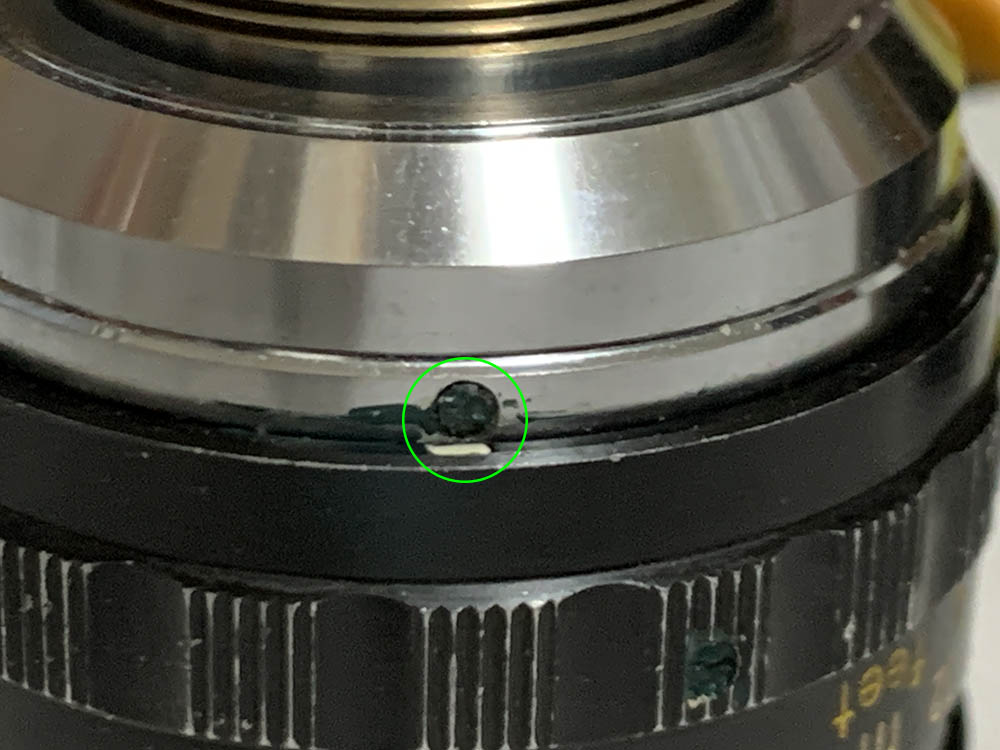
Locate and loosen this little screw. It may be sealed so do that alcohol trick again if you have to.
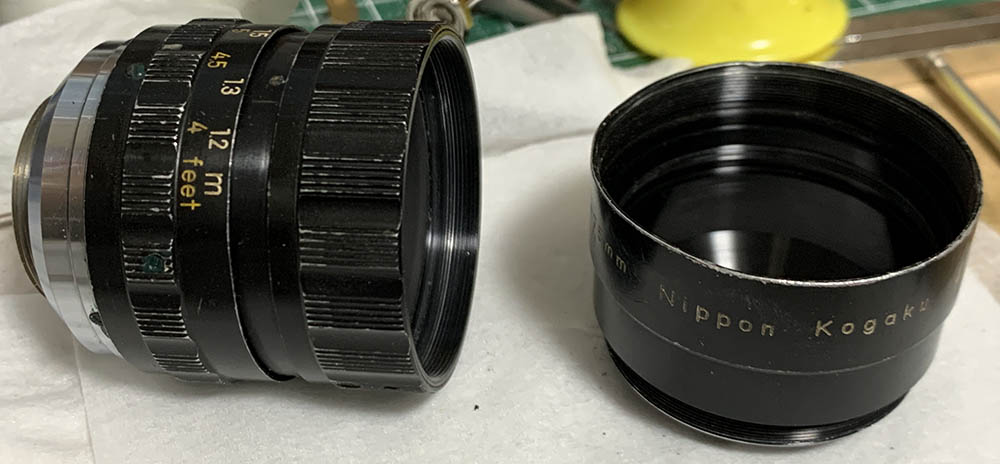
Once that screw is loose you’ll be able to unscrew the front barrel off. Come to think of it, it may be better to remove it earlier.
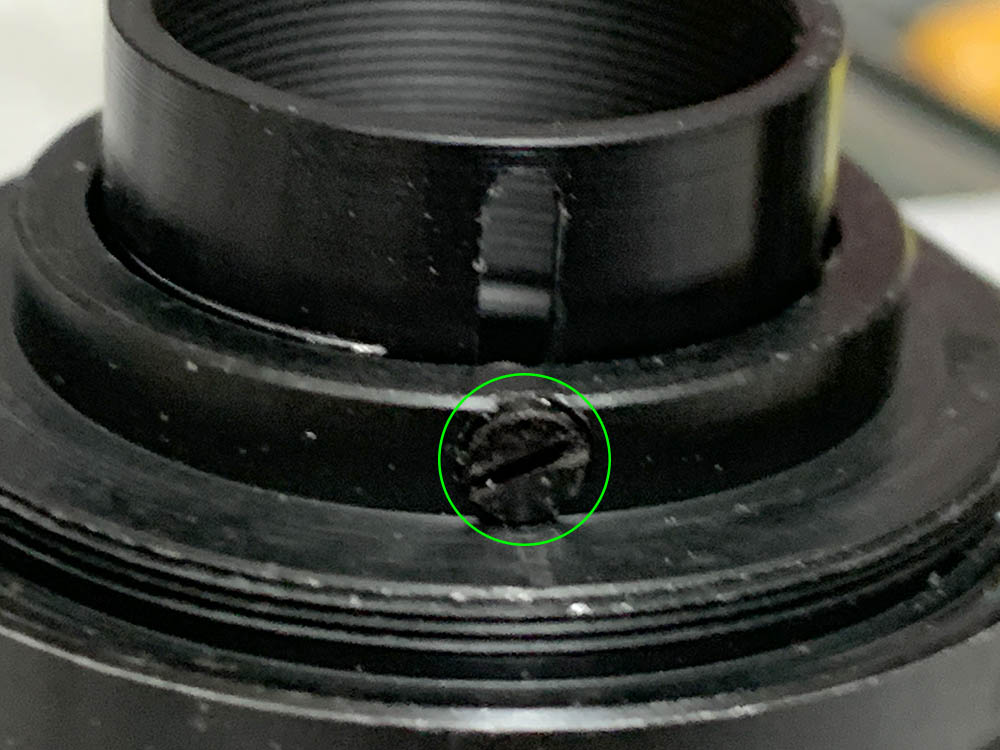
Locate and extract this so you’re able to unscrew the mount off.

Carefully clean everything specially the spring, these can be greasy inside so you should never leave any residue.
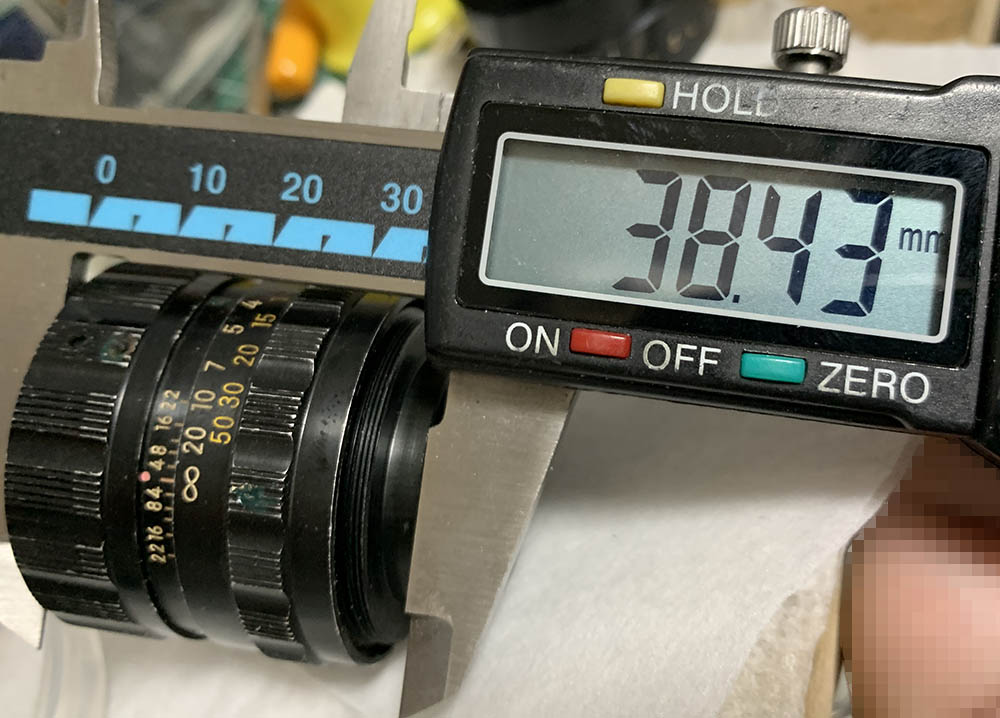
At this point measure the length of the barrel while it’s at infinity, you should be able to reproduce this later.
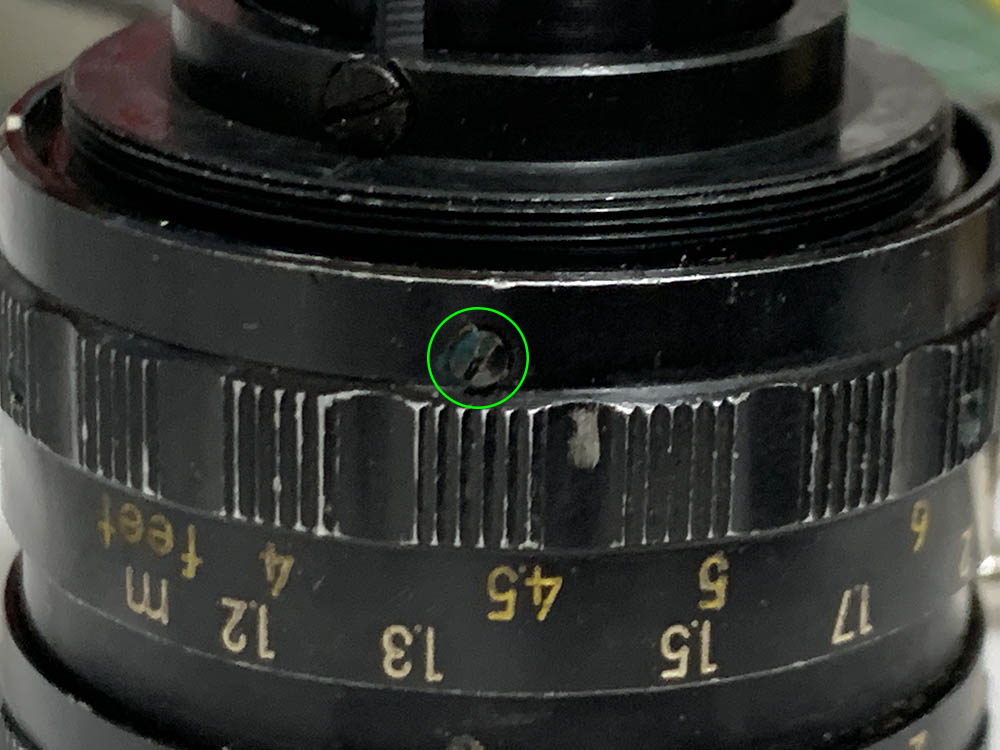
Extract this, it serves as a pin so the focusing ring won’t be able to turn beyond its intended range.
Extract this so you’re able to separate the helicoids.
Carefully unscrew the lower helicoid until it comes off. Never forget to note where it parted, many people forget to do this so they get stuck guessing where the helicoids should mesh. Read my article on servicing helicoids so you will know how to do this the right way.
Extract these to remove the focusing ring from the lower helicoid.

Dismantle everything and never forget to take a couple of notes.
Extract the biggest screw on the aperture ring and pull the diaphragm’s cup off. You could dismantle the iris earlier, it’s best to get the most delicate things out of a lens as early as you could in order to prevent damaging them.
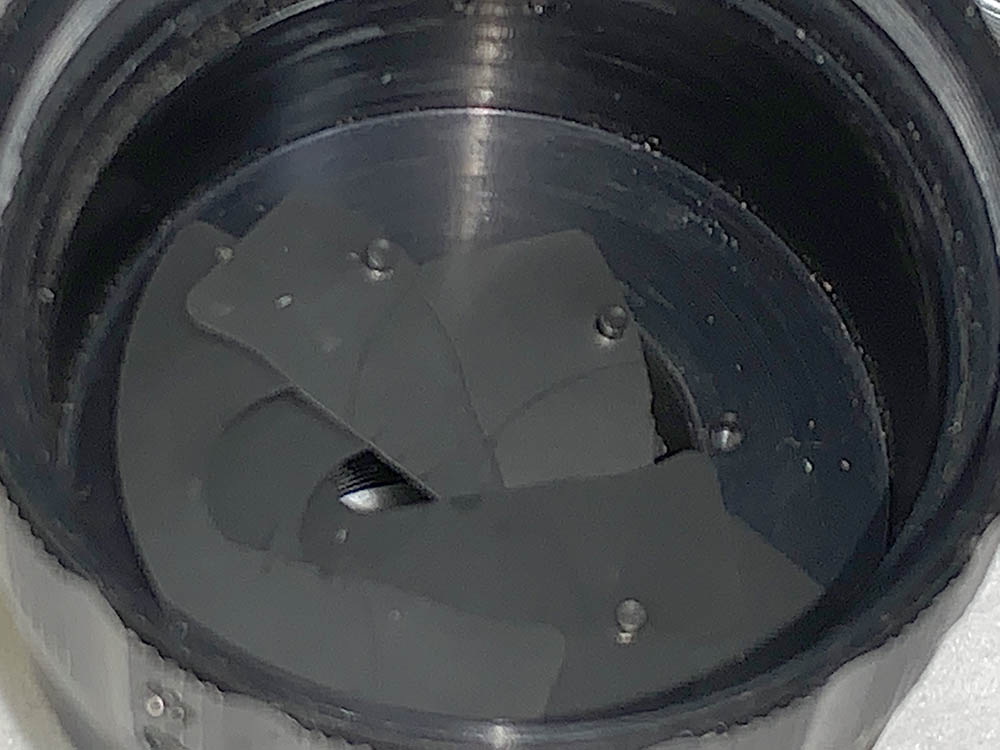
Carefully remove the leaves from the objective’s housing.
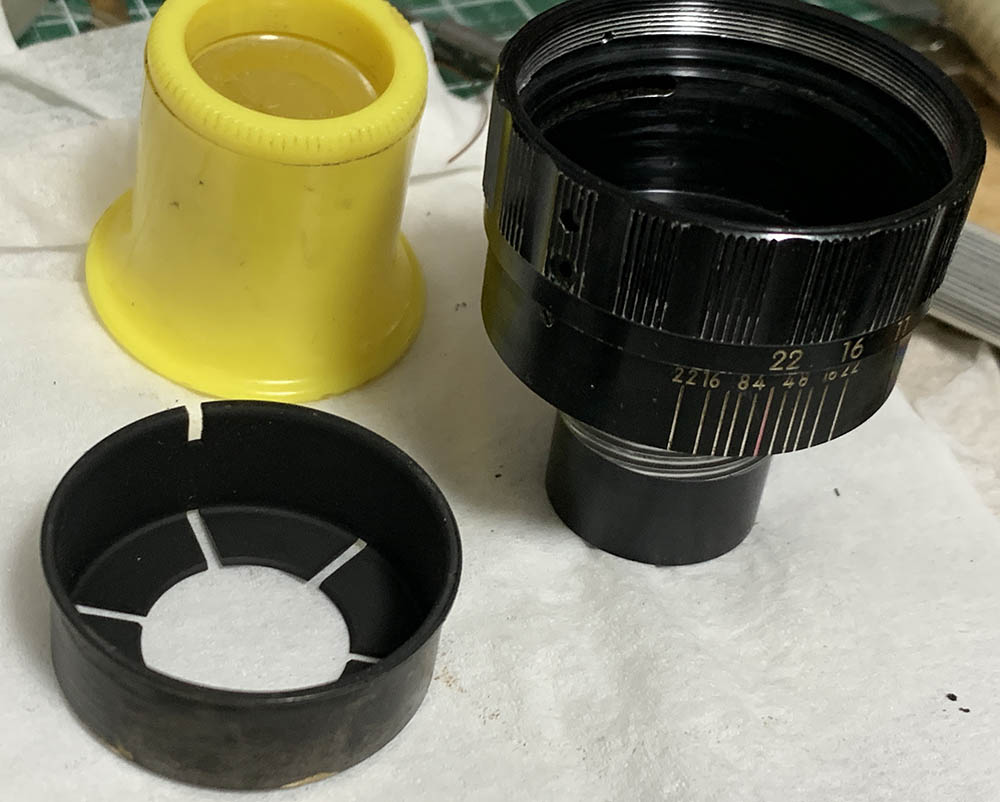
Loosen the screws of the sleeve and pull it off, retighten them so you won’t misplace any of them. You can also remove the aperture ring at this point.
The rear group can only be removed with a special tool. Carefully unscrew the retainer to extract the rear element. Do not forget to note which side should be facing the front so you won’t put it back facing the wrong way later.
Avoid using oils to lubricate anything, the iris mechanism is rather delicate and it requires a light dusting of powdered graphite in order for the leaves to glide-over each other smoothly, blow any excess off.
If your lens has fungus read my article on how to clean lens fungus. Remember to dilute the solution and never use it at full-strength or that will ruin the coating. Clean every part really well, I scrubbed all of the metal parts with a strong detergent and a stiff brush, rinsing them in alcohol helps remove residue and I left them to dry thoroughly before I continue. This lens requires a type of grease that’s neither thick-nor-thin, whichever you prefer never apply too much or they will settle in the iris sooner or later, creating an even bigger mess which requires an overhaul. This lens is susceptible to the oily-iris problem because the iris mechanism is adjacent to the helicoids so only apply a thin film of fresh, high-quality grease. Read my article on grease and lubrication for more information.
Conclusion:
This project took me the whole night with most of the time spent on cleaning the various parts. I enjoyed every bit of it since this is such a rare lens. Remember, if you are lucky enough to own this be sure that it gets serviced by a professional. There are many bogus repairers out there so be careful.
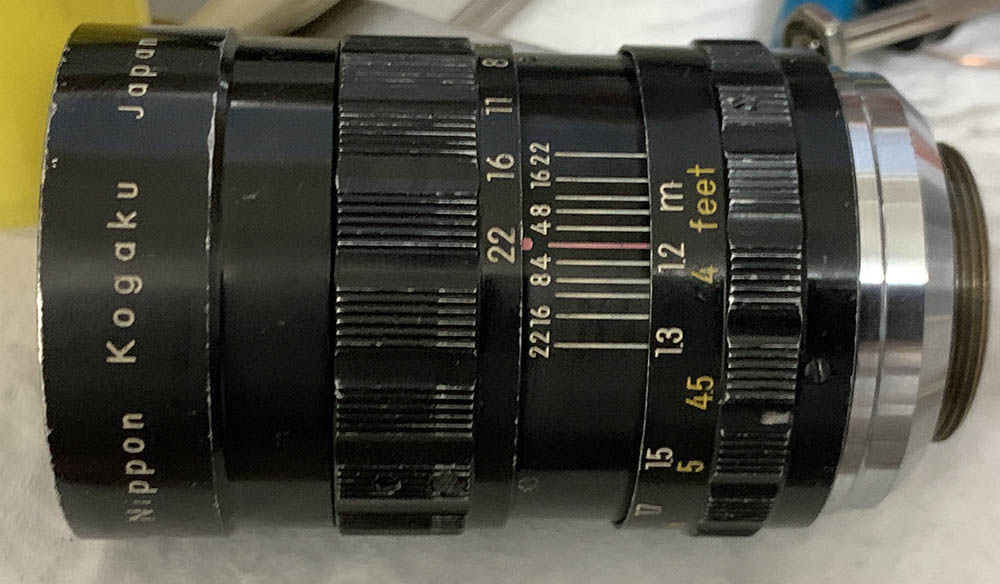
This is how it looks like after the overhaul. It’s now so clean and everything works smoothly. The filter ring was bent, it’s still not perfectly-round but at least it’s now more presentable to look at compared to how it was when it got to me.
Adjusting the focus took some time but I was able to do it. Be sure that it focuses just a little bit beyond at infinity. Read my article on how to adjust a lens’ focus to know how I did this in a DIY setting with only using the tools that are available to me.
That’s it for this article, I hope that you enjoyed this as much as I did. If you like my work be sure to share it with your friends. You can also help by donating, this blog only earns a few cents a day from views and your help ensures that it’s kept online. I use the fund for hosting this site and also for purchasing film and processing it, you’re assured that it goes to a good cause. Please do not download my contents because I mostly rely on views just to get by. I am aware that some people plagiarize and make videos out of some of my contents, that is unavoidable but please link to my site at the very least. Thank you very much for all your support, this site wouldn’t have lasted this long without you. Ric.
Help Support this Blog:
Maintaining this requires resources and a lot of time. If you think that it has helped you or you want to show your support by helping with the site’s upkeep, you can make a small donation to my paypal.com at richardHaw888@gmail.com. Money isn’t my prime motivation for this blog and I believe that I have enough to run this but you can help me make this site (and the companion facebook page) grow.
Buy me a roll of film or a burger?
Thank you very much for your continued support!
$2.00
Helping support this site will ensure that this will be kept going as long as I have the time and energy for this. I would appreciate it if you just leave out your name or details like your country’s name or other information so that the donations will totally be anonymous. This is a labor of love and I intend to keep it that way for as long as I can. Ric.

May 07, 2022 @ 13:11:26
Good to see you are back
May 07, 2022 @ 14:08:32
Very same feeling
May 14, 2022 @ 00:33:41
I am happy you are back, hope you are well, I have always found that your site provides information and detail not found elsewhere on Nikon and Pentax lenses, again thank you…..
Jun 28, 2022 @ 07:50:37
Nice to see you back.Just a suggestion.
Why not review/repair some of the earl AF lenses.
The 35mm f/2, 28mm f/2.8D and the 85mm f/1.8 were unique optical designs.
It would be nice to see your thoughts on these lenses.