
Hello, everybody! Have you ever been in a situation where you thought you have gotten a good deal but you just realized that you have been screwed? Life is mostly fair, you do not win all the time, nor should you lose all the way. There is always something for you at the end, good or bad. That is just the nature of things and is the natural order of the universe. My readers know that I do not win all the time in my camera repair adventure, sometimes my projects don’t go as smoothly as expected due to defects or because of some idiot getting to the camera before me. Today, I will show you what I meant by that but you must read the article carefully in order to know exactly why.
Introduction:
We’ve talked about our Gucci-wearing broke friend that is the Hansa Canon in the previous article. It is interesting to see what is inside of such a rare camera and even more interesting to for us is the workmanship. One can see that everything did indeed began in a small workshop but that should not excuse the level of crudeness at all. A humble beginning should not mean sloppy. We shall see more of the interior of this camera in this article.
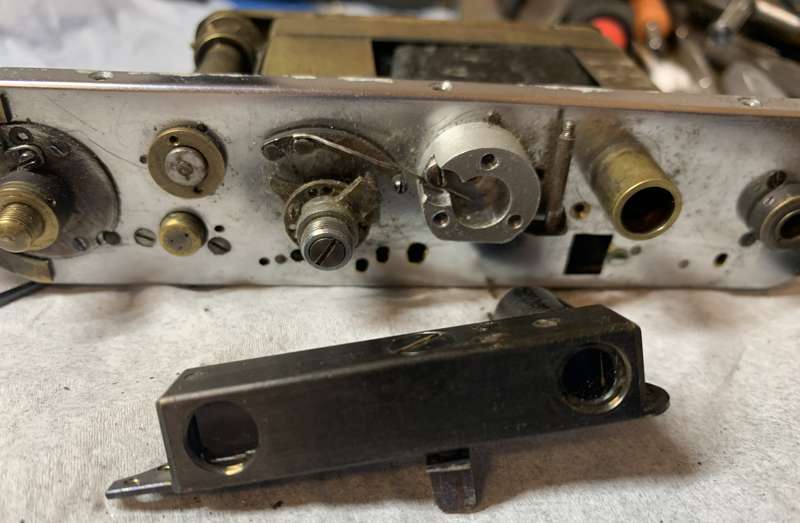
This is just the beginning! If you have been repairing cameras for a while then you should know what I am talking about. Usually, this is as far as I will go if the camera is still clean but this one had some of the nastiest gunk I have ever seen in an old camera.
I am still upset that I got screwed by this deal since it’s missing a couple of parts, one of them was even sourced from an junk that could have some minor value (Canon IIb). The mystery of the missing parts remain unsolved but I will move on, there is no time for sulking over it since we have a camera to save. I just got screwed again by an dishonest Kurdish taxi not long after, such is life.
It is without reserved judgement that I present to you what many people haven’t seen and I shall expose everything so historians or the repair guys will be better prepared when they have received such a request.
Before We Begin:
If this is your first attempt at repairing cameras or lenses, I suggest that you see my articles regarding screws & drivers, grease and other things. Also read what I wrote about the tools that you’ll need.
I suggest that you read these primers before you begin:
- Essential tools
- Best practices 1
- Best practices 2
- Best practices 3
- Ai conversion
- Working with Helicoids
Reading these should lessen the chance of ruining your lens. Before opening up anything, always look for other people who have done so on the internet. Information is vague and scattered but you can still find some information if you search carefully.
For more advanced topics, you can read my fungus removal article. It has a lot of useful information, it will be beneficial for you to read this. I also recommend that you read the working with helicoids article so you will not get stuck because you couldn’t reassemble the helicoids back properly.
Disassembly (Interior):
While it is mostly similar to most Leica clones there are some noticeable changes. If you have read my Seiki Kogaku S article you should be able to see the similarities between both cameras, both in design and how crude it looks like inside. If you have seen my Canon 7 article then it is clear that in around 3 decades the crudeness had gone away yet the cheapness remained. I must also warn you that while my camera is in this state for a reason as you shall soon read about it, I still think that it should have been better.
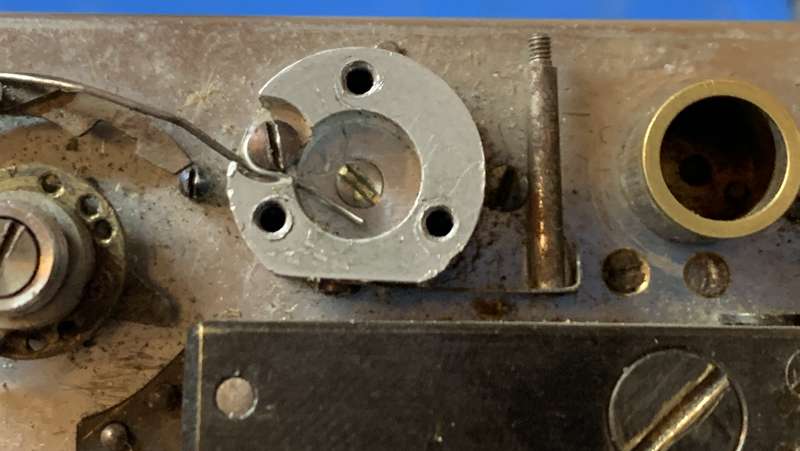
Locate and remove the screw holding the spring, that should prevent it from getting damaged. There are 2 screws that you should extract to remove the top baffle, one inside of the base for the cold-shoe and another just outside of it.
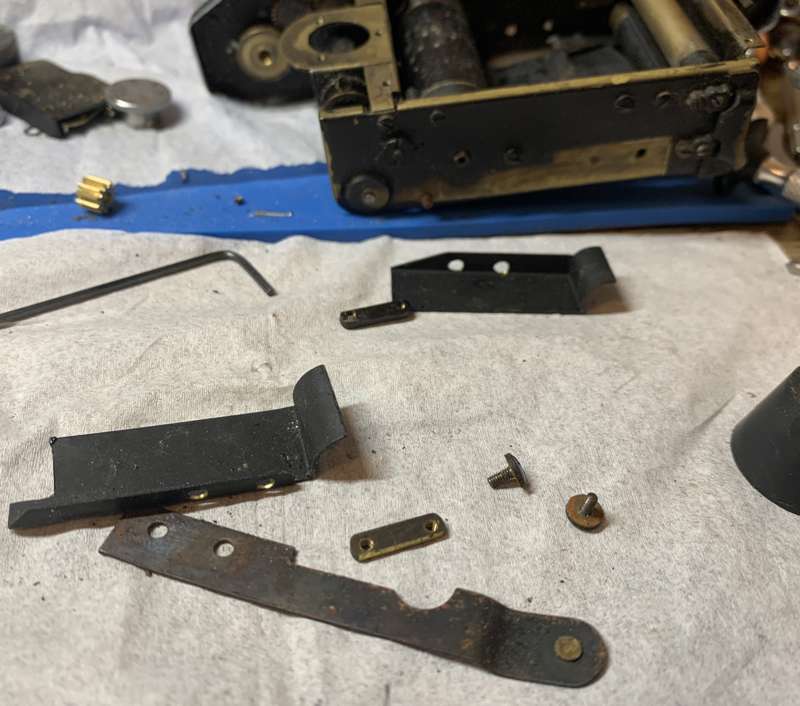
Extract the 2 screws securing the spring to the lower baffle, in the process also removing the bottom spring. There are small bars at the other side so don’t lose them.
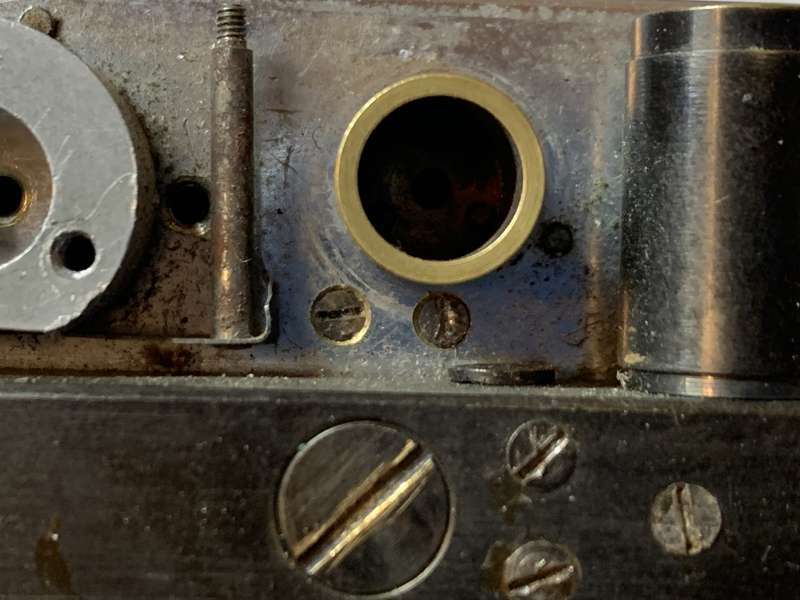
There are 2 other screws just behind of the rangefinder assembly that you should extract to remove light shield of the rangefinder.
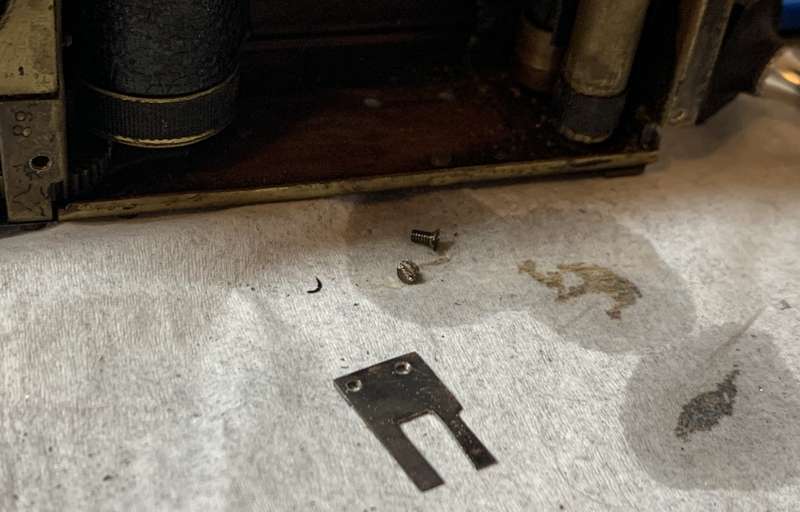
This covers the huge hold intended for the rangefinder’s arm.
The rangefinder’s housing is held by 3 screws and it’s easy to extract them from the other side.
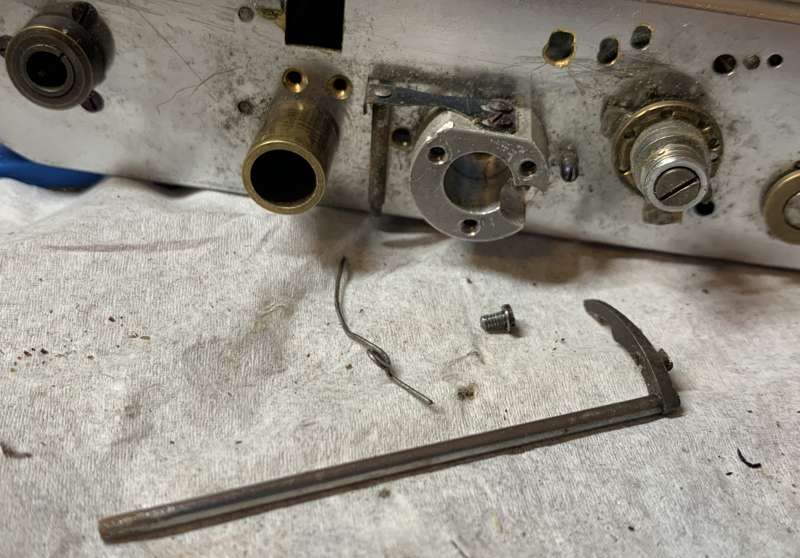
If you haven’t removed the spring, this is the right time. Pull out the lever and its shaft and keep it safe.
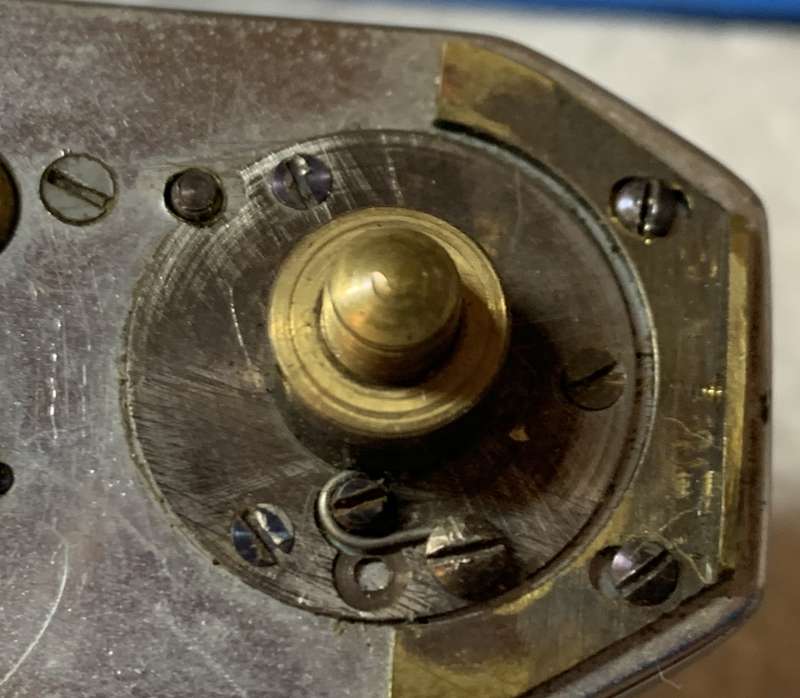
Extract the screws of the brace, it’s not supposed to be tightened too much so it slides a bit in order to adjust itself when you install the top shell later.
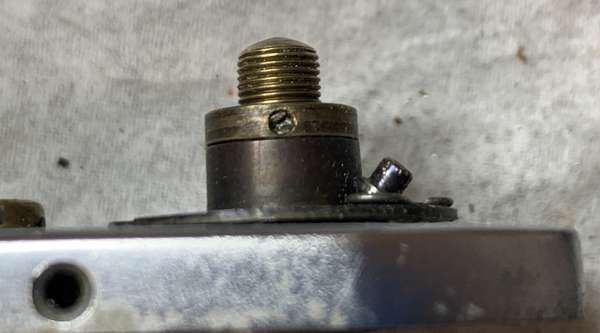
Locate and extract this little screw to remove the collar.
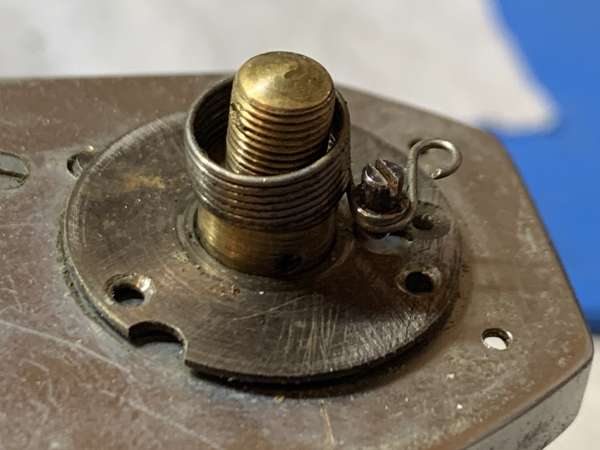
Once the collar is gone you can remove the cover of the spring then extract the rest of the screws here. Do not damage the spring!
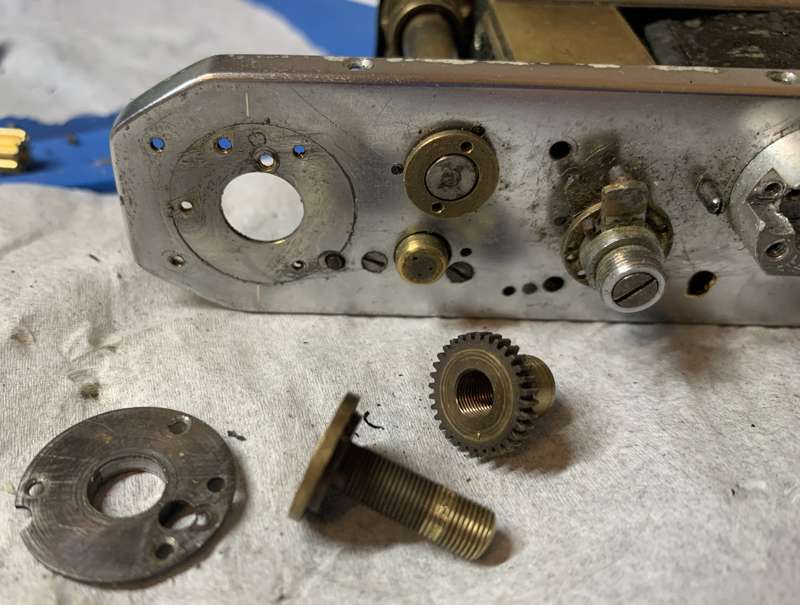
You can now unscrew the cog at the other side of the advance mechanism’s stem, you may need to remove another screw here if it is there.
It is at this point that I realized that I got screwed! This camera is missing the spindle! Somebody took it out for parts and the other things that I find to be sketchy could be a result of that! This is a chop-chop camera!
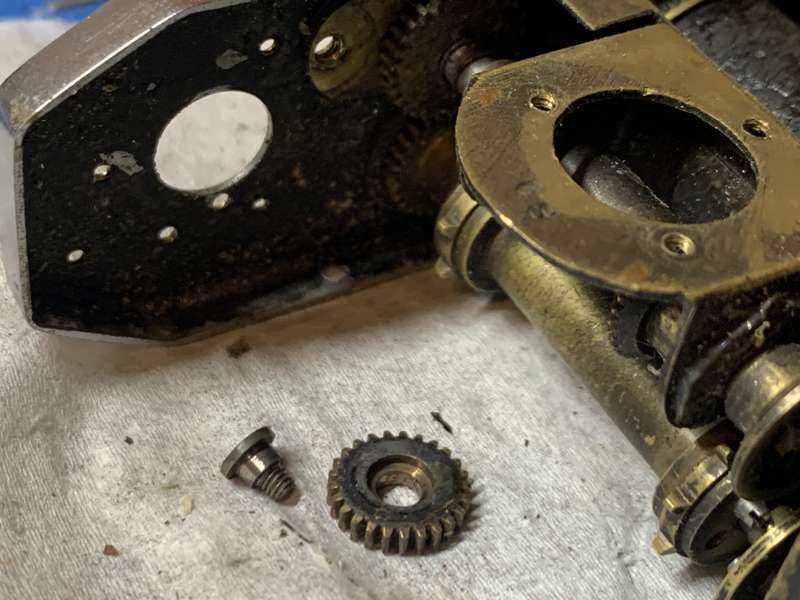
Dismantle this part and clean the cog as best as you can as it’s always the case that it is filthy.
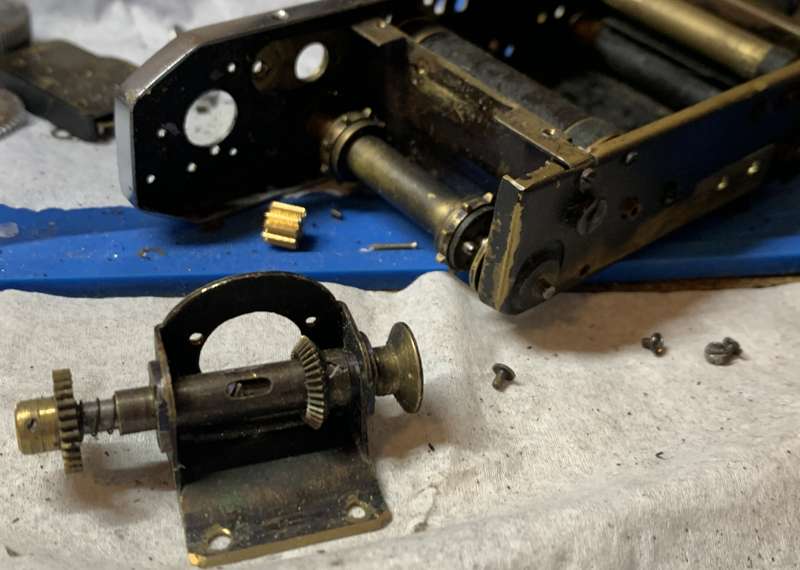
The plunger shaft assembly can be removed after you extract the screws securing it.
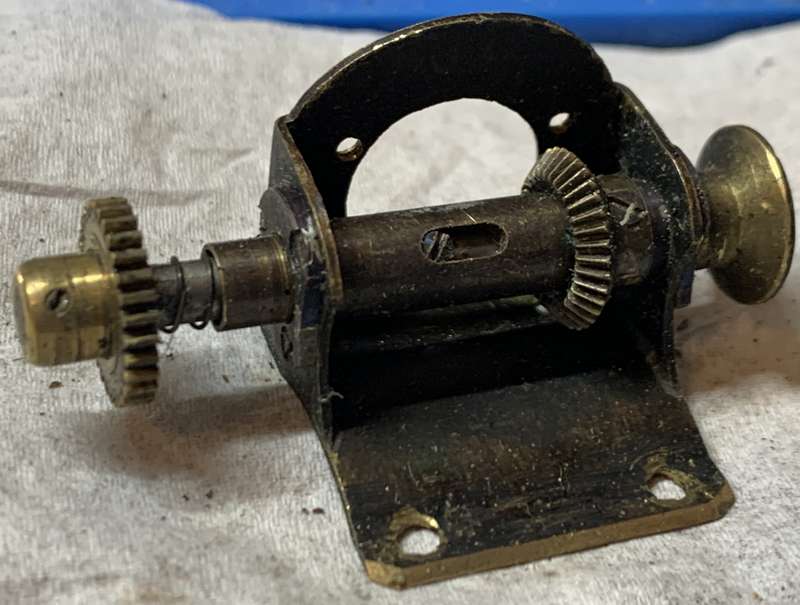
You can take it apart by extracting the screws. It is recommended to clean this part thoroughly for smooth winding action.
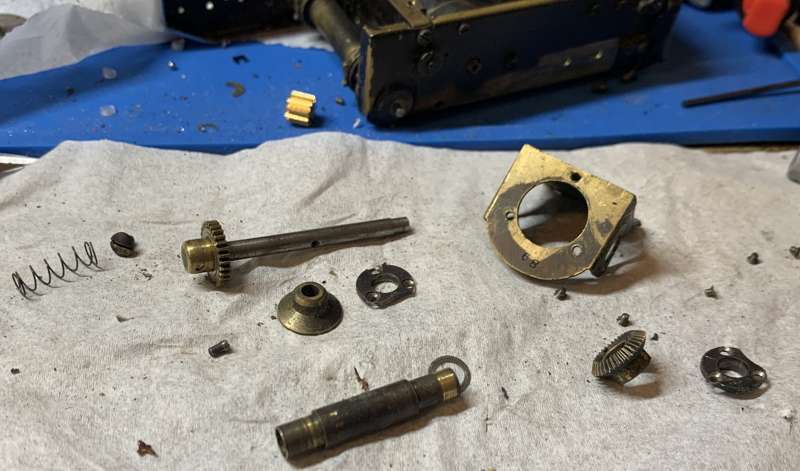
Here it is with everything in pieces.
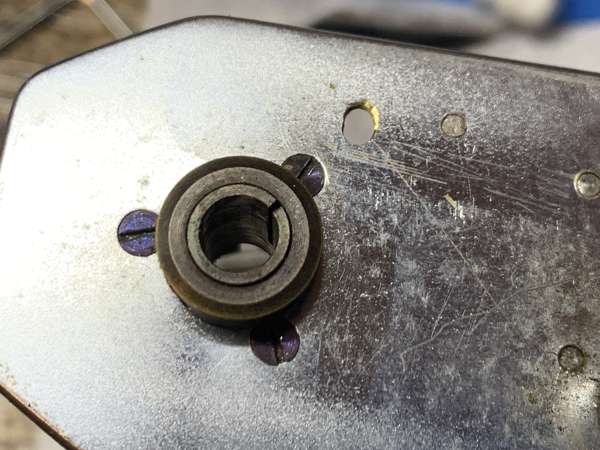
On the other side. Extract these screws to remove the base of the rewind assembly.
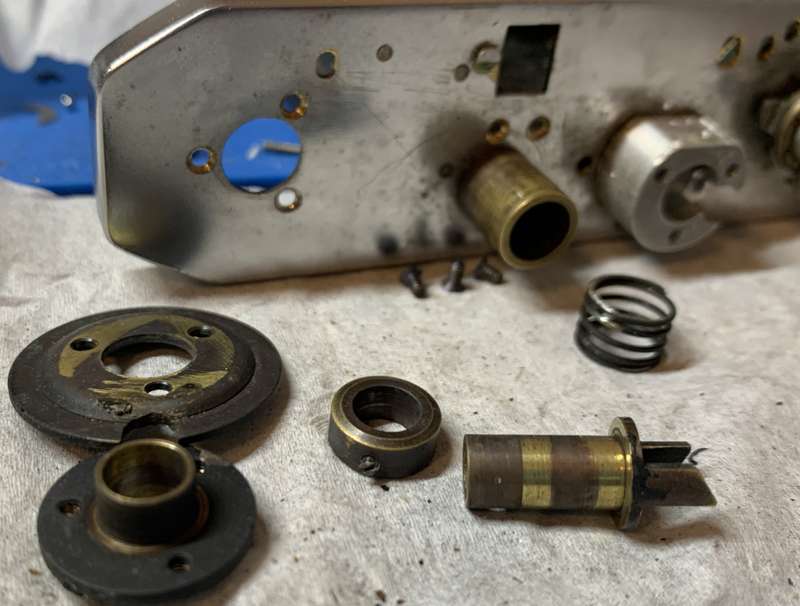
Loosen up the screw of the collar and turn it until it’s off then the whole assembly can be taken apart for cleaning.
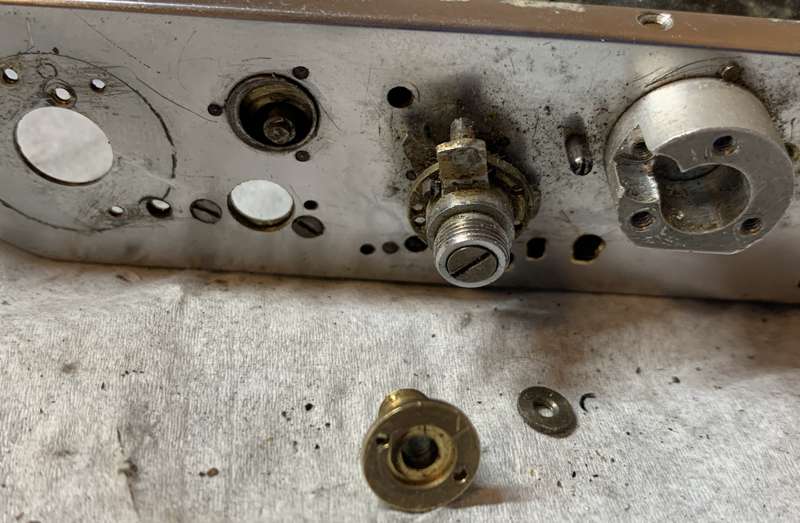
Locate the screw at the other side of this brass spindle, it’s just above the sprockets and under the teeth of its cog. Next, use a lens spanner and unscrew it after you remove that small nut that secures the shaft. Everything could be taken apart once these are gone.
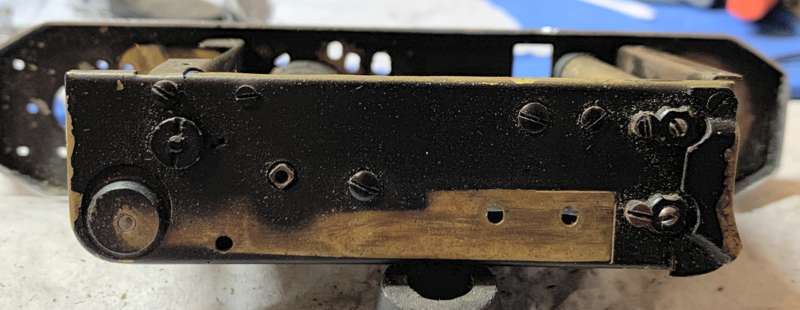
There are about 8 screws to be extracted here plus the ones for locking the spring’s nuts. Mine has extra screws for no reason at all, screws that are meant for the delay mechanism and some other parts that were never there. It is also missing that disc for the brake but the shaft clearly shows that it’s threaded. This is weird because the paint job indicated that the missing parts were never there in the first place! It could be the case that the base could have come from another camera model?
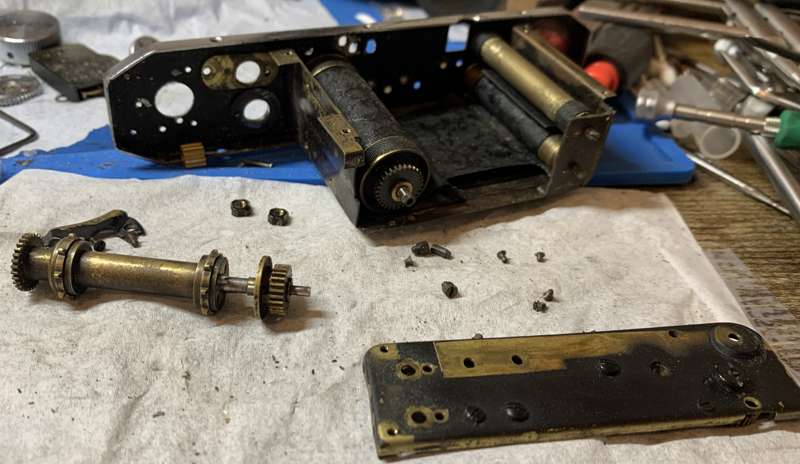
The base come off in this manner.
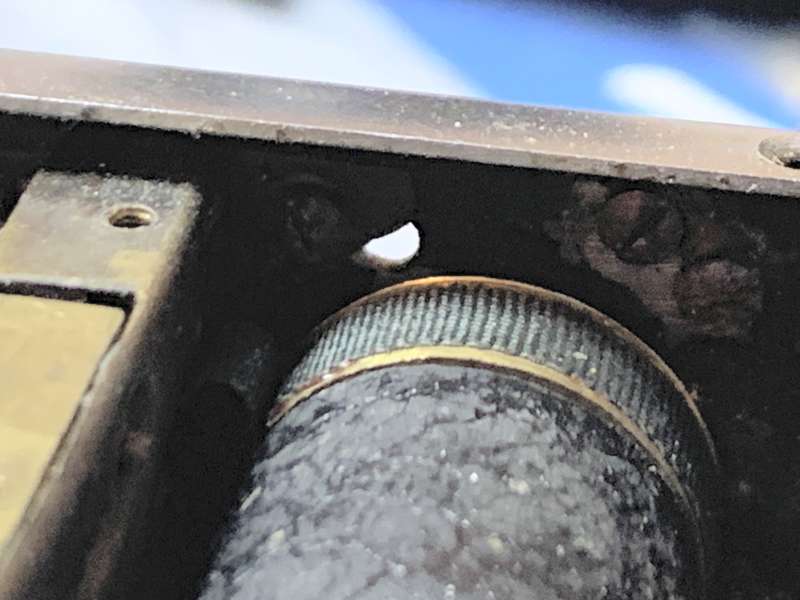
Extract the biggest screw you ssee here.
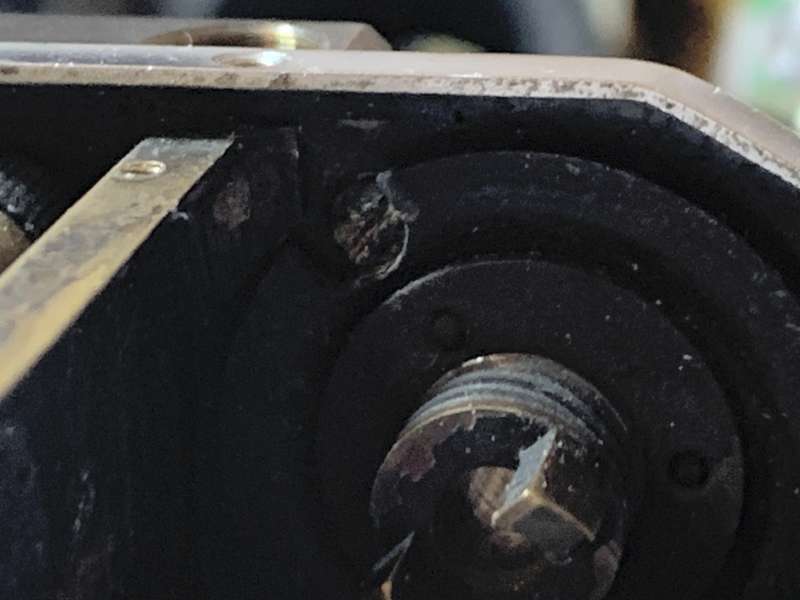
And this one as well.
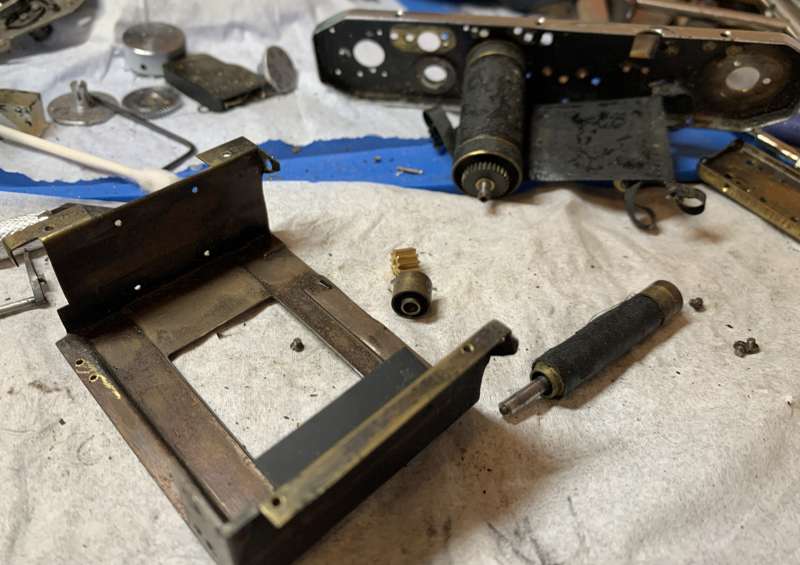
Look for another screw just behind the cradle and extract it, once all 3 are gone the cradle comes off easily. It is stupid how such a thing is only secured by 3 screws! Its rigidity is augmented by the fact that the outer shell is secured to it, what a lazy design.
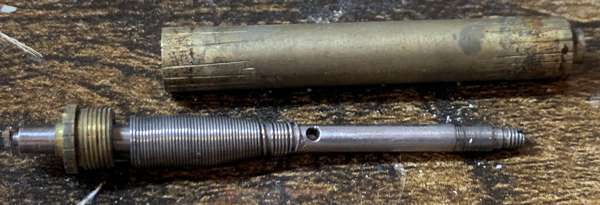
The springs look nice inside and were not dirty at all.
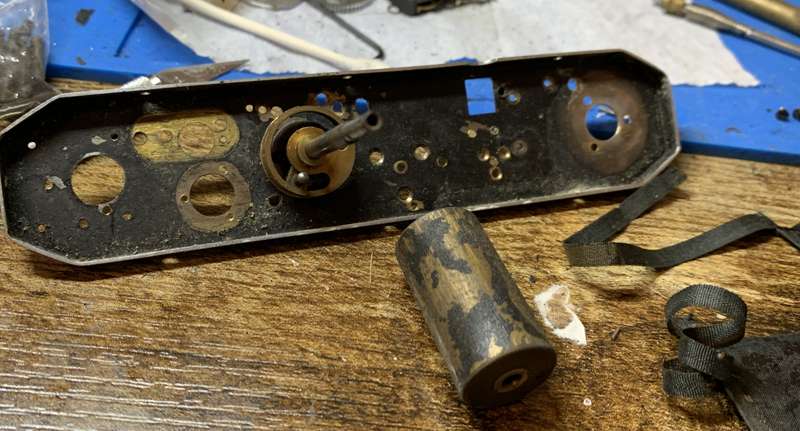
Dismantle the drum by removing the screw securing the lower cog to the shaft.
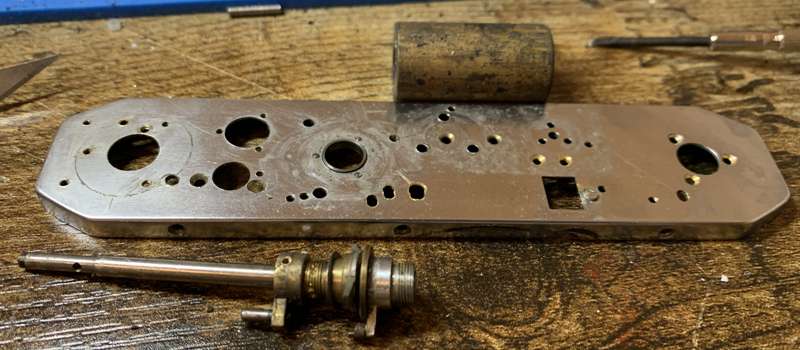
This is now ready for a thorough cleaning! The rotating shaft and everything connected to it will bee dismantled, too. Don’t forget that the pin of the rotating part that sticks into the drum is always at the opposite end of the lever of the rear curtain!
I generally avoid taking the camera apart to this degree but the amount of germs and decay demanded that it should be taken apart down to the last screw. The bigger parts were cleaned in an ultrasonic cleaner and the smaller ones were cleaned manually. Seeing the parts so clean made me very happy because it is now finally looking decent!
Disassembly (Rangefinder):
The rangefinder assembly is identical to the one found in the Seiki Kogaku S as shown in that article, at least it looks like it. There is nothing special to report if you have read that one and I felt dumb now because I realized that I have just repeated myself!
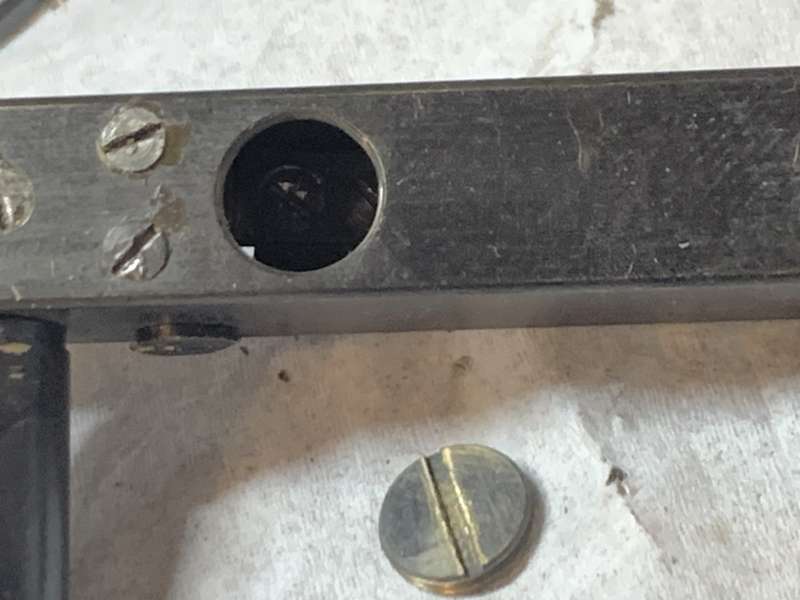
Removing this cover will give you access to the 2 screws inside that secures the arm of the rangefinder’s lever, extract them both.
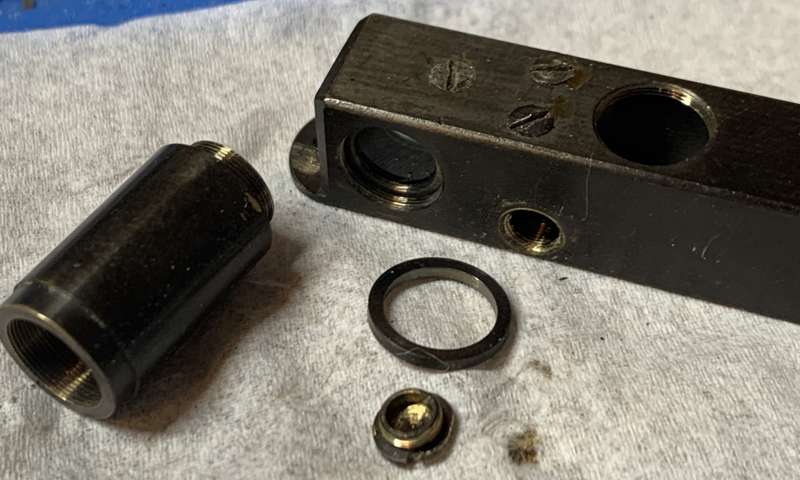
Before you proceed, remove that small circular cover at the back and be careful because there’s a tiny spring there that we need to remove. If that thing flies out and disappears then it’s gone forever! It’s also a good idea to remove that tube along with that shim.
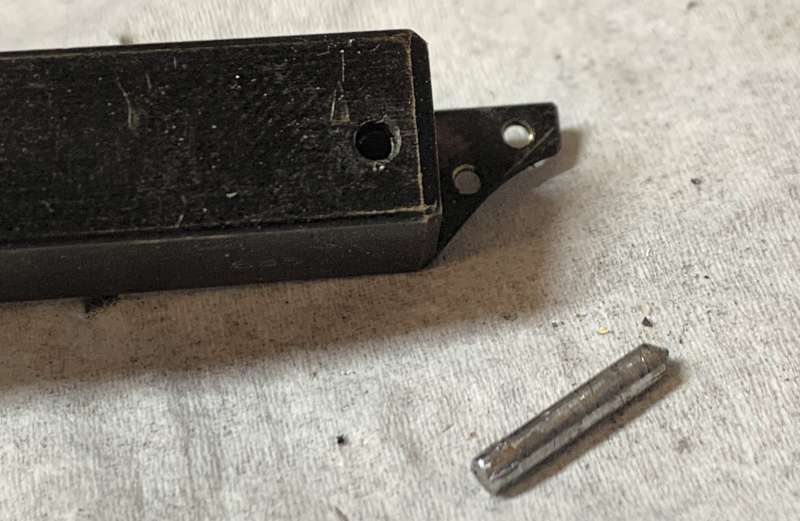
carefully push this out an be careful not to crack the prism. This is the main pivot for the rangefinder’s internal lever.
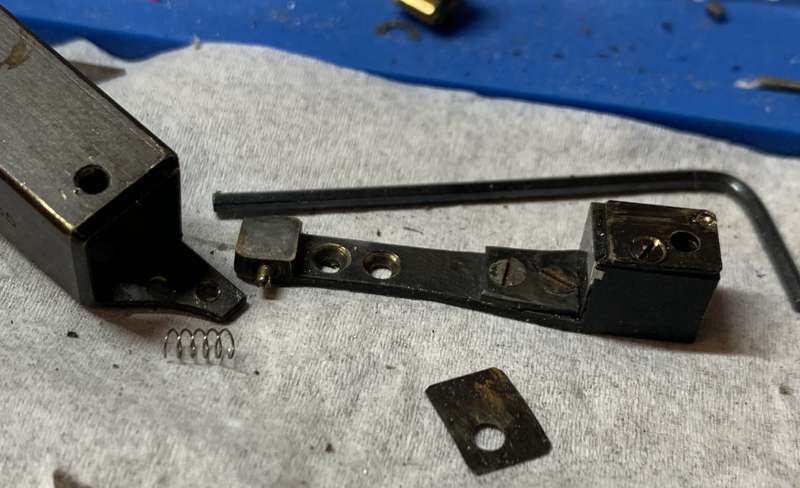
Once that pin is gone carefully pull the internal lever assembly off. Don’t forget where that shim came from, too. Seen here in this photo is that tiny spring that we should remove from 2 steps before.
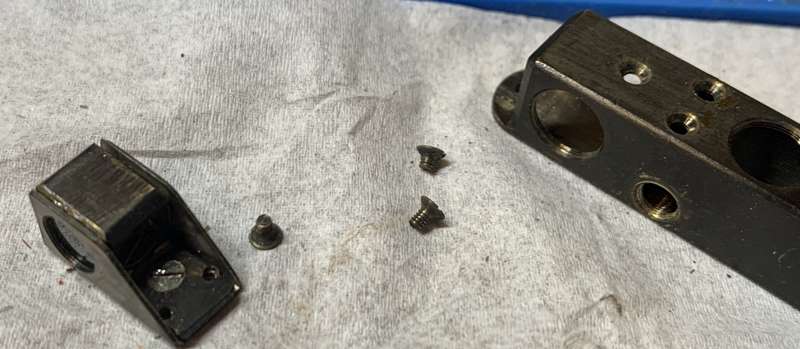
Extract the 3 screws on top of the housing to remove the beam splitter asseembly.
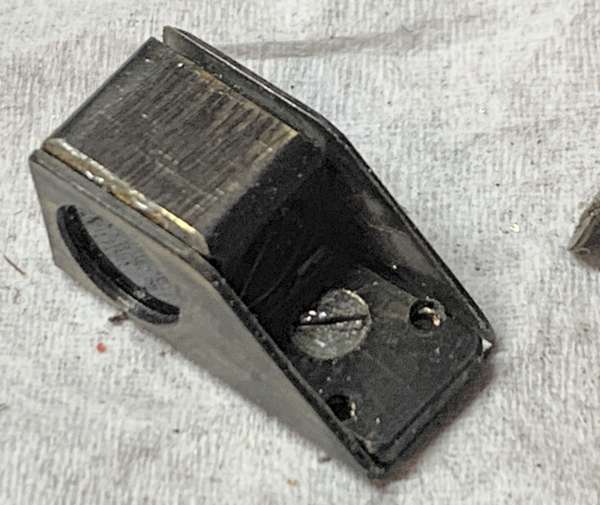
It is being held together by this big screw. Carefully extract it and don’t scratch anything!
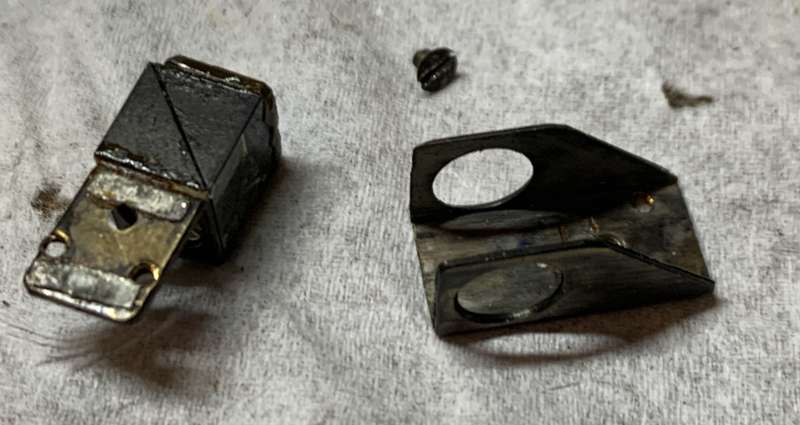
You are now free to clean it as best as you could and do not even bother going any further than this!
Clean every part really well especially the internal surfaces of the main housing. You will use a lot of Q-tips and you should buy ones that are really small and another set that has pointed tips used by ladies for the fine work on their eyebrows. That’ll help you reach the difficult places that a normal Q-tip won’t get to.
Conclusion:
Taking things apart did not take long mostly because there’s no slow speeds so everything took a shortcut. However, the fit and the poor state of the camera did indeed made things a little bit more complicated for me. I spent more time cleaning everything but the real challenge is putting things back togethter again.
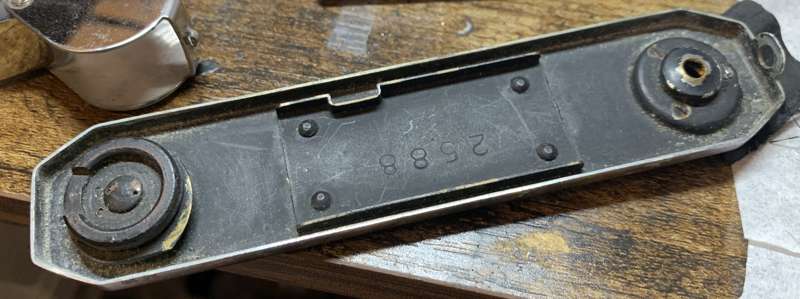
The bottom plate looks absolutely filthy and must be taken apart completely. Interestingly, the tripod mount is just a flimsy plate, it is just screwed into place by 3 small screws and it does inspire confidence at all.
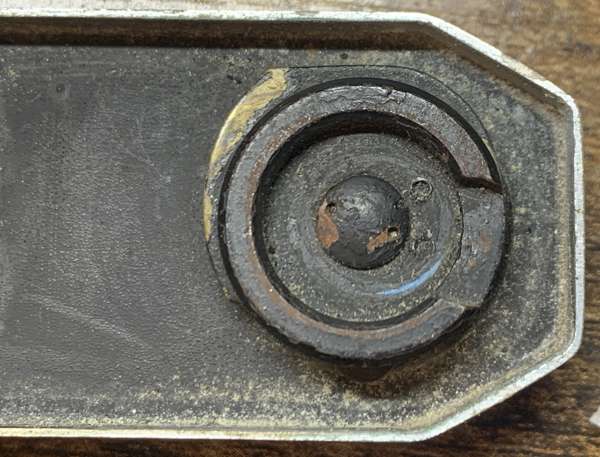
The locking mechanism feels just as flimsy. I took it all apart, down to the last screw! It is identical to the Seiki Kogaku S and there is a photo of this part in pieces in that article.
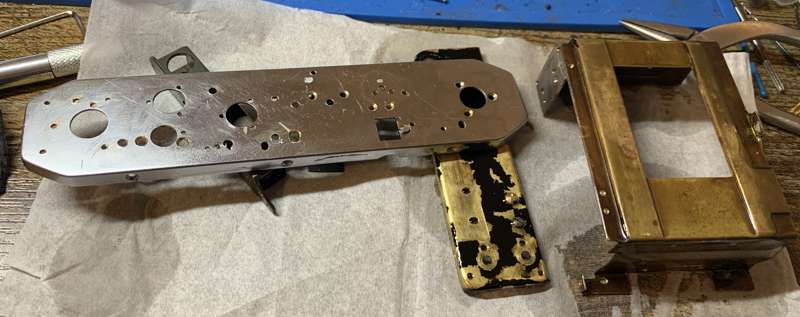
The bigger parts were all cleaned with an ultrasonic cleaner and the chipped paint was scraped clean where practical, a new coat of fresh paint will be applied to where it’s needed even if some of the parts weren’t painted in the first place.
And there goes the second part of the article! Are you all excited to see the last part? I hope you all are so please come back again. I am thankful for all your support as it enables me to continue presenting you with quality content. The tips may be tiny but that is enough to keep this passion alive. Who would have known that a small camera repair blog would become this big? I was told by a person who owned a camera forum that I should stop doing this because I was just recycling information at the earliest days of the site, but I never listened. People who usually do that are just jealous and small. Thanks to all of your support that we won over the community and we are now the best vintage camera repair site anywhere in the world, I can say that with absolute confidence. All your help keeps me moving forward, ensuring that help is there for repairmen wanting to fix something they have never seen. See you all next time for another exclusive!
Help Support this Blog:
Maintaining this site requires resources and a lot of time. If you think that it has helped you or you want to show your support by helping with the site’s upkeep, you can make a small donation to my paypal.com at richardHaw888@gmail.com. Money isn’t my prime motivation for this blog, I believe I have enough to run this myself but you can help me make this site grow.
Leave me some tip?
Thank you very much for your continued support!
$2.00
Helping support this site will ensure that it will be kept going as long as I have the time and energy for this. I’d appreciate it if you just leave out your name or details like your country’s name or other info so that the donations will totally be anonymous. This is a labor of love and I intend to keep it that way for as long as I can. Ric.


Sep 17, 2026 @ 05:00:05
beautiful work, as always !! i’m curious how it will look, all reassembled and cleaned. it’s because of you that i’m now repairing my third nikon F !!