
Hello, everybody! Do you have that friend who always dresses nicely but is actually cheap? He is not cheap because he is frugal but he is cheap because he has nothing much to his name! I had such a friend and he was a miserable piece of work because he is the type of bastard who would eat all the good bits at a dinner but disappears when it is time to pay the bill! Not only that, he is the biggest poser out there, acting like he pays for everyone. Frankly, I am the generous type, I just can’t stand being close to people like him that’s why I told him to bugger off. Today, I will show you one such camera. It looks nice outside but is kind of a mess in the interior. It’s trying to present itself as something it isn’t, but unlike the dork that I mentioned this was all necessary because it’s the first of the many production cameras that the brand ever produced. Although that’s not an excuse since Nippon Kogaku made an even better camera at an even worse state given how the factory had been bombed to nothing, that camera is the Nikon.
Introduction:
The Hansa Canon was made by Seiki Kogaku (now Canon) in the early 1930s as Japan’s first production 35mm camera of its kind for consumers. This is not Canon’s first camera because there is an even earlier one that did not made it into mass production but it has laid the foundations of all cameras that are to be made from the same workshop. It is essentially a copy of the Leica but there’s a lot of differences that made it unique, these were done in order to skirt around patents. But unlike the Soviets who just stole every detail from the Leica (like all good socialists parasites do), the Japs did many different things that made this camera special. There is that stupid pop-up finder to differentiate it from the Leica’s central window, a complicated helicoid focusing unit specially made by Nippon Kogaku (Nikon), a dumb front-facing film counter, the omission of strap lugs, and many more. That’s just the external differences, you will see what’s inside of it later. To their credit, they did improve some things where possible but they are minor or insignificant to mention.
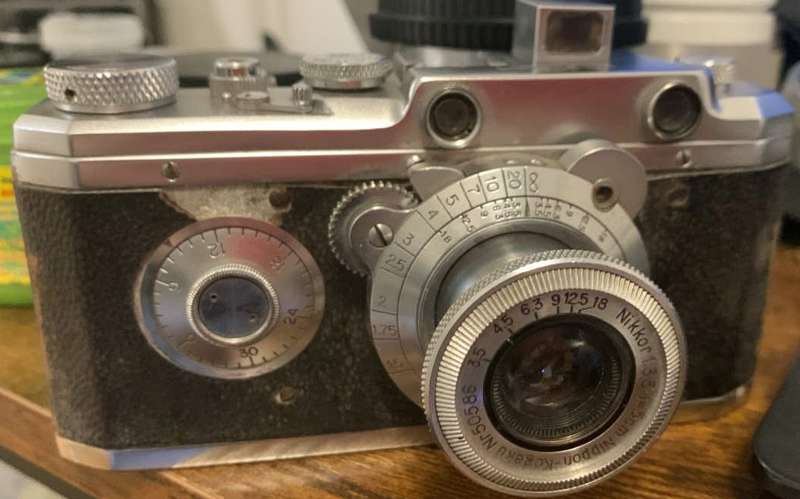
This is the face of Japan’s first production Leica clone. It was sold as a premium item at that time, commanding a high price and it also has an air of luxury to it as well with all the beautiful, shiny details. Despite that, notice that it does not have a slow speeds. It has a frame counter at the front which makes it unique along with the Mickey Mouse look of the focusing unit. The top shell is also unique, and even unnecessary as you will soon see but that’s more for evading a Leica lawsuit than anything else. It’s in pretty bad shape but it looks like something that I am able to restore.
If you ask me, it is kind of decent for its time but it’s nothing compared to a Leica nor anything Contax when it comes to features. I will even go as far and say that the workmanship is crude specially on the inside, sort of like many Soviet cameras as you will soon see. The parts fit nicely outside to an acceptable degree but it’s a bit of a patchwork inside as if the parts were strewn together by a technician from spares. I can’t comment much about how it functions since it’s still in pieces as of writing but it shouldn’t differ by a lot compared to the Seiki Kogaku S which is kind of “okay” to be generous.
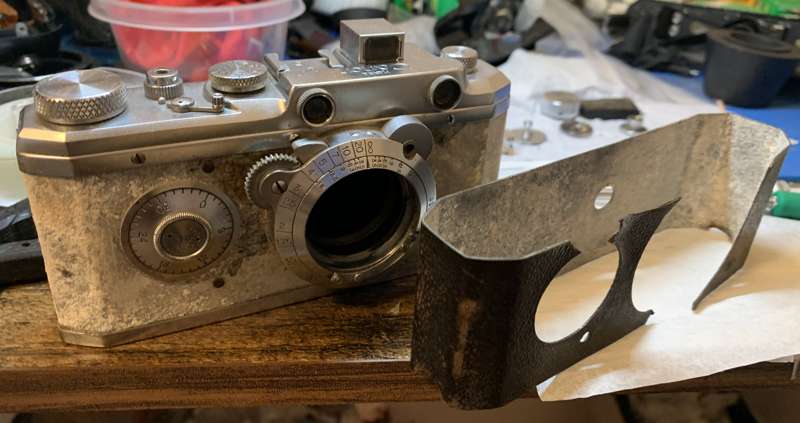
The leather came off neatly thanks to the aluminum oxide that formed underneath it. It saved me a lot of time and kept the leather safe.
I’m not sure what to do about this camera when I got it because it’s a collector’s item. Should I restore it or should I just leave it all alone? I thought to myself that I am not really a collector and did the sacrilege of restoring such an artifact to make the collectors cry. All that for you to see what is inside this rare camera.
Before We Begin:
If this is your first attempt at repairing a lens, I suggest that you see my previous posts regarding screws & drivers, grease and other things. Also read what I wrote about the tools that you’ll need.
I suggest that you read these primers before you begin:
- Essential tools
- Best practices 1
- Best practices 2
- Best practices 3
- Ai conversion
- Working with Helicoids
Reading these should lessen the chance of ruining your lens. Before opening up anything, always look for other people who have done so on the internet. Information is vague and scattered but you can still find some information if you search carefully.
For more advanced topics, you can read my fungus removal article. It has a lot of useful information, it will be beneficial for you to read this. I also recommend that you read the working with helicoids article so you will not get stuck because you couldn’t reassemble the helicoids back properly.
Disassembly (Exterior):
We begin by removing the exterior parts in order to remove the shell/skirt. It’s not all that difficult if you are used to working with the numerous Leica clones. However, care must be done as this is a valuable camera and given its age and state, it is quite fragile! I do not recommend any beginner to tackle this project and its best left to the experienced repairman to handle it. If the repairman is not familiar with this camera you can show my article so it will help him find his way around. Just be sure that he is familiar with working with Leicas as a baseline.
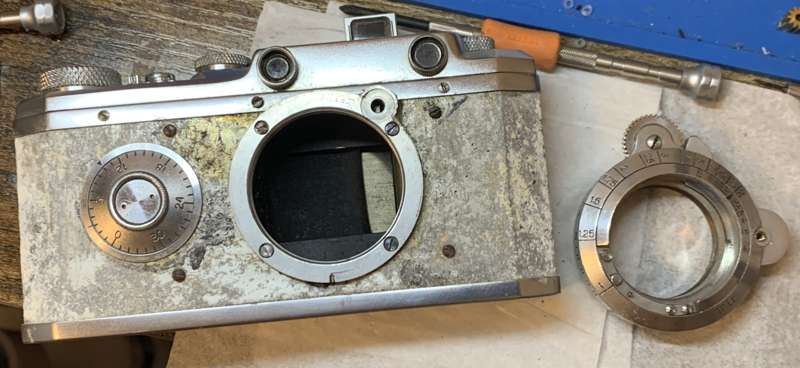
Remove the focusing unit by extracting a screw underneath it and removing the pin. Read the Seiki Kogaku S article to know how I did it.
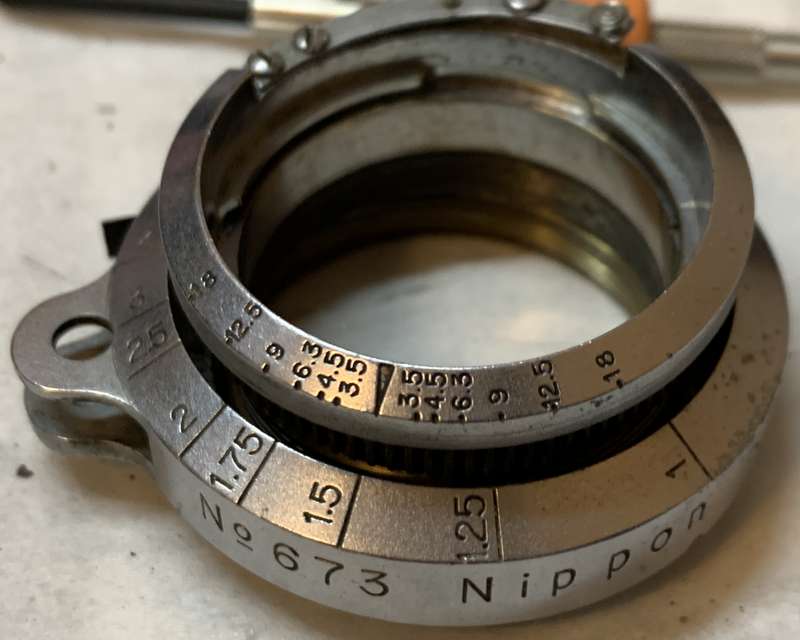
Just like any other helicoid you will need to remember where it separated, mine parted here.
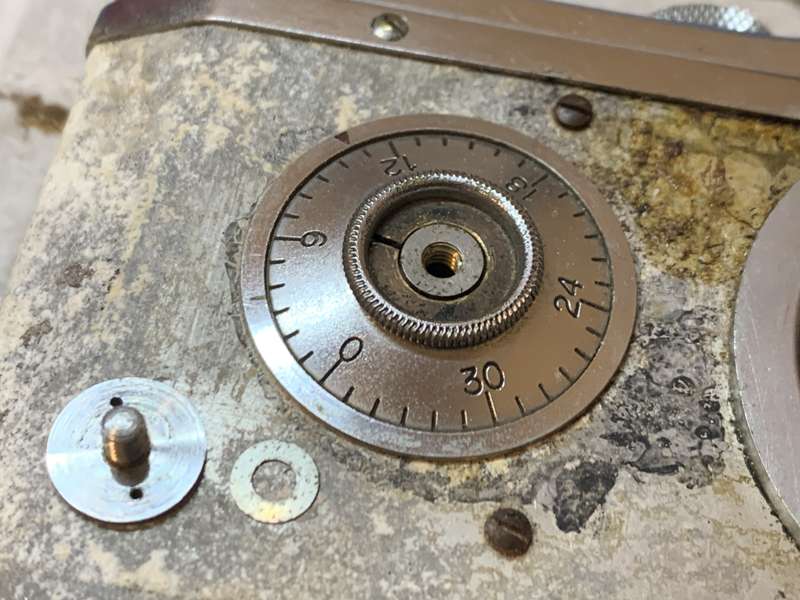
Carefully remove the cover of the film counter and do not scar the face.
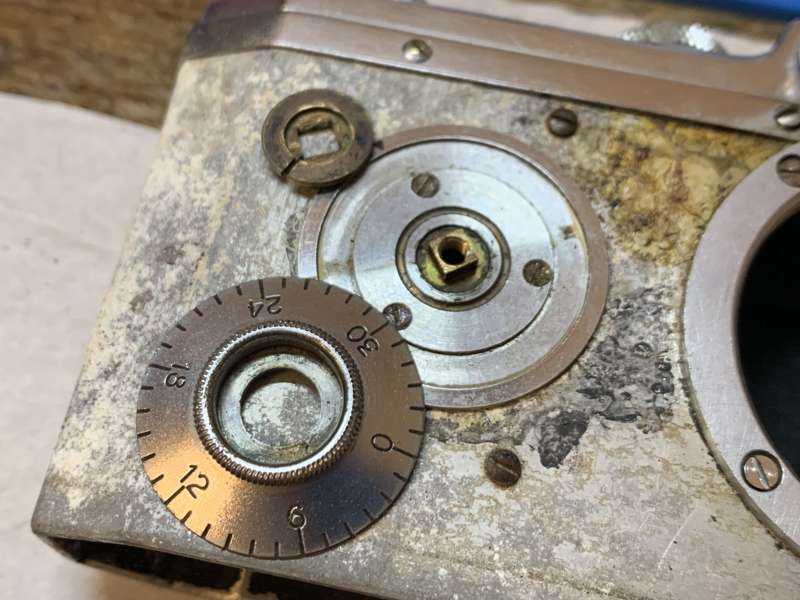
Remove the dial along with the nut.
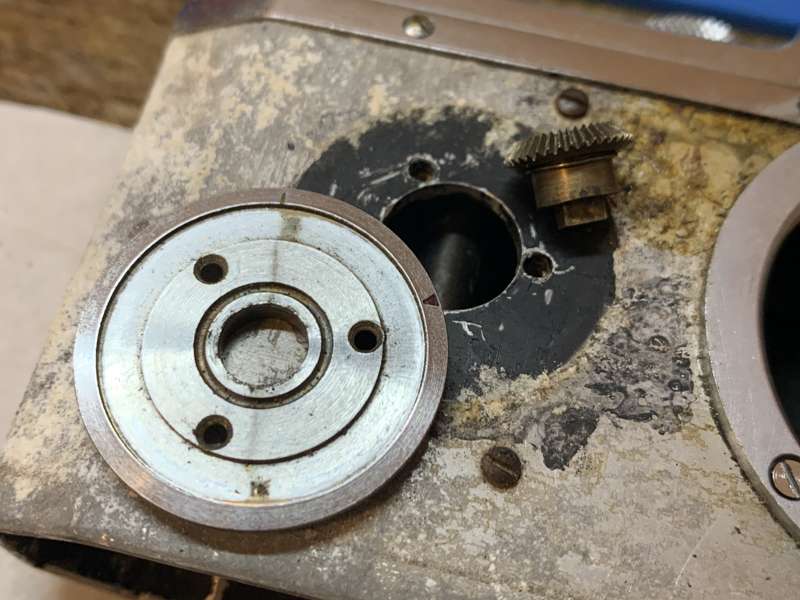
Remove the plate next (after removing the screws) and the bevel gear underneath it.
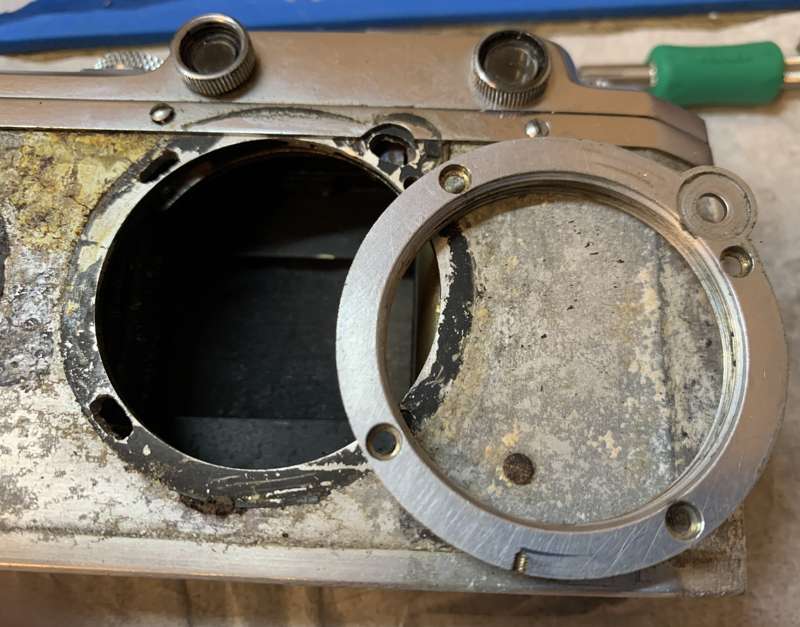
Slowly lift the lens mount plate with your nails to remove it, being careful not to disturb any shims under it. I did not find any in my camera but there should be at least a few of them here, perhaps the other guy lost all of them. If you found any, please mark their positions because they are precise adjustments made to make your camera focus properly.
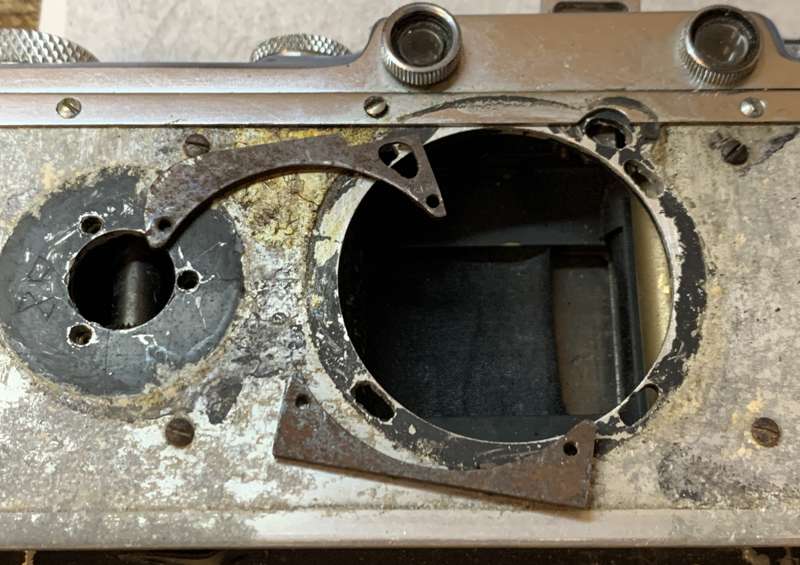
The metal plates you see here secure the plate from behind, clean them all up and store them in a safe place.
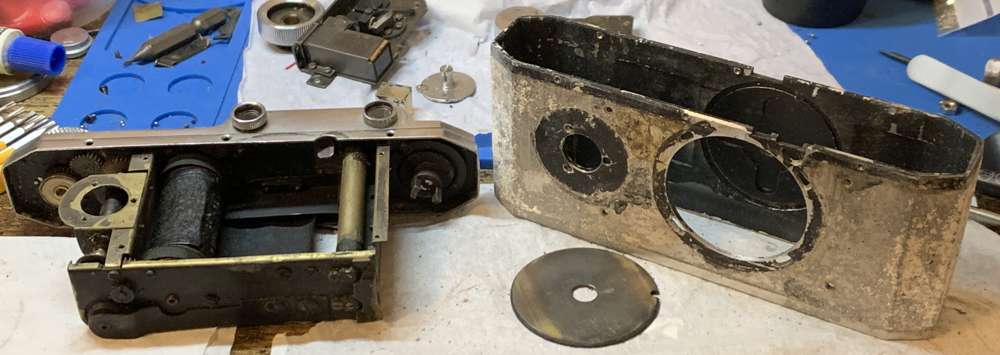
Locate and extract all screws securing the shell and carefully remove it. Mine was tough because the corrosion bonded the shell to the top together but I eventually got it out. Notice that the pressure plate is there, it came right off so be careful or you might lose the spring!
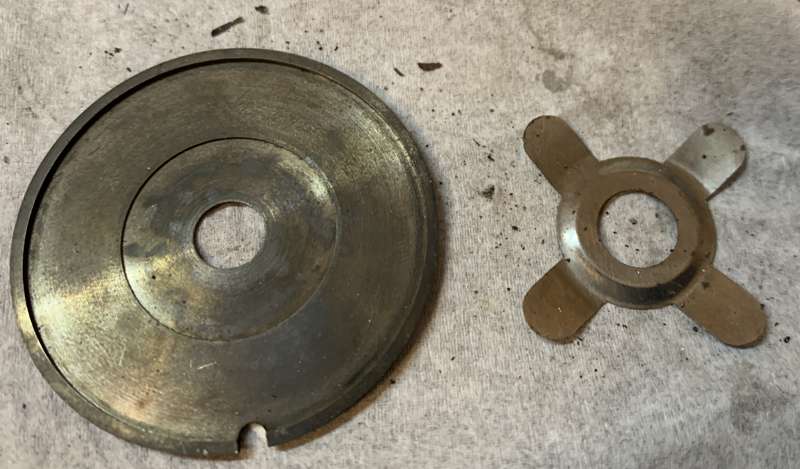
It is unusual that it has a circular pressure plate, it is the first time I have ever seen anything like it. The spring looks unique, too. It is easy to lose the spring in the previous step.
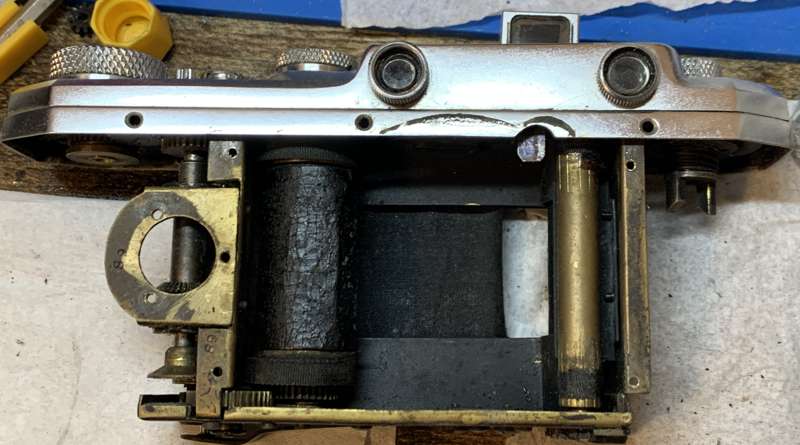
This is your change to take as many notes as possible and admire how it looks like before you take things apart.
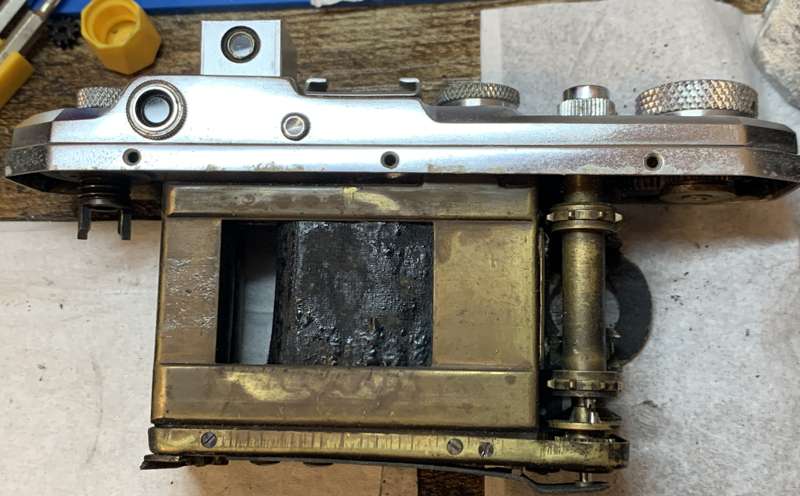
The back looks like this. Many of the parts are left untreated nor painted for some reason. The fabric parts look terrible.
Disassembly ():
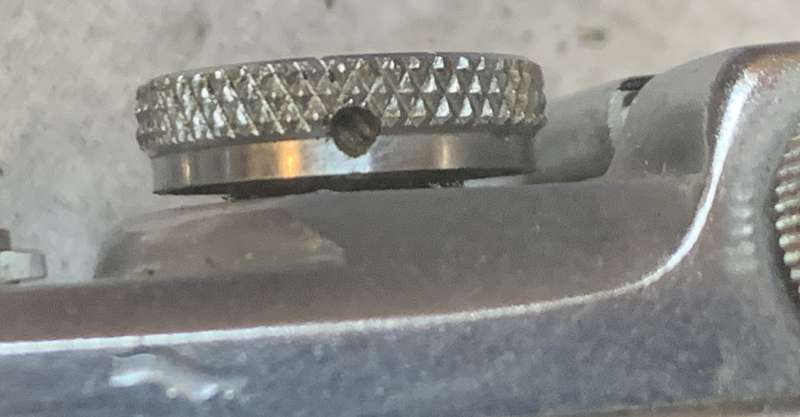
Locate and extract this screw so you can remove the shutter speed dial. You will have to wind the dial a bit to expose this for better access.
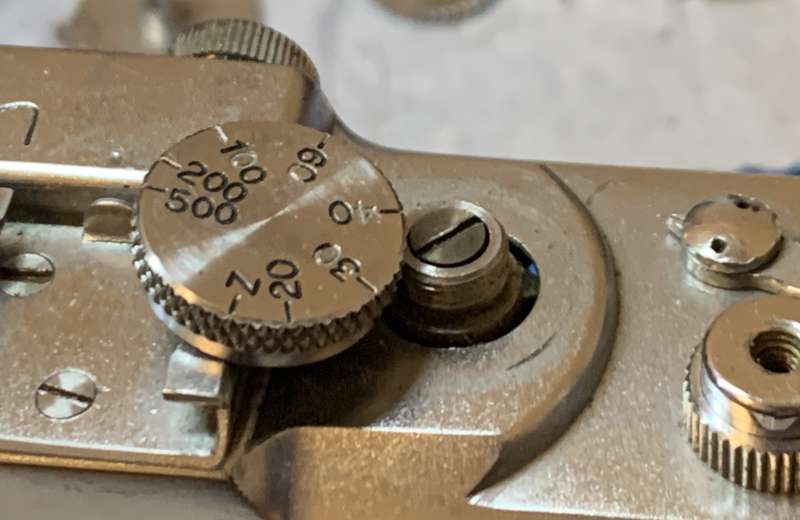
Once the screw is gone you can turn the shutter speed dial counterclockwise until it’s off.
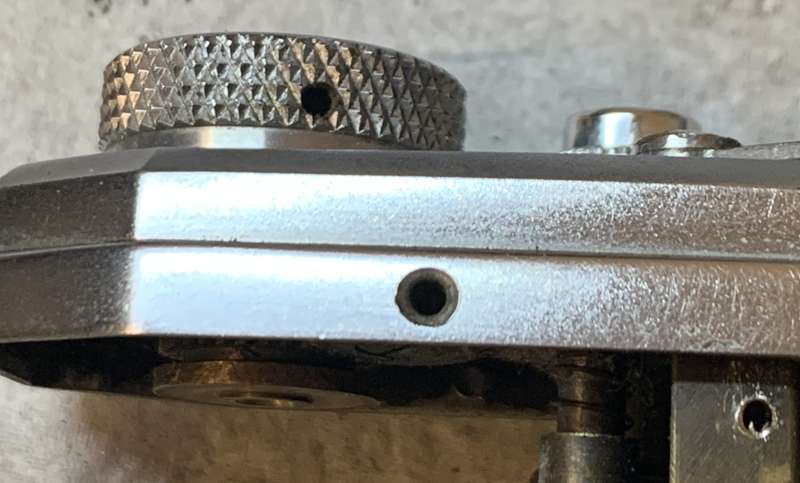
Carefully unscrew the film advance dial after extracting its screw, you do this by gripping it tightly with a rubber sheet then grasp the part underneath it with another rubber sheet. Doing this will help prevent the gear’s teeth from being damaged.
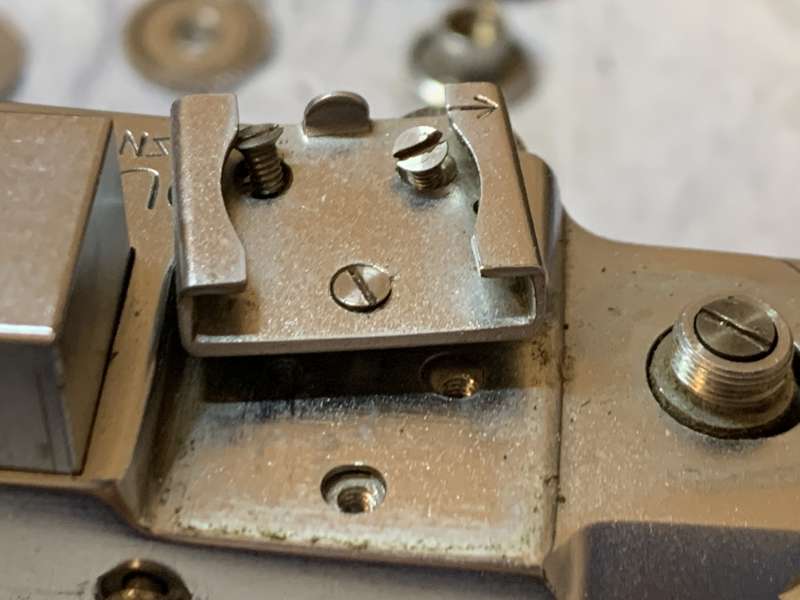
Extract the screws of the accessory shoe so you can get it off. At this point you will also need to extract all of the other screws that can be found externally before you proceed.
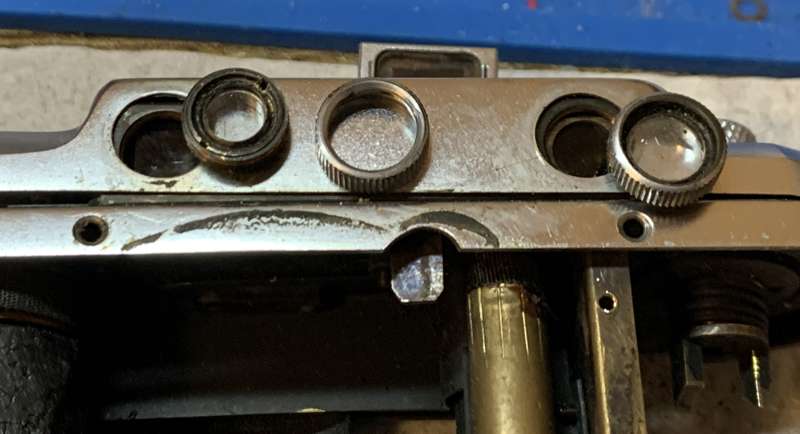
Carefully remove the windows and the prism with rubber tools or what ever is safe to use.
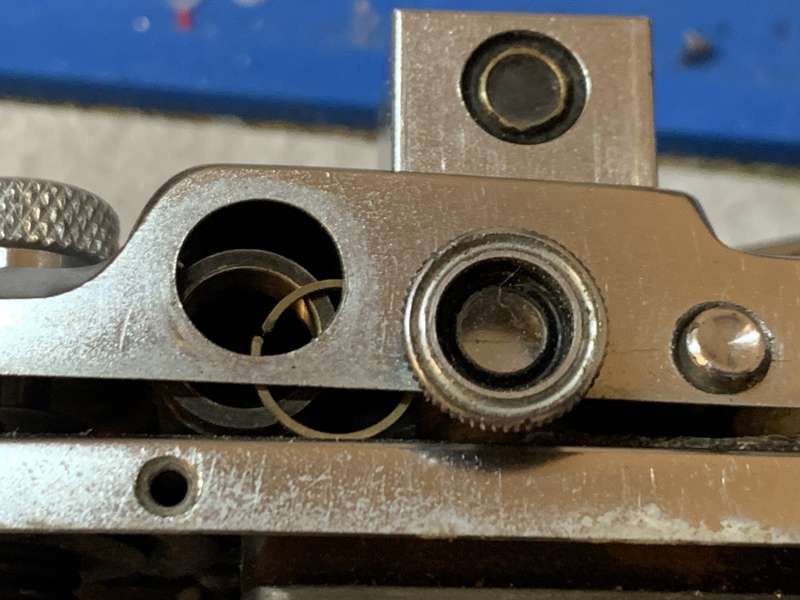
Extract the eyepiece carefully and do not lose the shim underneath it.
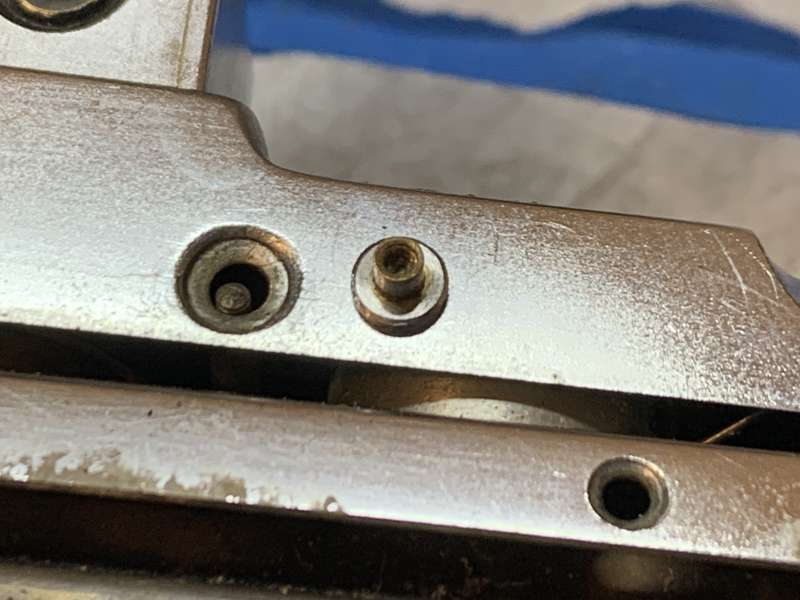
Carefully unscrew this button for the pop-up viewfinder. It can be difficult to remove but you should be able to get it off with perseverance or by using a special tool like a flex-clamp.
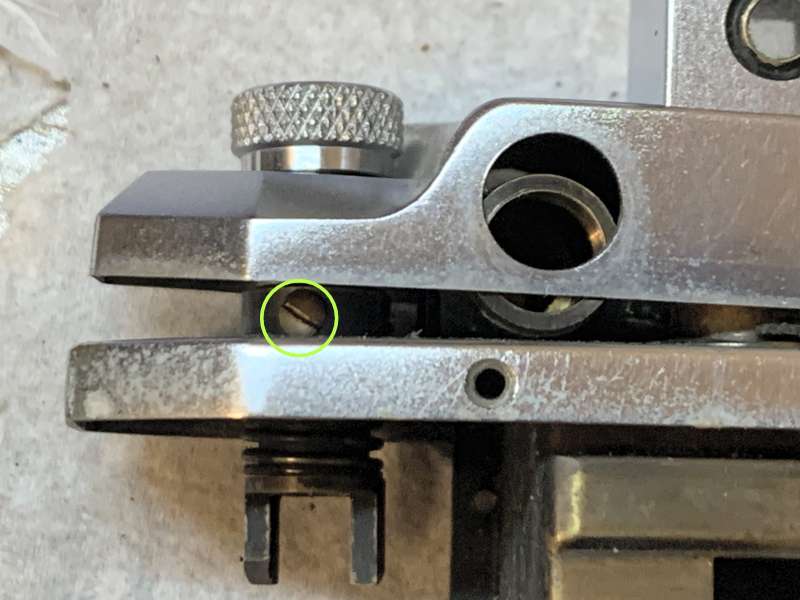
The rewind dial can only be removed by carefully lifting the upper shell slightly to expose its screws. Carefully turn the dial to get it off while holding on to the fork with your fingers.
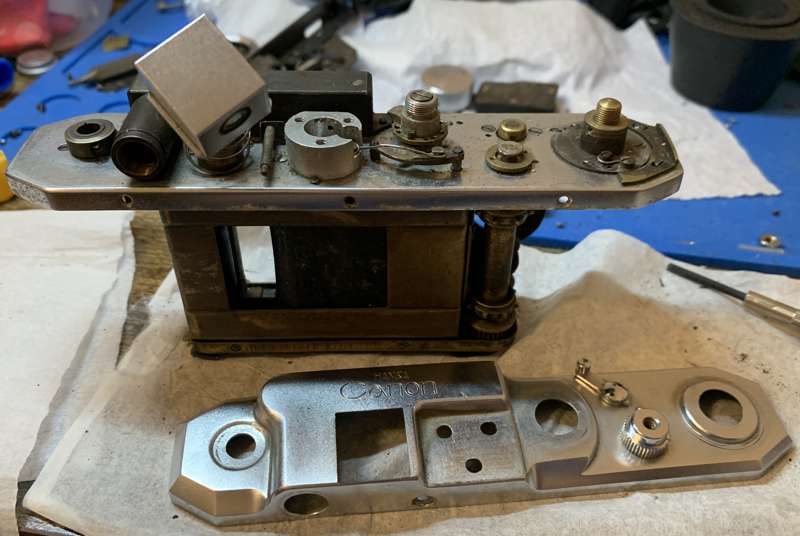
The upper shell came off easily after that.
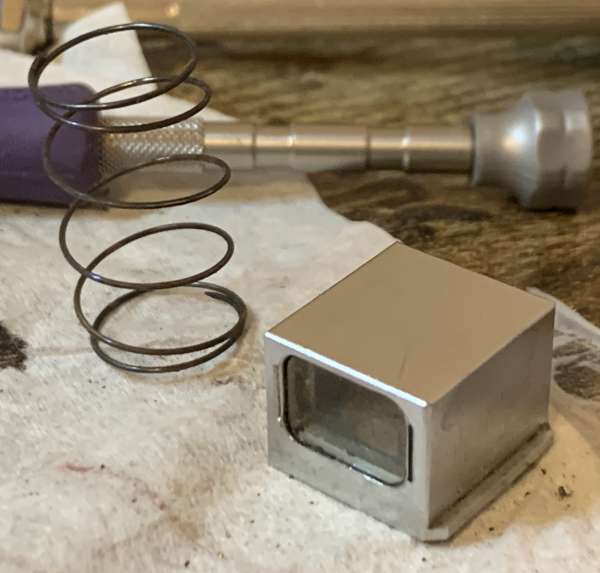
Pull the pop-up viewfinder off along with its spring. Clean the glass with a Q-tip and be sure that it’s clean before you continue. I tried to dismantle this even further but it seems that everything was glued, I do not think it’s possible to go any further than this.
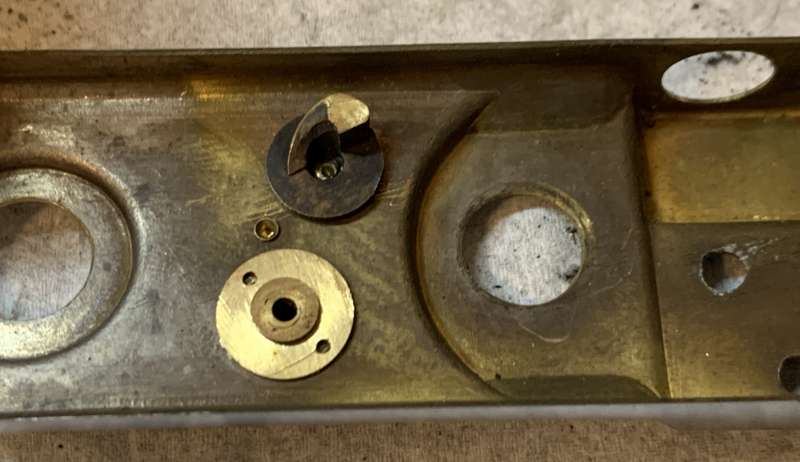
The following step are not necessary at all but if you really wanted to clean everything then why not? Unscrew this ring to remove the shutter assembly.
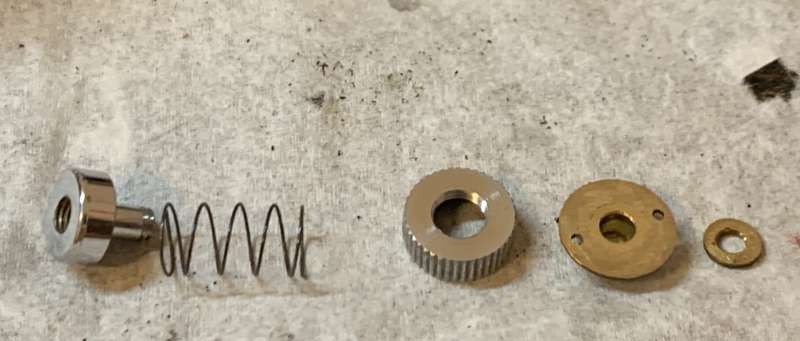
This is how it is supposed to look like.
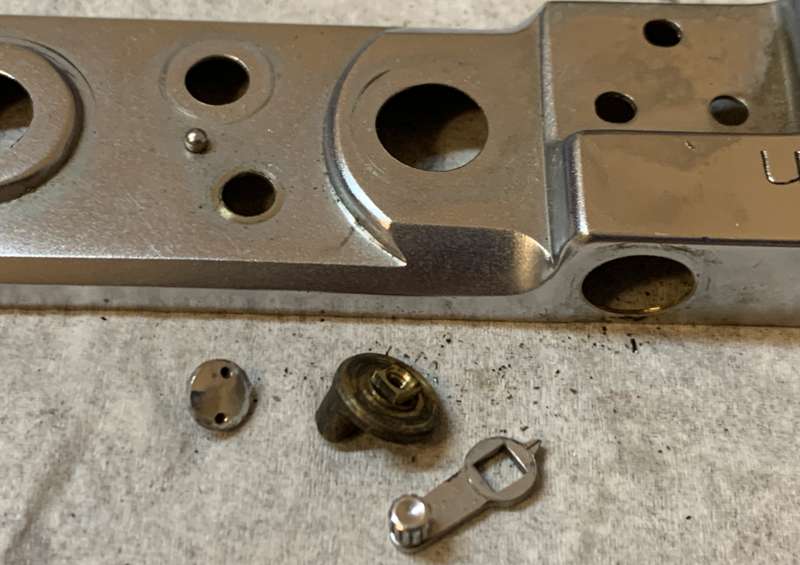
Extra effort was done to remove the rewind/advance switch lever. You can leave just like that but it is best to clean it well.
At this point I have all of the major parts in pieces so I cleaned them in the ultrasonic cleaner. The small parts were all cleaned manually for safety. This is just the beginning because we still haven’t touched the shutter just yet. We need to clean all the gunk that had accumulated inside which is even nastier than I thought.
Conclusion:
Taking apart the exterior took me less time than expected since I have the tools and I am familiar with these type of cameras. What took more time is the cleaning part of the process as it’s absolutely filthy inside. It’s as if nobody worked on it for decades. I’m sure that it was repaired at some point because I saw scars on the screws and the curtain does not look original at all. I am just glad that most of the camera is intact despite the fact that it is missing something insignificant underneath, which is the brake for the shutter. It is something it can do without.
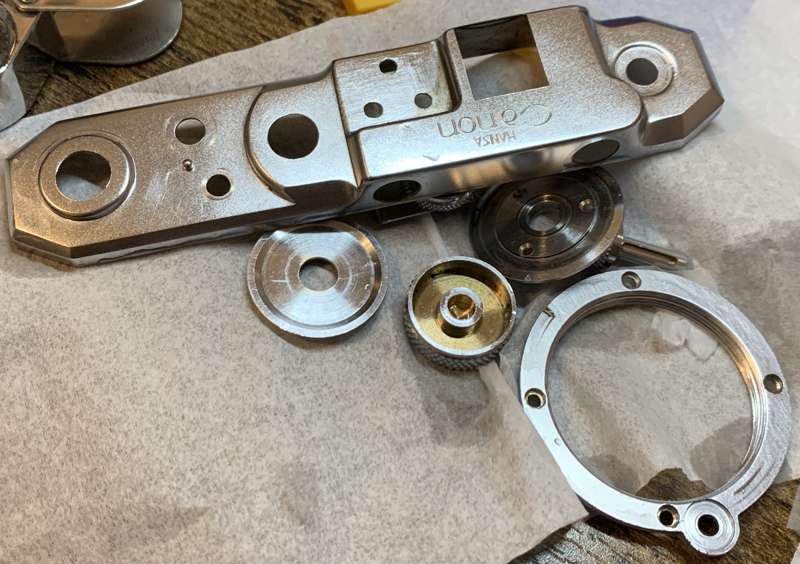
After cleaning in the ultrasonic tank things look much better.
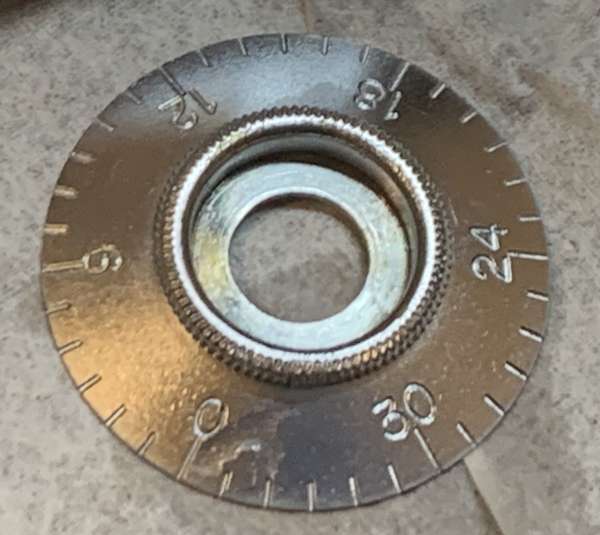
All of the paint has been stripped clean but I always redo them anyways.
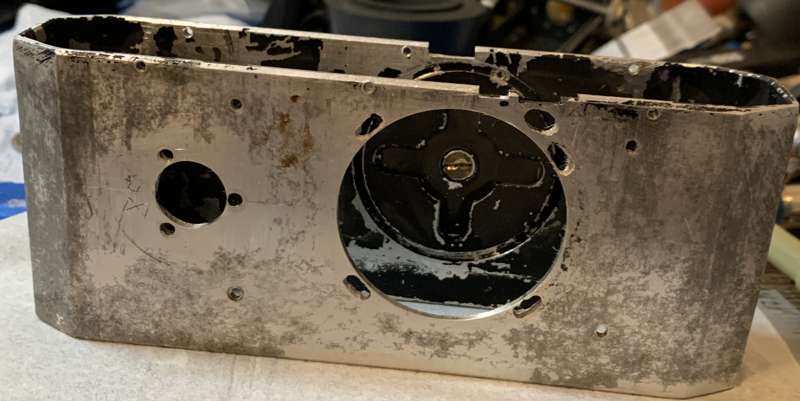
The shell looks a lot better now but sanding the corrosion that has been left behind made it cleaner.
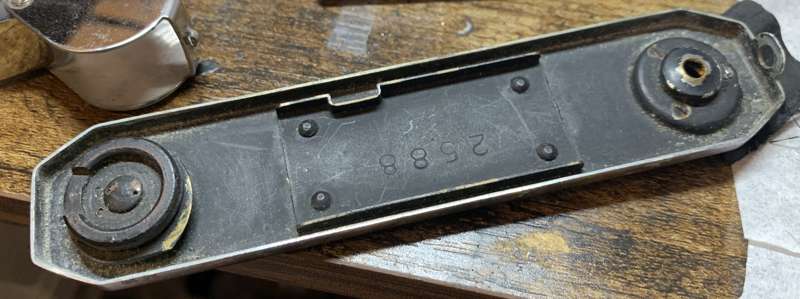
The bottom plate is filthy and will be taken apart soon.
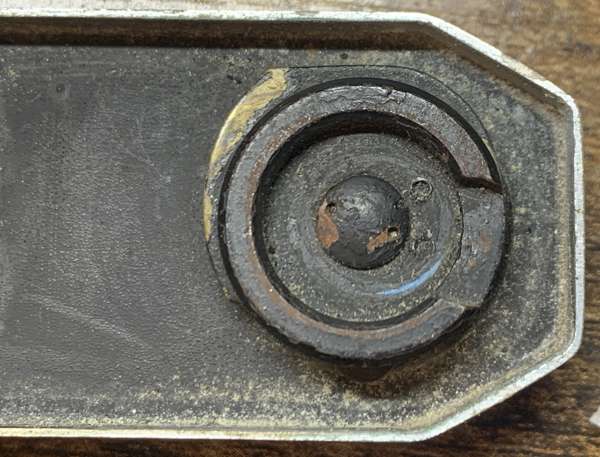
The screw is rusty, this needs to be taken apart to the last screw in order to make sure that there are no germs left behind!
That’s it for today’s article! Are you excited? This is one of the highlights of this site since I have not seen anyone write anything about this camera’s internals nor repair. I am not the history guy so if you’re curious you can find more information out there. I am more focused on things that nobody else could give. If you like my work, please consider sharing it with your friends. Supporting the site is also welcome because it helps me maintain it, a huge chunk of it goes to the upkeep like hosting and all that. You’re also helping me purchase, process, and scan film because it’s not cheap anymore. Film photography has become an expensive hobby in recent years. Thank you very much for your support! Just think of me as the busty waitress at the restaurant, instead of a nice drink I serve you the best information on the internet, with or without the boobs. Thank you all and come back for the rest of the series!
Help Support this Blog:
Maintaining this site requires resources and a lot of time. If you think that it has helped you or you want to show your support by helping with the site’s upkeep, you can make a small donation to my paypal.com at richardHaw888@gmail.com. Money isn’t my prime motivation for this blog, I believe I have enough to run this myself but you can help me make this site grow.
Leave me some tip?
Thank you very much for your continued support!
$2.00
Helping support this site will ensure that it will be kept going as long as I have the time and energy for this. I’d appreciate it if you just leave out your name or details like your country’s name or other info so that the donations will totally be anonymous. This is a labor of love and I intend to keep it that way for as long as I can. Ric.


1 Comment (+add yours?)