
Hello, everybody! I’m not feeling well today so I’m going to keep this short. I hate winters because it can get too cold for me to do anything at home. I am not as robust as I used to. I was almost immune to sickness but it looks like my body is telling me that I am officially a middle-aged person. On the topic of toughness, I will show you guys today a very tough Nikkor that was made a long time ago but is still worth looking at these days. Read on.
Introduction:
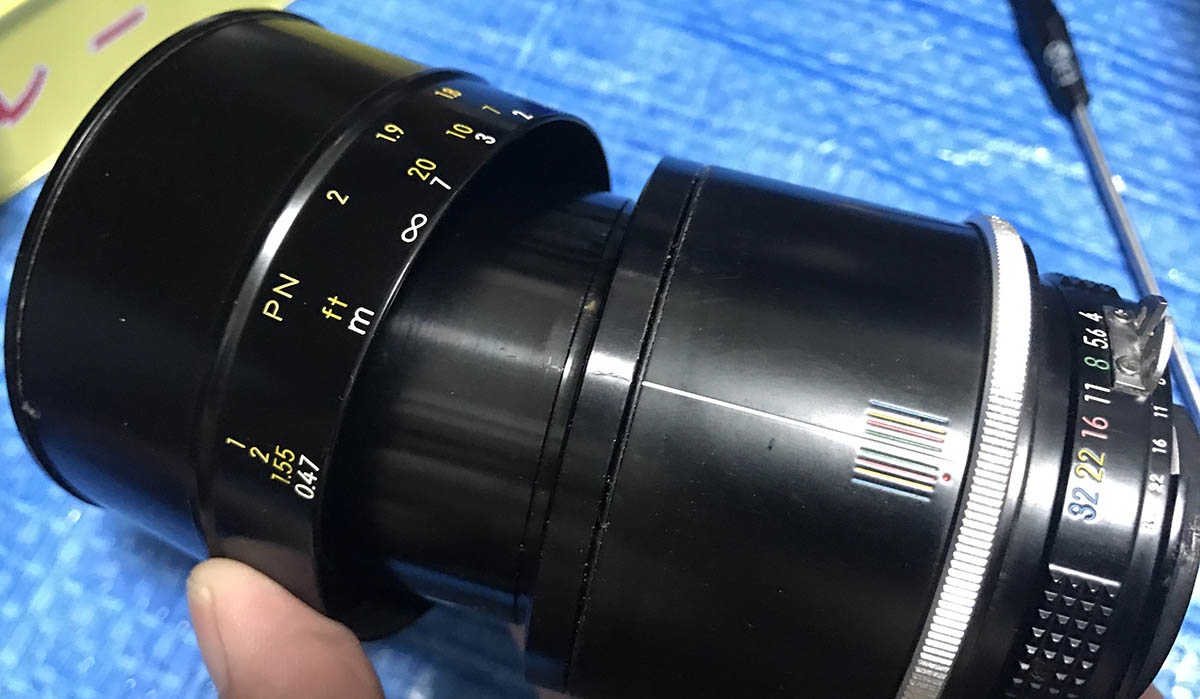
Today, I will introduce to you the Micro-Nikkor 105mm f/4 Ai. This fine lens debuted in the mid 1970s and it’s the first Nikkor of its class. Back then long macro lenses needed a bellows unit for you to focus. This lens changed it all by incorporating the 105/4 bellows Nikkor to a real focusing unit so you can enjoy focusing it like any normal lens. It was very popular and Nikon took a long time to make a successor to this because it’s just so good. This lens is a favorite amongst flower photographers and if you just do a bit of searching online you will find lots of people still using it. This went though a couple of versions but the optics remained the same essentially.
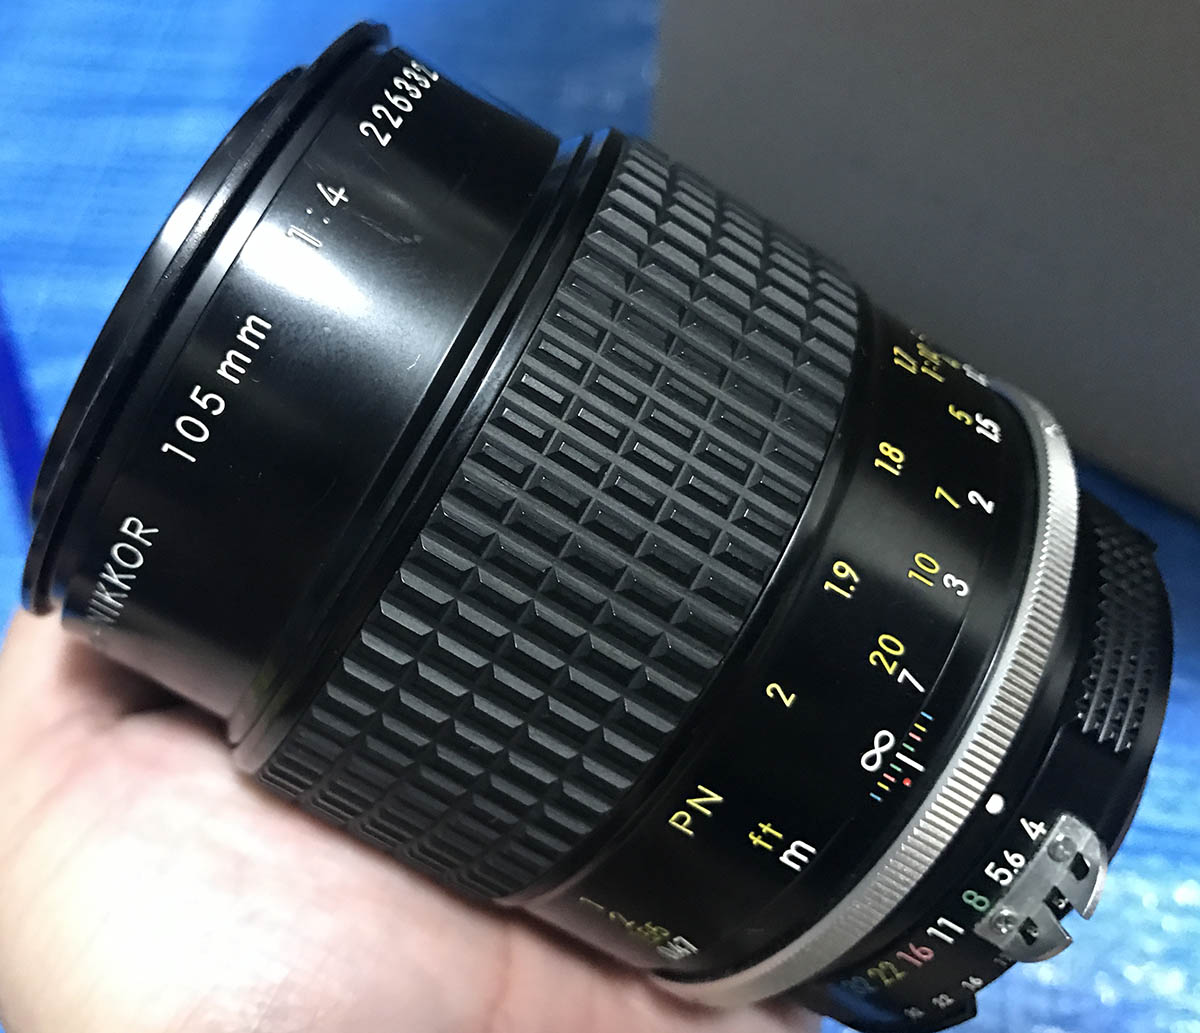
It’s a fat lens, it had to be because it has to house the helicoids that enables it to extend so you can get a higher magnification. It’s a simple lens but this is all you need for taking beautiful pictures of little things. The build quality is great, something that you don’t see these days. It can survive a beating so to speak, a true professional tool.

The Micro-Nikkor 105mm f/4 Ai only goes down to 1:2 magnification on its own. A Nikon PN-11 extension tube is needed in order for this to achieve 1:1 magnification, that’s why there’s a “PN” engraved on the focusing scale. This displays your magnification ratio when you mate it with this. This is a very well-made lens, it is heavy and it’s not flimsy in any way. There’s no plastic parts used in or out of this and this will last you more than a lifetime if you took care of it. The Micro-Nikkor 105mm f/2.8 Ai-S replaced this, it’s smaller and lighter. The optics have become more complicated since CRC was also implemented. I’ll say that the most important improvement is the brighter maximum aperture of f/2.8. This is important because as you extend your lens for higher magnification, the light reaching the mirror, sensor or film is also impacted. This will give you a loss of a stop’s worth of light or even more if you have extension tubes in your setup. This will give you a darker viewfinder and it can be difficult to focus precisely. Many will say that the Micro-Nikkor 105mm f/4 Ai is sharper and I think that’s true as well but it’s a difficult task to focus with a darker viewfinder which makes the later lens a more practical choice for some.

The Micro-Nikkor 55mm f/2.8 Ai-S is a good companion to this lens. They are both Micro-Nikkors, their focal lengths compliment each other. They have different uses, I would say that if you are shooting bugs, flowers and other things where natural lighting and keeping your distance from your subject are important you’ll want something that’s a little longer. The shorter focal length is great for duplication and documentation, its wider FOV is great for food photography or other types of photography where you will want your subject to not look so tiny because using a longer focal length will compress your frame, making your subjects appear smaller.
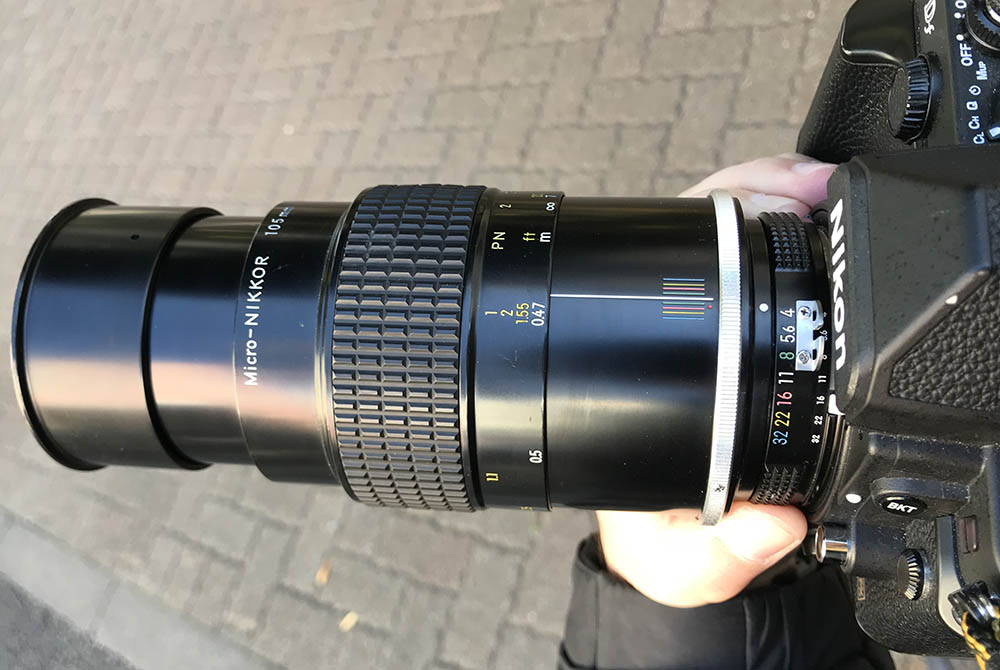
This is how long this can be when fully-extended with the hood deployed. It has a built-in hood which is handy. Add some extension tubes to this setup and you will end up with a long, heavy setup.
The key to this lens’ optical performance is the very simple 5-elements-in-3-groups design. Less is more in lens design, the simpler the lens design, the better in the traditional sense. This is true in most cases but there are times when you would need more elements to correct for the optical flaws. Check out my samples below to see what I mean.

It can be a bit hard to focus on moving subjects with an f/4 lens but here’s a sample of the lens when used for general photography. The high-resolution of this lens is great and this will not be out-resolved by high MP cameras.


(Click to enlarge)
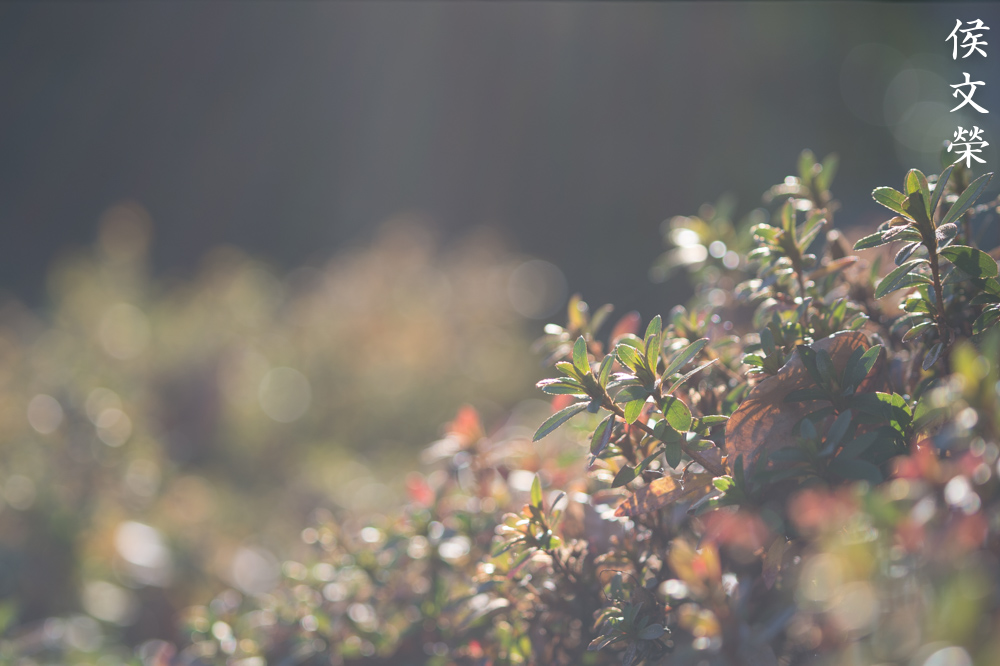
This seems pretty resistant to ghosts if shot with a strong light source within the frame, there is only a small blob. It’s really small, I initially thought that it’s a leaf on the branch. This is due to the simple optical construction of this lens, simple is best, less is more in lens design. The beautiful sunstars look gorgeous so this will be perfect for shooting jewelry.
While ghosts isn’t much of an issue, flare-resistance is terrible. Stopping this down won’t help much and I had the hood deployed here. This could be due to the old-tech coatings used on this. I wonder if this is also the case for film since film is less-reflective. I know that the sensor’s shiny surface impacts a lens’ ghost-resistance but maybe it also affects flaring? I do not think this is the case but who knows? The good news is this is sharp despite the terrible flare. If you can just zoom-in on what’s in-focus, it is obvious that the result is sharp despite the loss of contrast due to flaring.


(Click to enlarge)
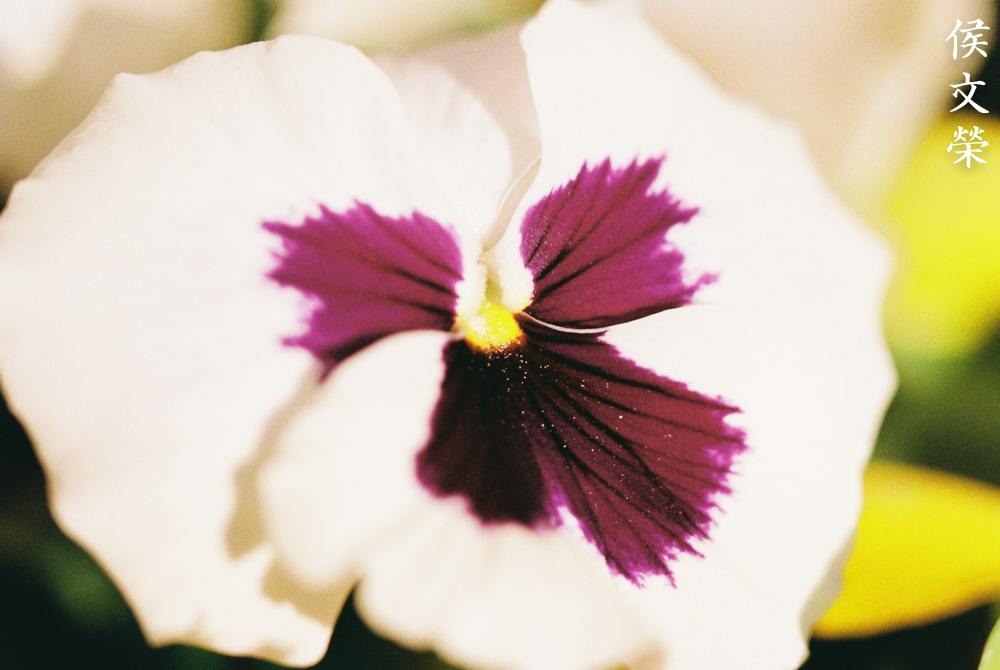
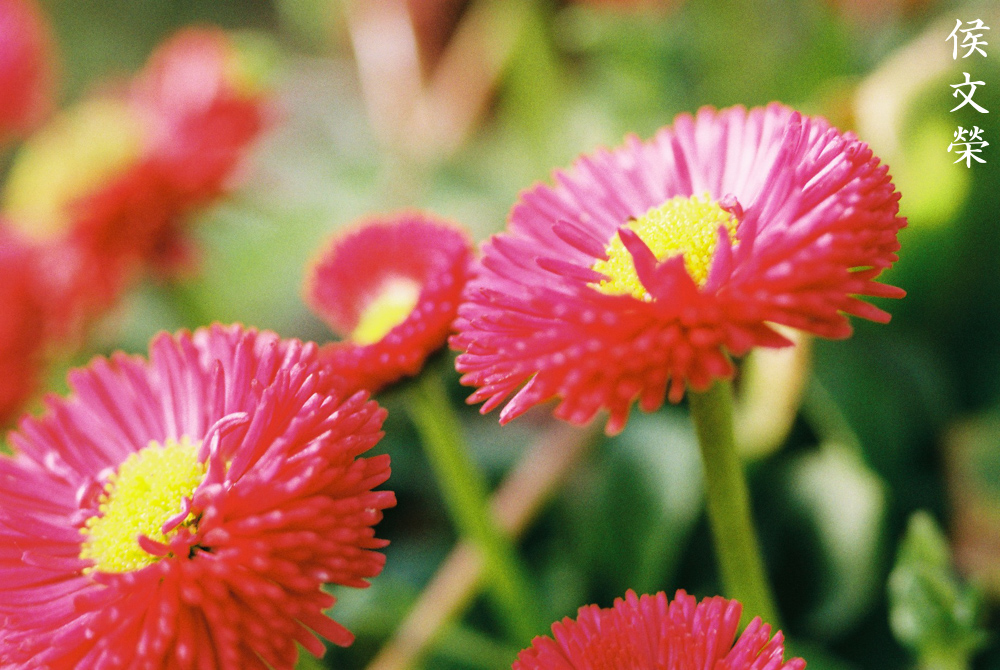
Here are some more examples of more practical pictures. The bokeh quality is nice at this magnification as expected from a macro lens. There is a little hint of chromatic aberration wide-open but it’s not something to get worried about.
Here is another picture. Notice how sharp this is and how the background melts into a wash of colors?
Here’s a 1:1 crop from the Nikon Df. See how nice and sharp things are? You can also find some hints of chromatic aberration on the bloom but that goes away when you stop this down. On the Nikon D750, this lens performed just as great despite the higher megapixel count.


(Click to enlarge)
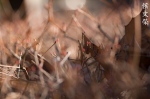
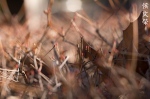
These were shot from f/4, f/5.6 and f/8 respectively. It’s already sharp at f/4 and it is near its peak resolution at f/5.6. At f/8, this lens is able to give you a good balance when it comes to speed and sharpness. I do not have pictures here but diffraction starts to affect the image at about f/16. I shot the last set with the twigs to show you how it performs when given a background like this where it’s easy to show ugly bokeh, it is expected that this lens failed a bit here but that’s no surprise. The positive side is this is very sharp as you can see from the samples. The center doesn’t really change a lot as you stop the lens down and the field curvature is reasonably flat.
Here’s a 1:1 crop wide-open. Great details! You can see the very fine details at the center.
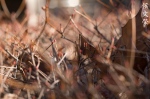
Here’s another picture with plenty of twigs. There’s a bit of vignetting when you shoot this lens at f/4 so if you’re bothered with it then shoot this lens at f/8. Again, pay attention at the “double-line bokeh”.
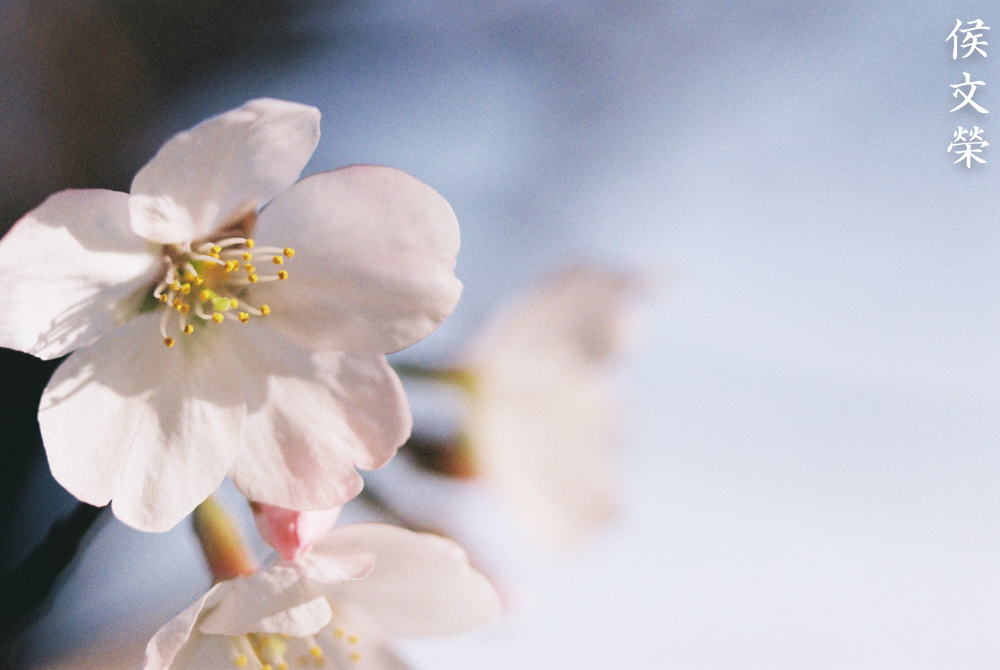
Let’s now see some photos that were taken with film. This lens was made to be used with film so it’s only fair that we judge it with its intended medium. Film has a unique look that’s difficult to simulate with a digital camera. The structure of film grain is organic, unlike digital noise. It helps mask flaws so you won’t see some things when you shoot with film such as the rendering of the out-of-focus details or even ghosts since film is less-reflective while a sensor has a mirror-like finish that can reflect light back to the elements. It is the reason why we’re interested in seeing more film photos. I shot thees with a Nikon F6 loaded with Kodak Gold 200.
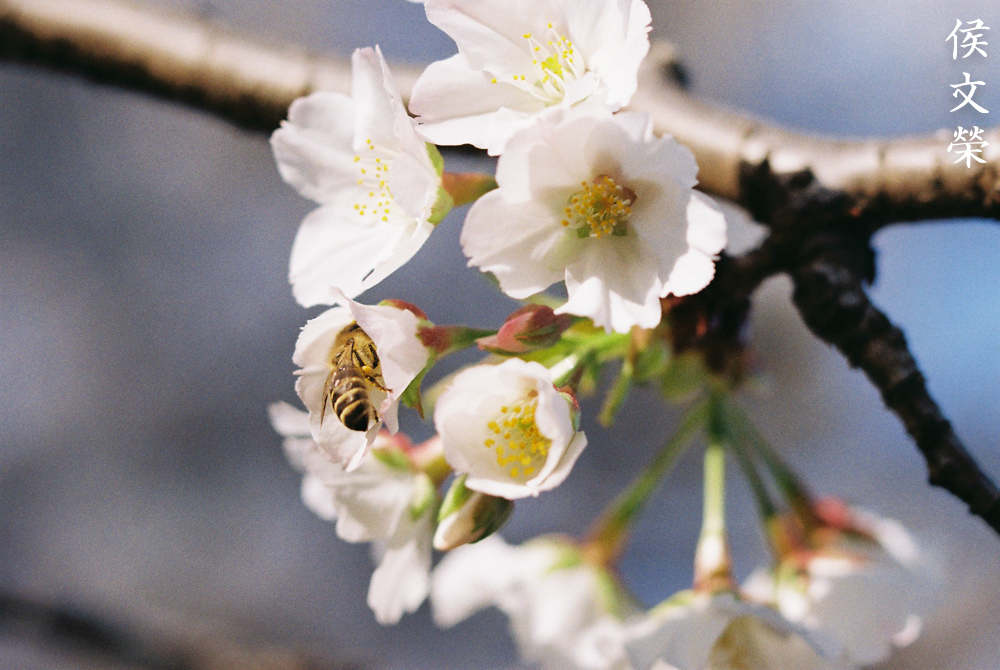
The long 105mm focal length enables you to shoot from a distance so you’re not going to scare your subjects. A shorter macro lens won’t be helpful here since the bee would’ve been gone once I pressed the shutter. Focusing this is not easy with subjects that move erratically like this bee. Pre-focusing helps a lot, it’s something that many photographers forgot to do since autofocus is so convenient.

Bees-in-flight is certainly very challenging, specially if you’re using film. You don’t have the luxury of “machine-gunning” your subject, you only have 36 frames. It requires a lot of patience and luck to pull something like this. This is a lucky shot, to get this I had to stop-down the iris a bit to get more depth-of-field.
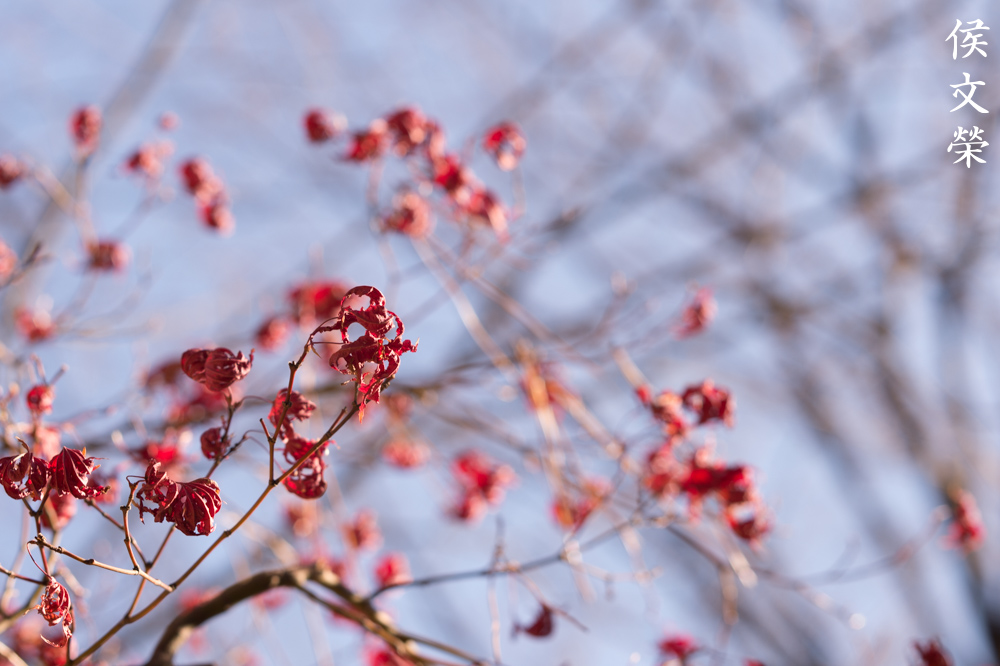
A longer lens can make your subject seem smaller thanks to foreshortening. I would have taken this with a wider lens if I had a choice. Using a long lens is a matter of convenience or how you imagine your scene to be. It can be a creative or technical choice.
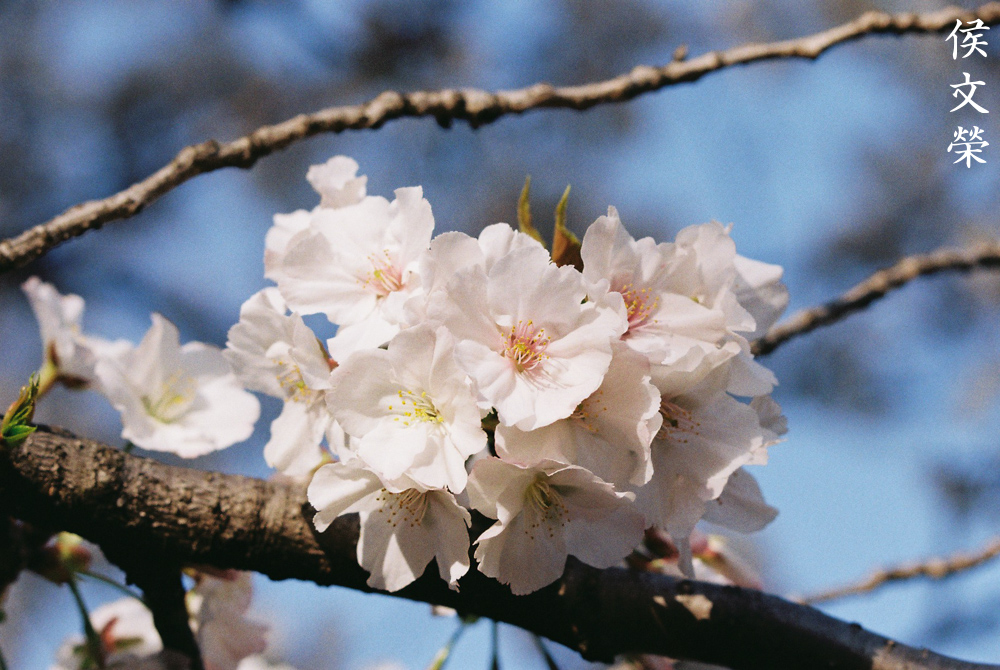
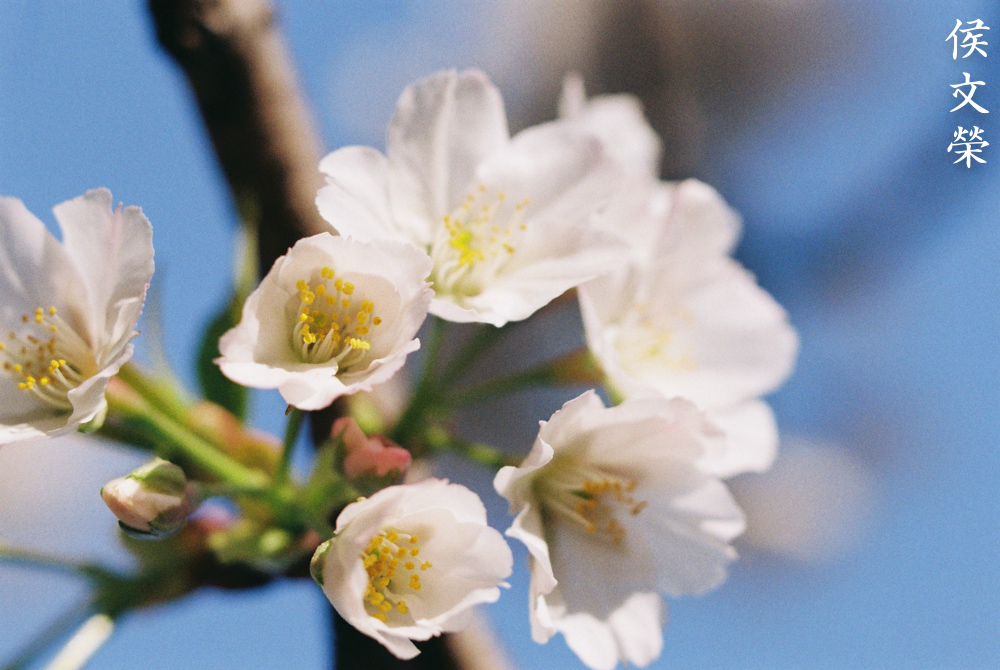
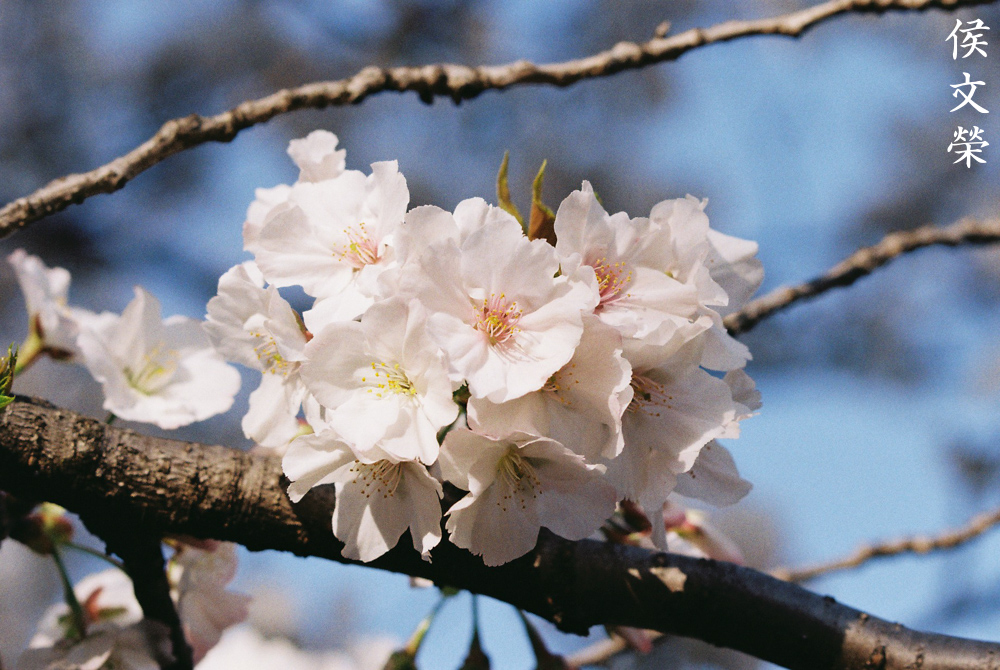
A longer lens will flatten your perspective, enabling this kind of look. Using a wider lens won’t give you the same effect but it will allow you some reach. I’m not tall so a long lens enabled me to shoot this sakura cluster.
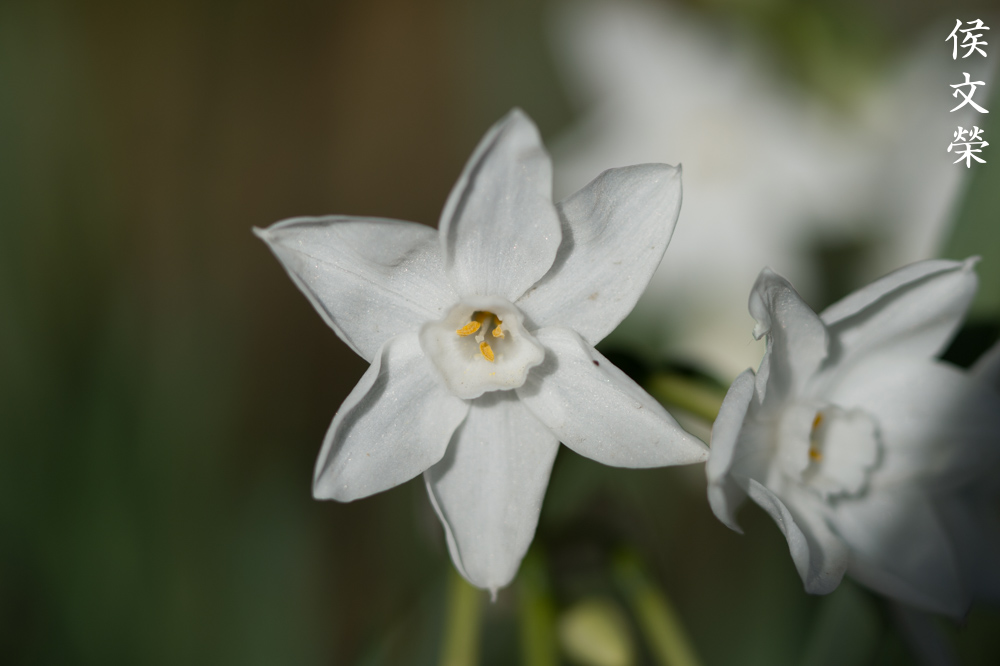
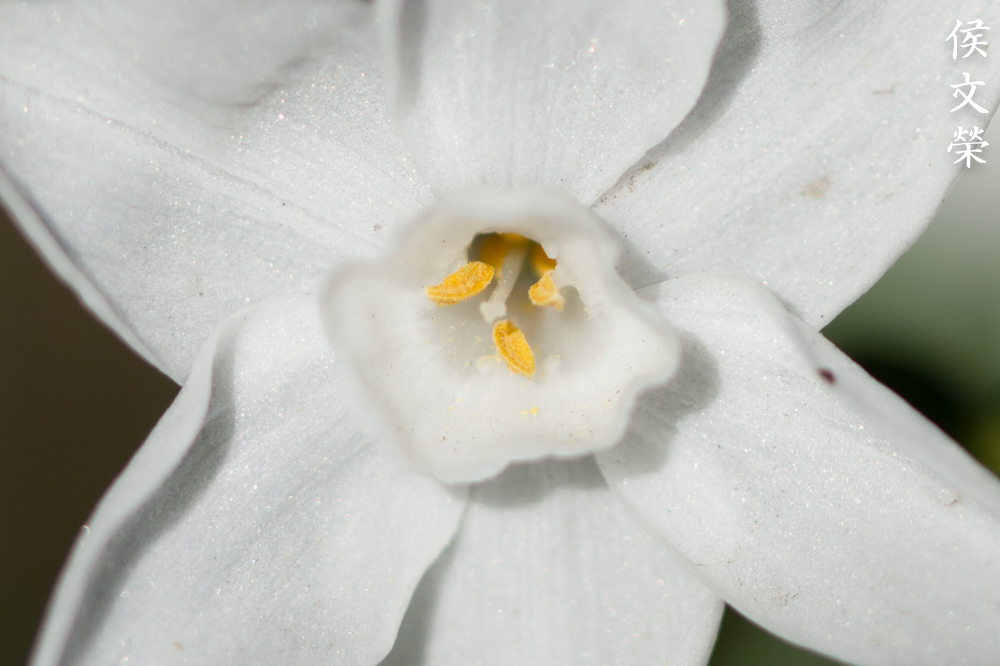
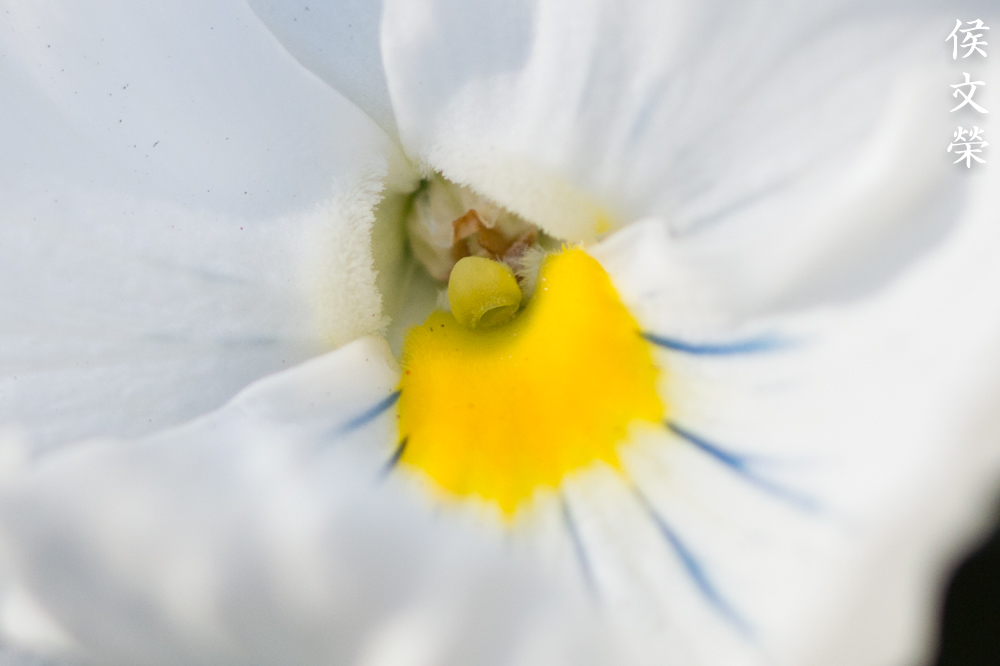
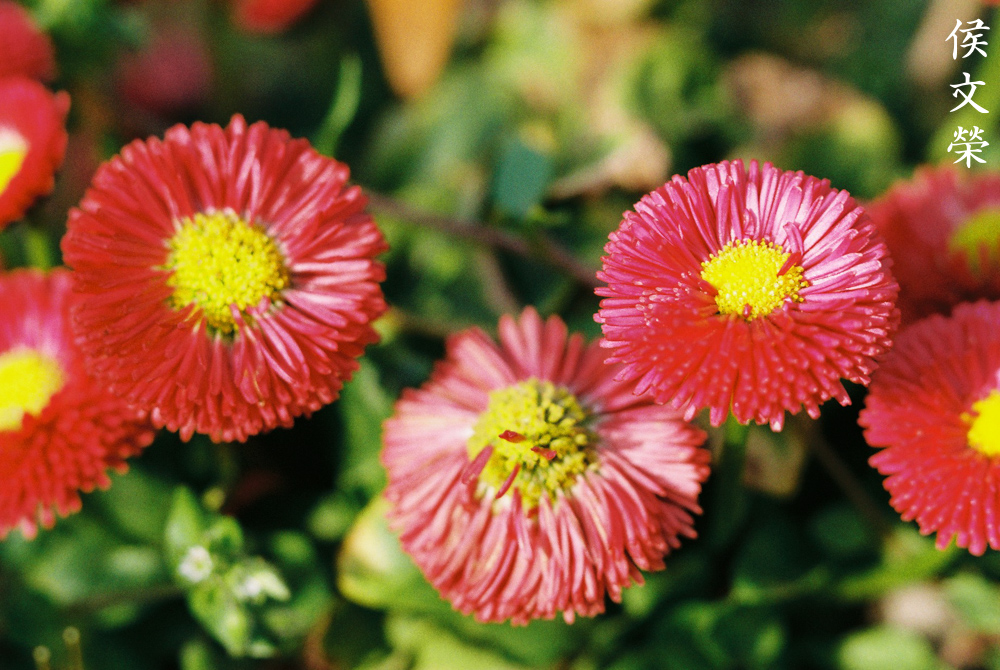
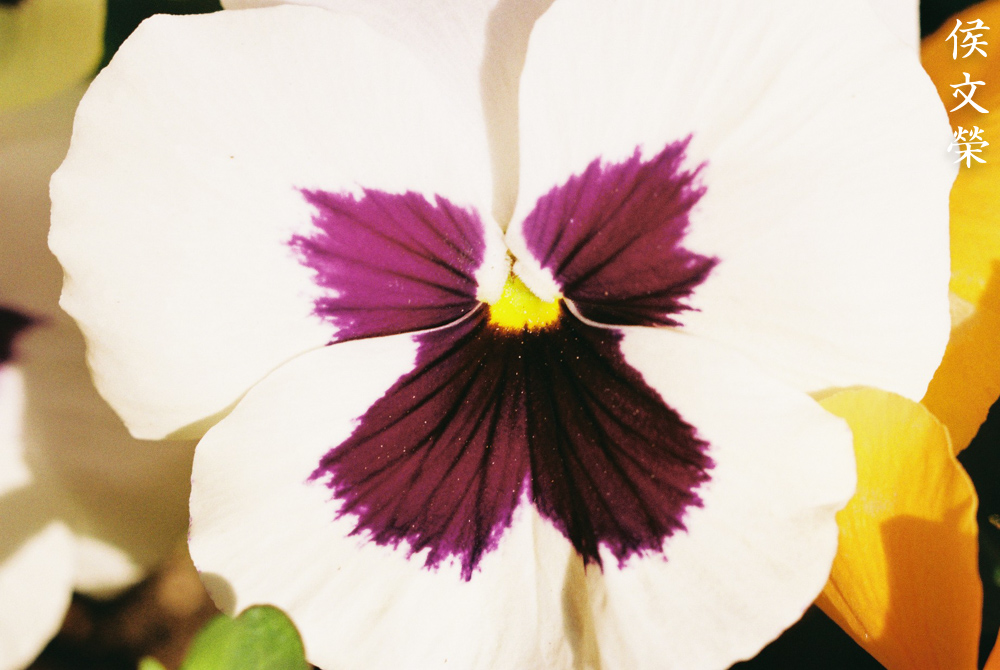
I am impressed by how well this lens handled this shot, the white petals are over-blown but that’s how it’s supposed to be exposed anyway. I do not see alarming amounts of chromatic aberration despite it. Sharpness is excellent as evident in how well the pollen was rendered.
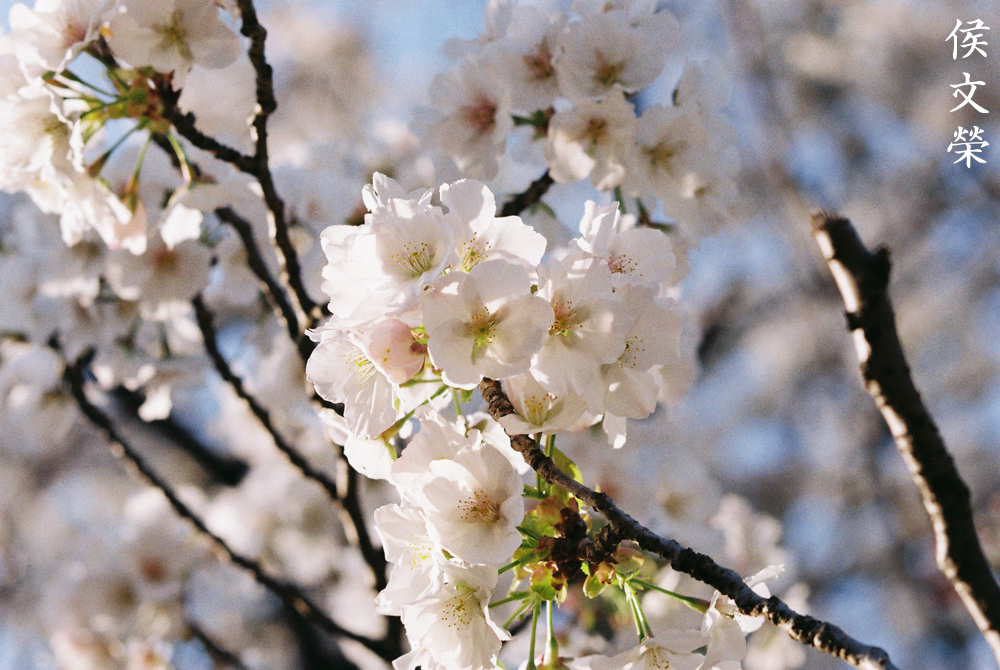
The corners look decent, too. It’s not as good as the center but it’s not what I would call bad at all.
(Click to enlarge)
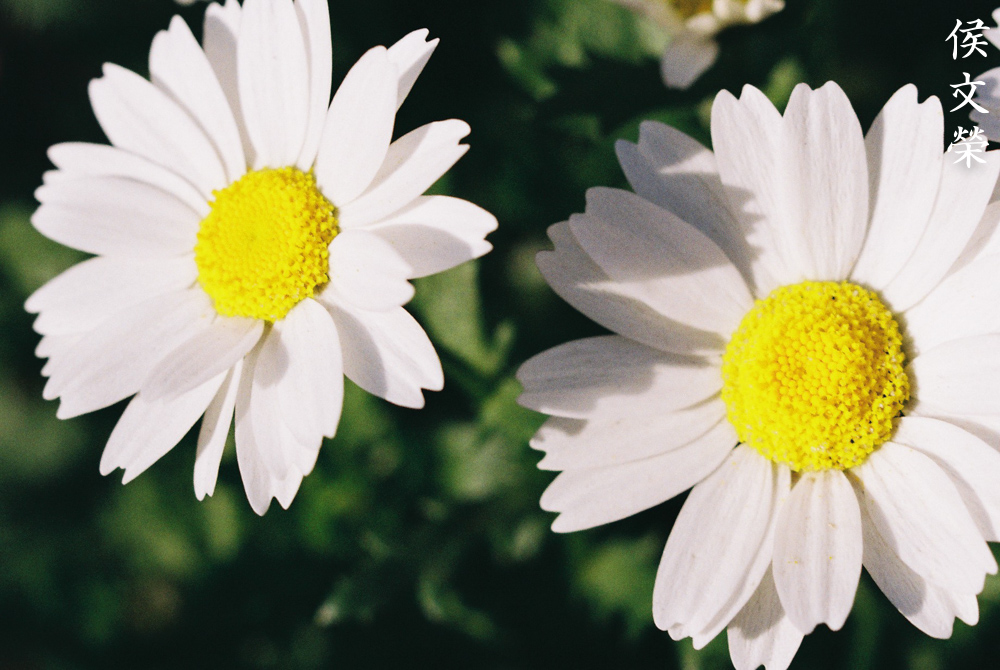
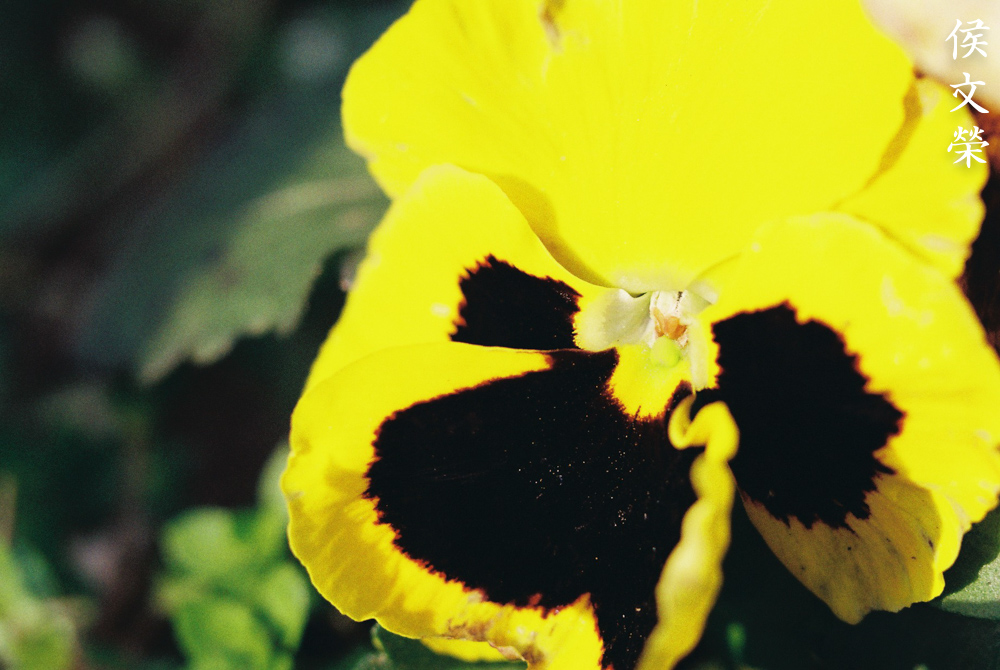
Here are more photos for you to enjoy. This is a very practical lens, it’s great for general photography and it’s something that you should consider if your main medium is film. These should give you a better understanding of how it performs with film, you don’t see a lot of samples online on this.
This is a lovely lens, something that every macro photographer should think about. I can say that it’s sharper than the Micro-Nikkor 105mm f/2.8 Ai-S but that’s just me and my observation. The Micro-Nikkor 105mm f/2.8 Ai-S is not cheap but it offers a brighter view which can be handy when shooting close and specially useful when shooting with an extension ring. It all depends on what you value, I’ll personally choose this one over the latter because mine is sharper. If you don’t have much money to spend on a macro lens then the Micro-Nikkor 105mm f/4 Ai will be the obvious winner. You can’t go wrong with either lens, it all filters down to how much you have and what you are willing to compromise.
Before We Begin:
If this is your first attempt at repairing a lens then I suggest that you check my previous posts regarding screws & drivers, grease and other things. Also read what I wrote about the tools that you’ll need to fix your Nikkors.
I suggest that you read these primers before you begin (for beginners):
Reading these primers should lessen the chance of ruining your lens if you are a novice. Before opening up any lens, always look for other people who have done so in Youtube or the internet. Information is scarce, vague and scattered (that is why I started this) but you can still find some information if you search carefully.
I highly recommend that you read my working with helicoids post because this is very important and getting it wrong can ruin your day. If I can force you to read this, I would. It is that important!
For more advanced topics, you can read my fungus removal post as a start. This post has a lot of useful information and it will be beneficial for you to read this.
Disassembly (Lens Barrel):
Taking the lens barrel apart isn’t difficult for this lens if you’re experienced with working with manual Nikkors. The one impression that stuck with me when I was working with this was the amount of adhesive used on this lens. It can get pretty annoying really quick so I’m warning you now. Having said that, this lens is probably the easiest 105mm Micro-Nikkor around to service and it’s perfect for people who want to have a relaxing afternoon repairing lenses.
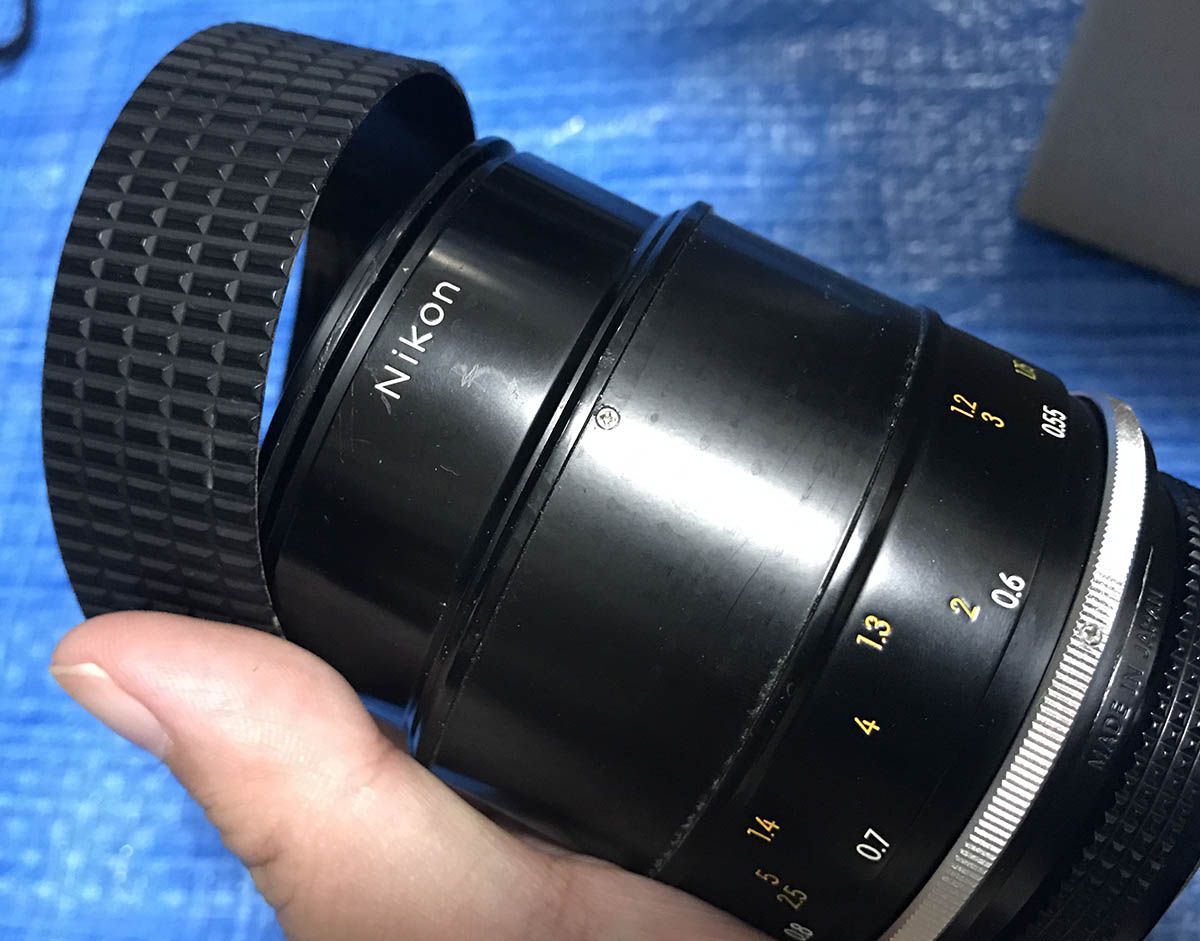
Remove the rubber by running a blunt, rounded peg like a toothpick under its whole circumference to lift it and be careful not to tear it.
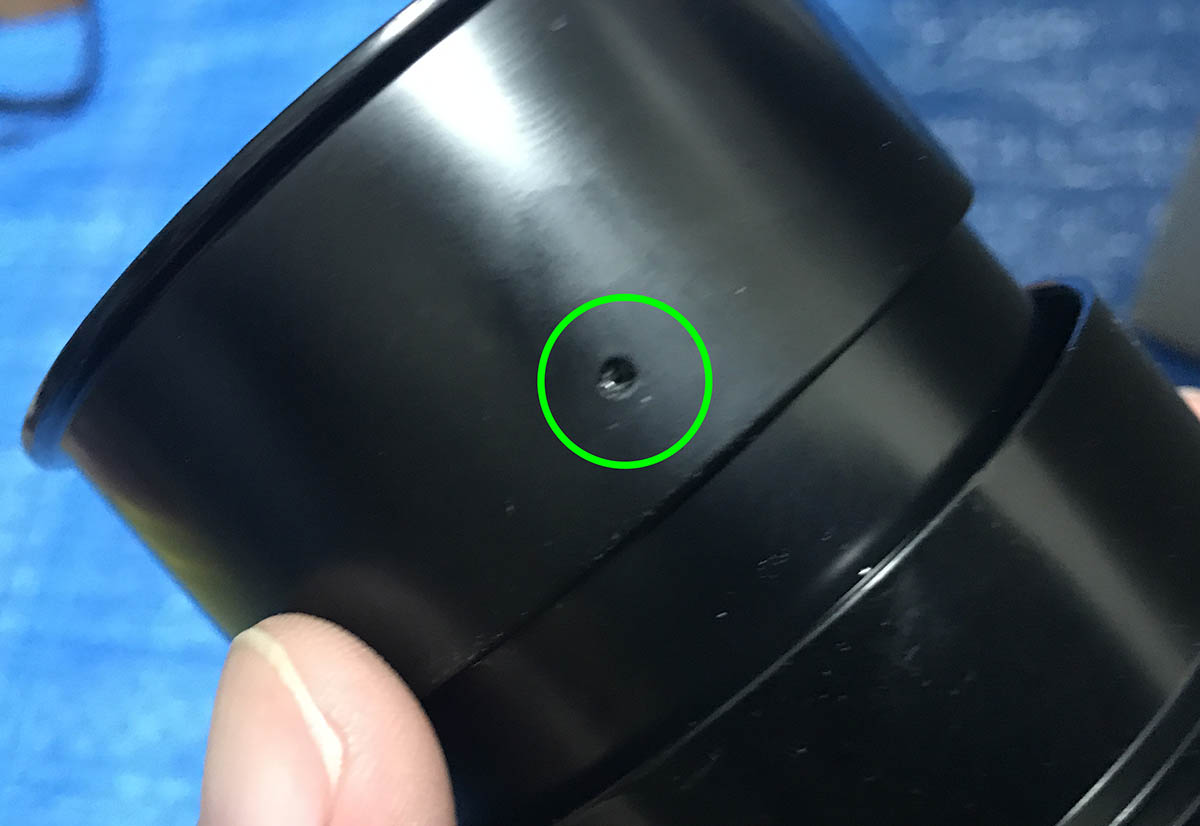
The front part is secured by a tiny grub screw. Rotate the hood until the hole is atop the screw, carefully extract it with a precision screwdriver. The grub screw’s slot can be delicate and brittle so be careful. If it doesn’t move, use a bit of solvent and try again later.
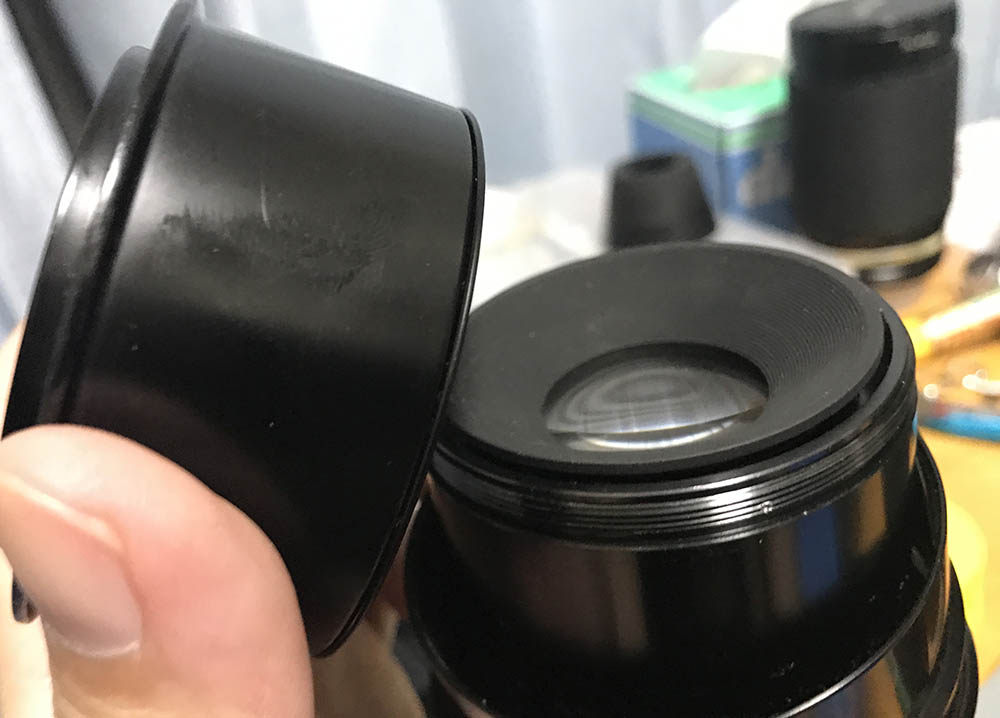
The front should be easy to unscrew once the screw is gone. See that small depression on the thread? That’s where the grub screw should sit when you reassemble it later. If this isn’t placed properly into the depression you may break that little thing or it may not get in properly.
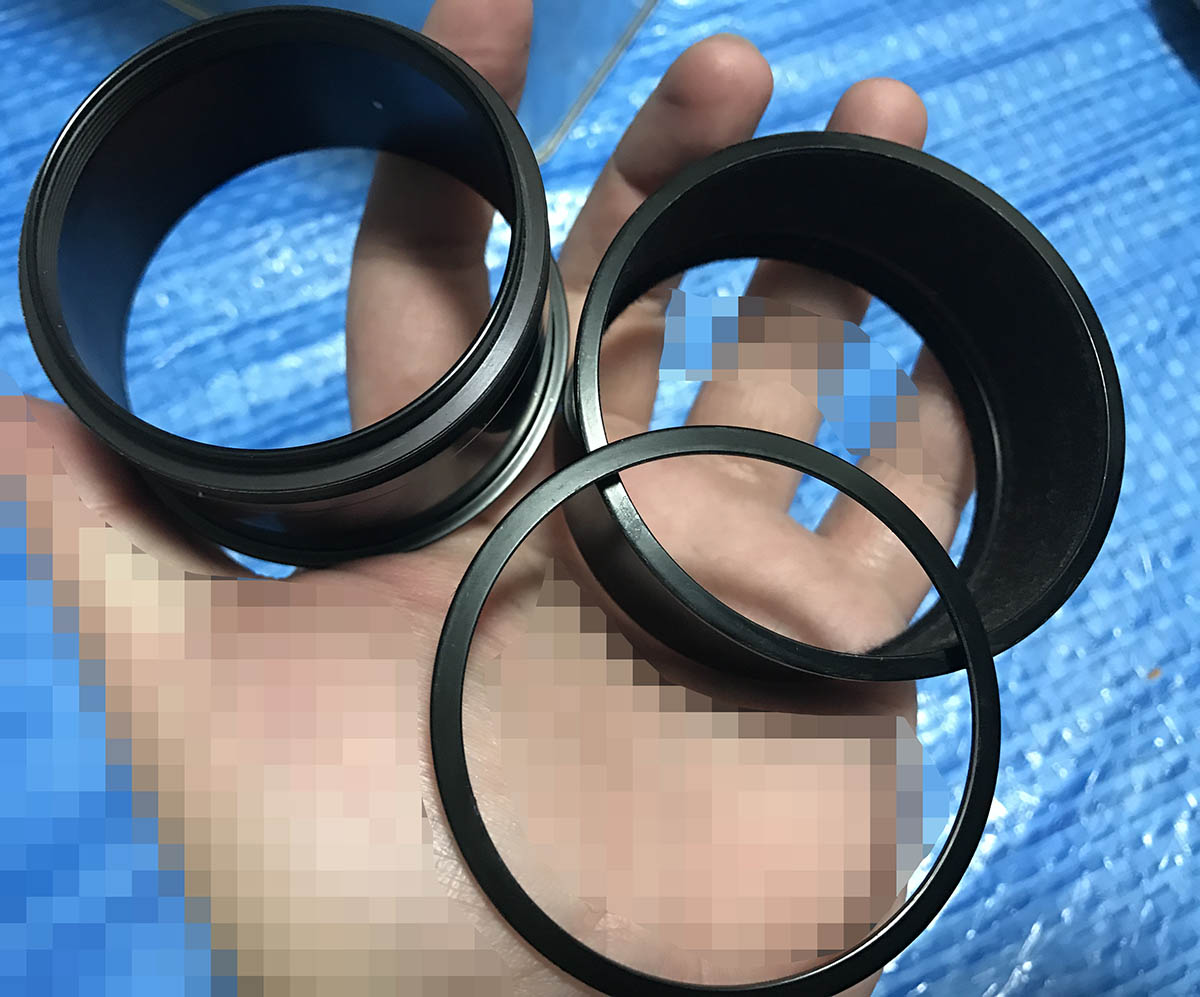
The front part comes in 3 parts, this includes the front ring, front bezel and hood.
The front part of the lens consists of the front ring and the hood. The front ring is used to secure objective so it doesn’t fall off. You can now safely pull the objective from the barrel of the lens. Note that the screw near the tip of the housing of the objective should line-up with the slot on the barrel. This is just a guide so the objective won’t rotate. Once the objective is gone store it in a safe place so it won’t be damaged while you work on the barrel.
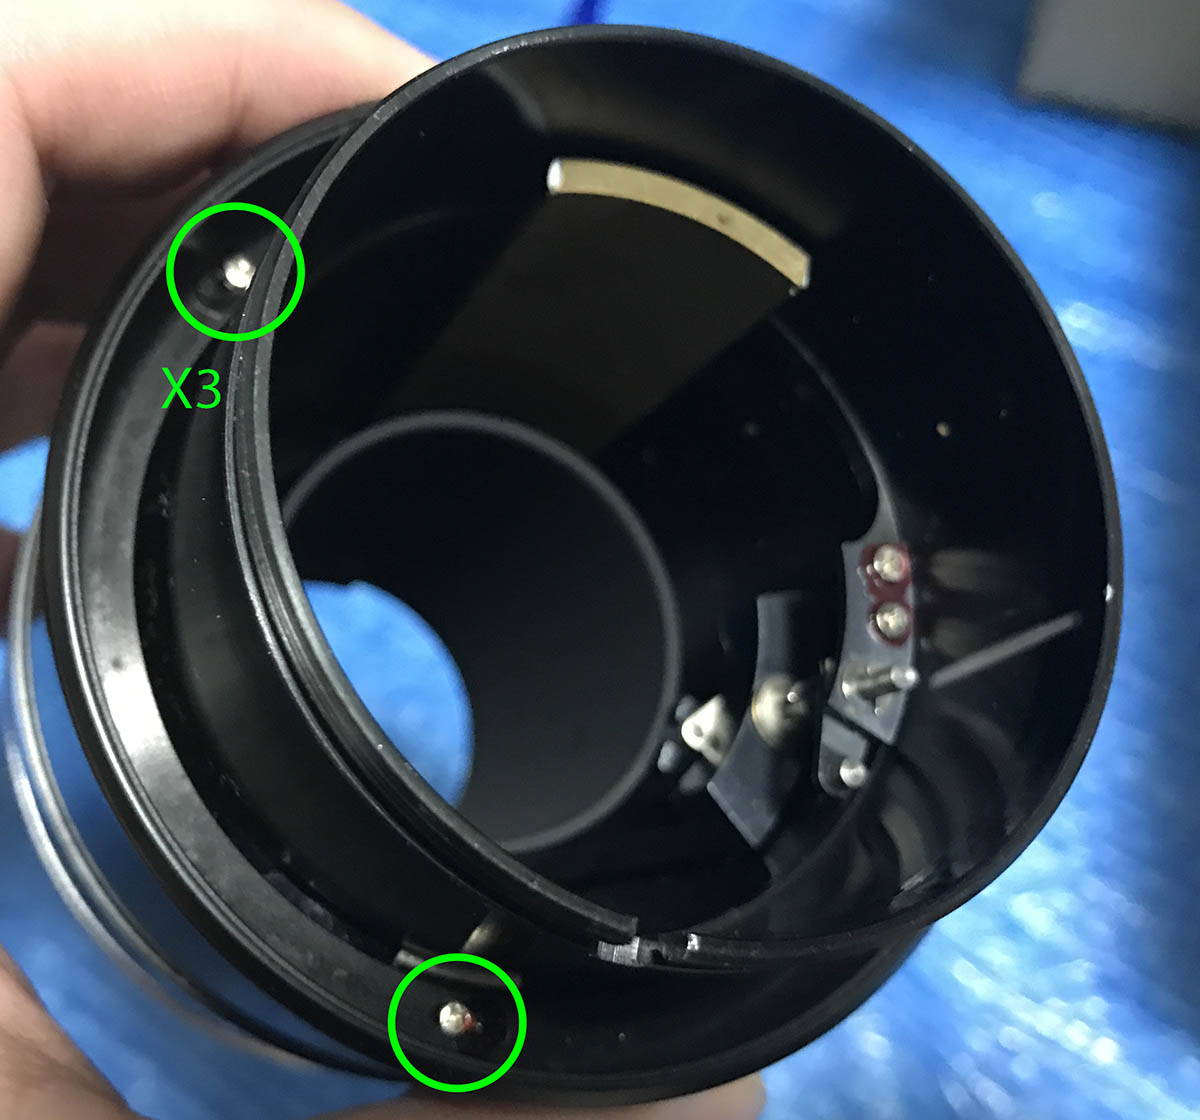
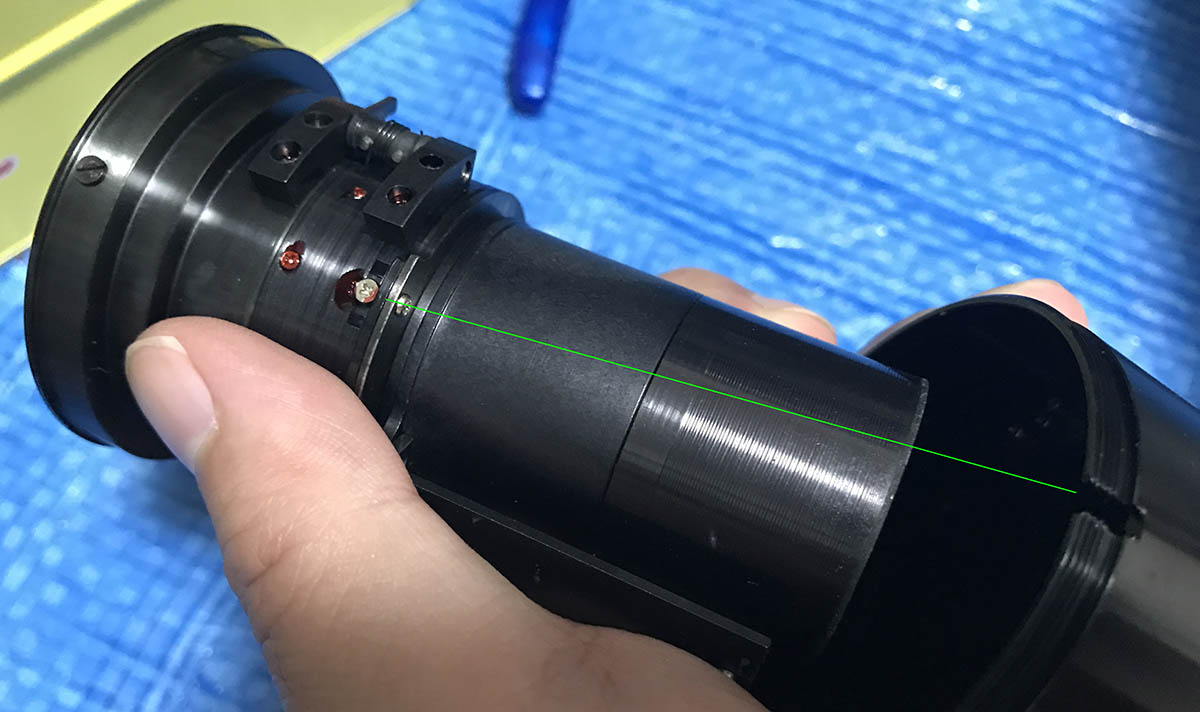
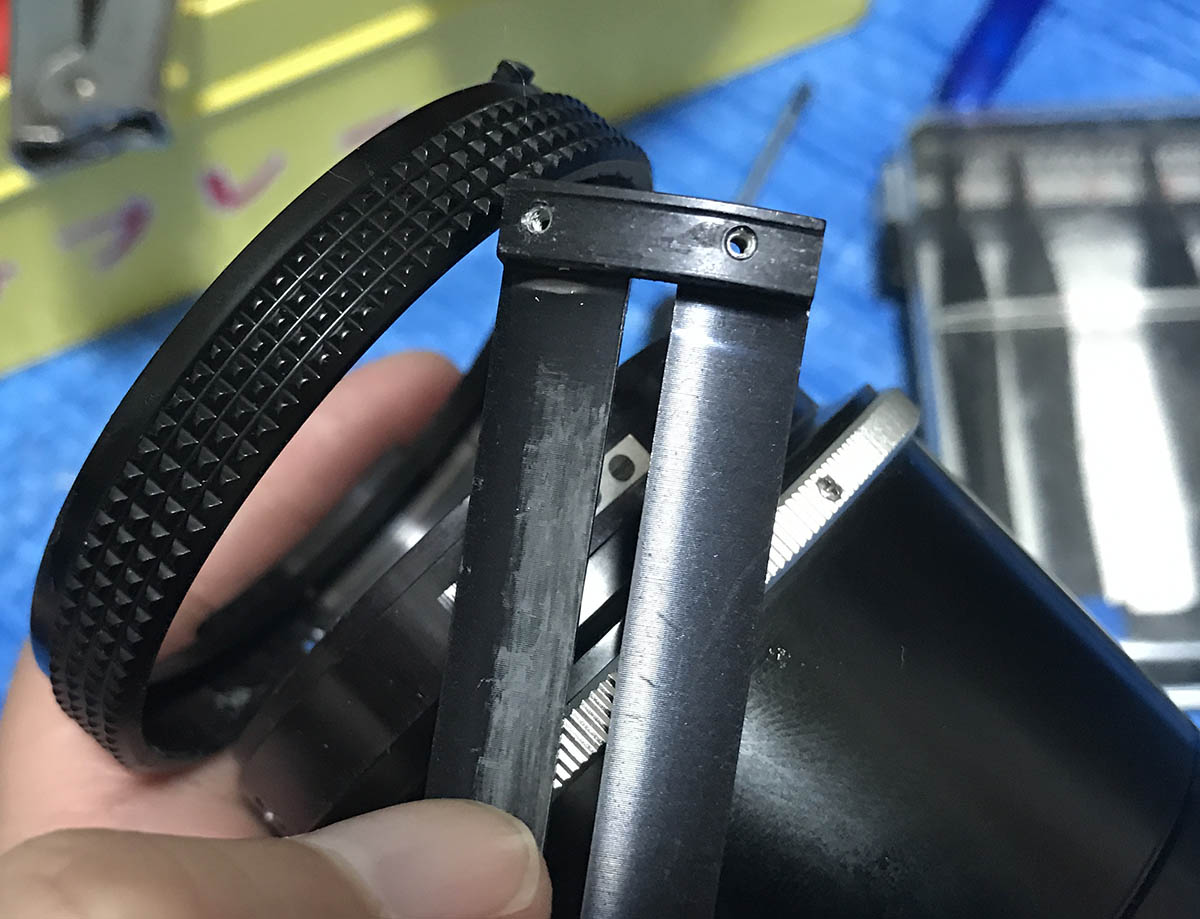
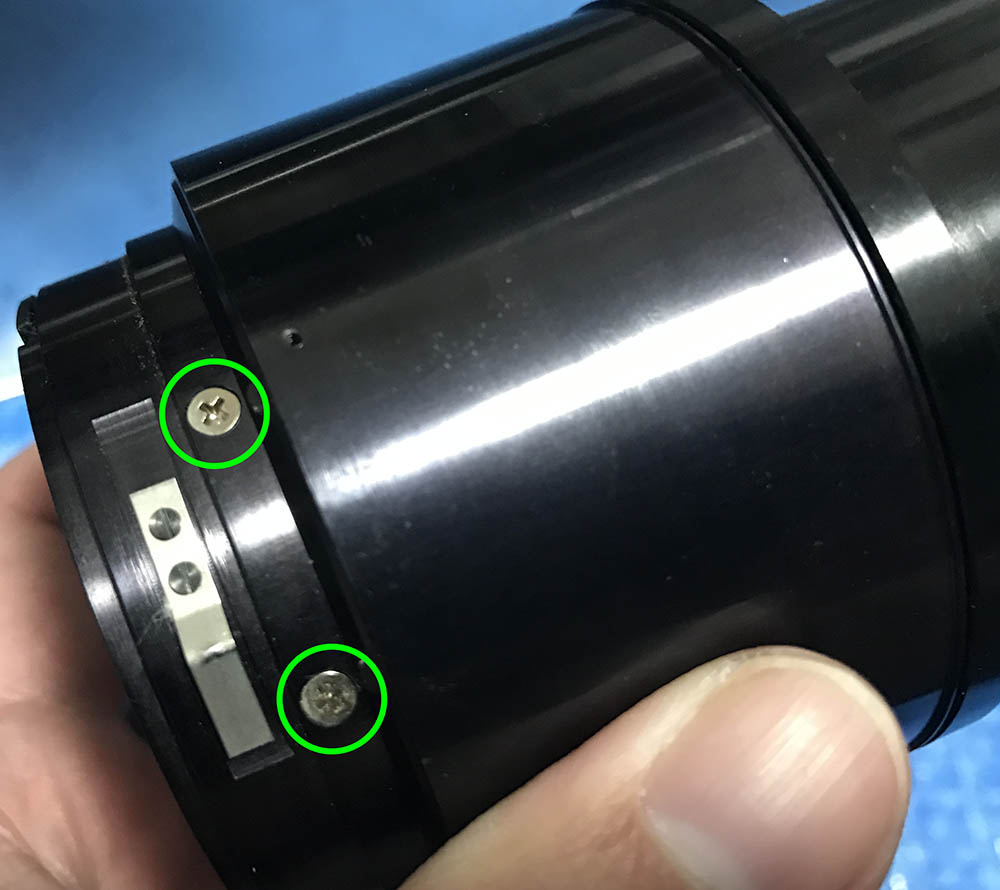
With the focusing ring turned all the way to infinity, unscrew these and take note of the focusing ring’s orientation in relation to these. These screws are precision adjustment points, it’s used for calibrating the focus. These screws are sealed with lacquer. The lacquer helps Nikon determine if this has been tampered with.
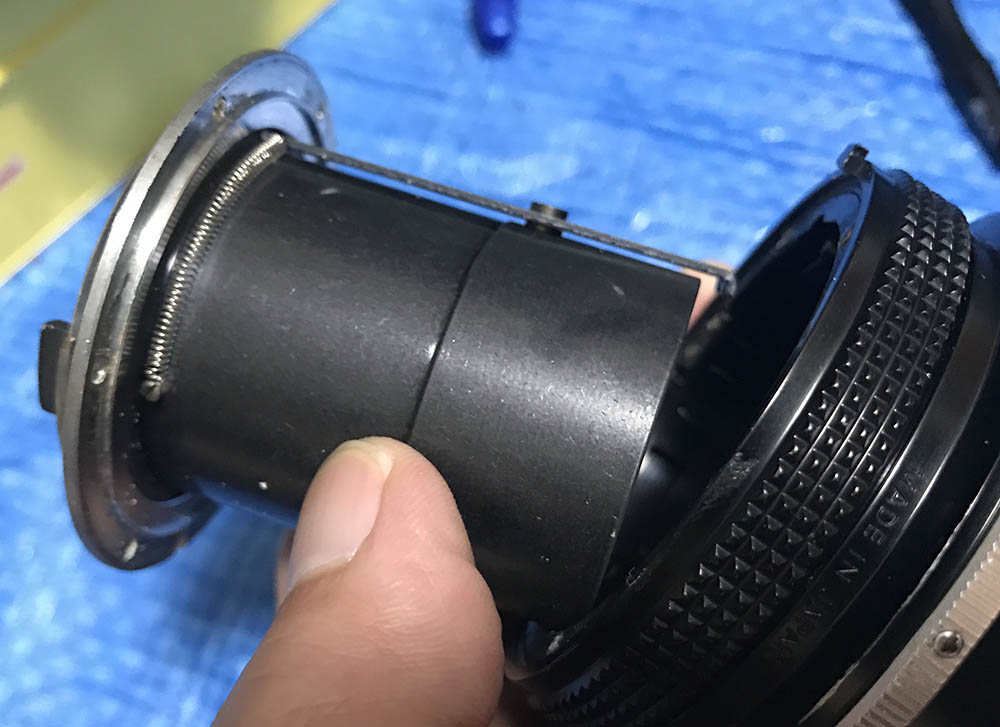
The focusing ring can now be extracted. Note that I scratched a few lines on the central helicoid and the inner helicoid’s walls to remind me that these should line-up later when I reassemble this. It doesn’t have to be big or deep but it has to be visible to you.
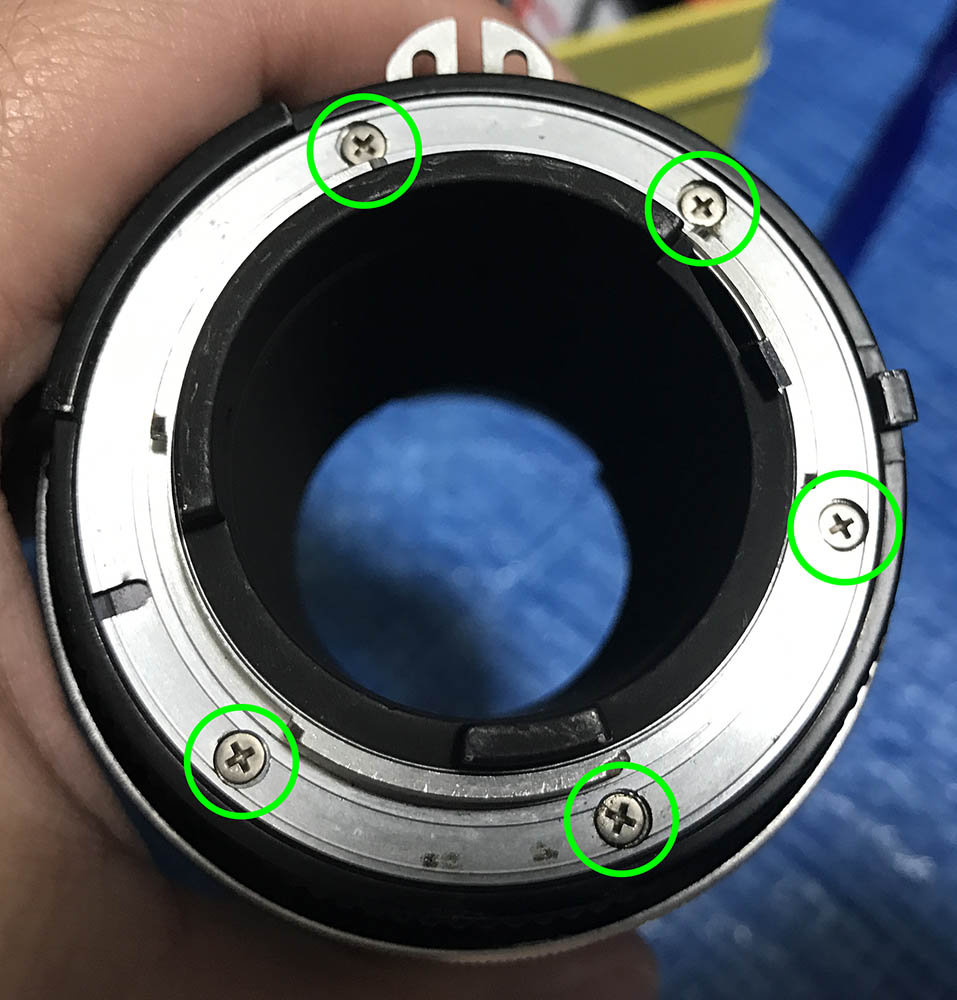
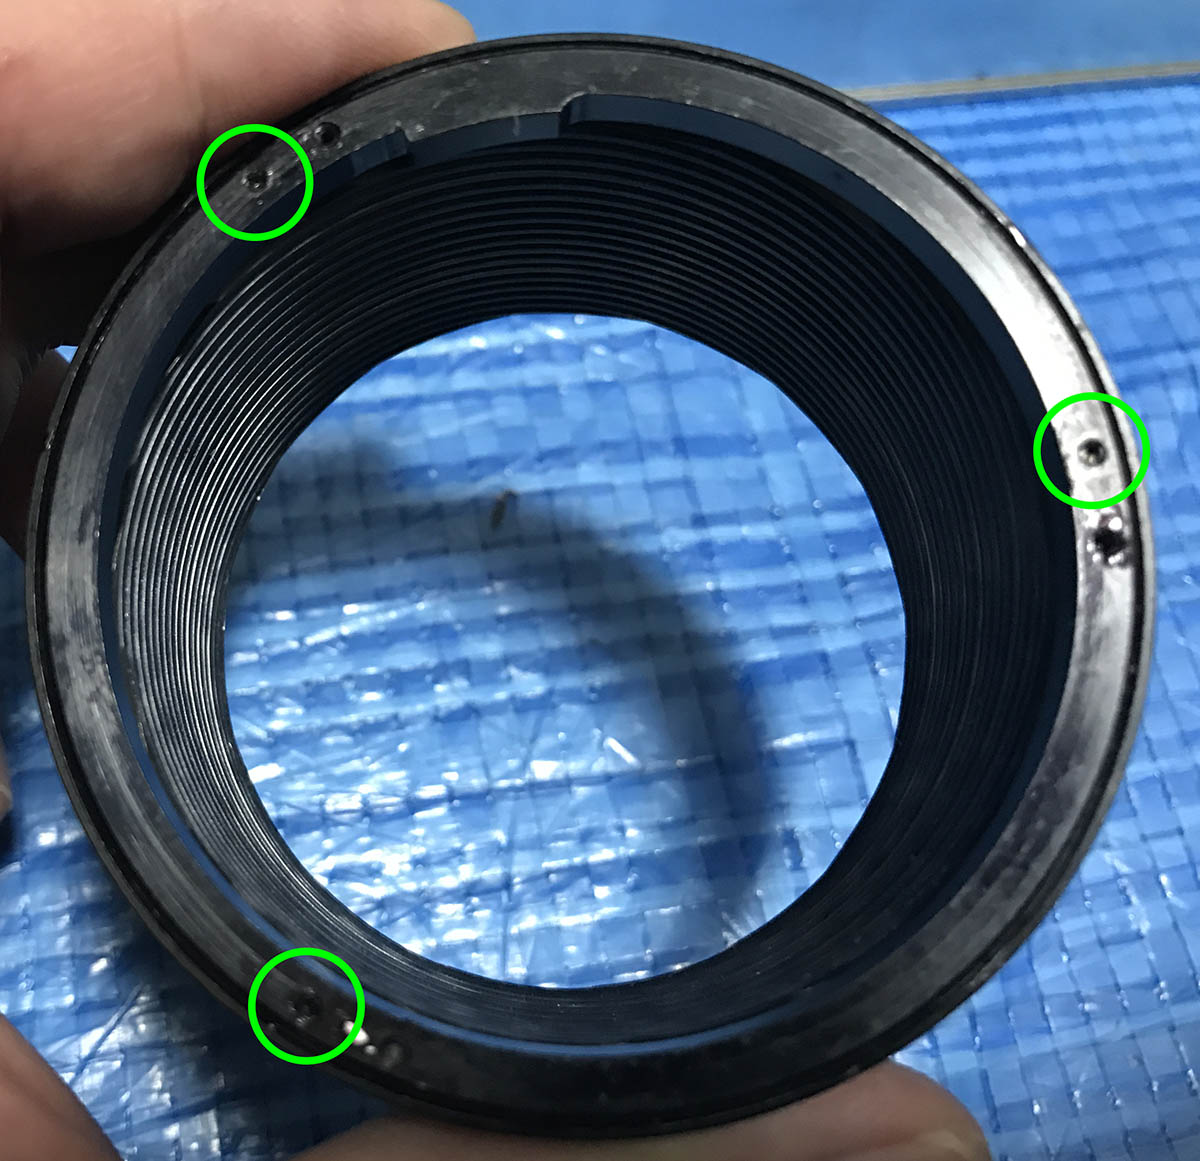
On to the back of the lens. You can remove the bayonet by unscrewing these screws. To make sure that you don’t mess this up, read my article regarding screws and how to remove bayonet screws. I hope that my readers read my fundamentals, if you haven’t, it’s time for you to read them.
The bayonet can now be safely extracted. Be careful not to damage anything like that spring for the stop-down lever mechanism.
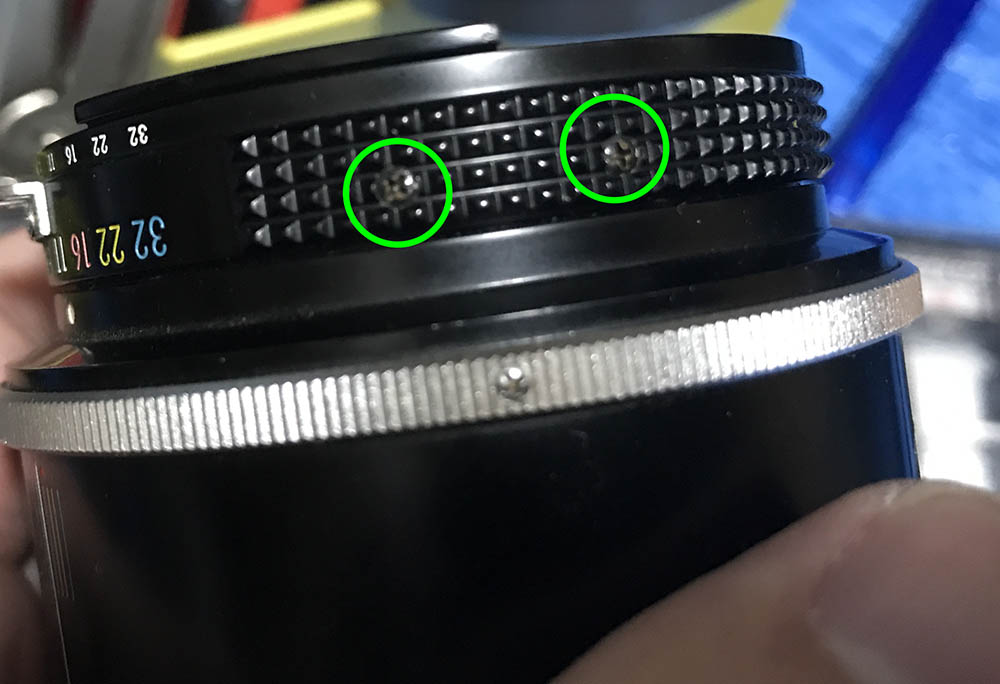
The aperture ring can be removed after you extracted these. These hold the aperture fork to the aperture ring. Be careful while removing these, this can be a delicate job, these screws can get rusty and brittle from sweat and oil.
You can now remove the aperture ring. The aperture fork’s screw holes are lined with a white substance. That is dried-up lacquer that makes removing the screws a bit more difficult. If you want to be careful, heat these using a soldering bolt to soften these before you extract them. Notice that the inner slot is lubricated, this is too much grease so when you reassemble this later make it a point to only lubricate it with a very thin film of grease. This part links to the iris and it is not a good idea to oil something that’s connected to the iris in one way or the other as any oil on it can migrate to it. This has to be lubricated because it’s long and if you left this dry this will squeak as you focus in-or-out. It’s metal-to-metal contact, it will make your lens give out a slight but very annoying sound.
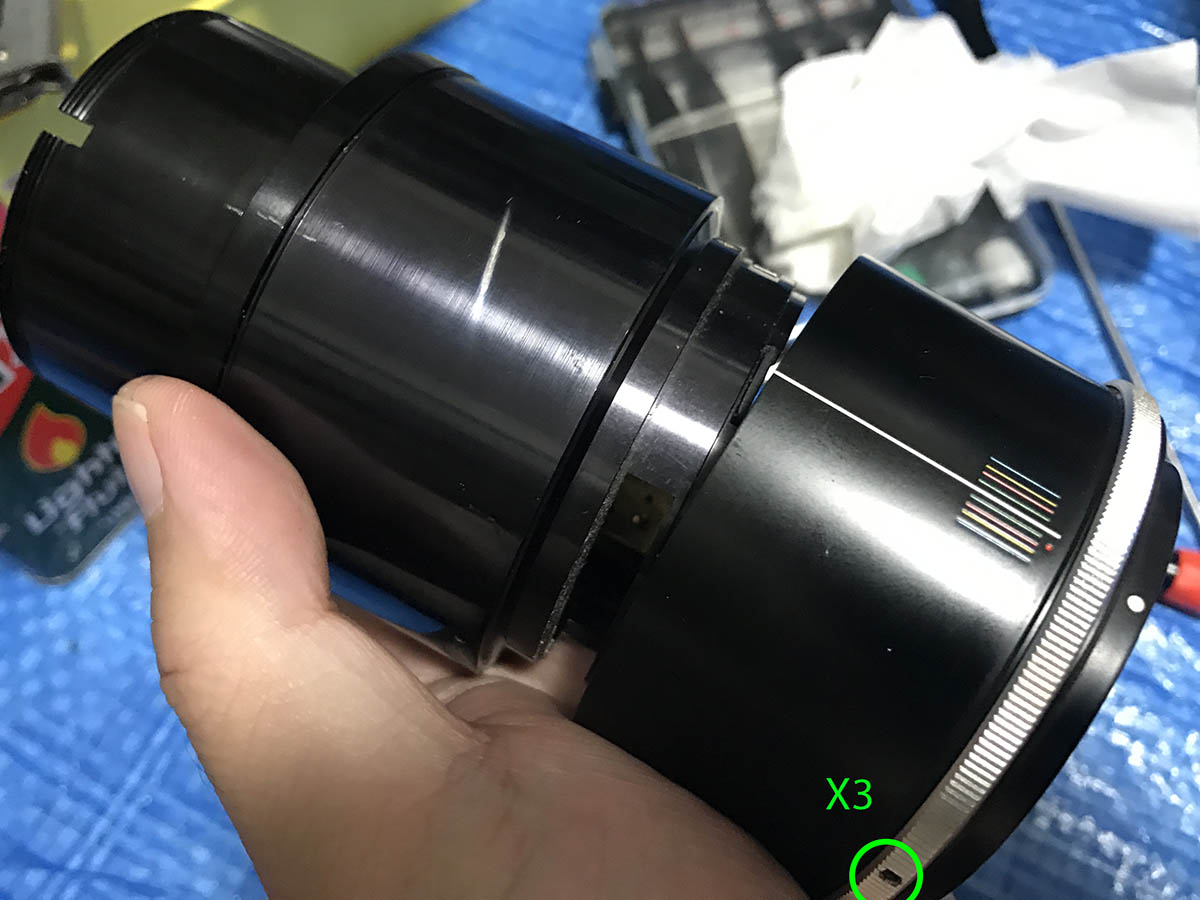
To remove the sleeve and the grip, carefully extract these screws. Make sure that the tip of your screwdriver is not too big or it may scar the grip.
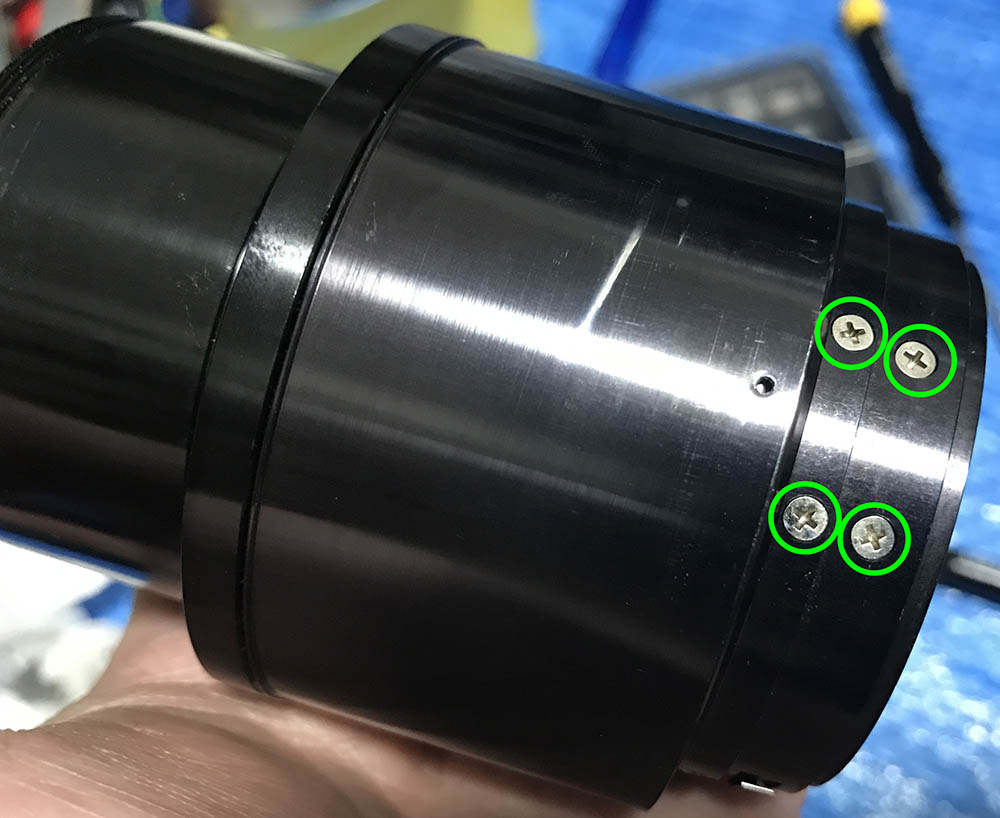
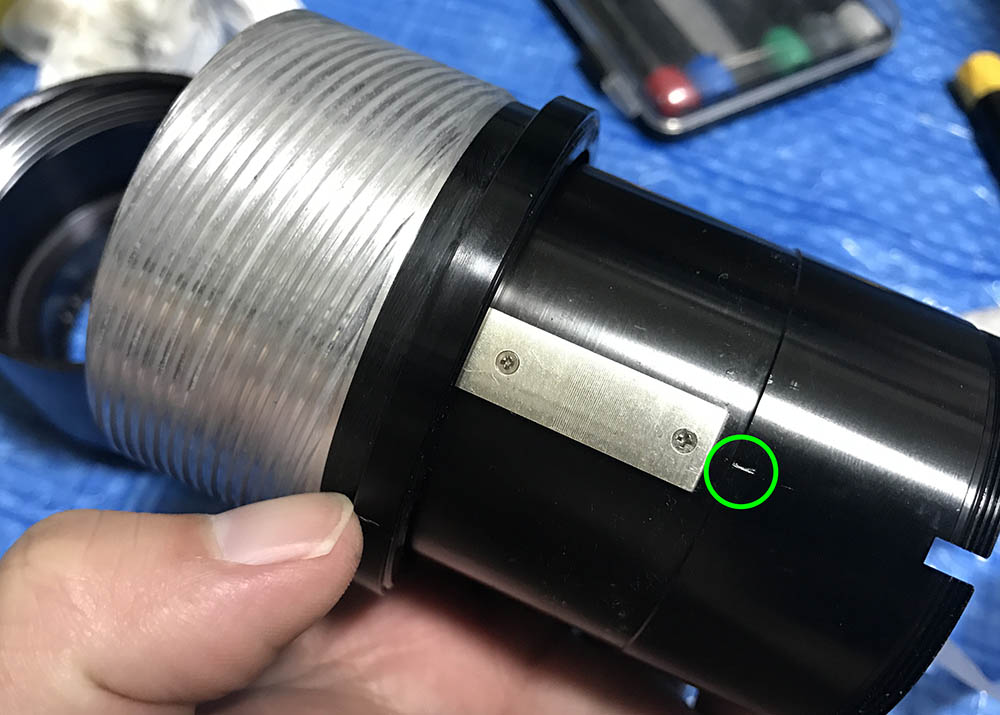
The helicoid key is secured by these big screws. These are tough to remove, I will advise you to heat these up really well before you attempt to remove any of them. If they’re still stuck despite applying heat, use MEK and leave it overnight. You’ll have to do it several times because MEK evaporates rather quickly.
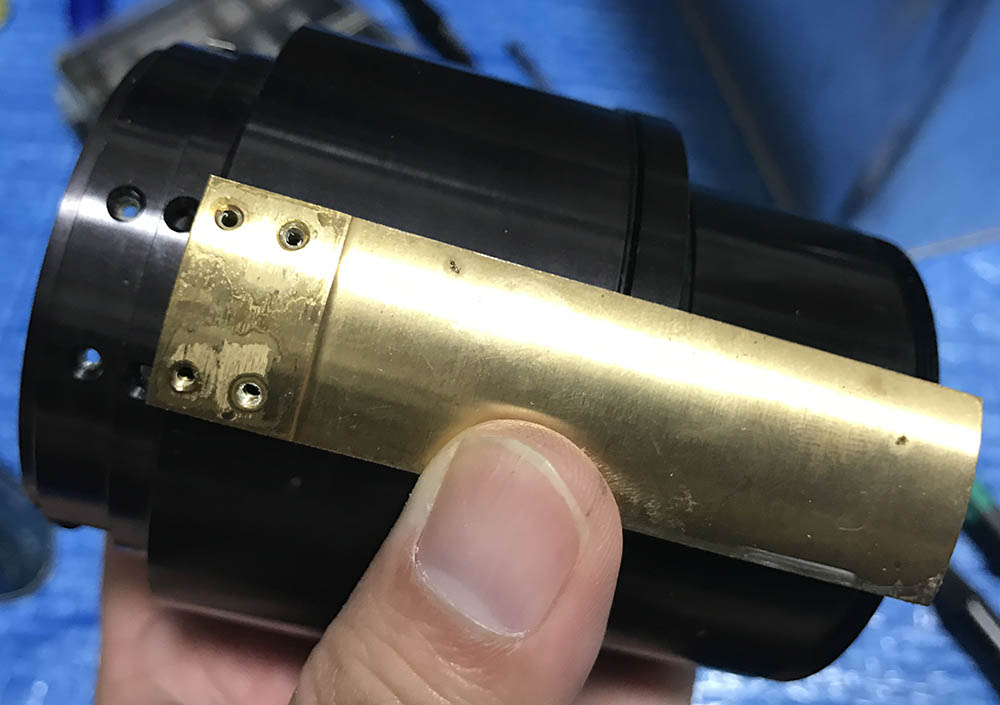
Here’s the helicoid key, notice the white substance inside the holes? The key is used to keep the helicoids moving in-sync. This key is very long because it needs to cover the length of the helicoids when fully-extended and this lens extends a lot.
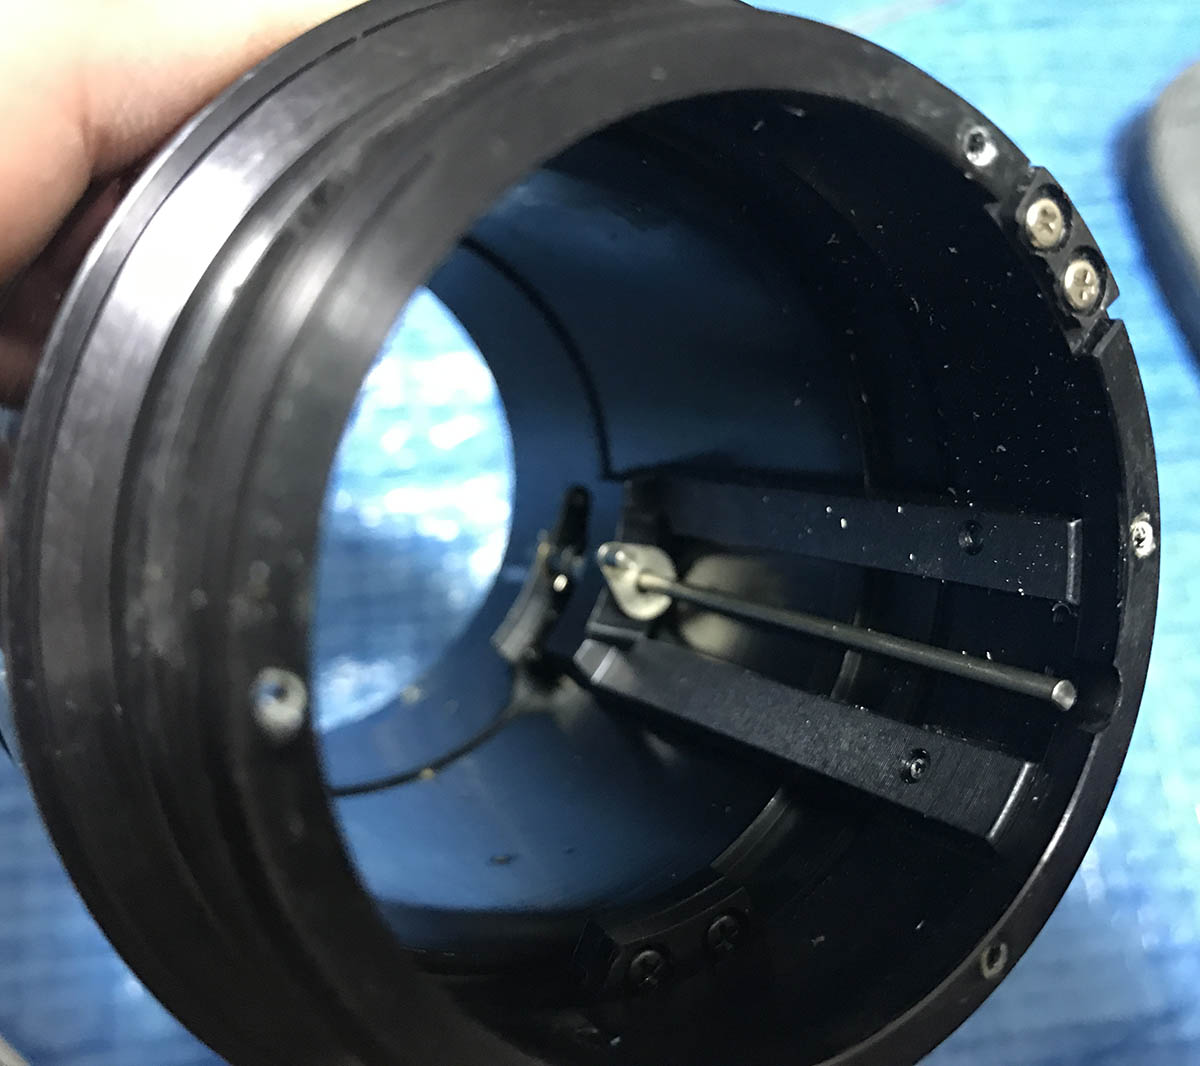
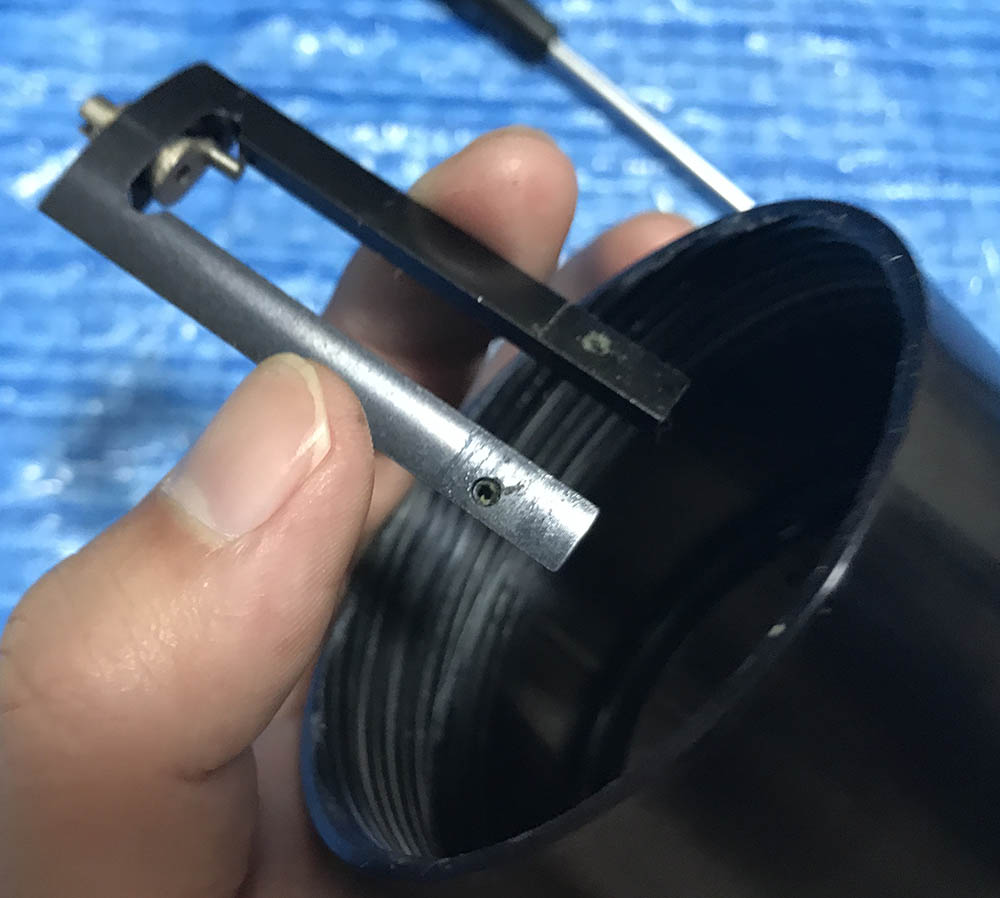
Before you separate the helicoids you will need to extract this actuating rod for the iris assembly. Notice how long it is? This is long for the same reason as the helicoid key.
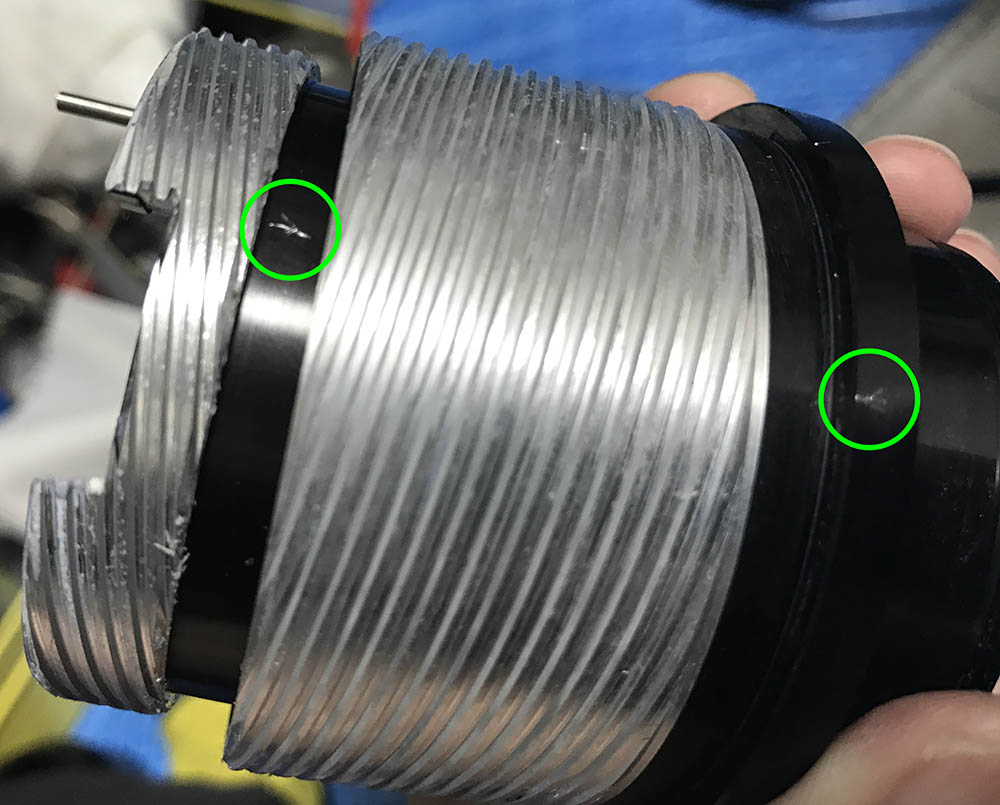
The assembly is secured by these screws. Just like the screws on the helicoid key, these are tough to remove. Do the hear routine again and it should be a lot easier.
You can remove this part by extracting these screws.
Now that all of the things that are in the way are gone, it is now possible to the helicoids. Begin with the central helicoid, carefully remove it and mark where they separated. Read my article on how to work with helicoids if you are new to this. Many people don’t know how this is done and end up doing a lot of stupid things that make theirs a botched job.
Oops, I forgot to remove this.
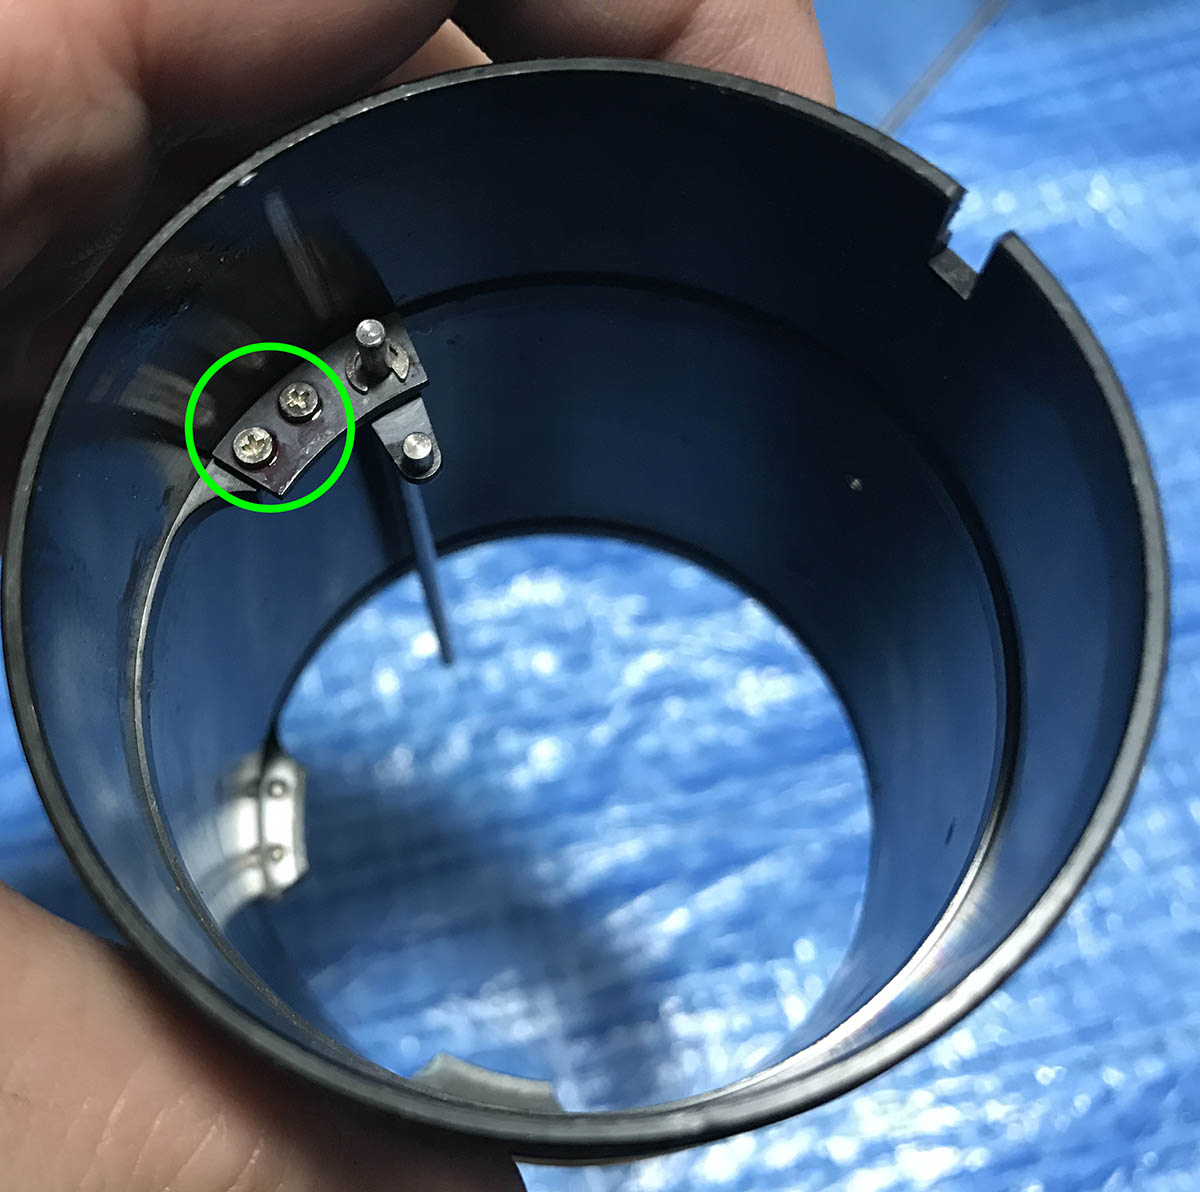
The inner helicoid can’t be separated from the central helicoid because this helicoid stop is in the way. It can be removed by extracting its screws. Note that I made a mark just in case.
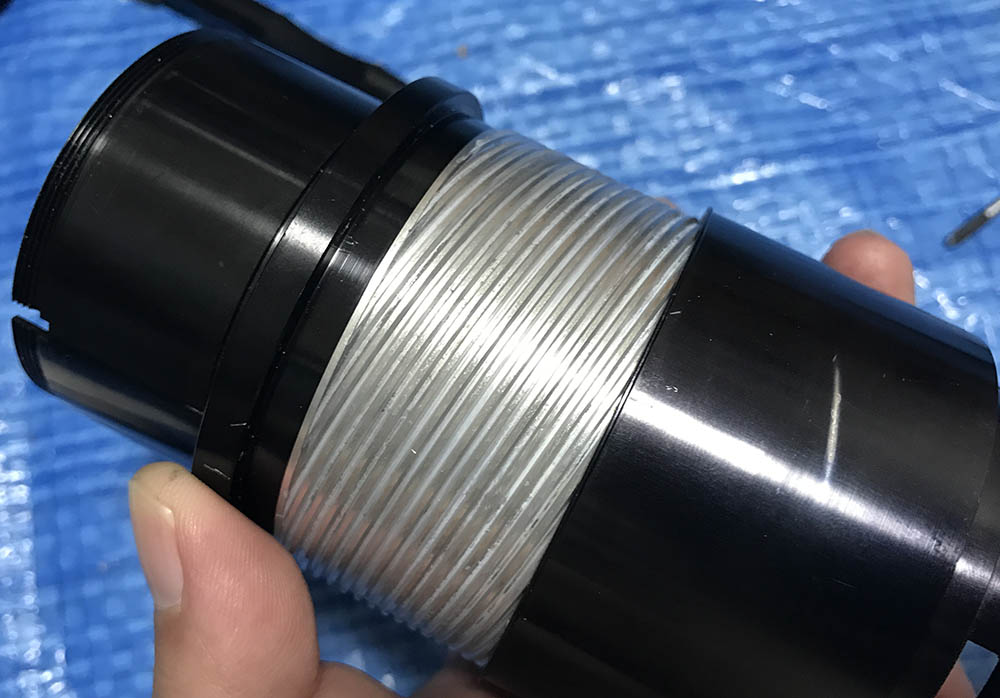
The inner and central helicoids can now be separated. I made small marks to remind me where they separated. This is very important because this is also the where I will have to mate them in order for them to mesh together properly.
These grub screws secure the adjuster ring to the central helicoid. This ring is used to adjust the lens’ focus range, it also serves as the attachment point for the focusing ring. This thing is usually glued and it can be very tricky to remove. The screws are also glued at times and old grease can fuse them to the surrounding metal. You can just leave this alone if you want but since I want to remove the old grease on the inner surface I had no choice but to remove it. I would usually soak this in an alcohol bath just to soften the glue or old grease before I attempt to work on it. It usually takes several hours to a whole day, it’s better just to be patient than end up with a botched job.
That’s it for the lens barrel. The helicoids are very prominent in this lens’ construction so pay attention when you clean them and make sure that they are smooth. Remove old and dried grease with a toothpick and brush them carefully with a stiff-bristled brush. If you got it right then you will enjoy how smooth the focusing feels.
Disassembly (Objective):
The objective isn’t difficult to take apart and there are only a few number of lens elements to clean. I won’t be showing you how to open the iris because mine is clean. If yours is oily then this guide will not help you open your iris to clean it. Unfortunately, this can be prone to the oily iris problem because the iris mechanism’s close to some oily parts. Be sure not to lubricate it too much and you’ll be fine.
The rear baffle and the rotating collar can be pulled using your barehands. Don’t lubricate the collar later as it doesn’t need to be oiled. The collar links to the iris, any oil on this has the potential to migrate to the iris mechanism and cause a bigger problem.
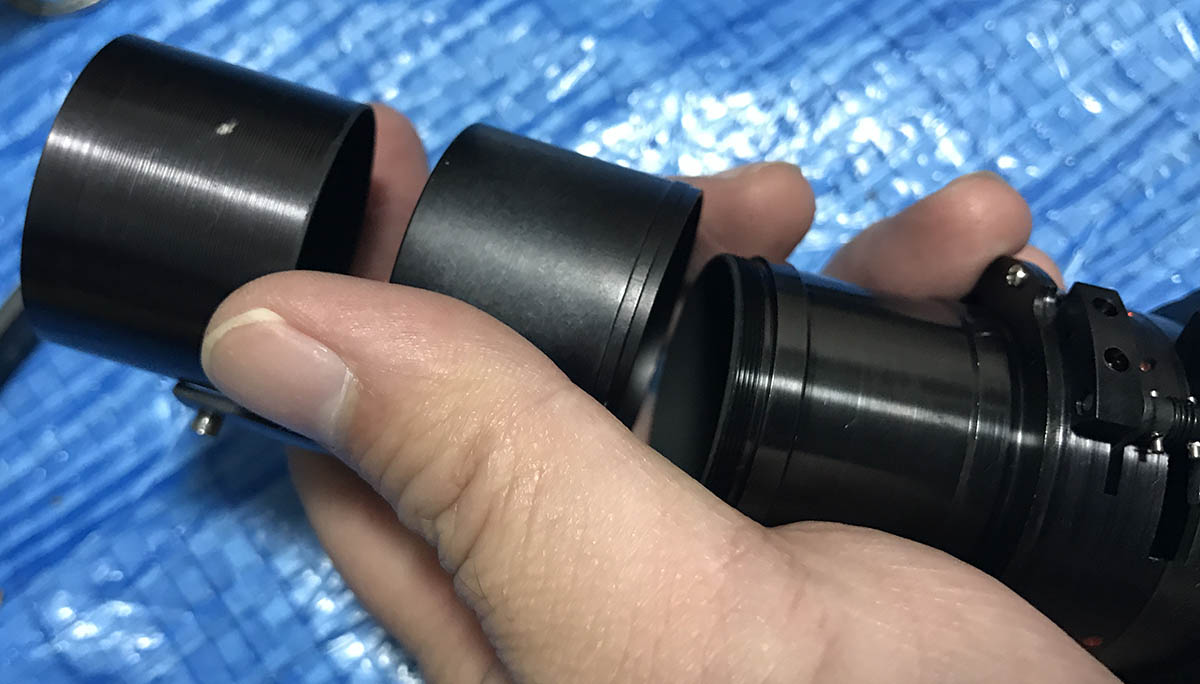
The front elements assembly can be unscrewed from the housing.
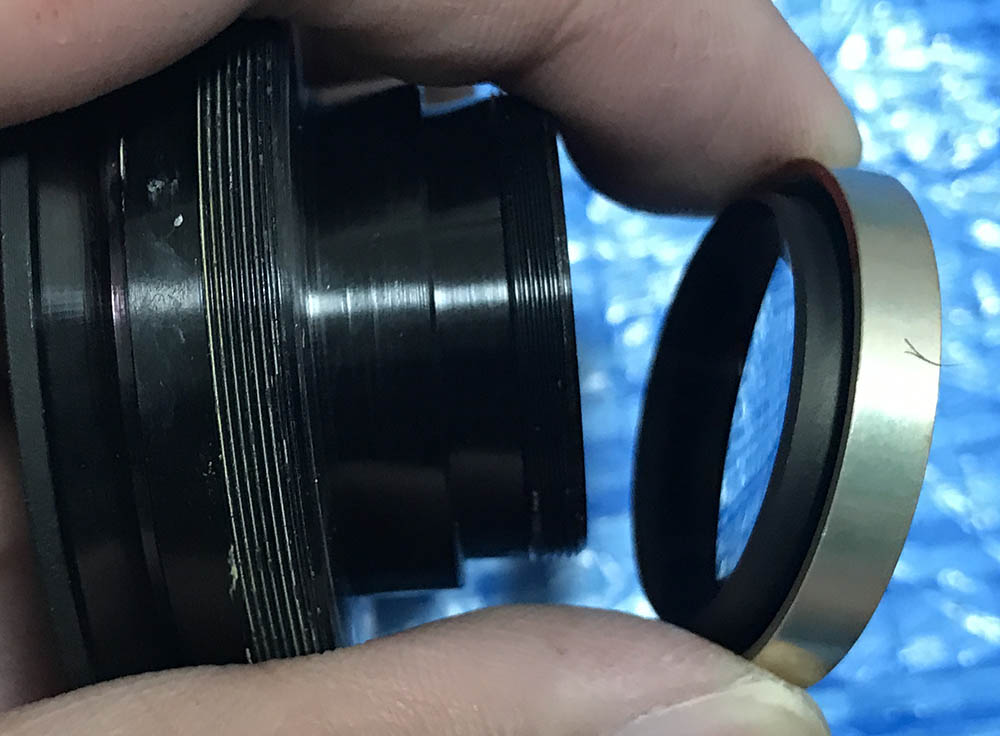
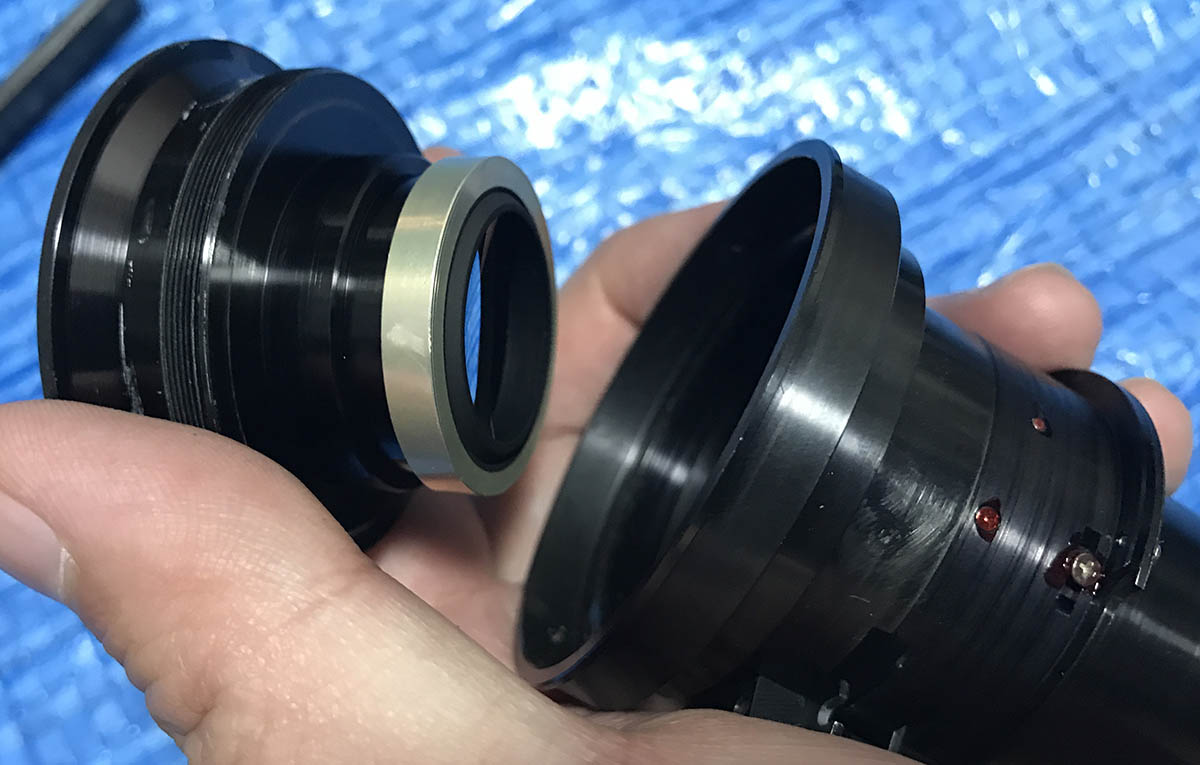
You can unscrew this collar with your hands. This houses an element so be careful not to scratch the glass.
That’s it for the objective. You shouldn’t be spending plenty of time with this, it’s a simple design. It is nowhere near the complexity of the Micro-Nikkor 105mm f/2.8 Ai-S so don’t worry.
Conclusion:
That’s it for this lens. Make sure that you calibrate its focus and if you’re not familiar with how to do it you can read my guide for focus calibration. It is a great project to work with for a lazy weekend’s afternoon. I had no trouble working on it because I’m experienced with working on Nikkors. If you’re a beginner, this is still within your skill so long as you have the correct tools if you just follow my guide carefully. I will remind you to read my lens repair fundamentals just in case you haven’t, its screws are nearly all secured with lacquer. There are people who would tell you that it’s OK to use any type of screwdriver for this kind of job, don’t listen to them. They’re the reason why people end up with a ruined job. There’s the right way to do things and I am trying my best to show you how. Thank you very much for supporting this blog, it’s because of you that this blog is still around. This is my last post for 2017, we’ll look forward to a wonderful 2018! See you guys again and have a very happy new year! Peace and prosperity to everybody, Ric.
Help Support this Blog:
Maintaining this blog requires money to operate. If you think that this site has helped you or you want to show your support by helping with the site’s upkeep, you can make a small donation to my paypal.com (richardHaw888@gmail.com). Money is not my prime motivation for this blog and I believe that I have enough to run this but you can help me make this site (and the companion facebook page) grow.
Leave me some tip?
Thank you very much for your continued support!
$2.00
Helping support this site will ensure that this will be kept going as long as I have the time and energy for this. I would appreciate it if you just leave out your name or details like your country’s name or other information so that the donations will totally be anonymous. This is a labor of love and I intend to keep it that way for as long as I can. Ric.

Jul 11, 2019 @ 16:24:33
Wonderful Article. I used this to clean my 105 as it had some dust in the elements that showed up in macro shots when using higher f-stops. Question: What are you using to re-glue the rubber grip back to the lens? That’s my last step.