
Hello, everybody! It’s Spring now, it signals the beginning of nature’s cycle. The sakuras are in full-bloom earlier than usual this year, nothing heralds the coming of spring in Japan better than seeing sakura trees blooming. It’s a time for festivals, people go out and enjoy life under these beautiful trees, forgetting what happened last year and looking forward to a new and joyful beginning. Speaking of beginnings and originations, I’ll show you a lens that started a whole-new class of zooms which we still use and enjoy to this day in one form or another. Read the article to know what this is.
Introduction:
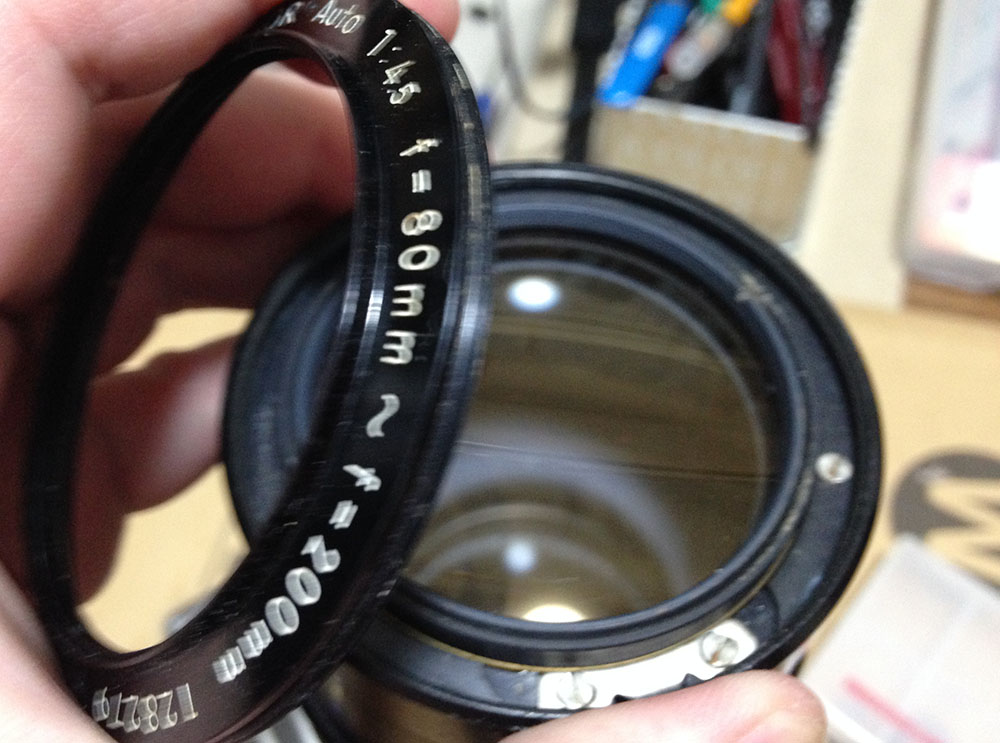
The Zoom-Nikkor 80-200mm f/4.5 Auto is one of the most important lenses in modern photography. Ever wonder how the 70-200mm class of lenses came to be? Well, it all started with this. It started the standard compact telephoto zoom for professionals, even the latest 70-200/2.8 lens could be traced back to this. Before it thing came out, the telephoto zooms were all big lenses that you could barely hand-hold for a whole day. It gave us the freedom to bring a telephoto zoom and shoot with it the whole day while still being able to do the same the next day. As expected, it became a big hit, everybody who shot sports, news, weddings and everything else got one. Sure, the current lenses of the 70-200mm line have wider apertures, autofocus, VR, etc. but the basic concept is still the same, it hasn’t changed much since this lens came out.

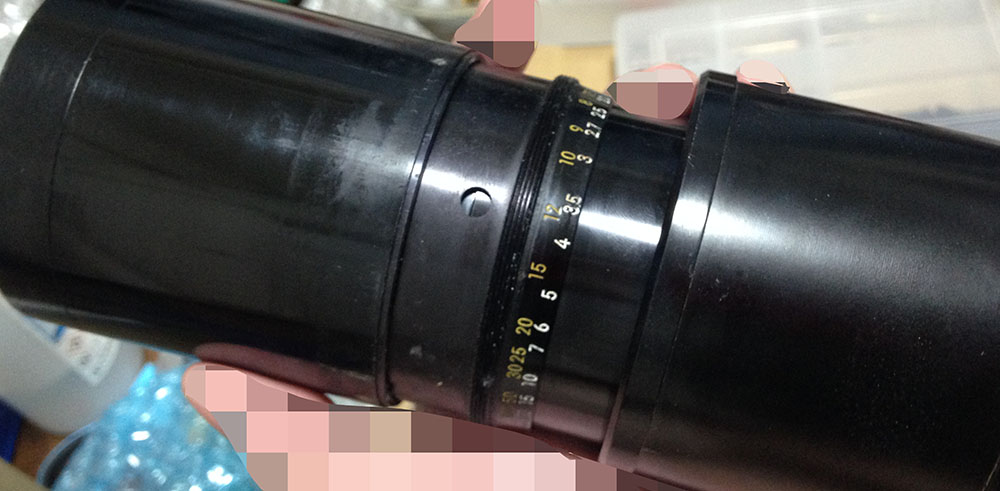
It’s a tough lens. The last zoom that was made that’s closest to it is the Zoom-Nikkor 80-200mm f4 Ai-S but its build pales in comparison to this even if the Zoom-Nikkor 80-200mm f4 Ai-S is considered by many to be tough. The scale at the sleeve is beautifully-made, it is a real work-of-art. I love Nikon’s since the scales are usually colorful so it’s easier read. It’s all these small attention to details that convinced me to go Nikon years ago.
It has a 15-elements-in-10-groups design which is quite complicated when it was introduced in 1969. The later version has a new optical formula but we won’t cover that lens here as it can be considered a totally-different design. Before this lens was introduced, long telephoto-zooms of this class were all huge, this changed all that and it now made this class of lens more portable. It also helped break the poor reputation of zoom-lenses as having unusable results due to poor image quality and high distortion amounts compared to prime lenses. It’s hard to out-perform prime lenses even today but at least it could deliver something that’s acceptable for professional use.

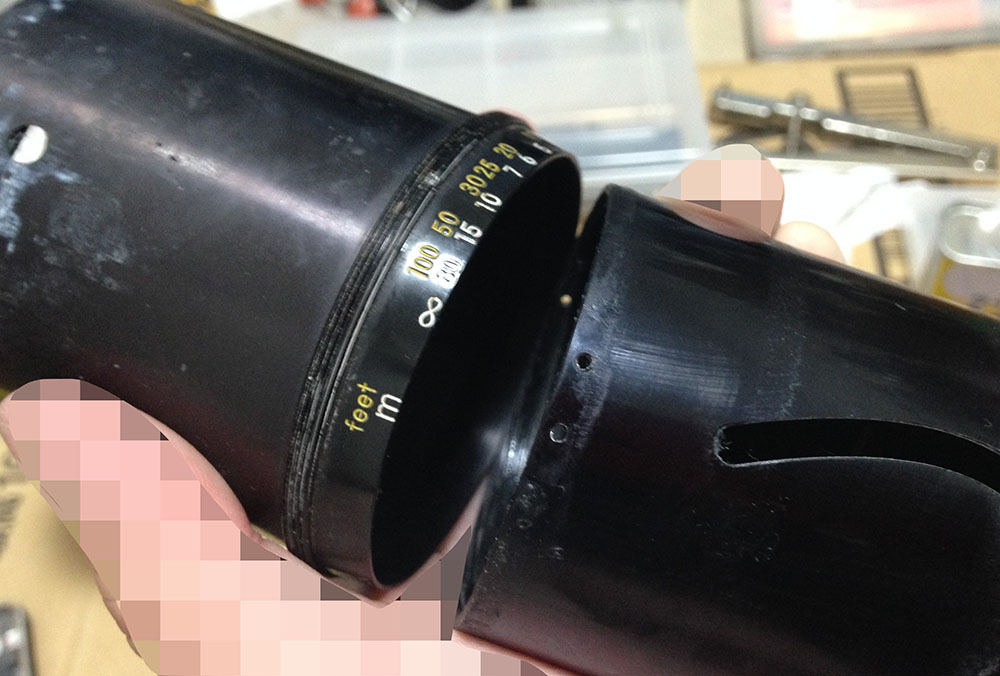
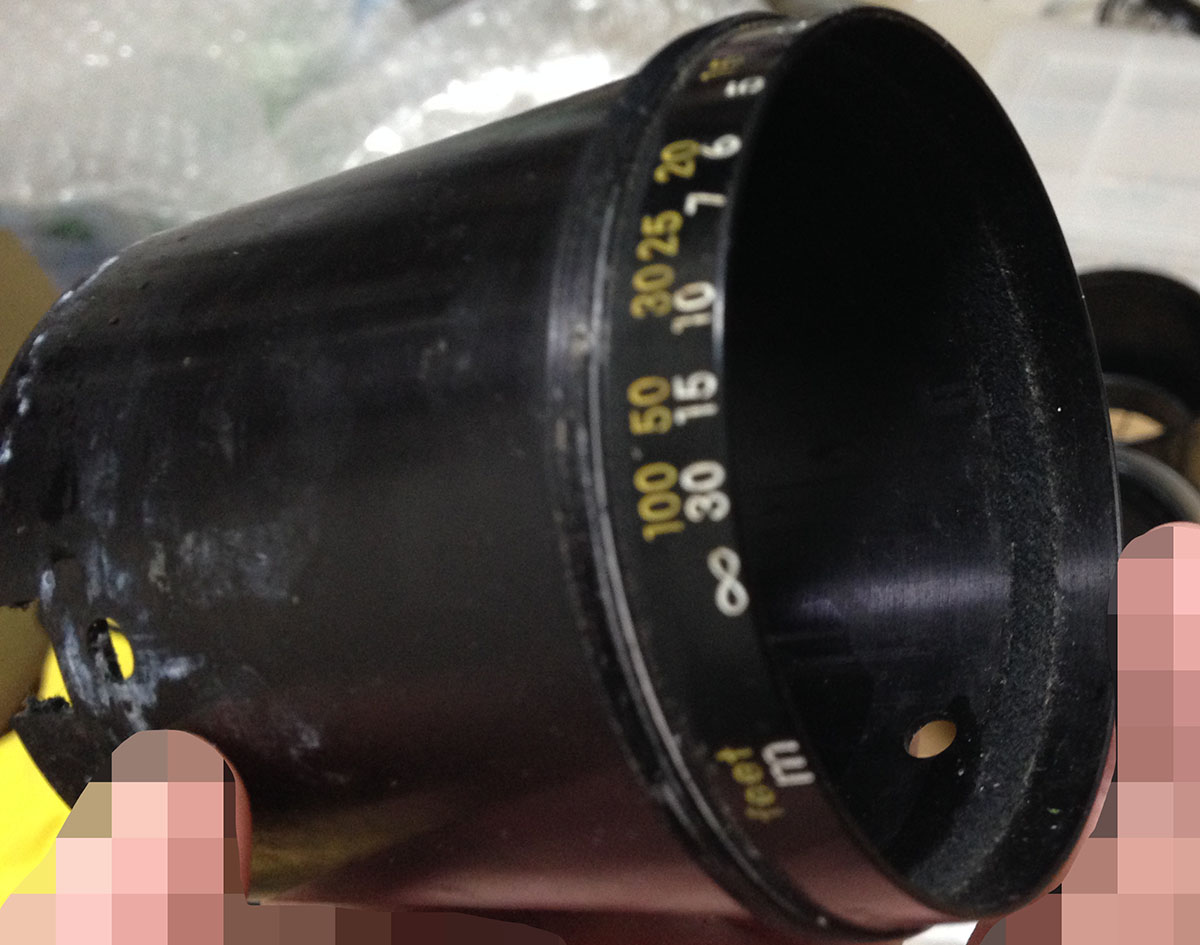
This is how it looks like at 200mm, note that its length did not change much. This is important when shooting on a tripod. The filter size is also standard 52mm, it’s amazing how the engineers calculated this lens without having to make it larger so folks can keep using their 52mm collection. That was a big deal since many manufacturers never cared about filter sizes back then. Today, it’s sad that Nikon didn’t stick to this guideline as tight as they used to so we now have 82mm and other odd sizes being used instead of the usual 77mm. The lens in this photo has an Ai-ring but it originally came without it so look for one that has it or you couldn’t mount it safely with newer Nikons from the late 1970s and later unless the Ai-coupling tab on the camera could be flipped like what you see on the Nikon F3 and the Nikon Df.
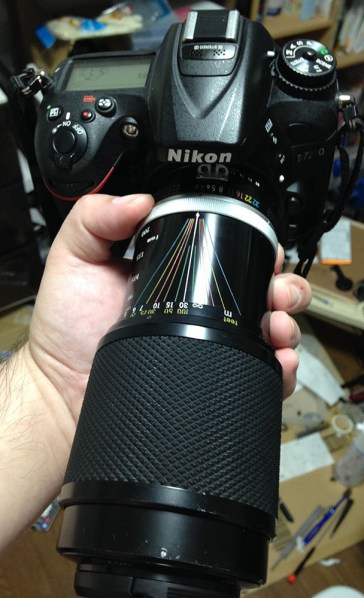
To give you an idea of how compact this is, here it is with my Nikon D7200. It’s feels quite heavy but it balances well when mounted on any Nikon. It’s a “pumper-zoom”, which means you could zoom and focus using one hand. I like this a lot since it enables me to quickly frame and focus. The down-side to this is you lose accuracy when shooting long-exposure photos since this is difficult to keep steady, by that I mean the barrel could move slightly due to its weight. This is caused by “zoom-creep”, it happens when the lining of the zoom-barrel is worn so it easily slides in-or-out due to gravity. Adjusting the focal length precisely is also another problem compared to the usual 2-ring setup which is the standard these days.
Nikon made several lenses in this class and size:
- Zoom-Nikkor 80-200mm f/4.5 Auto, this is the earliest one.
- Zoom-Nikkor 80-200mm f/4.5 Ai (N), a new, improved version.
- Zoom-Nikkor 80-200mm f4 Ai-S, the last professional model.
- Nikon 70-210mm f/4 Series-E, a cheap lens with decent optics.
They all have different characteristics and quirks. Some are better at certain aspects but fail on some things. It is difficult to compare them, it’s like asking a shoe collector which one is the best.
Let’s now see how this performs. Knowing how a lens performs is crucial to maximizing its use. You’ll learn how to avoid its weaknesses and exploit the lens’ strengths. This knowledge will help you decide whether to use it or not in any given situation. I took the following photos from f/4.5, f/5.6 and f/8. It shows the most changes in rendering with these apertures, I also think that most people would want to shoot this with these values, too. These pictures were taken with my Nikon Df.


(Click to enlarge)
Distortion is rather high at either-end of the zoom-range but the profile isn’t complex at all as far as I could see. I wouldn’t use this lens for architectural or reproduction photos. The corners look dark wide-open but it’s not bad at all. It clears-up nicely by f/5.6 but you’ll still see slight traces of vignetting at f/8. It’s not noticeable at all at this aperture unless you really look for it.


(Click to enlarge)
This doesn’t have the best coatings applied and it has rather poor resistance to flare and ghosts. You normally wouldn’t get this unless you intentionally framed your shot like this. You could actually use this to your advantage as an element in your scene, it’s distracting but it also has its use.


(Click to enlarge)
I cropped the photos at the center so you could examine it better. You could compare both the original and cropped versions and study them in detail. It is also going to help you observe its performance on subjects that are far so please click on the thumbnails to see the bigger versions.
Chromatic aberration is quite high if you are not careful. It’s bad wide-open on areas with really high contrast. Stopping the iris down to f/5.6 helps a lot, it’s not as bad but you’re still going to get it in extreme cases and even if you stop the iris down to f/8. This is not something that I am worried about since I intentionally shot these photos to exhibit this reaction. You normally won’t get this if you exposed your photos properly.


(Click to enlarge)
The character of the bokeh is quite pleasing, it’s smooth and the discs are all mostly even. Foliage and twigs are usually difficult to render if a lens shows poor bokeh quality but this one does it quite well.


(Click to enlarge)
Sharpness at the center looks great even wide-open. Resolution is adequate, I am able to resolve some nice details with it. Chromatic aberration could be seen wide-open but not it disturbing amounts, I exposed these properly. It’s only going to be a problem if you over-exposed your shot or there’s parts of the photo that have areas of really high contrast. Saturation looks nice but it doesn’t look “forced”, contrast is quite nice as well without being overdone. This is true throughout the whole aperture range. Stopping the iris down to f/5.6 makes the center sharper, it’s already quite wide-open but this takes it to another level. Resolving power also improves quite a bit. Set the aperture to f/8 and the center is now performing at its peak, the difference isn’t huge but it’s enough for you to notice a slight difference in optical quality. If your scene has over-blown areas, spherical aberration could be seen throughout its aperture range up until f/8. The only real reason to stop the iris down is to get more things in focus and also to get the corners looking better. If you need nice corners then you should be using this from f/8. You could only get as close as 1.8m with it, which isn’t a lot but it’s enough. I do notice that this performs better at closer ranges compared to objects that are further in the scene.


(Click to enlarge)
The photos above should give you an idea of what’s the difference between 80mm and 200mm. The compression at 200mm gives your subjects a flatter look. It’s sharp even at f/4.5 as you can see in the 2nd photo. There are hints chromatic aberration but not much. It’s capable of rendering decent-looking bokeh.


(Click to enlarge)
Here’s another set showing the differences between 80mm and 200mm. The focal-range is convenient for shooting a variety of scenes and 80mm is wide enough for lots of things so people use it to take environmental photos, too. The 200mm end is convenient for taking detail photos or the subject’s face in a tight composition. This is a versatile zoom, a perfect lens for any event, that’s why pros always have a lens of this class with them.


(Click to enlarge)
This can exhibit some dark corners wide-open as you can see in the pictures above, just stop it down to f/5.6 if this bothers you. The good thing is that the bokeh is not bad at all and you don’t see any ugly super-imposed lines when shooting foliage or twigs. The downside is that there are some smudging in the bokeh as you can see with the 1st photo.

Being able to focus close is an added bonus. This is very useful for weddings when you’re going to capture photos of the rings or the cake being sliced. I’d prefer that it could focus a little bit closer but it seems that I am asking for a lot from a lens design this old. An extension ring could do that for you, too.

Sharpness and contrast is quite good wide-open. Focusing it when shooting moving subjects can be a challenge because you don’t get thin-enough DOF in the viewfinder. It’s great to use a split-prism but a lens this slow will just black-out the viewfinder so a nice course-ground matte screen is more ideal for use with it. Only experience, timing and patience can give you perfectly-focused pictures when shooting moving subjects with a manual lens.
Small photos that were compressed for the web like what we see here don’t do justice to it so just trust me when I say that these look great when viewed at 1:1 with a huge monitor, at least from an old lens, that is.


(Click to enlarge)
Here are pictures of the “Garbage Rangers” doing their skit on teaching kids how to dispose of their rubbish well. Action shots are difficult to focus with it even on a sunny day just like this because there’s not enough separation. People used to shoot lots of sports with it, even indoor ones. The technique is to focus on something then just anticipate. You could track subjects with it if you’re good enough. I used to be pretty good at it but lack of practice and poor eyesight sure didn’t help make things better.


(Click to enlarge)
The photos above should show you the utility of this lens. You can just shoot about everything with it and the results are amazing. Patience is the key to using it. I always enjoy shooting with this lens because it’s compact and not too heavy even when slung on my neck along with a camera. It’s easy to see from these photos why so many people love it and why they still use it well into the 1990s (even to this day).
Let’s now see some pictures that were shot using film. It’s important that we see how it works with both film and digital because they render differently. This will help give us a better idea on how this lens performs. Since this was made to work with film it’s going to help us see how this lens is supposed to perform under its intended medium. I’m not a purist but I am interested in seeing how a lens performs under the context that it was made. I shot these using a Nikon F4 loaded with Fujifilm Industrial 100. Please pardon me for not nailing the focus on some of the photos, I was using the wrong focusing screen and this has a rather long focus throw so it’s hard to track my subject up-close if you’re using the longer-end of the lens.

Amazing rendering, it feels like I am viewing photos from the past. It’s nice and sharp even wide-open, the grain helps give the picture some character. This lens is nice for candid photos such as this because 200mm has enough reach so you could take pictures from a distance.


(Click to enlarge)
The nice character of the bokeh is nice for portraiture. I love this lens’ subtle character, this is not going to render anything harshly. The nice and smooth transition from what’s focused to what’s blurred is subtle and not abrupt at all. You won’t get hit with a “wall-of-focus” like what a lot of modern lenses tend to do. I just saw samples from some of Zeiss‘ latest offerings and while they’re excellent the rendering feel off to me, they seem over-corrected. The bokeh quality, colors and sharpness look great but it still looked un-natural. I am not saying that their lenses are bad it’s just that they don’t appeal to me in some way, they lack “soul”.


(Click to enlarge)
Here is the rest of the set. Click on them so you can see the bigger versions, see how nice the details are even wide-open and how it renders beautifully with film. I like this a lot despite not being able to auto-focus and it doesn’t have VR. If you are confident with your skills then those things don’t mean much to you as long as you’re able to shoot with a reasonable shutter speed and focus on your subjects when they aren’t moving too much. It’s great in a studio setting because you could control your subject and your lighting to a certain extent, giving you more time to adjust and think,
This lens will not be well-loved by many if it didn’t perform. In other words, this lens is a great lens in terms of sharpness, contrast and almost anything else. It’s safe to think that this lens is as close to perfect when it came out in 1969. This made a huge impact, it stayed in production longer and sold well with various versions, too. It was a big success in terms of engineering and marketing, this is one of the rarer occasions that engineers, marketing and accounting were all happy – a real trifecta. It wasn’t cheap when it was sold new but we can now get these for very little money, I got mine for less that what I spent yesterday at a curry shop. This is really great value as far as I am concerned and there is very little reason not to buy and enjoy this lens. If you found a great sample, just buy it. You’ll soon get used to the difficulty of shooting with a long zoom lens without VR and autofocus, this will teach you the discipline and patience that photographers were known for before. Your clicks will be more deliberate and you will learn to time your shots so your subjects end up where you want them to be. Having less is more, you’ll not have any excuses when you made a mistake. When looking for one, look for signs of fungus, oily iris and other irregularities with its movements. It’s difficult to find one that doesn’t exhibit any zoom-creep so don’t expect a lot in this department. Get one with an Ai-ring, too. They’re a little bit pricy but an extra $10.00 is worth it. The Zoom-Nikkor 80-200mm f/4 Ai-S is a nice lens as well but there’s something about this one that’s endearing so I always use it more than any other lens of the same class. Happy hunting.
Before We Begin:
If this is your first attempt at repairing a lens then I suggest that you check my previous posts regarding screws & drivers, grease and other things. Also read what I wrote about the tools that you’ll need to fix your Nikkors.
I suggest that you read these primers before you begin (for beginners):
Reading these primers should lessen the chance of ruining your lens if you are a novice. Before opening up any lens, always look for other people who have done so in YouTube or the internet. Information is scarce, vague and scattered (that is why I started this) but you can still find some information if you search carefully.
I highly recommend that you read my working with helicoids post because this is very important and getting it wrong can ruin your day. If I can force you to read this, I would. It is that important!
For more advanced topics, you can read my fungus removal post as a start. This post has a lot of useful information and it will be beneficial for you to read this.
Disassembly (Optics Extraction):
Our aim is to remove the optics before working with the lens barrel. Zooms can be a bit more tricky in this regard, they have really complicated barrel designs compared to the simple ones used on prime lenses. Working on this is a bit annoying because grime, glue and bad lubricants used by those who had worked on this made it difficult to take apart. You’ll also want to use a pair of rubber gloves to help grip things better. Some screws are difficult to remove so you’ll need drivers that fit perfectly. This lens isn’t for beginners since it’s complicated and you’ll need a little bit of know-how to put things back together. Make sure to document everything before you remove them, this will help you later when it’s time to reassemble things.
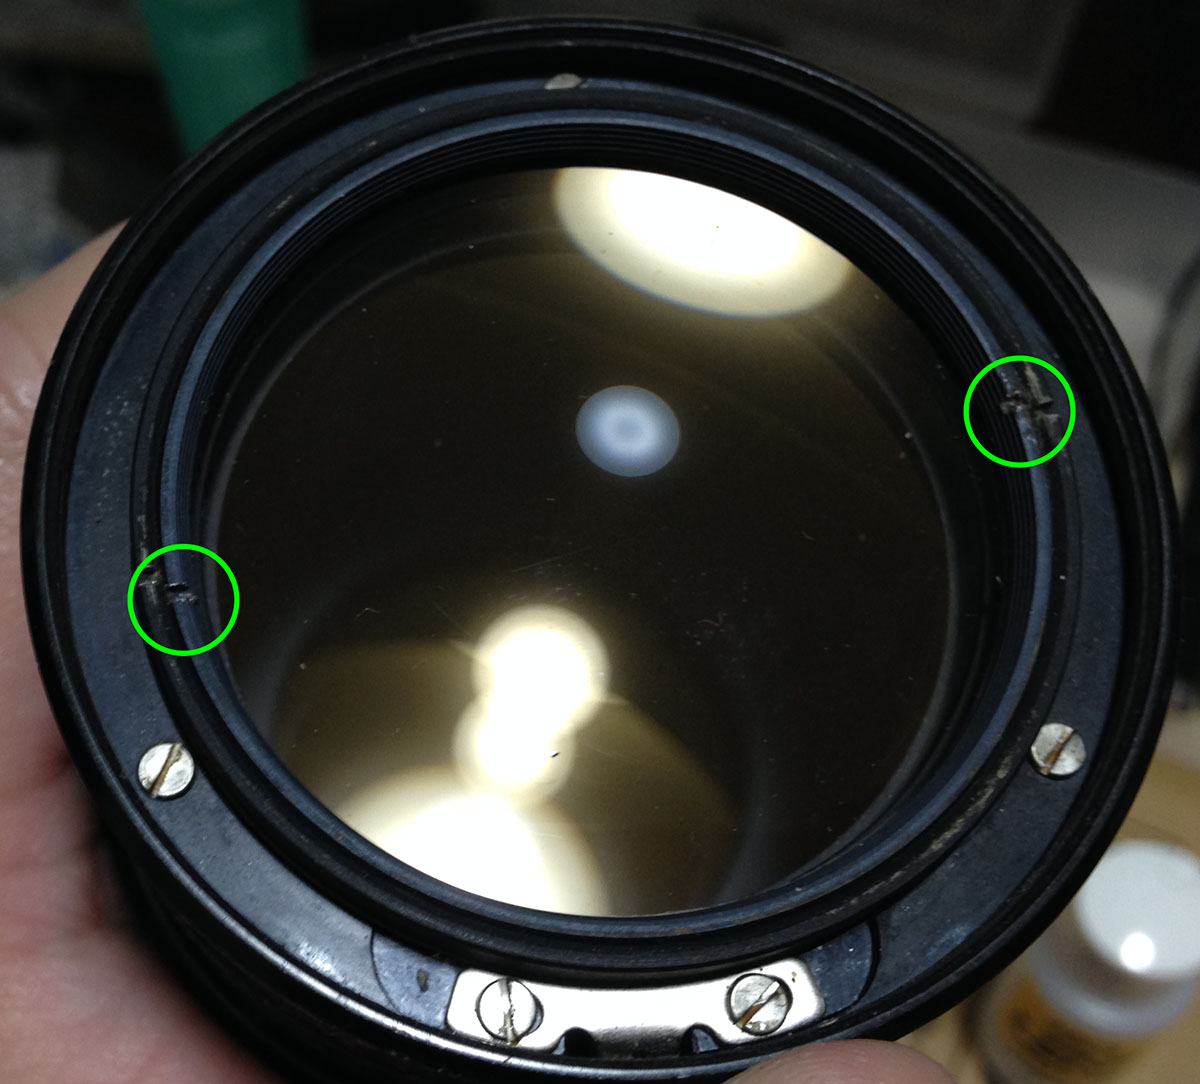
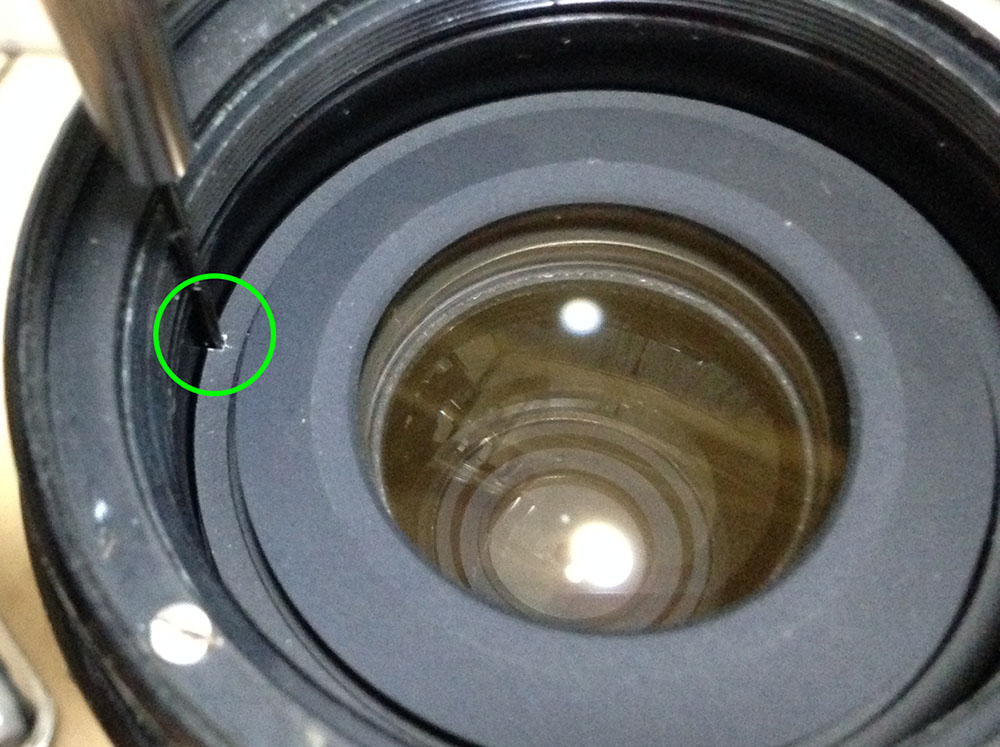
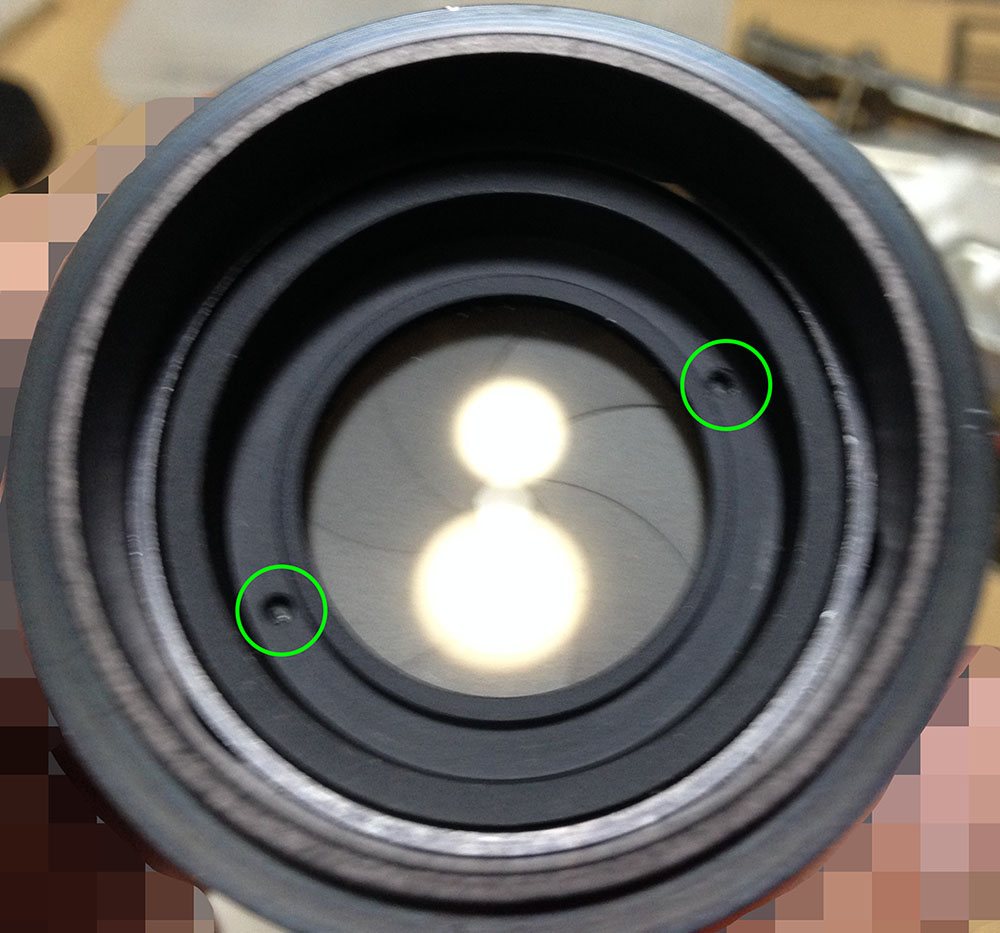
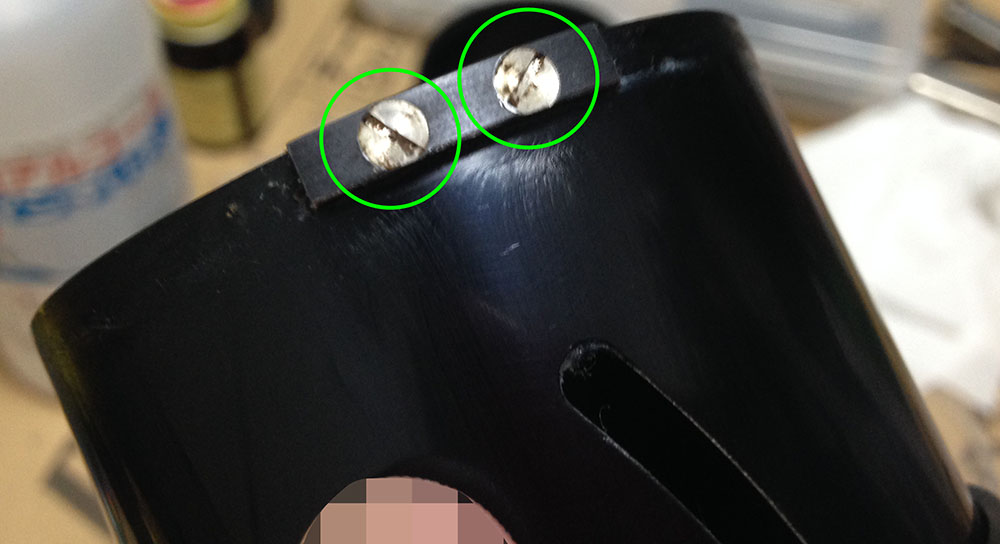
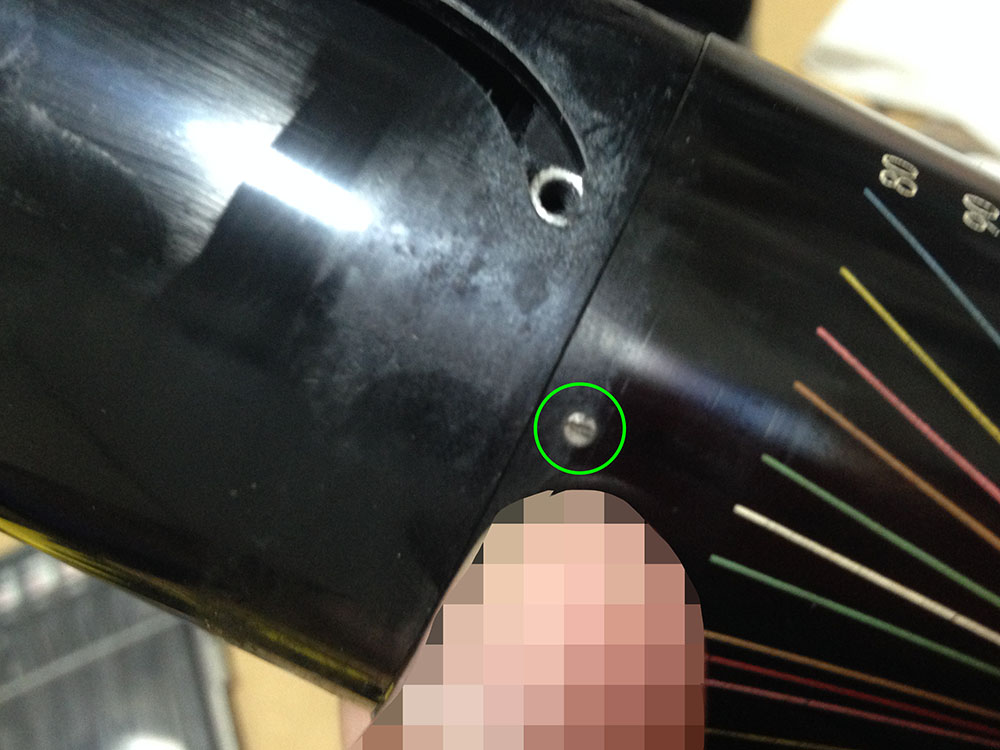
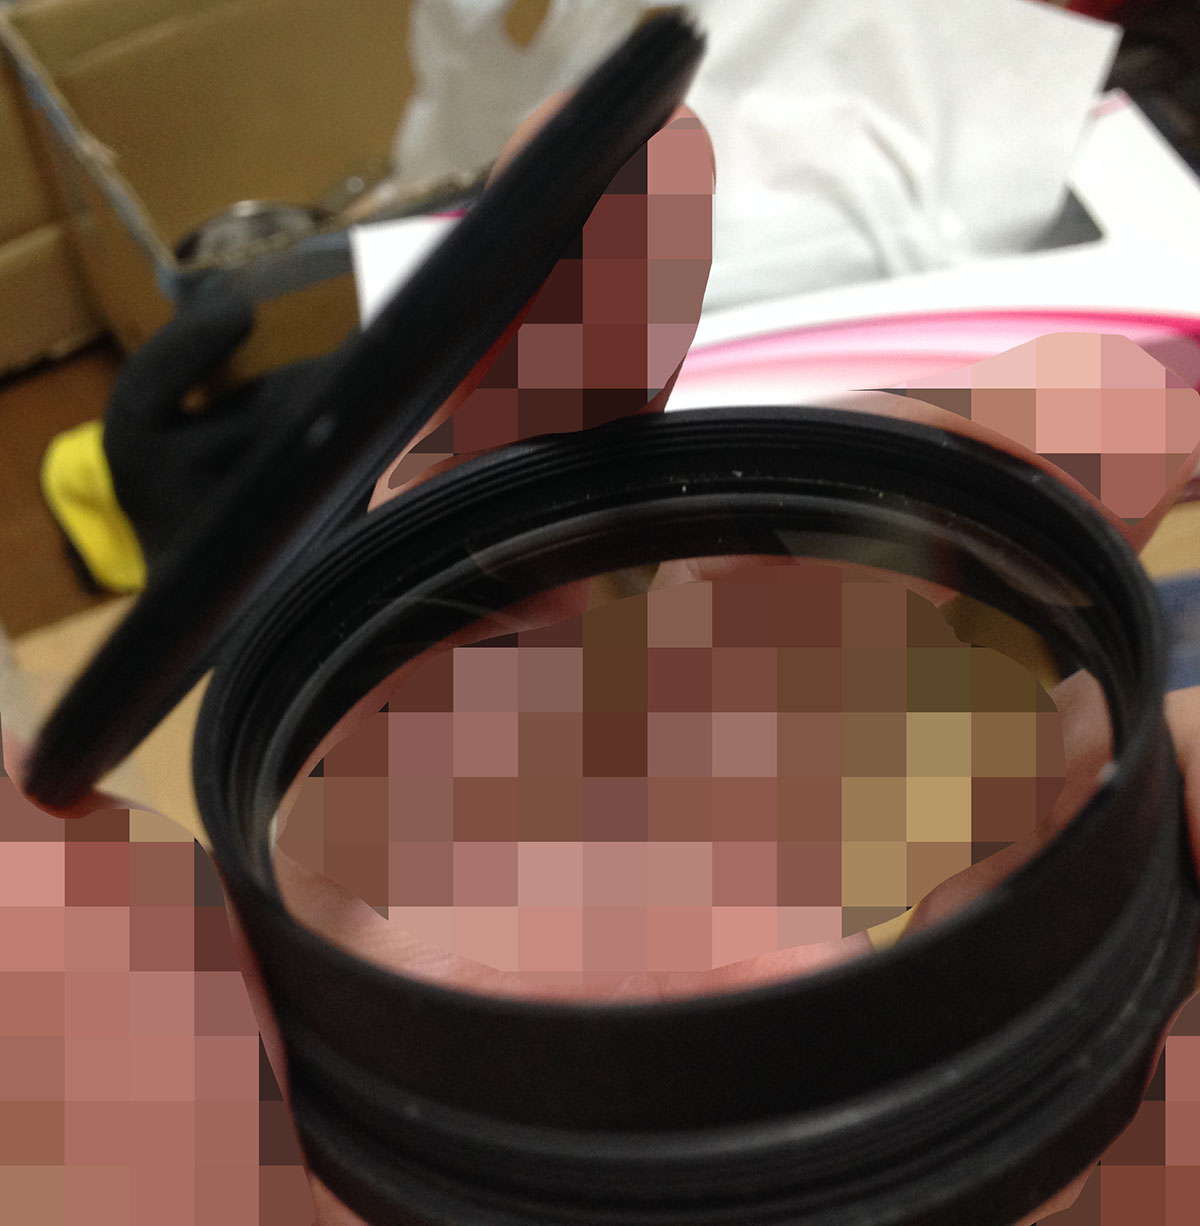
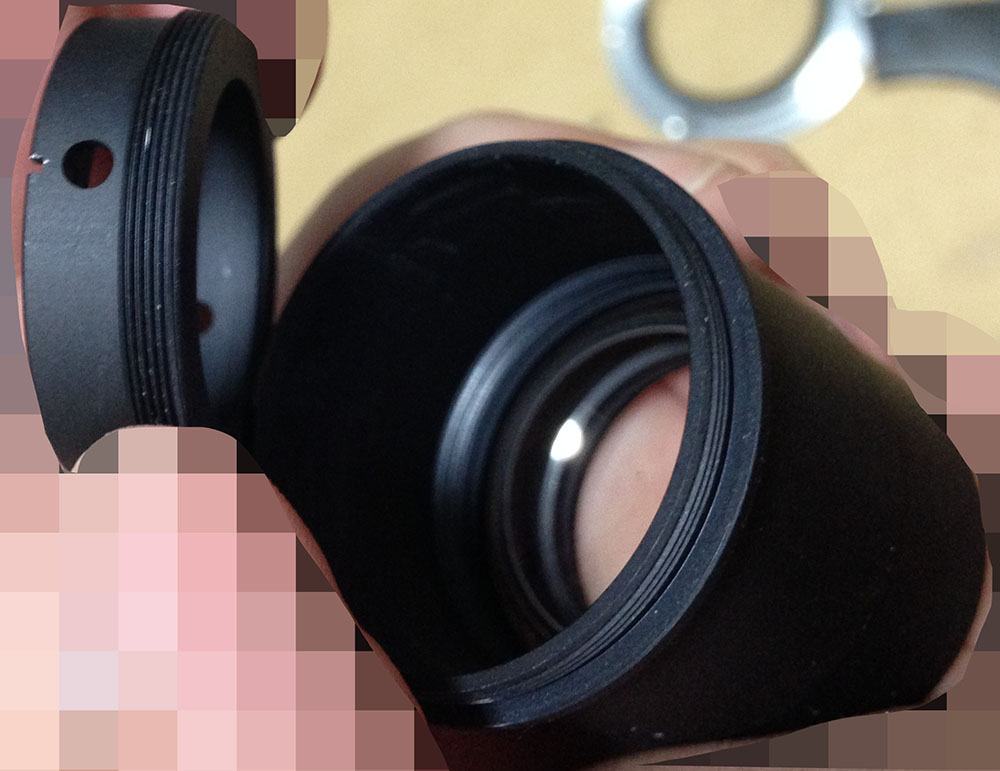
The front bezel is secured by this small set screw. Carefully remove it using the right type of precision screwdriver. You may want to dissolve the seals with solvents before you even try to extract it.
The bezel can then be unscrewed. This is sometimes secured with lacquer, a drop of alcohol on the threads helps if it’s stuck.
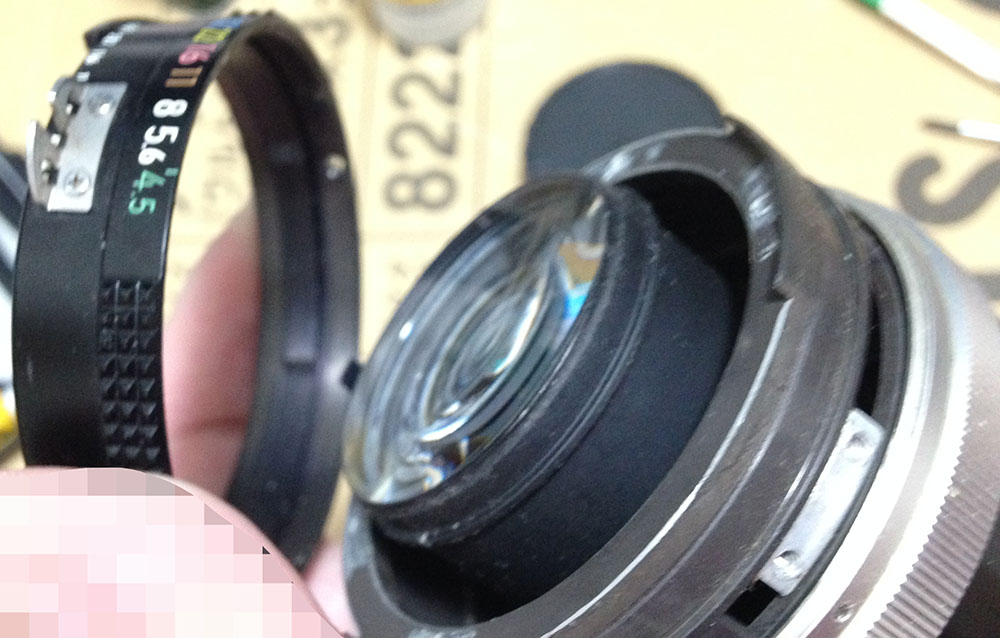
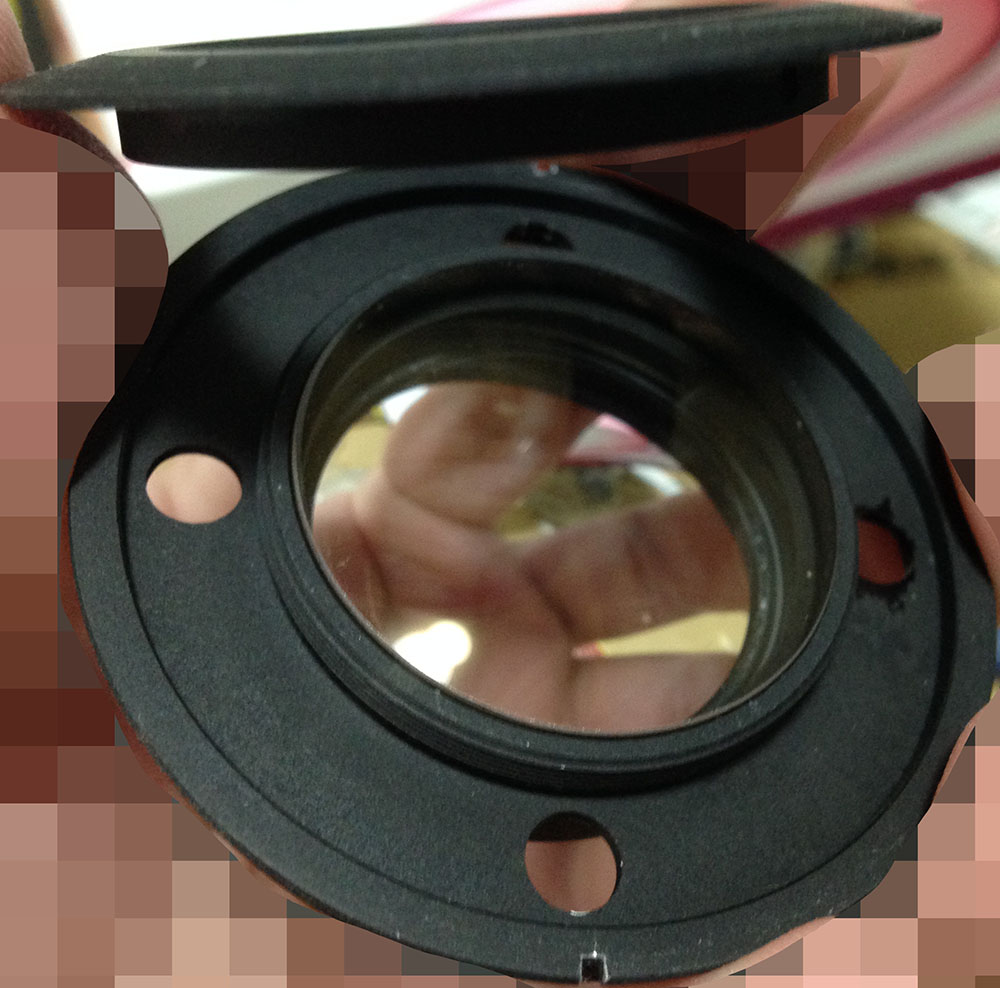
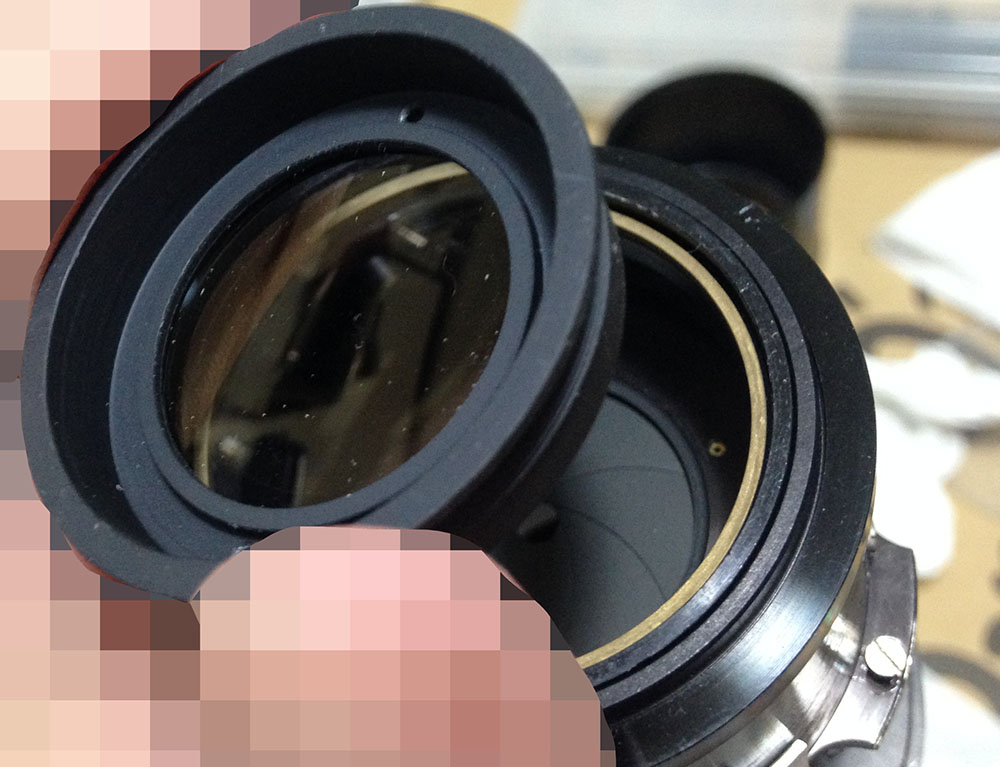
Removing the bezel will give you access to the front elements assembly. Use a lens spanner to remove this. The outer pair of slots is for the front optical cell’s housing while the inner one is for the front elements assembly.
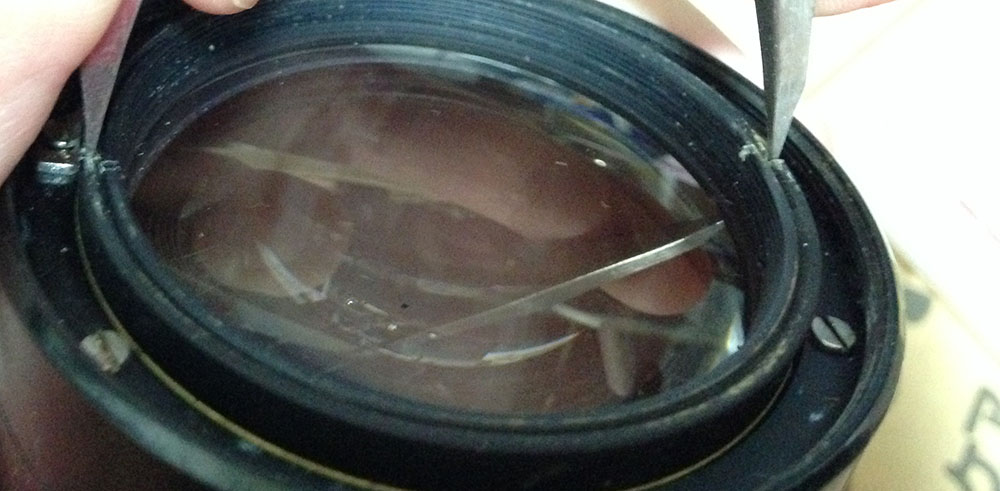
Be careful with your spanners so you won’t scratch the front element.
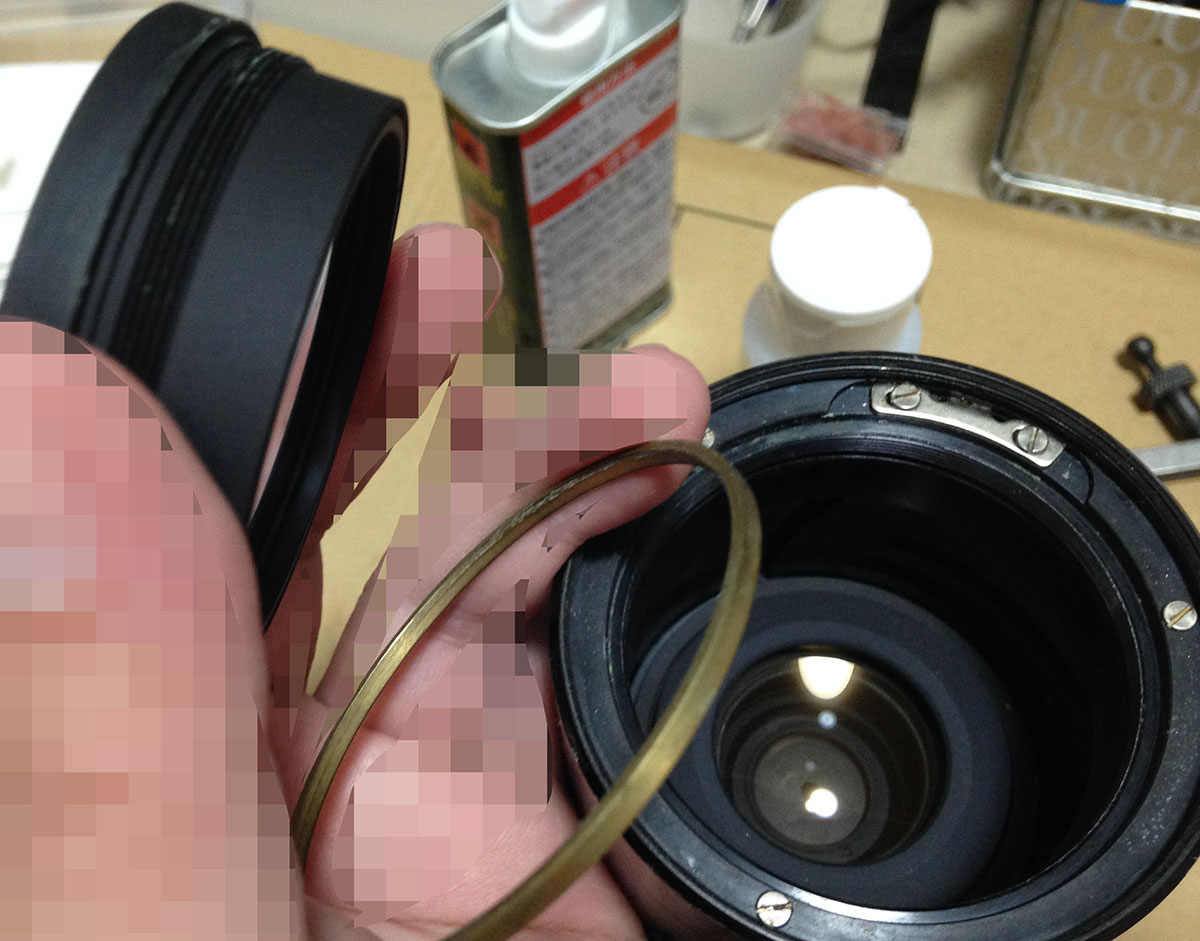
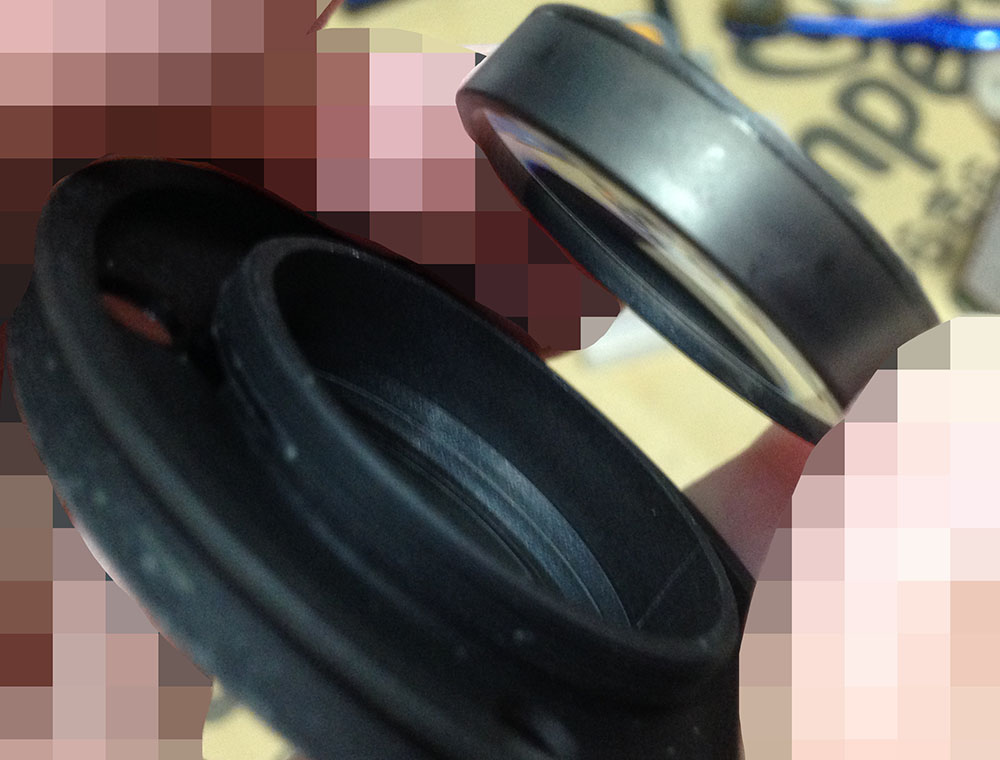
The front optical assembly can now be removed. There’s a thick brass shim here, it’s important that you don’t lose or damage it as this ensures that the front optical assembly is properly seated.

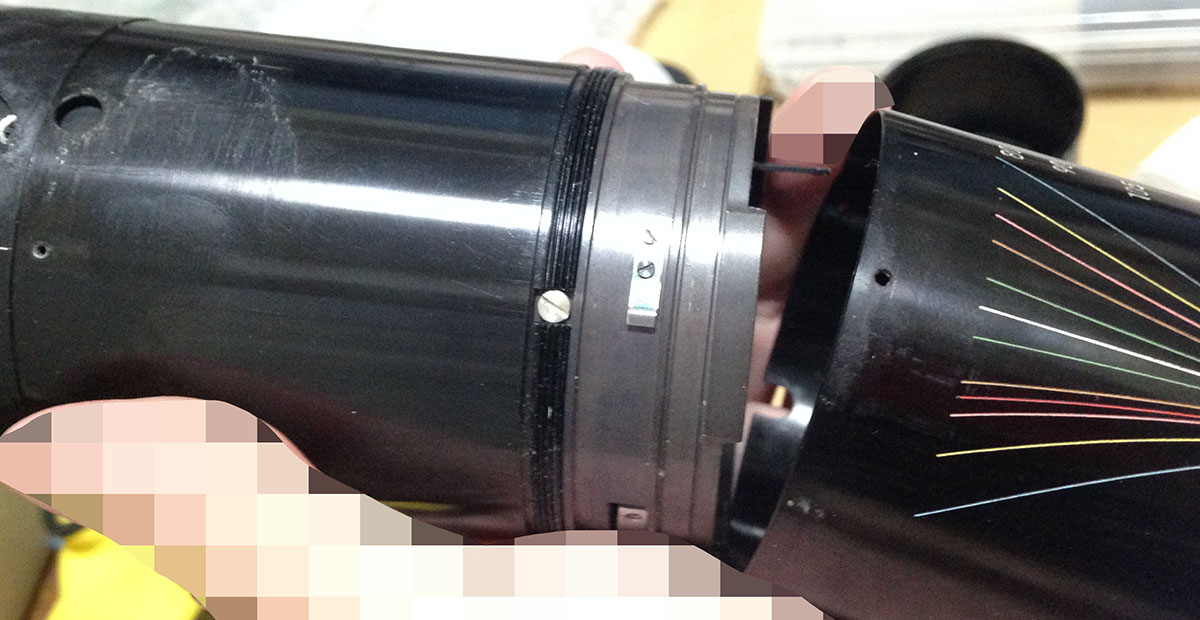
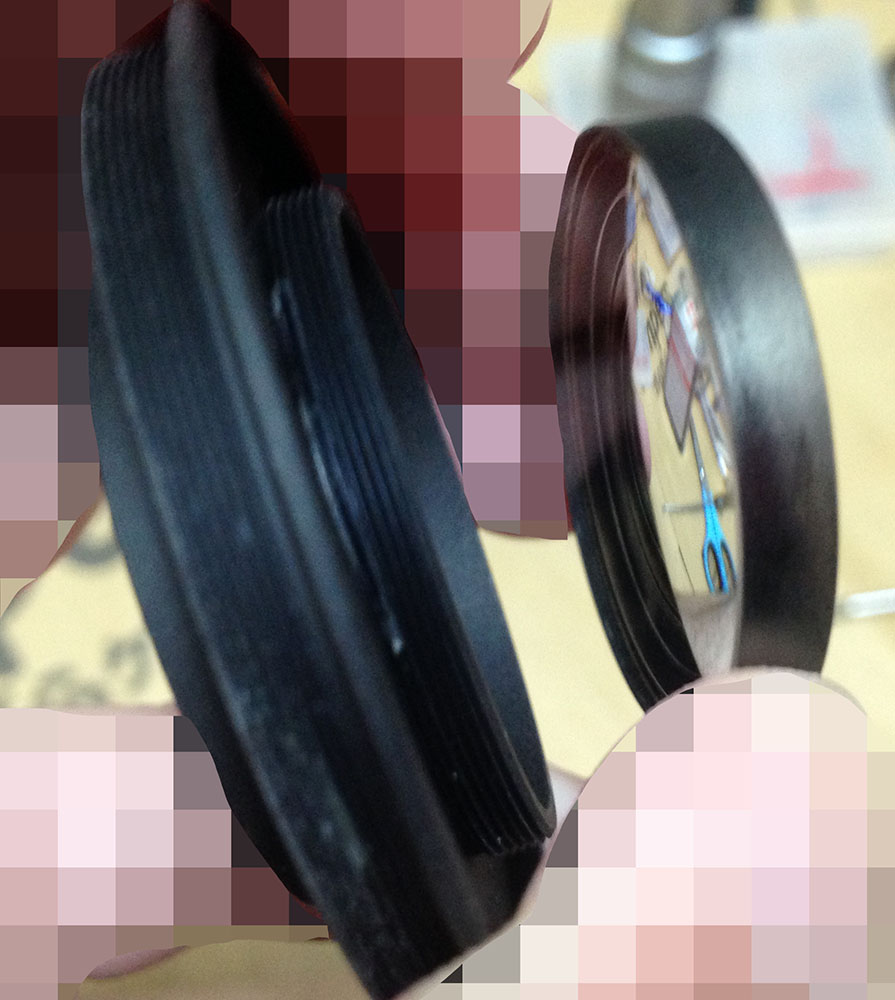
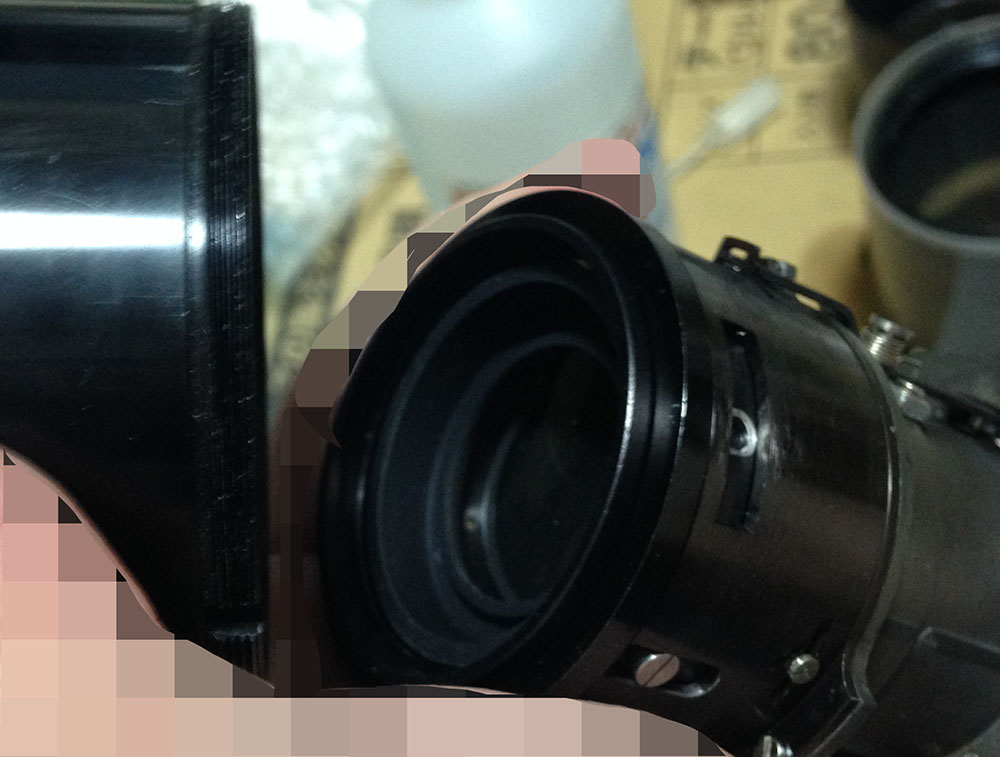
The 2nd optical cell sits deep-within the barrel but you can bring it closer to you by zooming it.
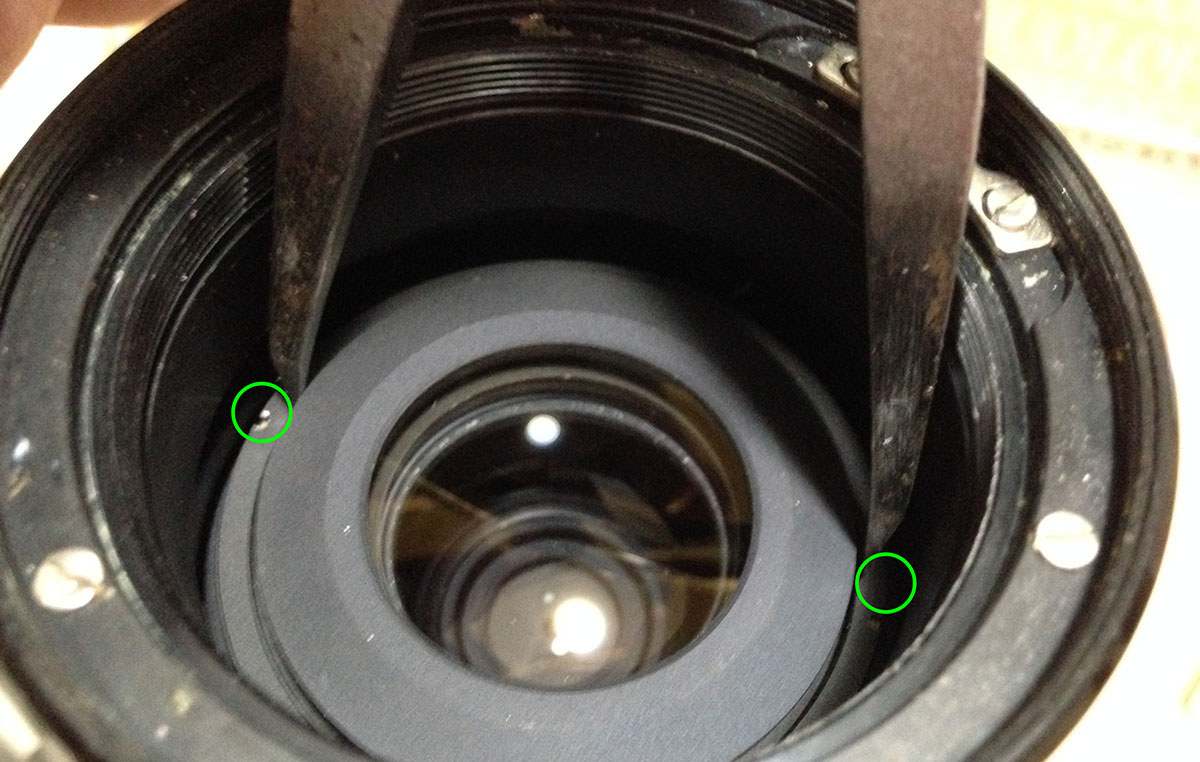
Now that it’s closer, you can use a lens spanner to remove it by inserting the tips in these slots. If your spanners are too thick to reach it, you will want to make a tool that will help you reach it. Read my guide on how to fabricate a pipe-key alternative to know about it.
You only want to loosen the housing then use a small screwdriver to turn it until you could extract it after it’s loose, you won’t damage the slot this way. As you can see, the slots are scratched and it’s an indication that somebody else has worked on this.
Extract it with a lens sucker and be careful not to drop it in the process.
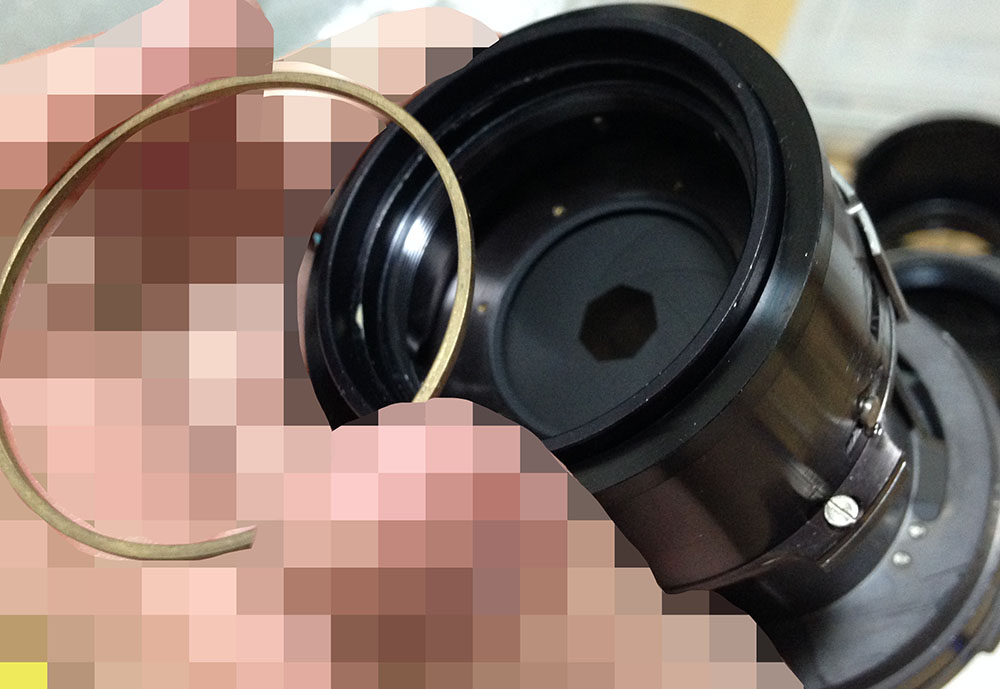
The 2nd optical cell also has a brass shim, store it in a safe place.
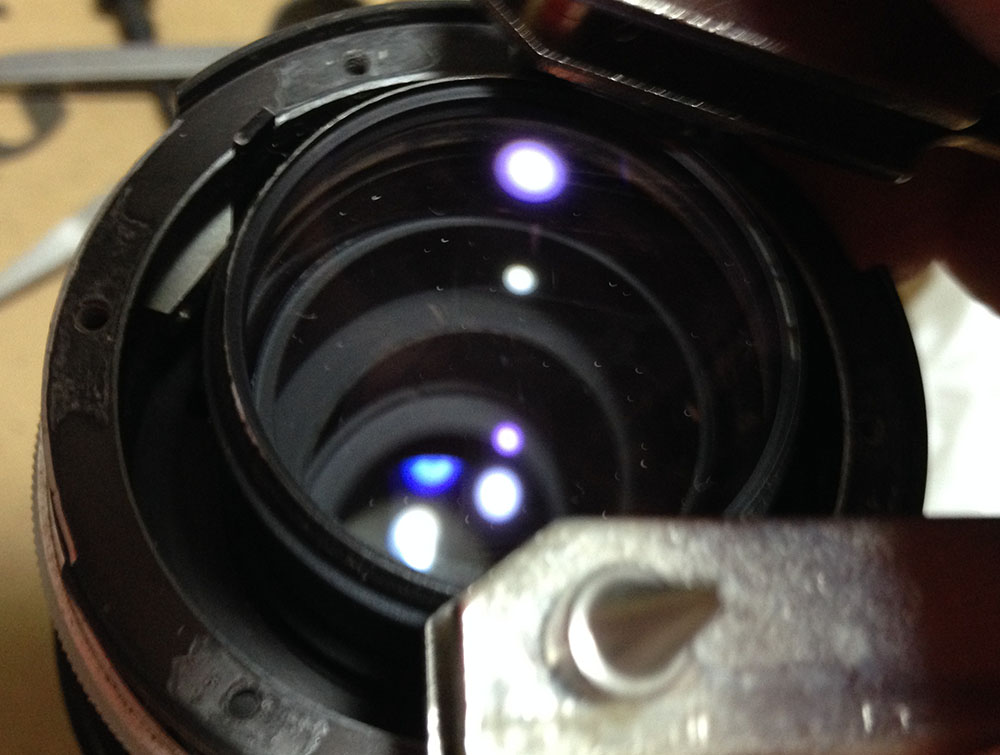
The floating element sits really deep within the barrel.
You could bring it closer by zooming and then use a long set of lens spanner to remove it. It can be tricky but it could be done safely using the right tools. Extract it with a lens sucker like you did with the 2nd elements assembly.
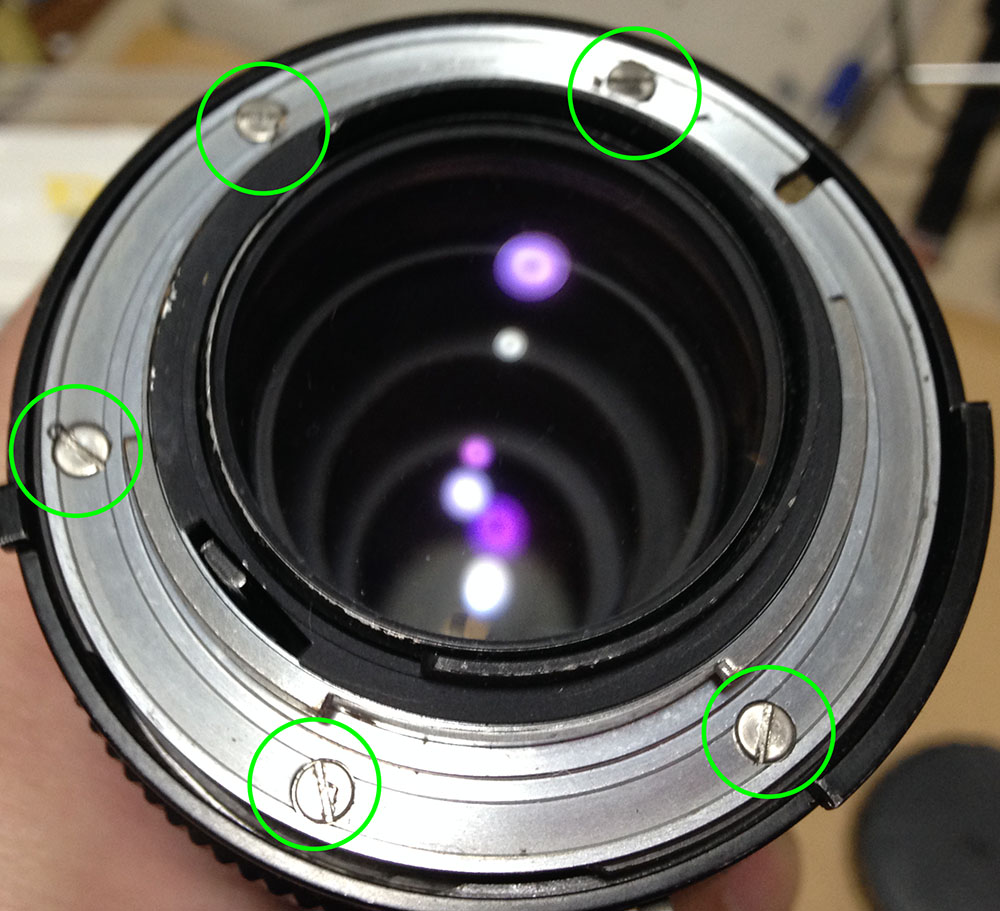
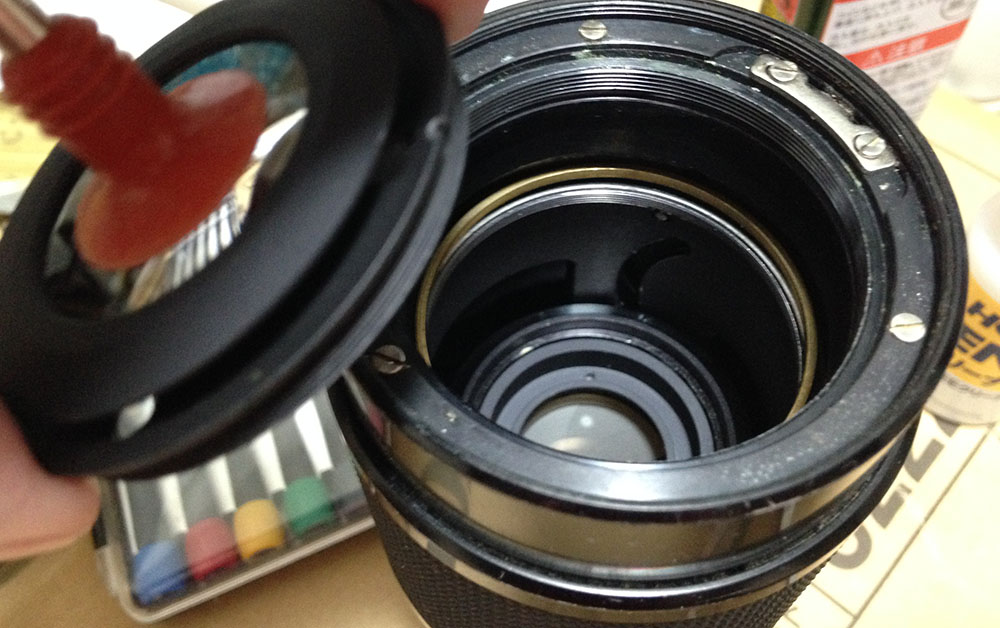
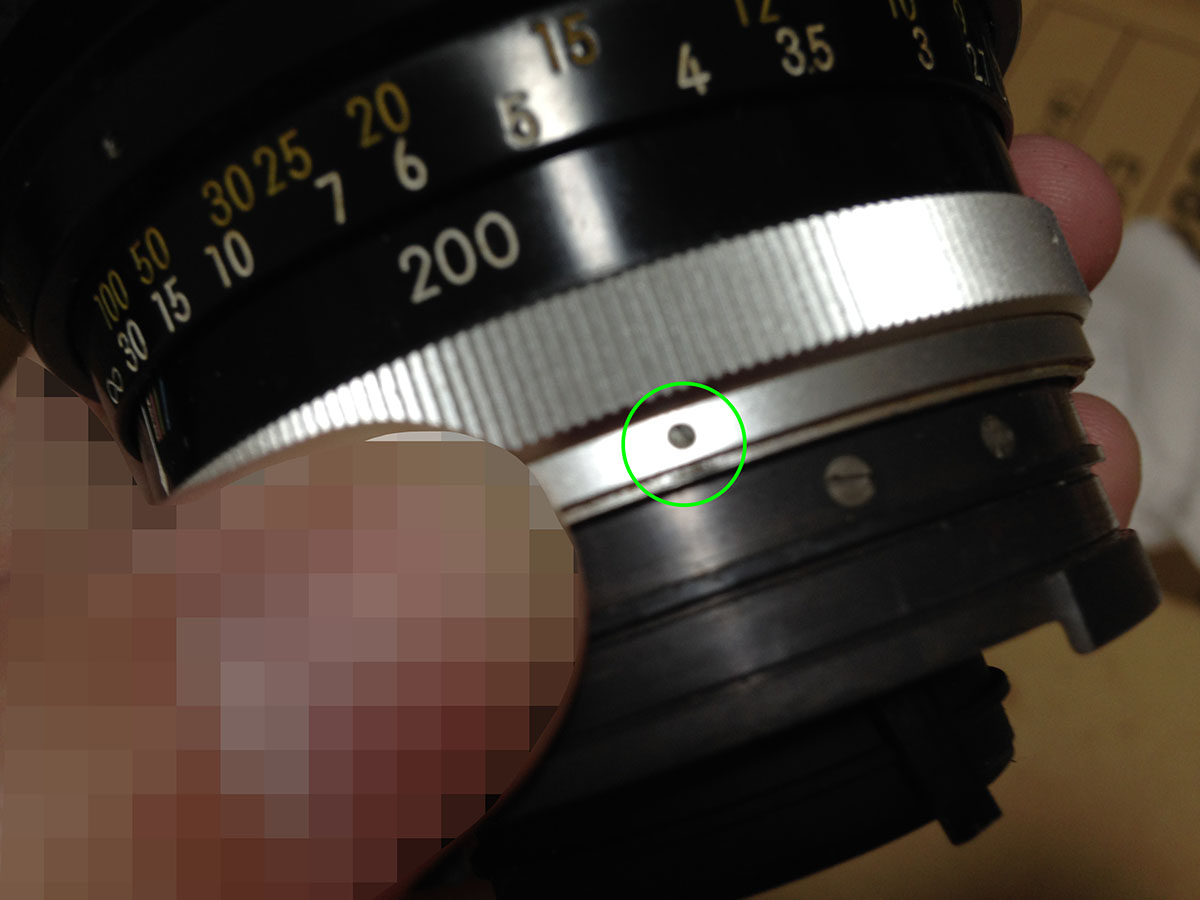
Now that you’re done with the front parts, store them in a safe, clean place. It’s time to work on the rear part, remove the bayonet by extracting these. If you are new to this, be sure to read my article on screws. It’s important that you read this because many people get stuck here because they stripped the heads of the screws.

Take note that one of the screws is shorter than the rest. Remember which hole this came from because you will need to put it back in that same hole later.
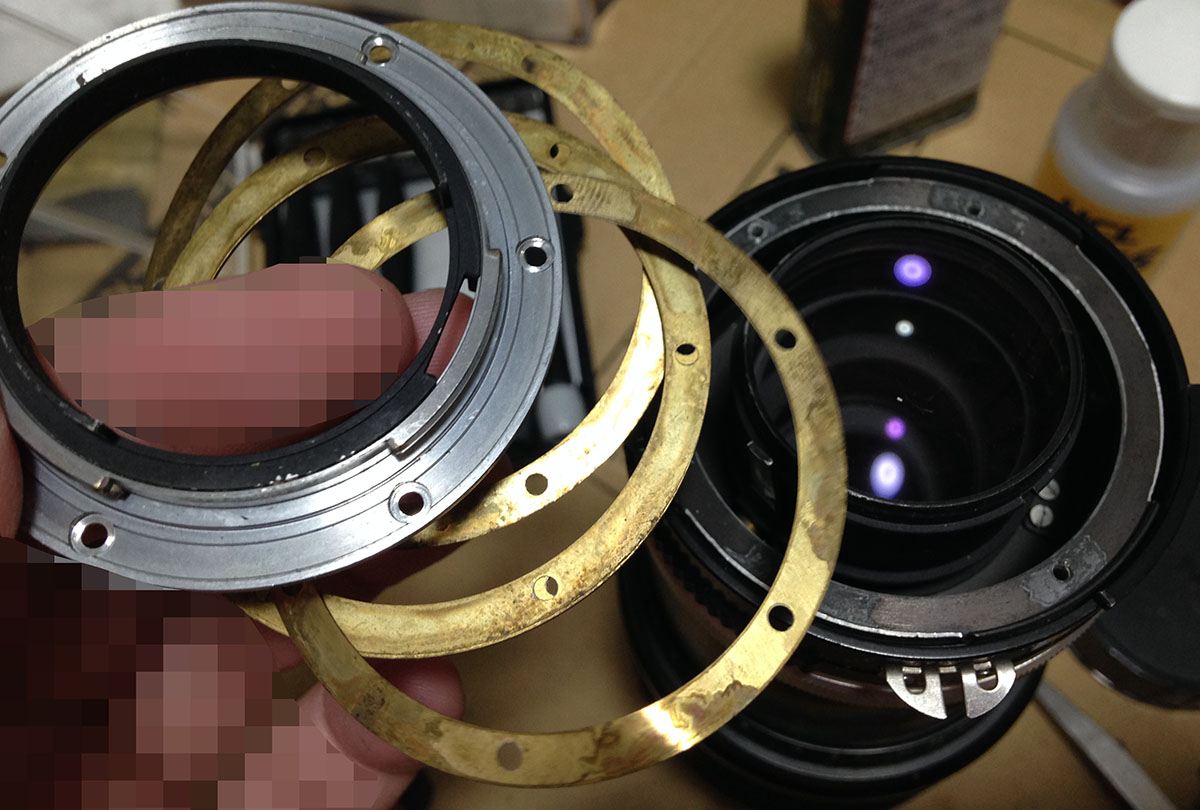
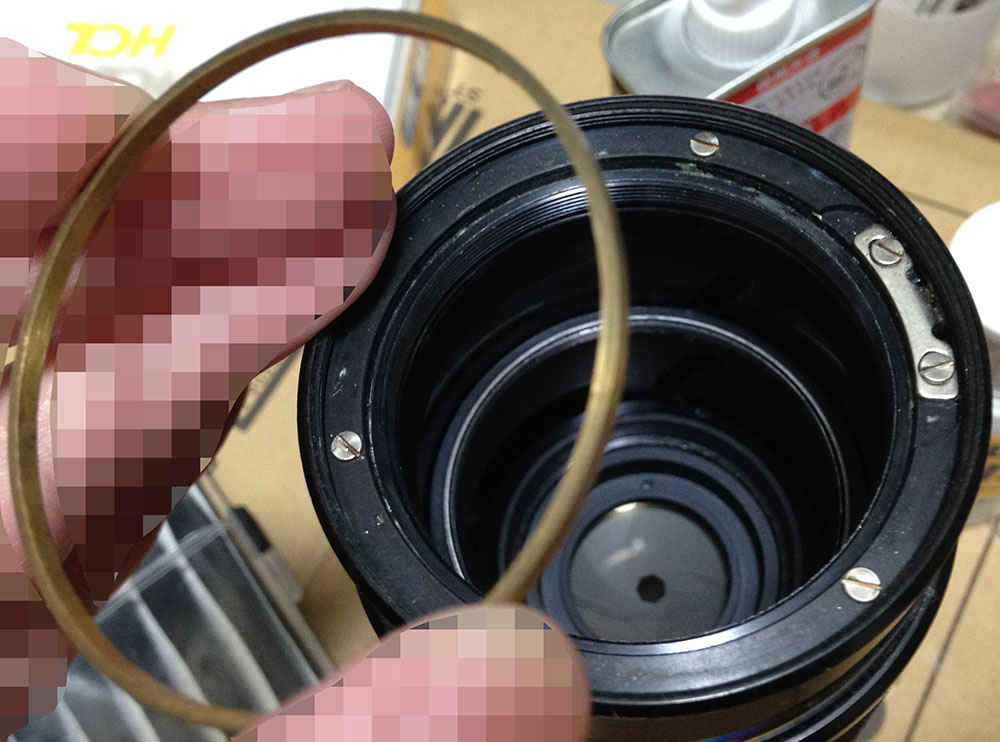
The bayonet can now be removed. Note that there is a set of shims here for spacing, you don’t want to damage or lose any of these. Clean these properly and store them in a safe place.
Before you remove the aperture ring you should extract these or you could warp the delicate coupling fork underneath it.
Once the screws are gone you can now safely remove the aperture ring.
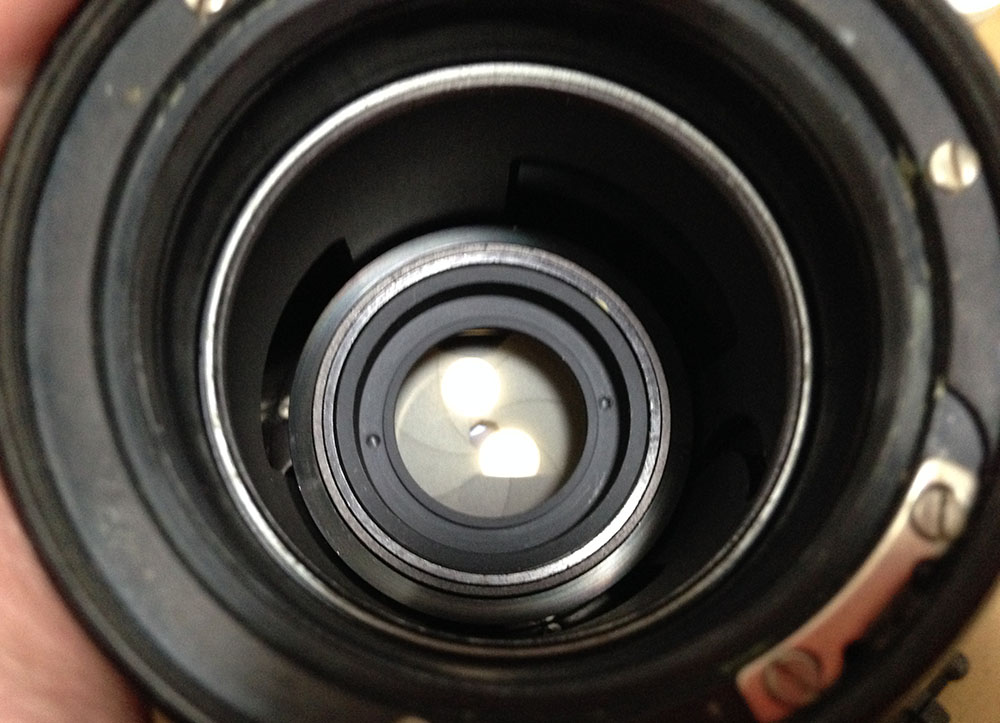
With it gone, you now have the room to extract the rear optical assembly in a safe manner. Be sure not to scratch the rear element with your tools.
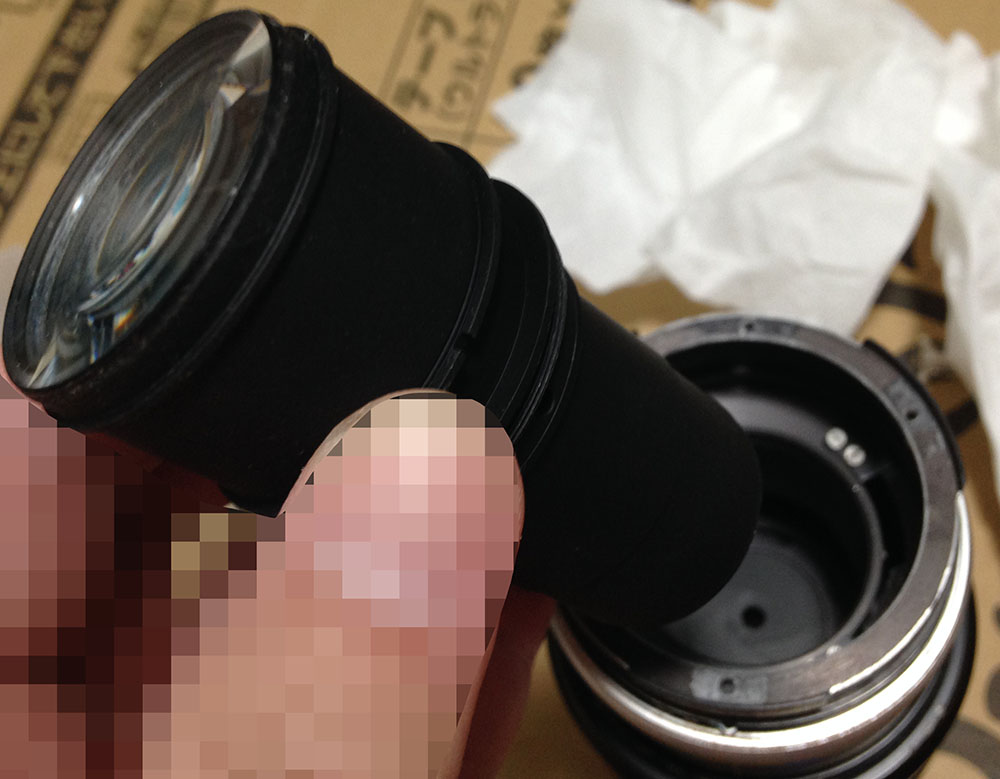
Just loosen it with your spanner and then unscrew it off using your fingers. You can then pull the entire housing off, store this in a safe and clean place.
I dedicated a whole section for this since there’s a lot of disassembly needed just to get these out. This is normal with zoom lenses and it’s something that you should get used to. Manual lenses are simpler than the newer electronic ones made today but they are good for studying how things work. Let’s now begin with dismantling the main barrel.
Disassembly (Main Barrel):
It was made in an era where things were made to last. You’ll find that all of the parts here were made very well. As far as longer zooms are concerned, this is as basic as it gets. You’ll need plenty of solvents like acetone because many of the parts here were glued at the factory. If something is stuck, just place a drop of solvent on the threads and let it soften the seals first before you attempt to unscrew it again. It could take several applications so you’ll have to be patient. It could take several minutes or several hours depending on the part and you’ll need to apply solvents again if it has dried-up just to keep it moist. Study how a mechanism works before you dismantle it. This will help you understand how things work and it will help you later during reassembly. You’ll also need to take plenty of notes and make a few marks just to help remind you how things should be aligned and positioned. These are complicated, the parts should align precisely in order for them to work properly.
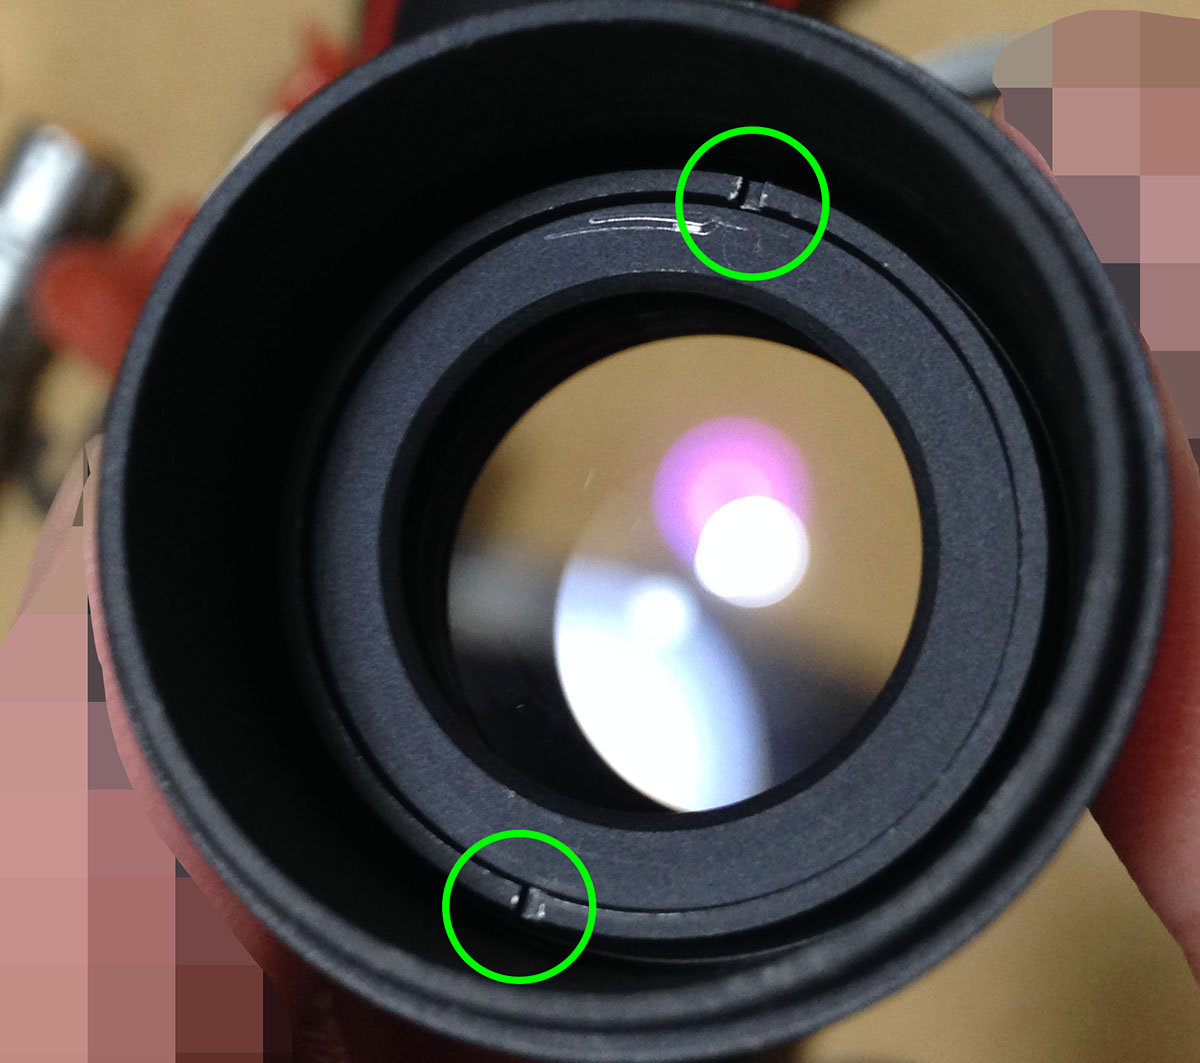
This picture was taken before I disassembled anything. While it’s at infinity, take note of the position of all the components and use the centerline of the lens as a reference. Taking notes is essential.
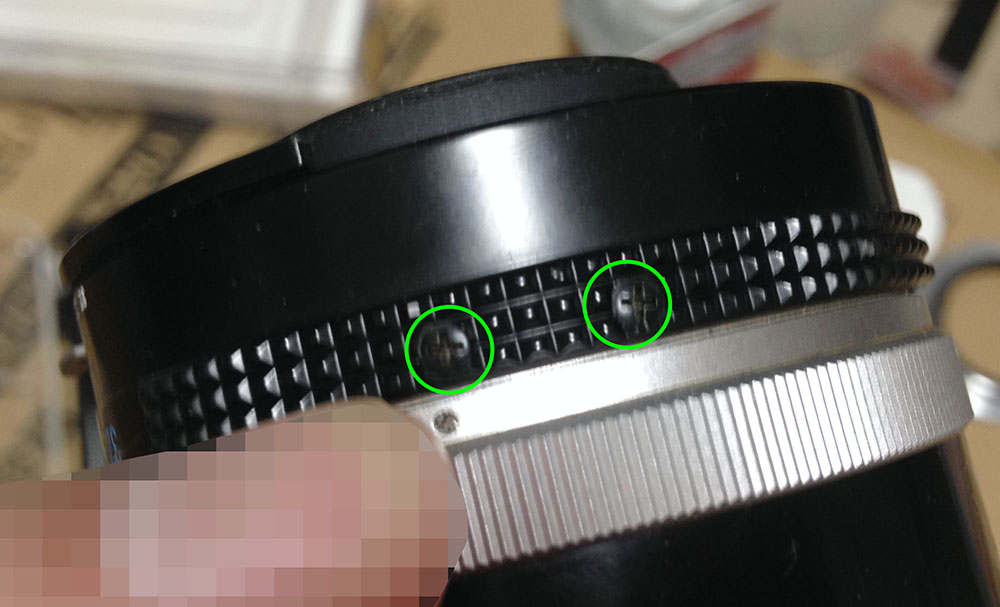
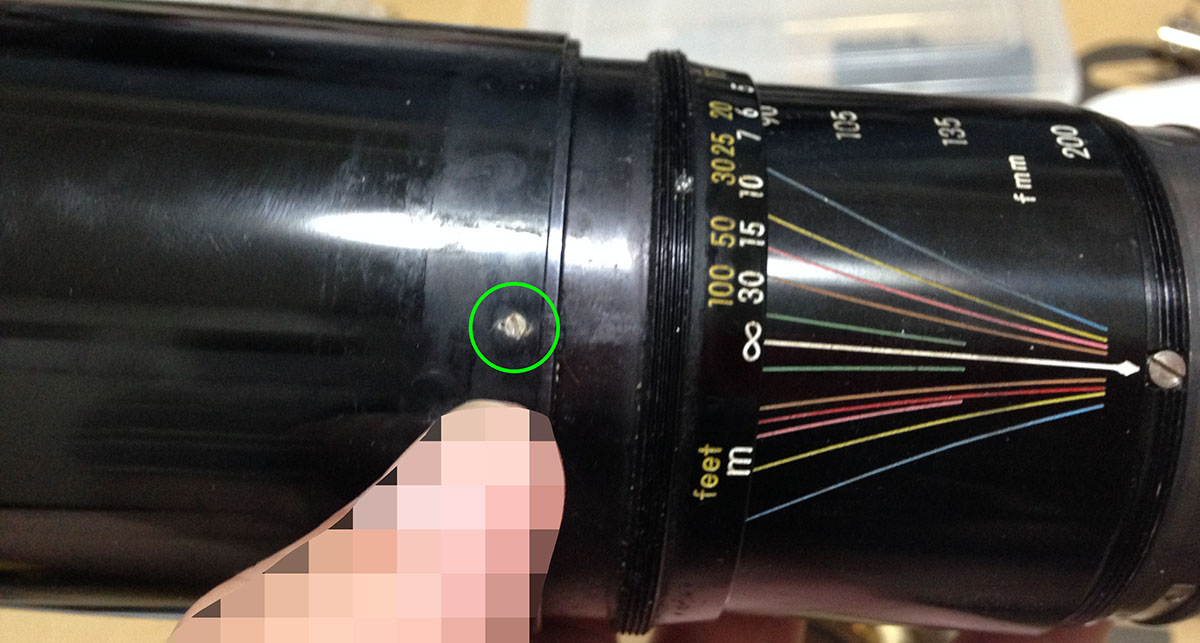
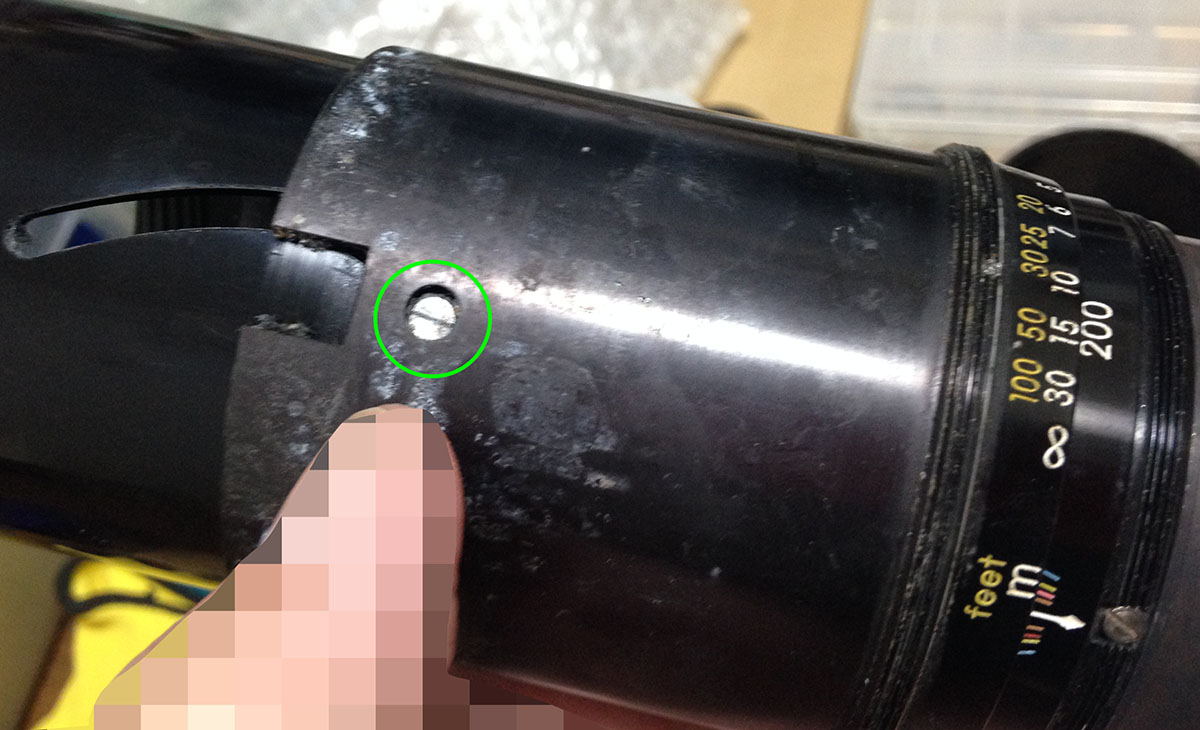
To remove the fluted grip, you will have to extract this set screw.

The grip along with its collar should come-off easily.
This is how tiny the set screw is. Be sure not to lose it.
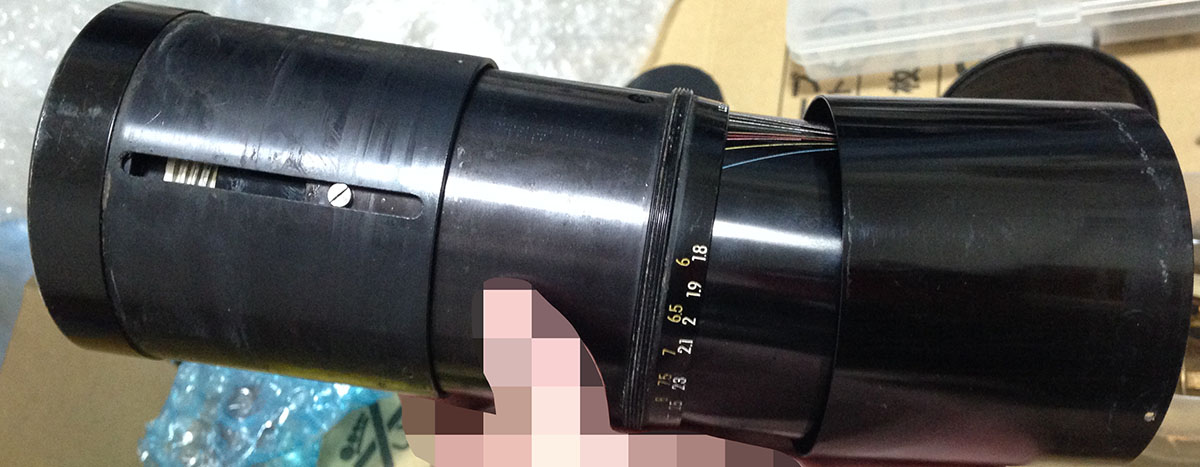
This is how things should look like at this point. The next thing we need to do is remove the focusing ring. It’s not easy depending on the lens’ state.

The focusing ring is secured with a big set screw. You will want to be careful with this if it’s rusty because it can be easily damaged. Note that the grip is still in the picture and forget about that for now.
You don’t have to remove the rubber grip. I just removed it because the lens was so dirty and I wanted to clean this well by soaking it in an alcohol bath. The focusing ring is usually sealed with lacquer or contact cement. I applied MEK to the threads because the bond was too strong so I needed something stronger to soften it. The solvent can also be dropped into the hole of the set screw and let capillary action take the solvent to the rest of the thread.
Once you’re confident that the seal is soft enough, extract the focusing ring. I’m not sure if this is a left-hand thread wherein you’ll need to turn it in the other direction in order to loosen it so just figure it out yourself.
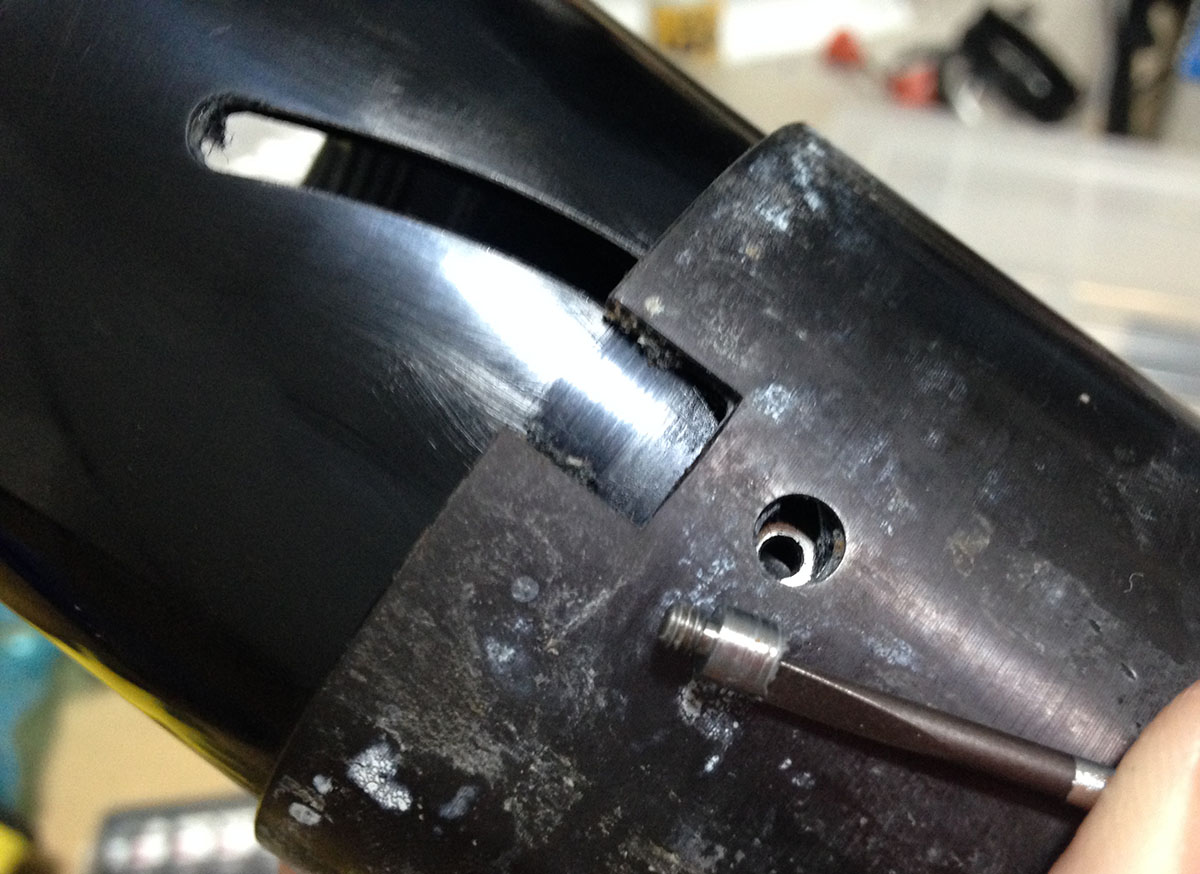
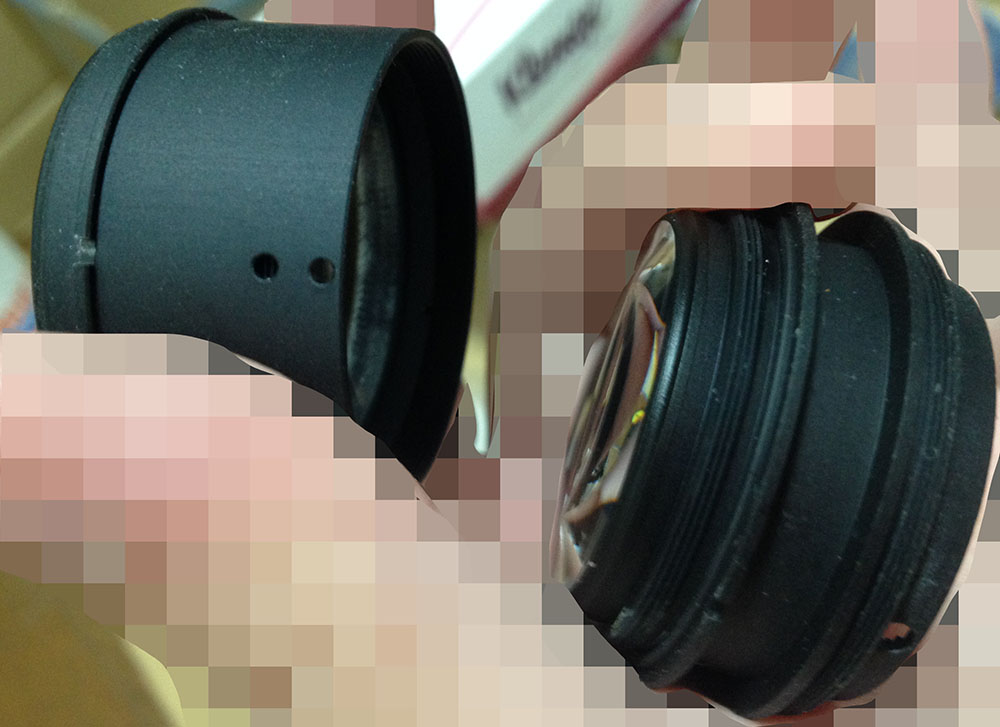
Extract these to remove the sleeve of the front barrel. It is also important to note that the sleeve can sometimes be stuck due to dried-up grease so apply some naphtha to soften it if yours is stuck. Also note that the dimple for the set screw of the focusing ring is visible in this picture. You will need to align this to the hole of the set screw and make sure that it sinks into this dimple.
The sleeve should slide-off easily.

Now that the sleeve is off, you can now access what’s underneath it. Loosen this roller but don’t remove it just yet. Removing it will allow you to remove the front barrel and it’s important that you take some notes first before you extract it.

Take lots of notes and measurements before you remove this helicoid key. Removing it will allow you to unscrew the front barrel and you do not want to do that before you take some pictures and notes first. Only when you are satisfied with your references can you remove the screws securing this and remove this helicoid key and that roller from the previous step.
You can then remove the 3 screws around the lip of the front barrel. They’re not in the pictures for some time now, I removed them earlier but I forgot to document the whole process. These 3 secure the front barrel to the helicoids underneath it so you’ll have to take some notes of its position.
This is how the front barrel and the helicoid should come-off. Remember to mark where the helicoids separated. This is important, if you got this wrong then the lens will not focus to infinity properly. To know how to work with helicoids, be sure to read how to work with helicoids.
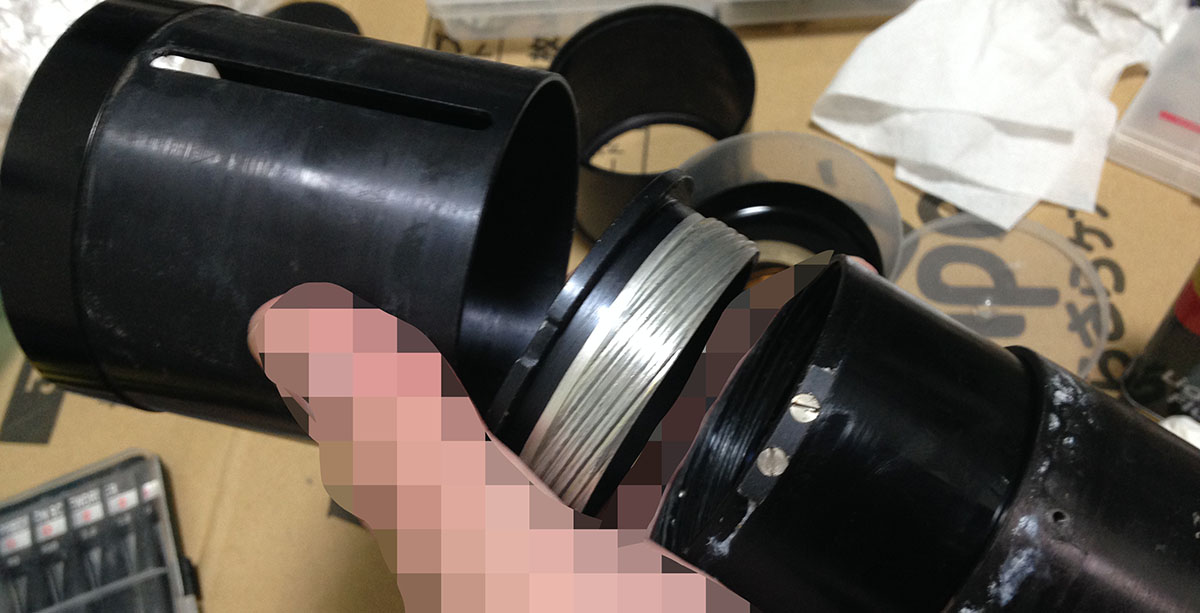
Remove this roller so you could remove the thrust cam.

Remember how this should be oriented before you remove it. You can also study how it moves so you’ll know what this thing does. This will help you understand how things work and will aid you later during reassembly.
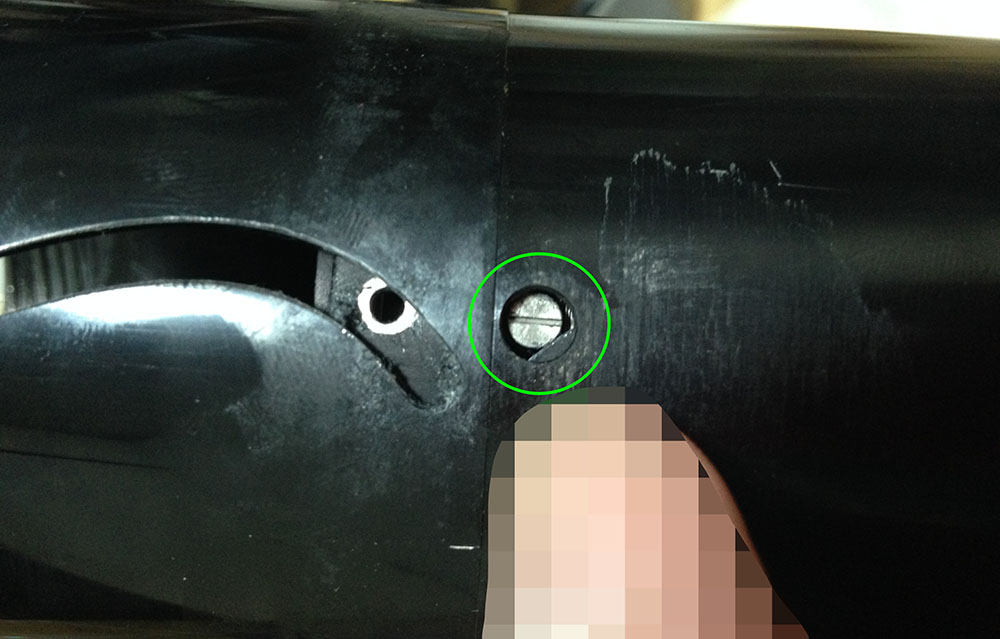
Carefully extract this screw. These are easily stripped so make sure that you are using he correct driver that fit the slots perfectly. These are glued, using a soldering iron can be helpful in softening it.
You’ll need to grease the polished part of the screw later during reassembly. Only use a very small amount of grease here. See how dirty the inner barrel is? That’s caused by old grease and fungi.
Now that the screws are off, you can now remove the focusing barrel. That screw acts as a pin to couple this to the inner parts so they move in-sync as you zoom the lens.
The inner surface of the barrel is lined with felt. This serves like a gasket to protect the lens from incoming dust as you zoom it in-or-out. When this felt lining gets worn, you’ll get one of the common problems of push-pull lenses, zoom-creep. It happens because the felt isn’t hugging the barrel anymore so the mere weight of the zoom/focusing barrel will cause it to move when you orient the lens at an angle. This can be troublesome when you are shooting with a tripod.
This is the stopper that prevents the helicoid from turning beyond its range as they key is going to hit this, preventing it from making a full turn. Extract it by unscrewing these screws. These can be tough to remove so use plenty of solvents. Old grease and germs tend to accumulate under this, too.
Just look at all this gunk. This looks like some cheap lithium grease that the Japanese love to use, it’s simply called “white grease” colloquially. It’s cheap grease for plumbers to use for your toilets and other stuff and I’ll never use something like that for lenses. It’s cheap that’s why it’s popular amongst the DIY crowd.
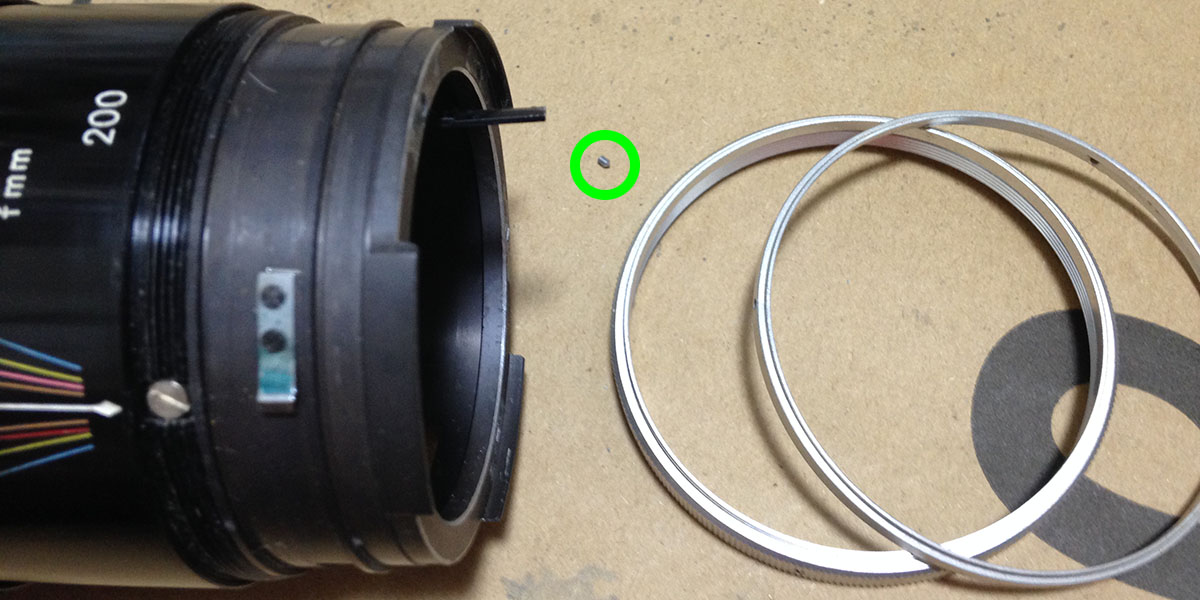
You can finally remove the sleeve. It’s being secured by these little screws.
These things usually collect plenty of dirt underneath and it’s always a must to clean the underside of these. The scale needs to be properly cleaned so all the beautiful colors painted on it will look vibrant again. Just scrub it with a soft brush and a little bit of soapy water. You may want to read my article of repainting lens engravings.
You need to replace all of the felt lining. These things are breeding spots for germs. Replace them with a material with the proper thickness. If it’s thick, it will make the lens hard to turn. If it’s too thin then it’s no good at all.
Do not make the same mistakes as the previous guy. Use the correct type of lubricants and only apply it where needed. Do not be tempted to apply too much because all you need is a thin film in most cases. Don’t apply a lot to the helicoids their its proximity to the front elements is going to make the grease migrate to it when it goes bad. If your lens is as dirty as mine, you’ll need to replace all of the felt lining, too. You could go to a milliner’s shop to look for the proper material. Sourcing materials aren’t always easy, you will need to invest plenty of time for this.
Disassembly (Optics):
Taking apart the optics isn’t really difficult. Most of the optics are housed in their own casing and you’ll only need to open the ones that need cleaning. Some of the parts here are sealed, you’ll need to do that solvent trick again. If they were sealed with paint then it is important to use something that can dissolve it. Be careful with the direction of the elements when you put them back. If you put them back facing the wrong way it could damage your lens or you will end up with a lens that focuses improperly.

The front element can be removed by unscrewing this retention ring with a lens spanner. It’s usually sealed with black paint so be careful and soften it first with turpentine.
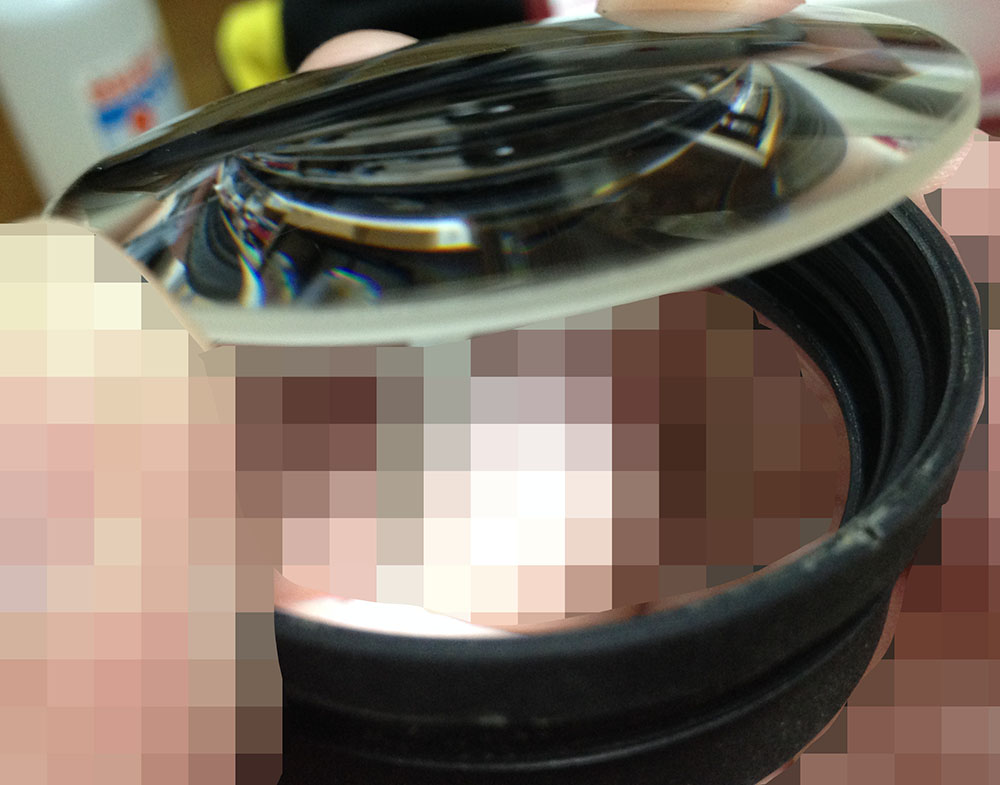
Carefully extract the front element with a lens sucker.
The 2nd and 3rd elements are cemented together as a doublet and is sealed with its own retention ring. Carefully remove it like the one in the previous step.

You can carefully extract it using a lens sucker. Be sure to note its direction so you will never put it back facing the wrong way.
The elements here can be removed by unscrewing the baffle off.
Extract it with a lens sucker and as usual, never forget to note its direction.
Theres another element here. Don’t put these back in the wrong order.
Time to work on the rear optical cell. This element can be cleaned without separating it from the housing so this makes things easier.
Don’t forget this brass spacer. Never lose or damage this accidentally.
You can access what’s inside this assembly when you remove this barrel.

The rear optical assembly is a single sealed unit. The elements here needs to be spaced in a very precise way so only open these when you have to. If you need to service yours then you’ll have to take notes on how many turn were needed to remove something and then take some notes on how they should be oriented by making small marks that will help during reassembly. These holes are convenient for dropping a little bit of solvent to soften any glue or to use as access holes for a screwdriver.
Here are more of these holes. If any part is stuck, the first thing you’ll need to do is to look for these holes so you can place a small drop of solvent into it. Be careful not to put too much or else it may reach a cemented element and dissolve the optical cement.
Once the bond has been softened, you can easily turn anything with just the force your fingers.
It’s now easy to take things apart now that the glue has been softened.
This retainer sits a bit too deep for my spanner to reach and it’s too close to an element. I would prefer not to open this but I had to.

I made a tool out of some scrap acrylic to help me remove the retainer.
That’s all for the optics. They’re not difficult to work with but you just have more of them to worry about. One sure trick that I use to help remind me which element I am working on and which direction it should be facing is using a marker to paint the wall of each element. You do not need to write something big, just a small dot is more than enough. I also draw a series of dots to represent element number, where the dots are drawn is important since I always draw on the leading edge. This help remind me which end of an element should be facing the front. You will want to keep these marks as small as possible since they can sometimes be seen when you view the lens as they’re more opaque compared to the ink used to blacken the walls of the elements. Make sure that you don’t rub it off when you clean it. Alcohol will remove them easily.
Conclusion:
After cleaning the parts thoroughly, reassemble them by back-tracking each of the steps we did. You will need to adjust the infinity focusing of your lens and to do that you will have to adjust the position of the helicoid key. There aren’t much to adjust here. Read about adjusting a lens’ focus in this article. This could also be adjusted by adding or subtracting the shims found under the bayonet mount but this is something that you should never consider if you have reassembled the lens in the proper order. It is used for adjusting the rear-focus. Make sure that you calibrate this at the long end so that your adjustment is more accurate since 200mm has a shallower DOF. If you find that the focus is off in one end but perfect on another then you may have to adjust the rear or inner elements assembly properly to get perfect focus on both ends. This is very tedious so just make sure that the focus is acceptably sharp on either end and call it a day.
This took me about 2 or 3 nights and most of the time was spent cleaning all that grime away or cleaning fungi from the elements. I do not like repairing zooms because of this but it can’t be helped, some of these are too important not to have in my collection. I also tend to use prime lenses more because I find them to be sharper and more specialized but this is just my opinion. If your lens needs to be repaired, bring it to a professional. If you have what it takes then you can work on yours but pay special attention to the alignment and spacing of the elements. There’s no room for mistakes here, even older zooms made in the adjust-and-fit way needs to be calibrated properly. I find that there’s less room for error with these vintage lenses than those made in recent times when adjust-and-glue became the norm. Enjoy and appreciate the workmanship of these old lenses because they were all made to last.
Thank you very much for following my work. I have not posted much these days due to my busy schedule and I have taken a dip in my page views but I will make it up to you this April. I have a few special things planned for this month so please come back to see what they are. If you like my work, please share this with your friends at social media or with your photography club. Share the pleasure of enjoying these old lenses and appreciating what many people today would disregard as irrelevant. Supporting this blog helps a lot, it helps me offset the cost of hosting and you help me purchase, develop and promote film photography. This would not have lasted this long without the help and support from you guys. Thank you and see you again, Ric.
Help Support this Blog:
Maintaining this blog requires money to operate. If you think that this site has helped you or you want to show your support by helping with the site’s upkeep, you can make a small donation to my paypal.com (richardHaw888@gmail.com). Money is not my prime motivation for this blog and I believe that I have enough to run this but you can help me make this site (and the companion facebook page) grow.
Buy me a roll of film or a burger?
Thank you very much for your continued support!
$2.00
Helping support this site will ensure that this will be kept going as long as I have the time and energy for this. I would appreciate it if you just leave out your name or details like your country’s name or other information so that the donations will totally be anonymous. This is a labor of love and I intend to keep it that way for as long as I can. Ric.

Sep 06, 2018 @ 06:06:23
Helpful!!
Sep 06, 2018 @ 11:18:58
Hi,
This is really helpful.
I recently bought used Nikkor 80-200 f/2.8 push and version, the lens is in great shape but there is a rattling sound coming from front element when I shake it. The lens also focusing on the back side after calibration still I feels its focusing little on the front area than the focus point but this is almost negligible and can be noticed only after zooming 200%.
The camera also has slight/ minor dent on the metal lens hood that might have caused due to a drop and I am worried and hoping that rattling sound is not because of any damaged component. so I wanted to dissemble and check it out. If there is any damage then I can return it within return period.
I have a repair-service manual for Nikkor 80-200 f/2.8D and I wonder will the same manual is usable for my lens or no?
I would be glad to hear from you about that, thank you in advance.
Regards,
Salman
Sep 16, 2018 @ 22:31:35
Thanks, glad that you liked the blog!
That lens is different from the 2-ring version. there’s nothing much in common mechanically. AF lenses are more delicate than manual lenses so a drop can be dangerous. that optical formula has a tendency to backfocus and the way to fix it is by calibrating the elements. It will not be easy. I will make an article one day about that. Ric.
Oct 07, 2018 @ 21:12:23
Hi Richard,
Since I got the virus by fixing my 85 1.4 following your instructions, I got my hands on a very nice copy of this 80-200, and could probably even leave it alone, except that wouldn’t be nearly as fun.
I have a question for you about the felt lining, which really is the weak spot at least on my copy. Do you reckon a 1mm replacement such as this: https://www.feutrine-express.fr/product/Coupon-Velours-Adhesif-Noir (here is to practice your French a bit) would do the trick? If not would you have an example or some sort of more precise indication about which material and how thick/thin it should be?
Thanks!
Romain
Mar 12, 2019 @ 17:29:53
Hello Richard
My lens is a 70-200mm f/4.5 N. I am totally unable to open the focus ring so that i renew the felt lining inside the zoom barrel so it does not fall. I use MEK ad you advise but it still breaks my hand and nothing moves. I have a video of the problem here http://www.peterpachner.com/pppik/?p=1313 (click the flowers). My zoom is slightly different than the one you work on and I wonder if it is at all possible to repair this one.
I find your site helpful and fix a few lenses already with success. But this 80-200 is a real pain since it will not open, any hint would be welcome. Thanks, Peter