
Hello, everybody! Are you a Vim fanatic or an Emacs supremacist? I personally don’t use both much but I Vim is something that I used a lot when I was still working on a Linux environment. It’s small, nimble and easy to use. It doesn’t have the power of Emacs but it gets the job done. I like simplicity, it makes me more productive because I don’t have to deal with any clutter. Today, I am going to show you something simple. It doesn’t have the bells-and-whistles of newer lenses but it gets the job done due to its simplicity.
Introduction:
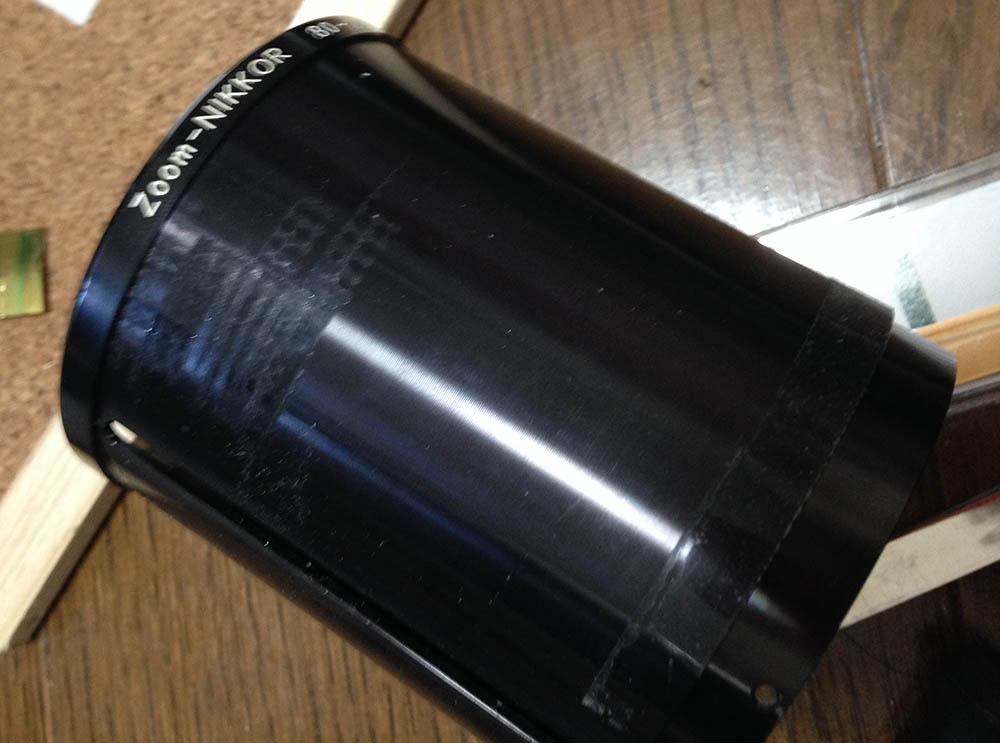
The Zoom-Nikkor 80-200mm f4 Ai-S was sold from 1981 to 1988. It was made to complement the Nikon F3 and this replaced the Zoom-Nikkor 80-200mm f/4.5 Ai (N). The former is an amazing lens that many people felt an attachment to and for a good reason because it’s a great performer. It was tough for Nikon to exceed it but this lens marginally improved upon it. The production ended because autofocus lenses were the fad, the Nikon F4 was introduced and that soon became the end of the manual Nikkor era.

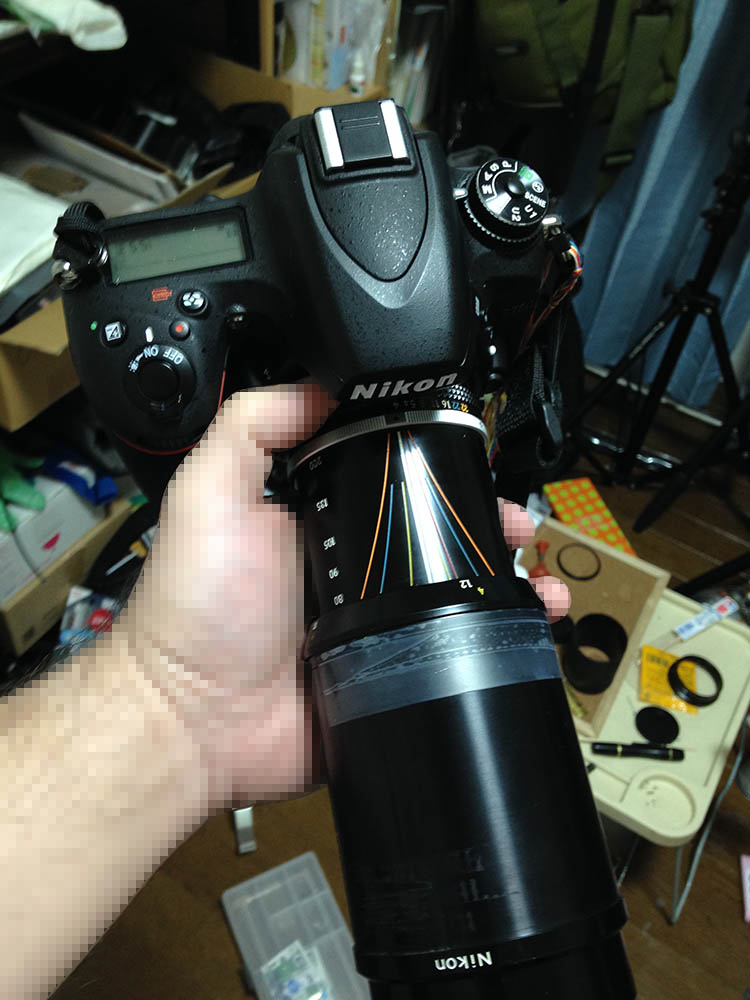
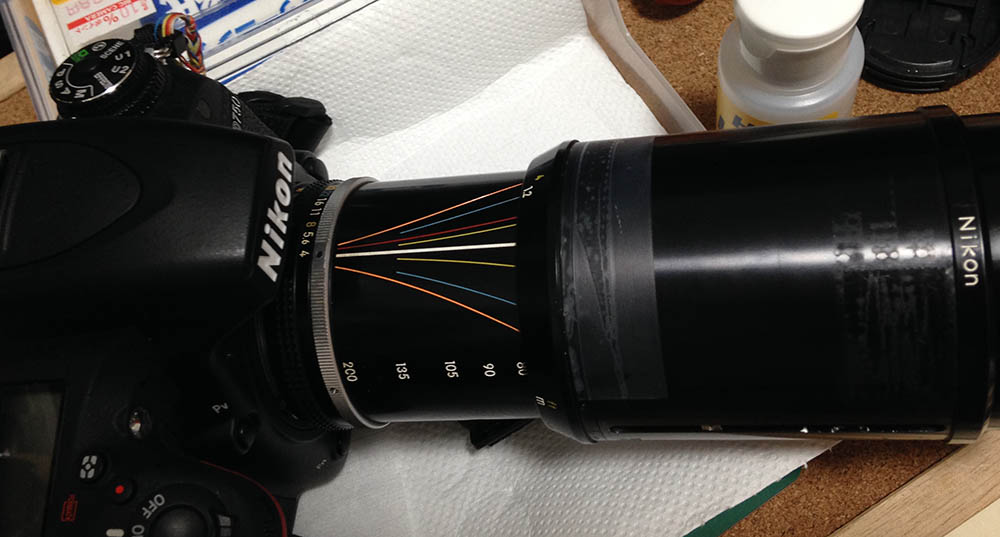
It has a huge barrel for both zooming and focusing. I call these “pumper-zooms”, it allows me to operate this with a single hand. This is handy for shooting action. The size of the barrel is just-right and it feels great to use it. Handling is quite nice but it’s a bit heavy, it will strain your neck.
The new 13-elements-in-9-groups design is elegant but a bit more complicated compared to the older one. It’s necessary since it now has a brighter maximum aperture. It helps give you a brighter view and will also make pairing them with teleconverters or extension-tubes. I don’t recommend using a split-prism with it, the center will turn dark when there’s not enough light. A matte-prism is the best choice for this.

I got this for $20.00 because the lens was in terrible shape. These don’t cost much these days, you could get a good-condition for as less as $80.00 and $120.00 will get you something close to mint. These used to cost a lot back then, almost the same price for Japan’s cheapest car.

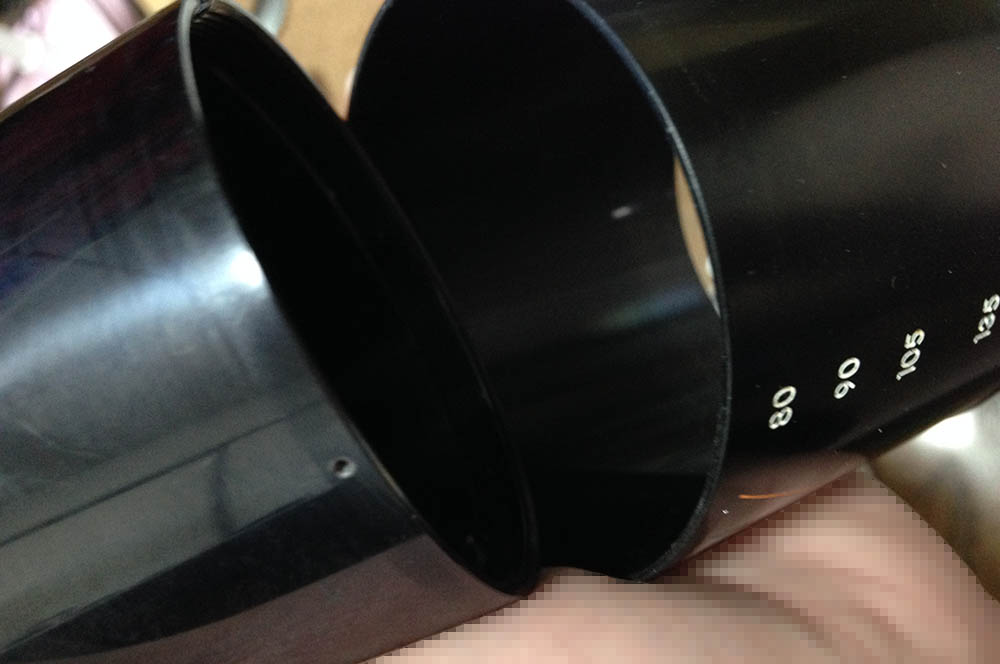
It’s well-made but not as tough as any of the older versions. There’s a few plastic parts but most of the barrel is made from metal. Compared to the older ones it has a bigger 62mm filter size. It’s also a bit larger overall. It has beautiful markings which are informative and very useful. Focus-throw is quite long which is normal for a manual-focus zoom. It also focuses closer, too. A small improvement compared to the older lens.

One issue about “pumper-zooms” is their tendency to develop “zoom-creep”. The barrel will move on its own when your setup isn’t horizontal since the focus/zoom barrel is heavy. This makes them annoying to use when they are mounted on a tripod. It’s cause by deteriorated felt lining under the barrel and the only way to fix the problem is replacing them. Despite that, these were never stiff even when sold new or else they would have been difficult to use and that defeats the whole idea of operating the zoom and focus with a single barrel.
Nikon made several lenses in this class and size:
- Zoom-Nikkor 80-200mm f/4.5 Auto, this is the earliest one.
- Zoom-Nikkor 80-200mm f/4.5 Ai (N), a new, improved version.
- Zoom-Nikkor 80-200mm f4 Ai-S, the last professional model.
- Nikon 70-210mm f/4 Series-E, a cheap lens with decent optics.
They all have different characteristics and quirks. Some are better at certain aspects but fail on some things. It is difficult to compare them, it’s like asking a shoe collector which one is the best.
Knowing how your lens performs will help you maximize it. You’ll get to know its strengths and weaknesses, this knowledge will help you decide if a lens is the right tool for the job. I shot these photos from f/4, f/5.6 and f/8 since we’ll see the most changes happen within these apertures. I also assume that these are also the most common apertures that people would want to use it with. I shot these with my Nikon Df.


(Click to enlarge)
There is some heavy vignetting at both ends of the zoom range wide-open. It’s about 1-2 stops’ worth of light depending on which end we’re shooting from. It improves by f/5.6, I will way that this won’t be obvious in real-world pictures unless you have the sky in the frame or you’re shooting an even-colored background. It finally goes away by f/8 but the far-corners will still show some traces of it.
(Click to enlarge)
The bokeh quality of this lens is great, it’s smooth and I don’t see anything objectionable. The lens is sharp at both ends even wide-open but it can be better. The contrast is great and the colors are saturated. Stopping it down to f/5.6 will improve everything, you’ll begin to see details rendered in greater detail as the resolution gets a lot better. You will also notice that sharpness has improved by a notch but contrast remains the same because it is already quite good wide-open. Once you stopped the lens down to f/8 you will find that the lens is now near or at its peak performance in terms of sharpness and resolution. It’s probably the best aperture to use if you need to render small details, etc. I would prefer it to reach this quality at f/5.6 but that is probably asking for too much. This lens has really smooth bokeh quality and in order to get that the designers probably did not over-correct it for sharpness, this is just my guess.
(Click to enlarge)
Chromatic aberration is evident wide-open in areas that have really high contrast such as the highlight on the shiny chrome. It’s not bad at this level, it’s almost gone by the time you stopped it down to f/5.6 and it is gone by f/8. I did not see any spherical aberration or at least the effect is too minimal that I hardly noticed it. One thing to note is how much it shifts its angle-of-view when focused, this effect is called “focus breathing”, it is really obvious and videographers should think about this when using this lens. Nearly all lenses do this but this one has just a bit more than usual.


(Click to enlarge)
This is a good example of how different both ends of the focal lengths are and how they alter the compression of the frame. Since this set was shot at about the same distance as the 2nd set my observations from that set also hold true for this set. The small details are rendered beautifully in the center of the frame wide-open, the corners and edges are not on the same level, unfortunately.


(Click to enlarge)
Here are some pictures that were taken with its minimum focusing distance, these were all shot at 200mm if I am not mistaken. Vignetting is evident in the pictures that were taken wide-open and will probably take away around 1-2 stops’ worth of light from your photos. If you need to take pictures like these be sure that you stop your lens down by a stop to get a clear and bright frame or compensate your exposure by 1.5 stops. Sharpness is great at this distance and the blur looks lovely.
(Click to enlarge)
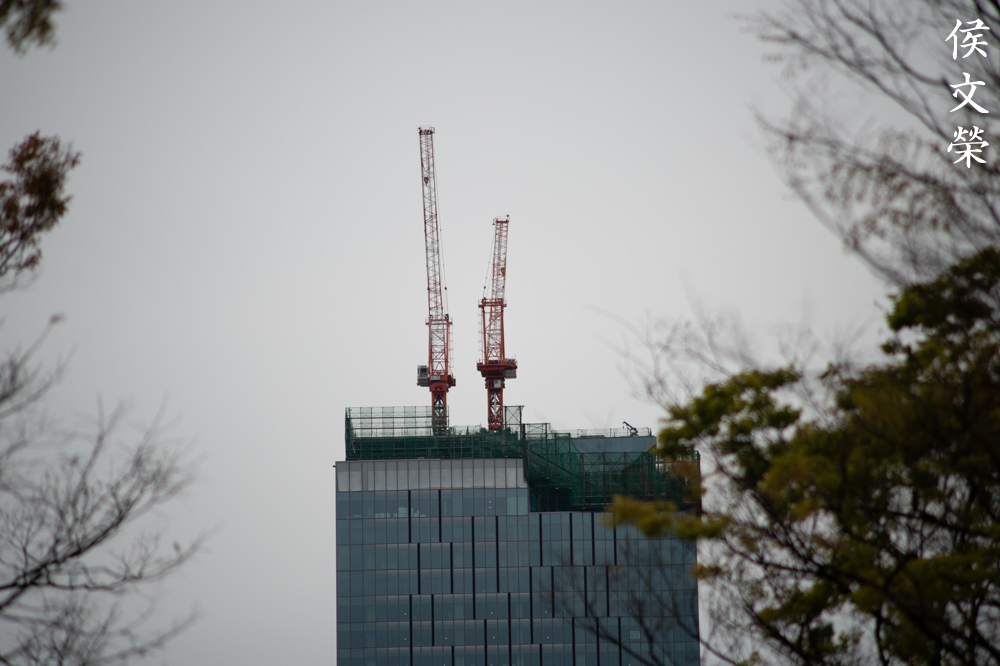
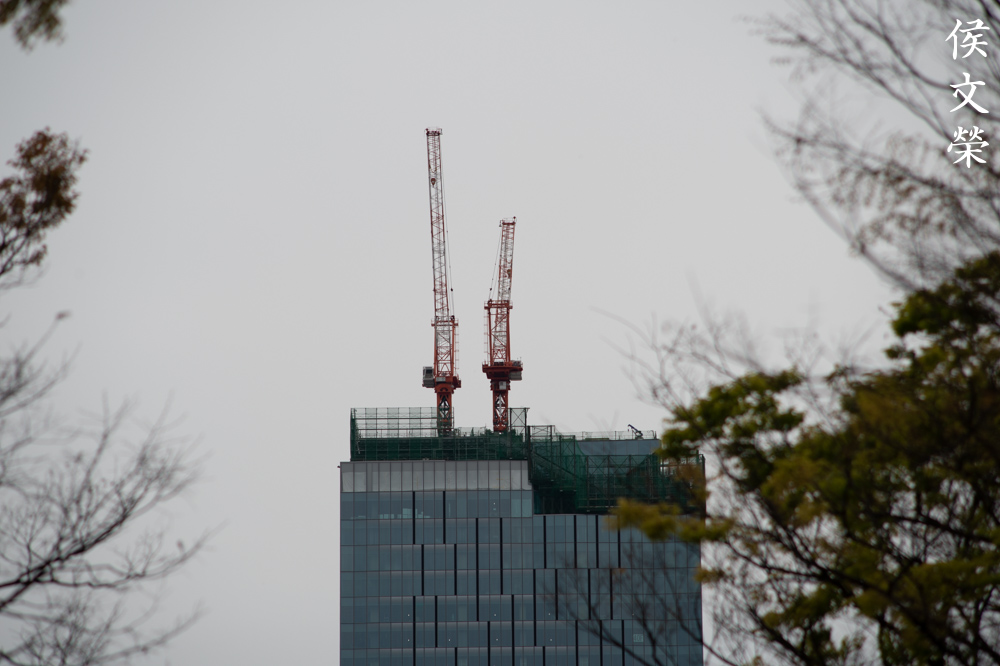
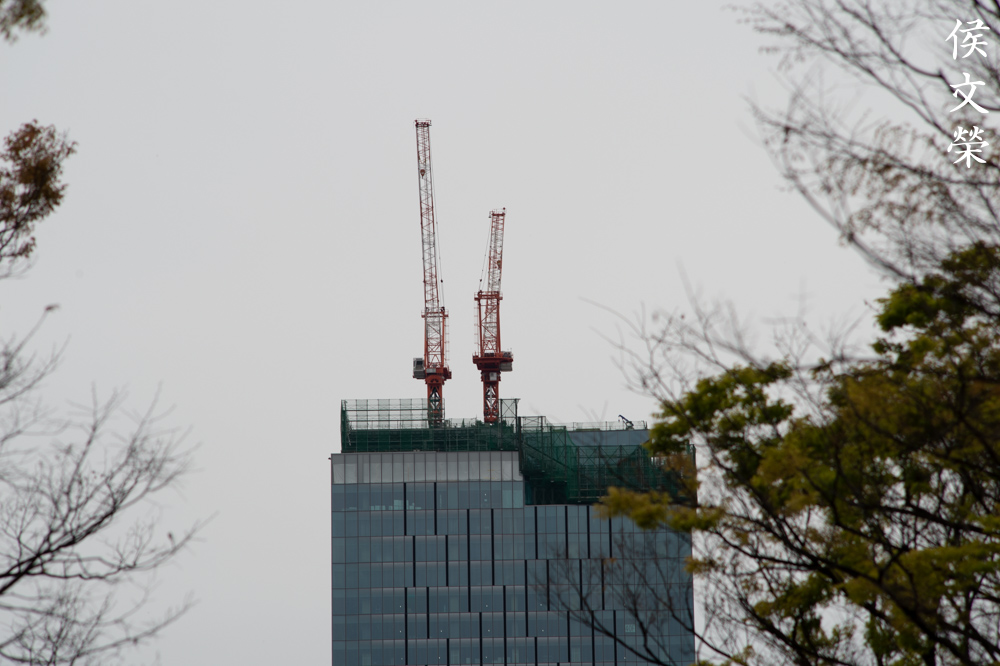
These were taken using the 200mm end on a subject that is far away from me. You will notice that the image quality isn’t really great wide-open, details are not sharp even at the center of the frame. A bit of chromatic aberration can be seen in the crane’s boom. Everything looks better once you stop it down. I’m disappointed by this and I will advise everyone to stop their lenses down to at least f/5.6 if you need to do shoot at subjects that are far. This is probably this lens’ biggest flaw as far as my sample goes.
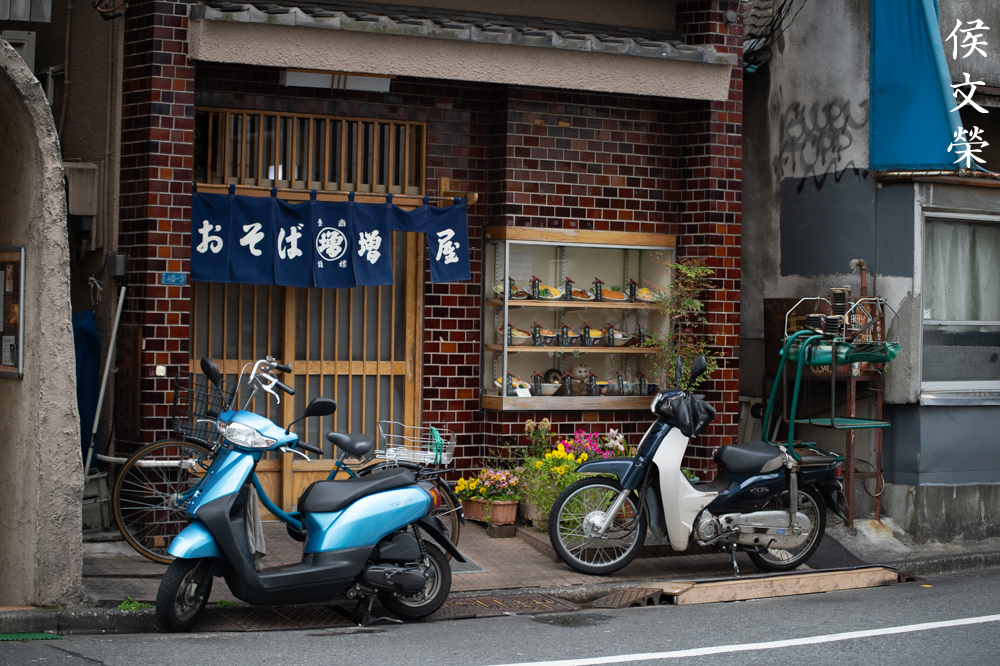
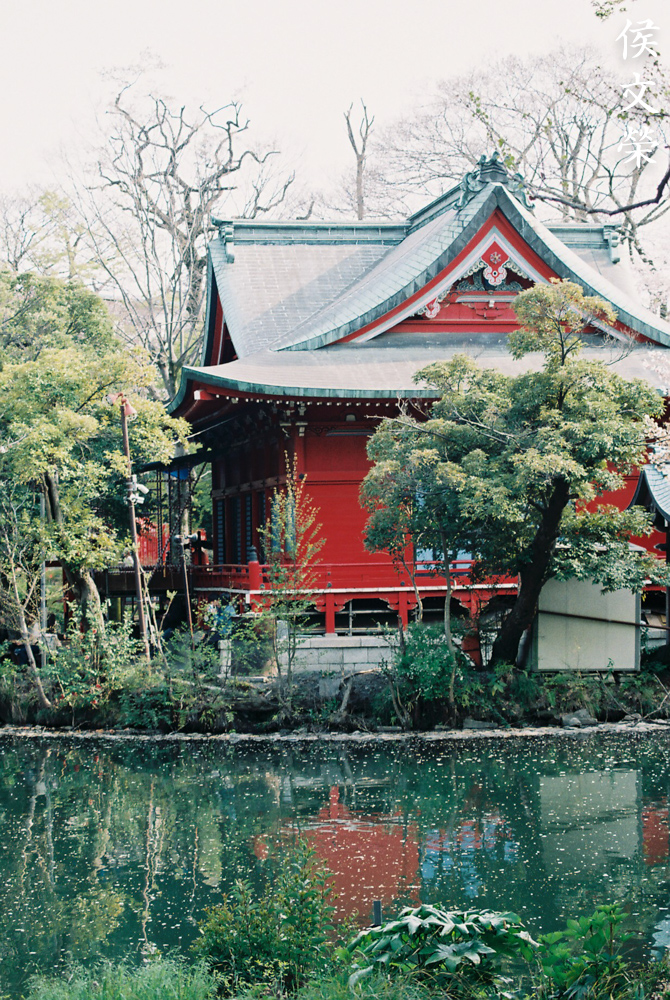
The wide-end is useful for general photography. It’s longer than 50mm so it can be challenging to use for most applications. I had to be 9m away from this order to capture the storefront properly. Frame compression is greater so I had a harder time framing it without making this look flat, 80mm is considered to be in the short-telephoto range, this is to be expected. It was shot wide-open, by the way.
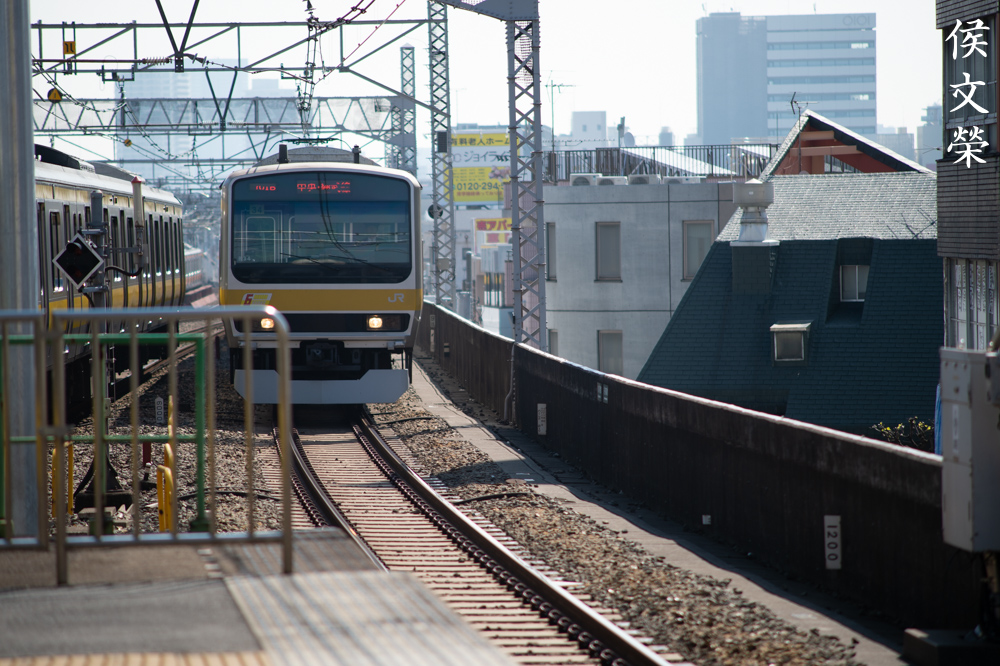
The 200mm end is handy for taking pictures of distant things and the frame compression is even greater than 80mm, this will allow you to make tighter compositions. A wider focal length will make some of the subjects in the foreground larger due to the effects of foreshortening so you won’t get this kind of framing. Moon-shots are best taken using a long focal length to make it appear bigger compared to the other elements in the scene. I will advise that you use something that’s longer than 500mm for those kinds of pictures. I would also like to note that you’ll notice some chromatic aberration in the shiny parts of the track since it was shot wide-open.


(Click to enlarge)
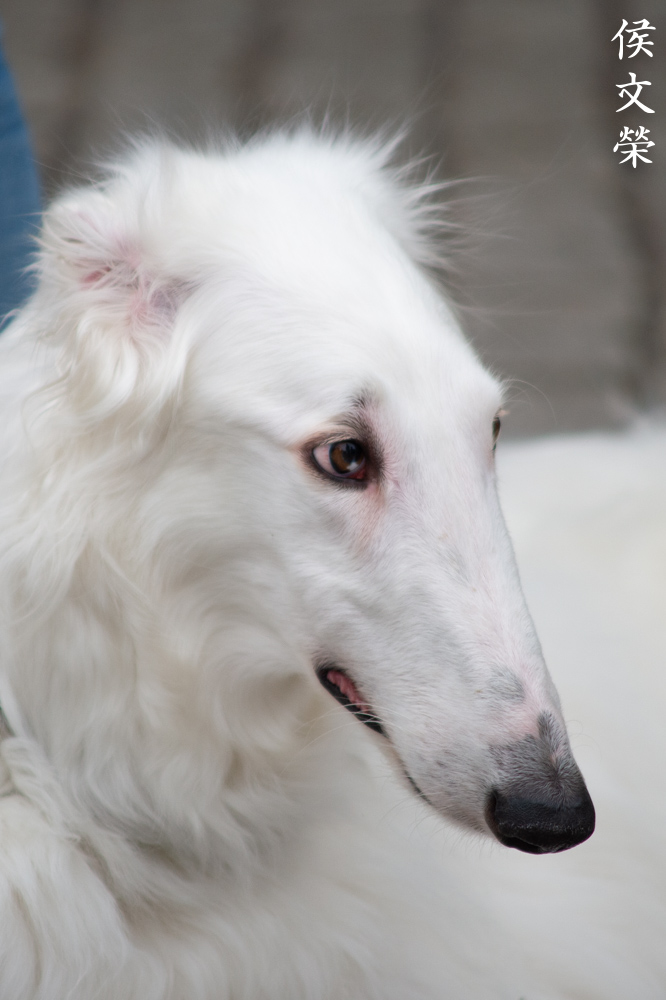
This lens is handy for a lot of applications and one of them is taking portraits because of the 80-200mm focal range. These were all shot wide-open, you can admire the details and colors that you get from this lens. The vignetting works to my advantage here because it’s helping me frame my subjects’ faces which are centered in the frame. It can help lead the eyes of the viewers to the center of the frame, this is how you use vignetting creatively.
(Click to enlarge)
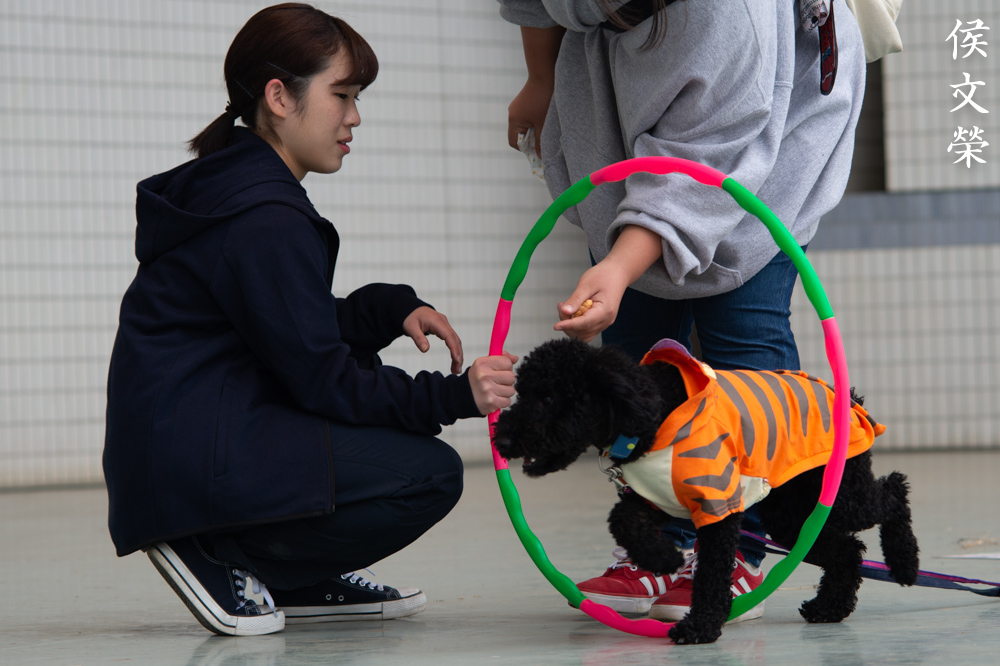
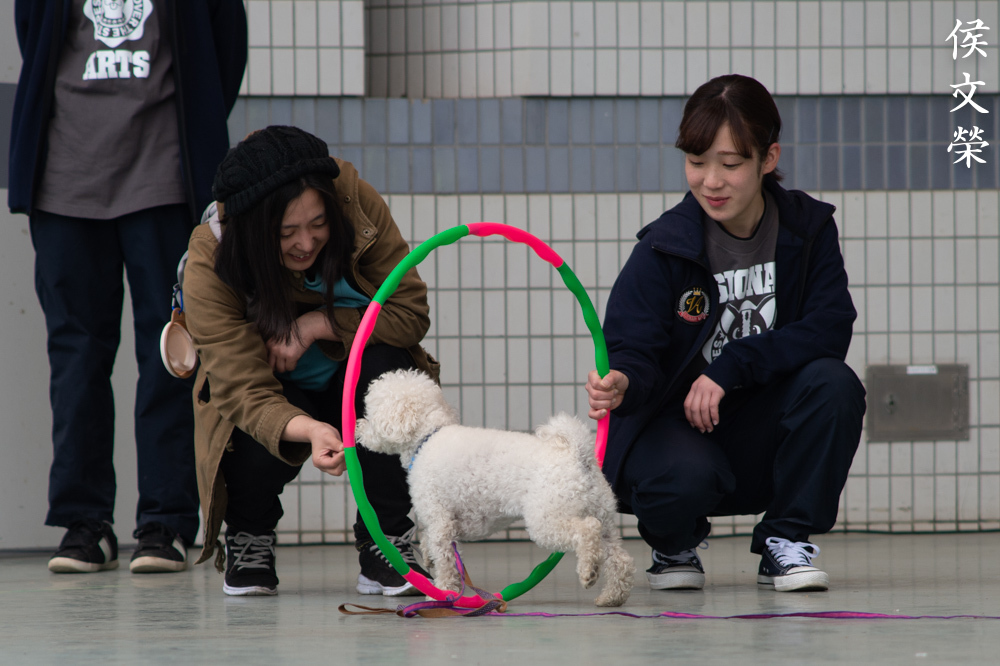
Nothing is more difficult than shooting the unpredictable movements of dogs so I went to the dog festival to take some pictures of a Schutzhund event. OK, that may be exaggerated too much but you get the idea. These dogs move just as energetic as the big ones and I had a tough time tracking their movements using a manual-only lens but I soon got the hang of it. The one-touch setup helped me zoom and focus at the same time, this allowed me to change my focus and framing faster. One trick that you can do is to pre-focus, this can help you anticipate your subjects’ movements, it is a skill that requires some practice to master if you are used to using autofocus lenses. Once you’ve learned it, this technique can be helpful in teaching you patience and discipline behind the camera which can help make your clicks more deliberate and won’t rely much on chance.


(Click to enlarge)
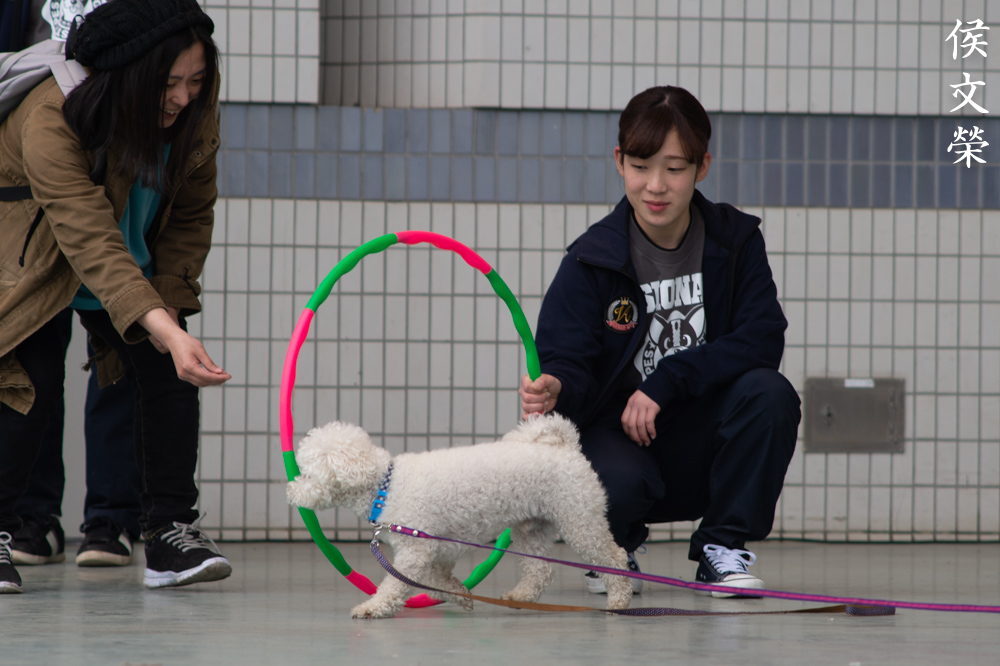
Here are some more pictures from the doggie carnival. Notice how nice the bokeh quality is and how sharp it can be on some shots where I stopped the lens down to f/5.6 for more depth-of-field so I can get more things focused.
Let’s now see how this lens performs with film. Knowing how a lens performs using film and digital will be helpful in giving a better assessment of a lens’ performance. Film also renders differently from digital and you won’t get the same look because of film grain, it is near-impossible to simulate in post. I took these using a Nikon F4 loaded with Fujifilm Industrial 100 and I had them scanned at the lab using the Fujifilm Frontier SP-3000.

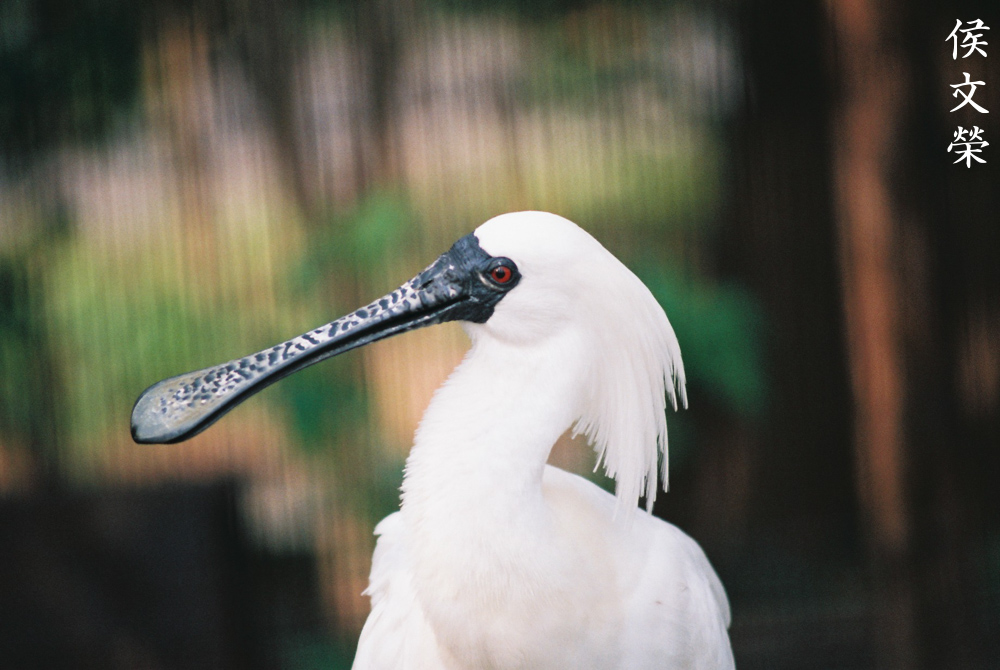
The details look stunning with film even wide-open. The feathers and the beak look nice since they are at the center of the frame where the performance is the best.

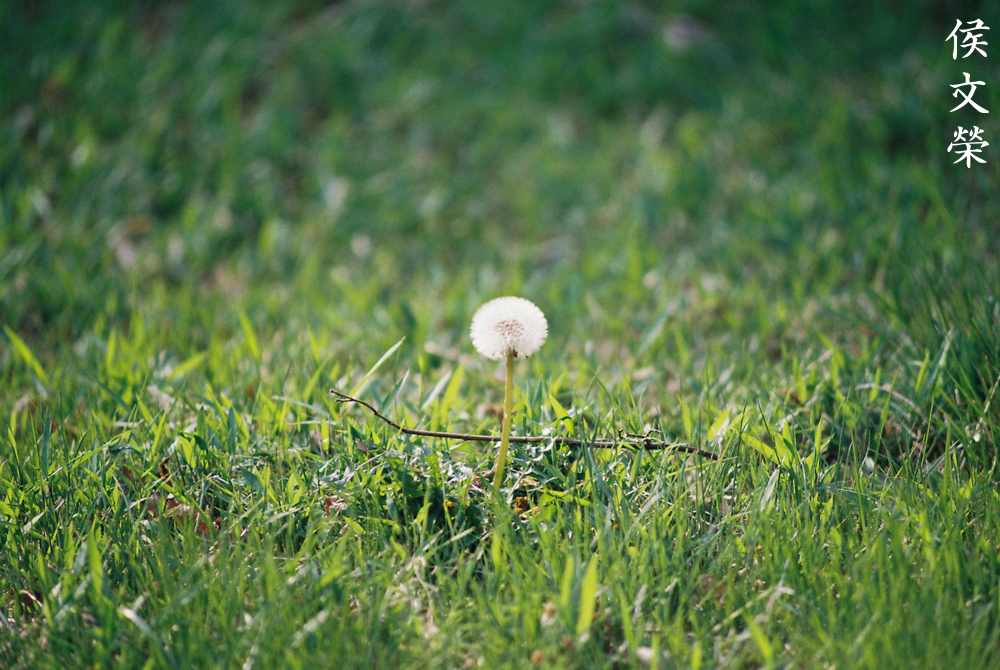
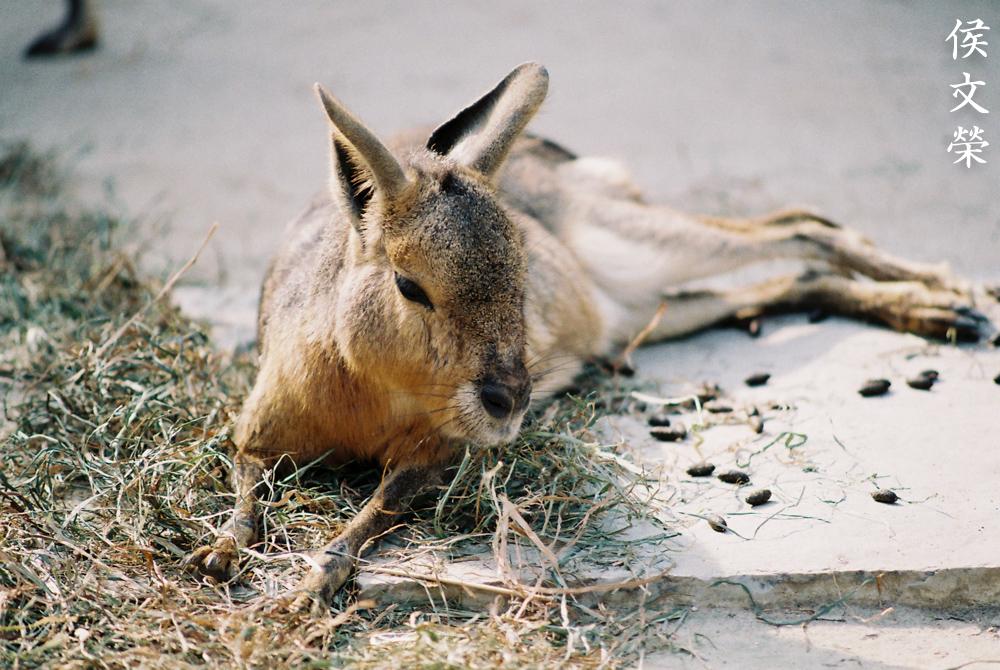
It can be tough to track small and energetic subjects like this little squirrel but you can do it with patience. An AF lens is the best option for situations like this. One interesting thing to note about this photo is it shows a bit of roughness in the bokeh characteristics. The background is challenging to render but this lens made sure it’s kept to a minimum, a lens with worse bokeh quality would render the foliage terribly.

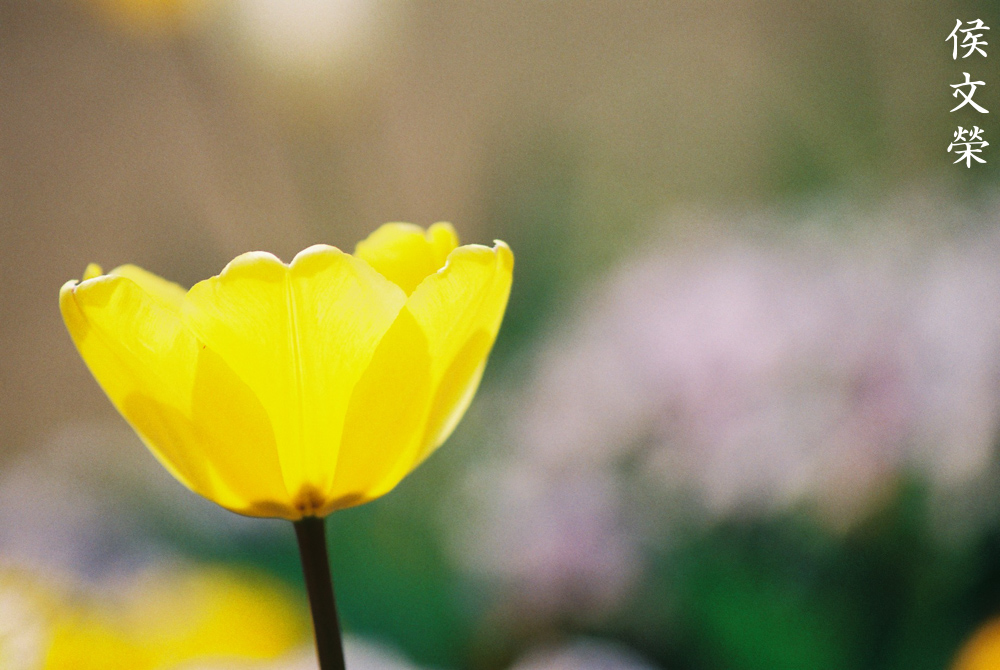
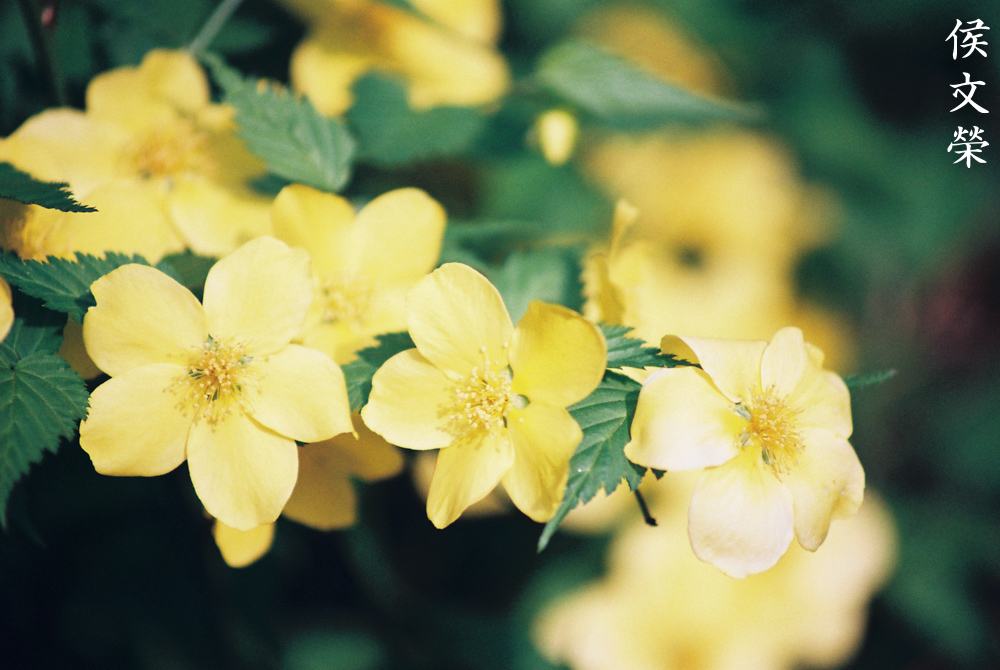
The frame compression at 200m is useful for taking photos like this. The tulip at the back will look a lot tinier if I were to shoot this using a 105mm lens. See how sharp the lens is, you can even count the serrations on the petals’ edges. The rendering is beautiful, like a painting almost.
The background can be thrown into a colorful wash of colors because of the smooth, even way it renders out-of-focus details specially when used in its closest focusing distances.
Even with a seemingly-slow maximum aperture of f/4 you’ll still have a shallow depth-of-field that will enable you to separate your subjects from the background.


(Click to enlarge)
Here are some more pictures along the same theme as the previous ones. You can use it for taking photos of flowers if you have a flower shop or just out on a stroll at the park.
There’s some chromatic aberration present in the twigs at the background. This is easily fixed in post but I’ll never do that since these don’t really matter to me in small amounts.
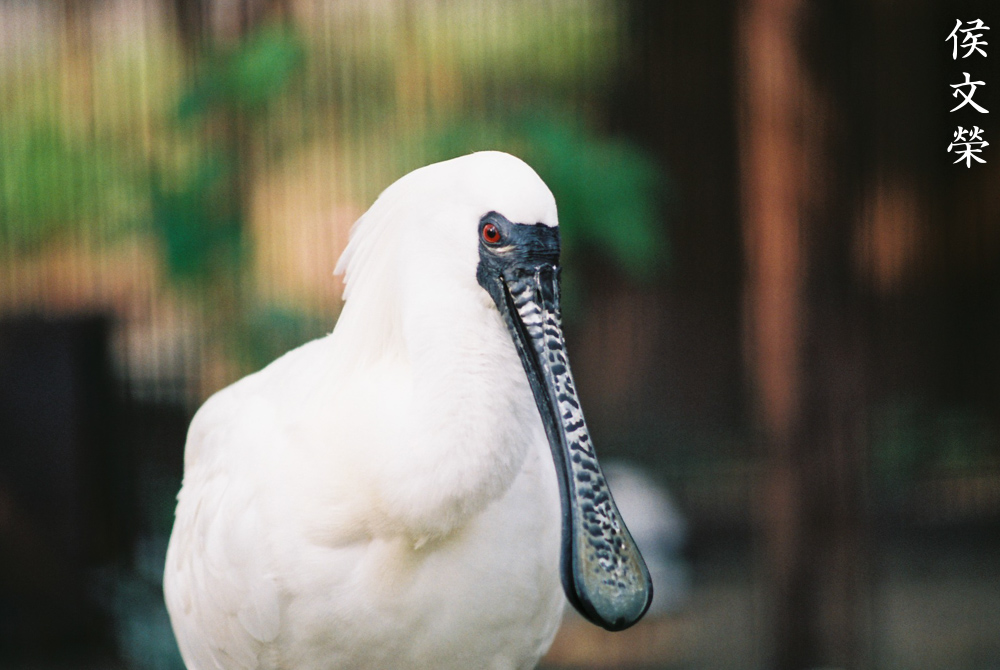
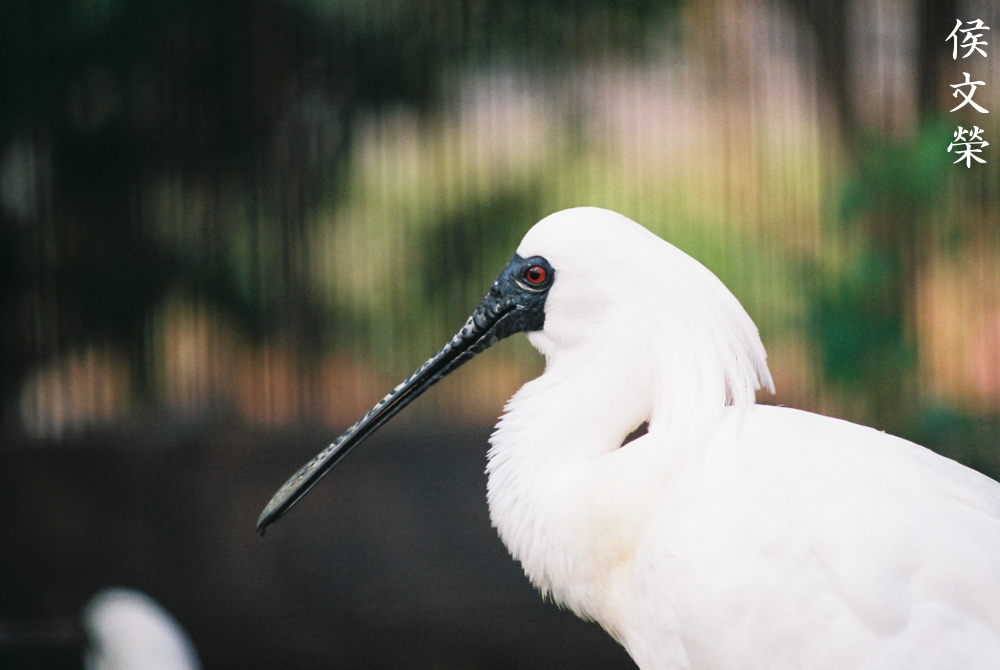
This spoon-bill is behind a wire cage so I used a trick to make the cage disappear. If you position the tip of the lens as close to the cage as possible and set the iris wide-open you could blur the cage so much that it won’t appear in your photos. I was initially worried, this lens only opens to f/4, I was afraid that it won’t be enough to do this trick.

(Click to enlarge)
Here are some more pictures that I took using this technique. You can get away with it in most situations so don’t be afraid of doing this.


(Click to enlarge)
Here’s the rest of the set. I sometimes wished I brought a longer lens that afternoon, this wasn’t long enough for some shots. I don’t use or like teleconverters but if I had one with me then that would have made a lot of difference.
I highly recommend this to anyone looking for a cheap, manual zoom. They’re usually cheaper than $110.00 even in excellent condition. The older Zoom-Nikkor 80-200mm f/4.5 Ai (N) is considered to be better by some people, maybe it is in some aspects so it’s still worth considering. You’ll lose a bit of speed wide-open and its minimum focusing distance is a bit longer and that’s it. Both will be great for people on a tight budget, you’ll take great photos with them specially inside a studio where things could be controlled a lot better. Those who want to get better will benefit from them since the handicap will force them to acquire new skills and focus on the fundamentals more. When looking for these be sure that the iris is dry and snappy when actuated. The glass and coatings should be clean and clear. Operate it, everything should work smoothly. Zoom-creep is hard to avoid and it’s something that you should accept when using older zooms. Happy hunting.
Before We Begin:
If this is your first attempt at repairing a lens then I suggest that you check my previous posts regarding screws & drivers, grease and other things. Also read what I wrote about the tools that you’ll need to fix your Nikkors.
I suggest that you read these primers before you begin (for beginners):
Reading these primers should lessen the chance of ruining your lens if you are a novice. Before opening up any lens, always look for other people who have done so in YouTube or the internet. Information is scarce, vague and scattered (that is why I started this) but you can still find some information if you search carefully.
I highly recommend that you read my working with helicoids post because this is very important and getting it wrong can ruin your day. If I can force you to read this, I would. It is that important!
For more advanced topics, you can read my fungus removal post as a start. This post has a lot of useful information and it will be beneficial for you to read this.
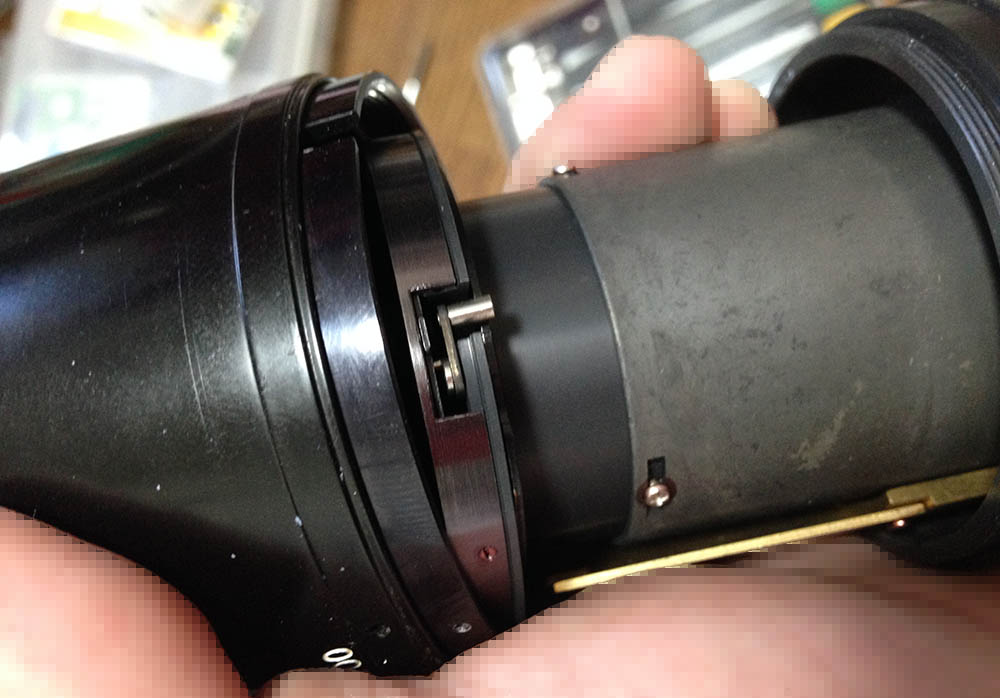
Disassembly (Rear Barrel):
Like most zooms this couldn’t be dismantled in subassemblies in a clear way. You’ll have to remove the parts in different sequences, they’re puzzle-like in this way. Unlike older Zoom-Nikkors, this one was designed to be a bit easier to service as things can be dismantled and serviced separately but it’s still a complicated design to work with. For this lens, you can either begin working with it from the front or the rear. It won’t matter at all, for this article we’ll begin working with it from the rear barrel.
This, and any zoom-lenses won’t be the best projects for beginners. They require experience and skill to work with. If your lens needs repair, send it to a reputable repairer.

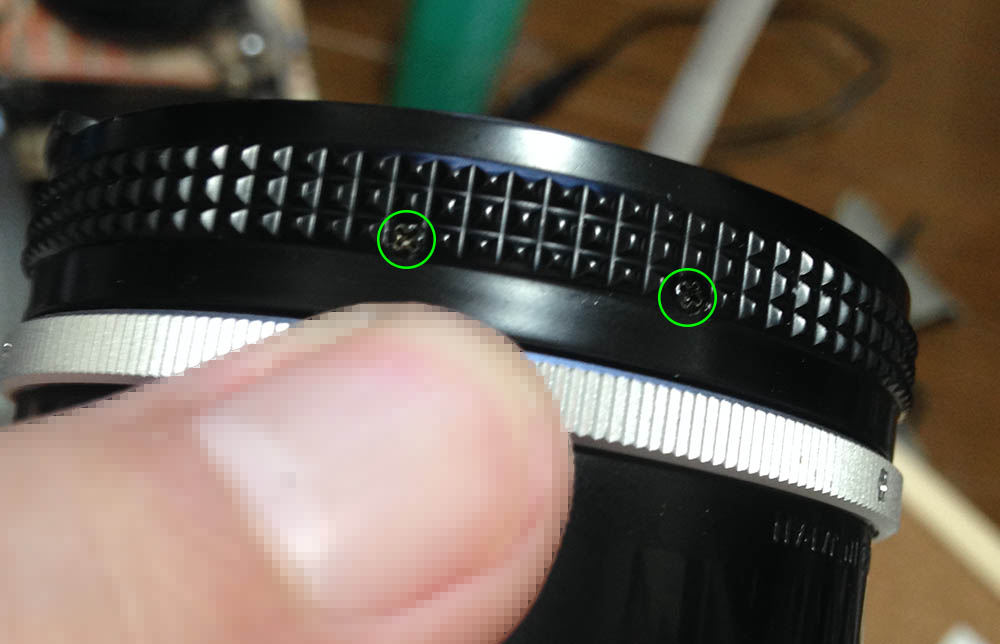
Carefully extract these to remove the bayonet mount. A lot of people get stuck here as they have stripped the slots by using the incorrect type of drivers. Read my article on extracting bayonet screws to prevent this from happening to you.

You can safely remove the bayonet mount since nothing is attached to it.

Examine how the mechanisms here work.
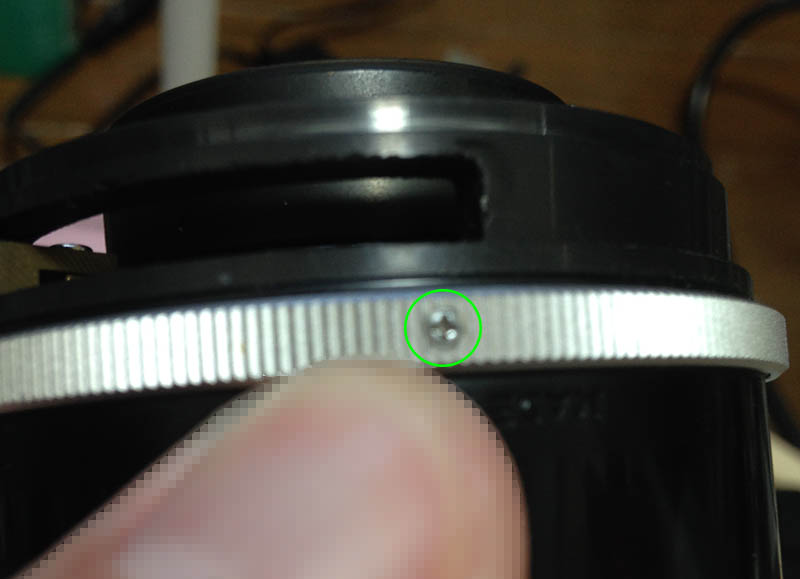
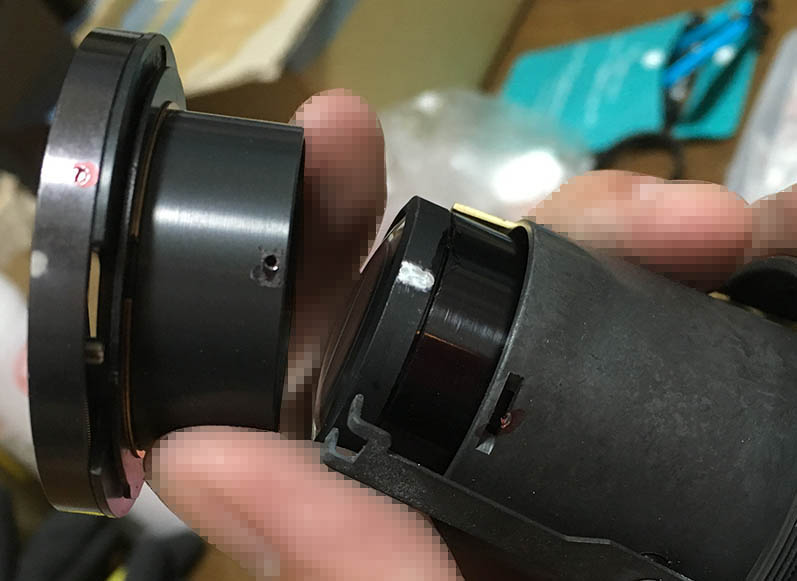
Extract these to remove the aperture ring. These are delicate so take care not to snap them. If they are stuck, a soldering bold will helps you soften the adhesive. Just heat them well and that should help you get them out.

Remove the aperture ring once the screws are gone.
Extract these to remove the grip.

Remove the grip.
You can remove the sleeve if you want to.

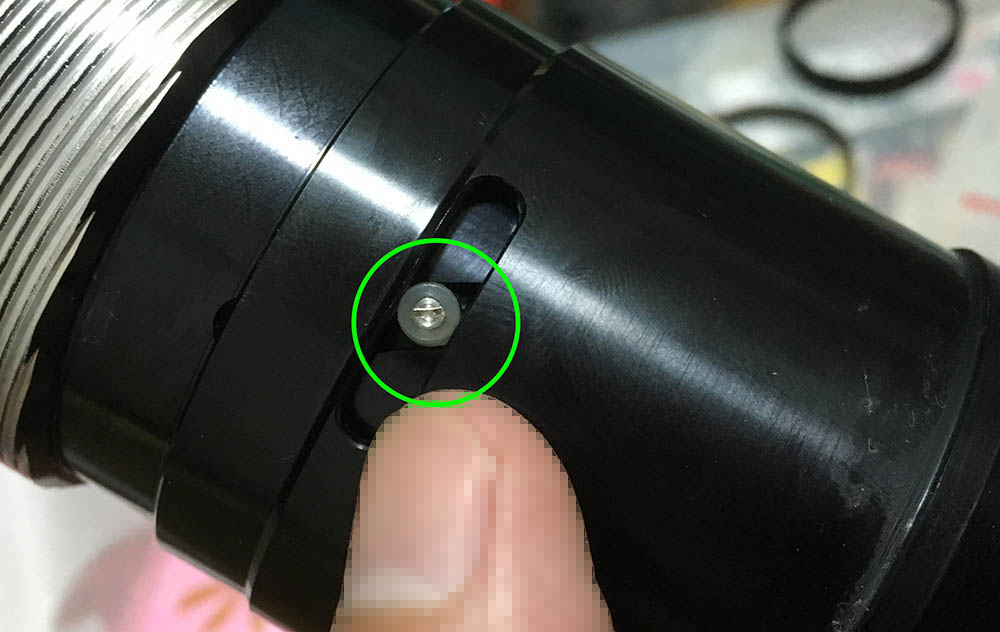
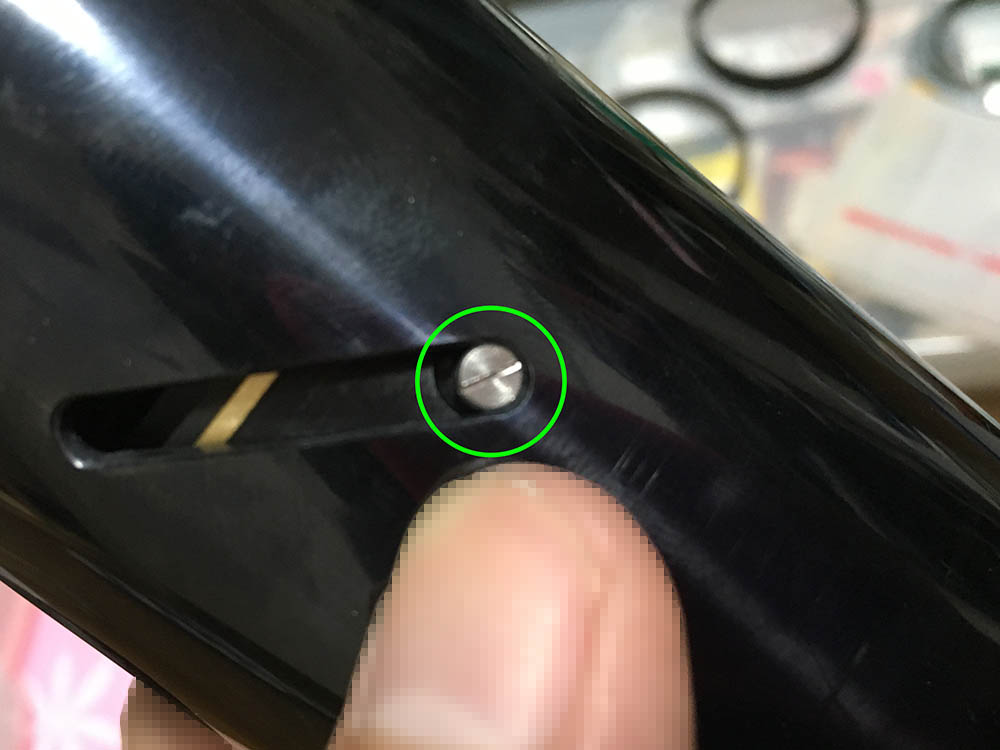
You can now access this, locate and extract it but don’t forget to make a mark so you’ll know how to align this back again later.
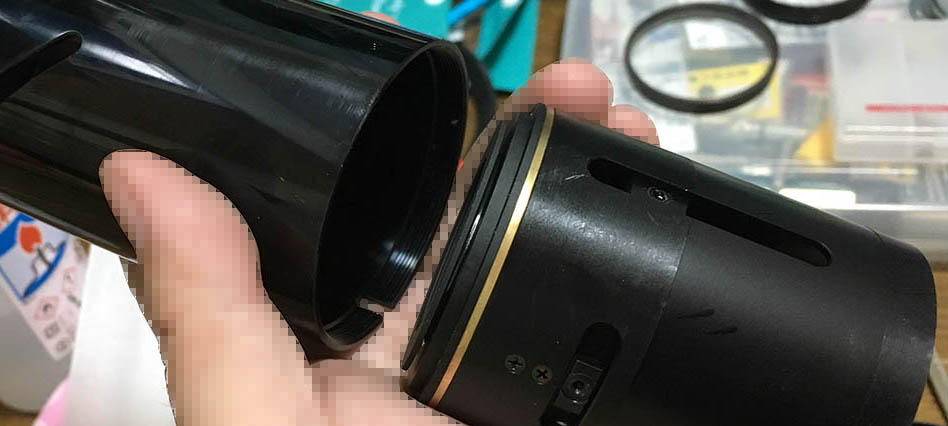
Unscrew the base off and count how many turns it took to remove it.
If you need to dismantle the iris mechanism mark its exact alignment first, it’s adjustable. Extract its screws to separate it from the assembly.
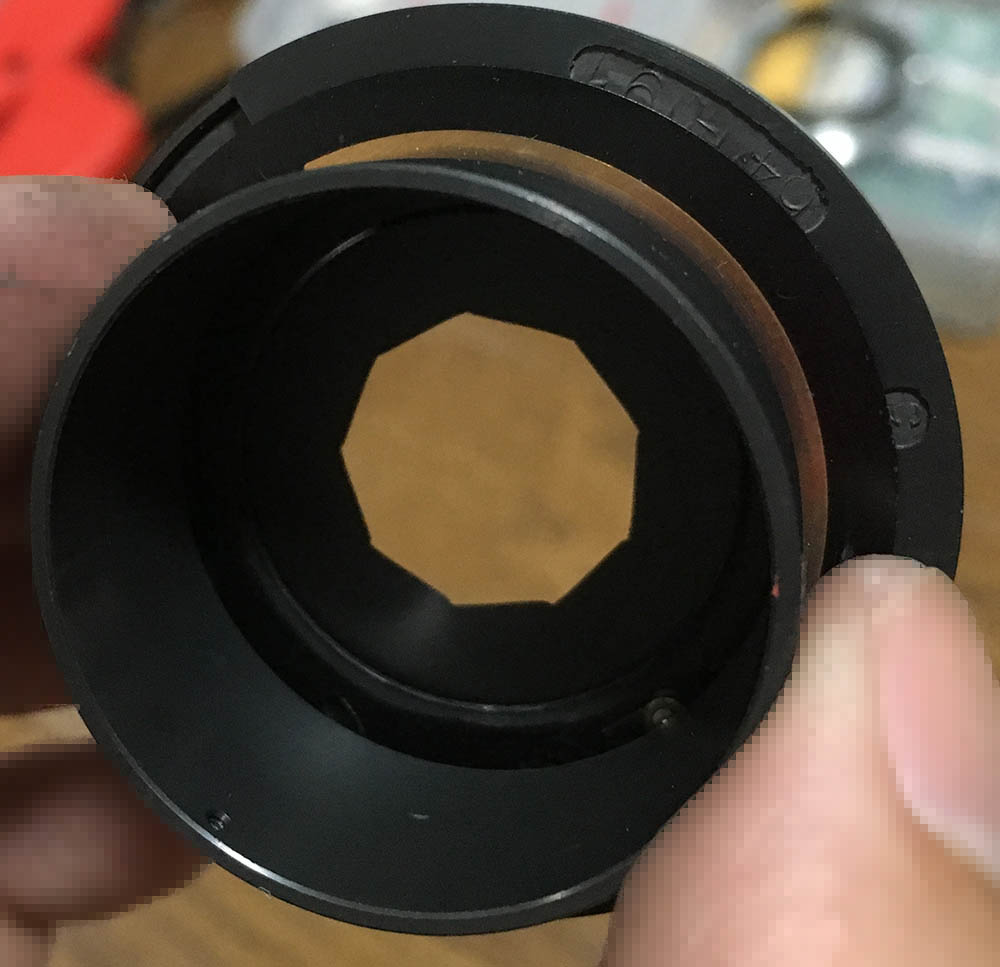
The iris still looks clean so I’ll leave it alone for now.
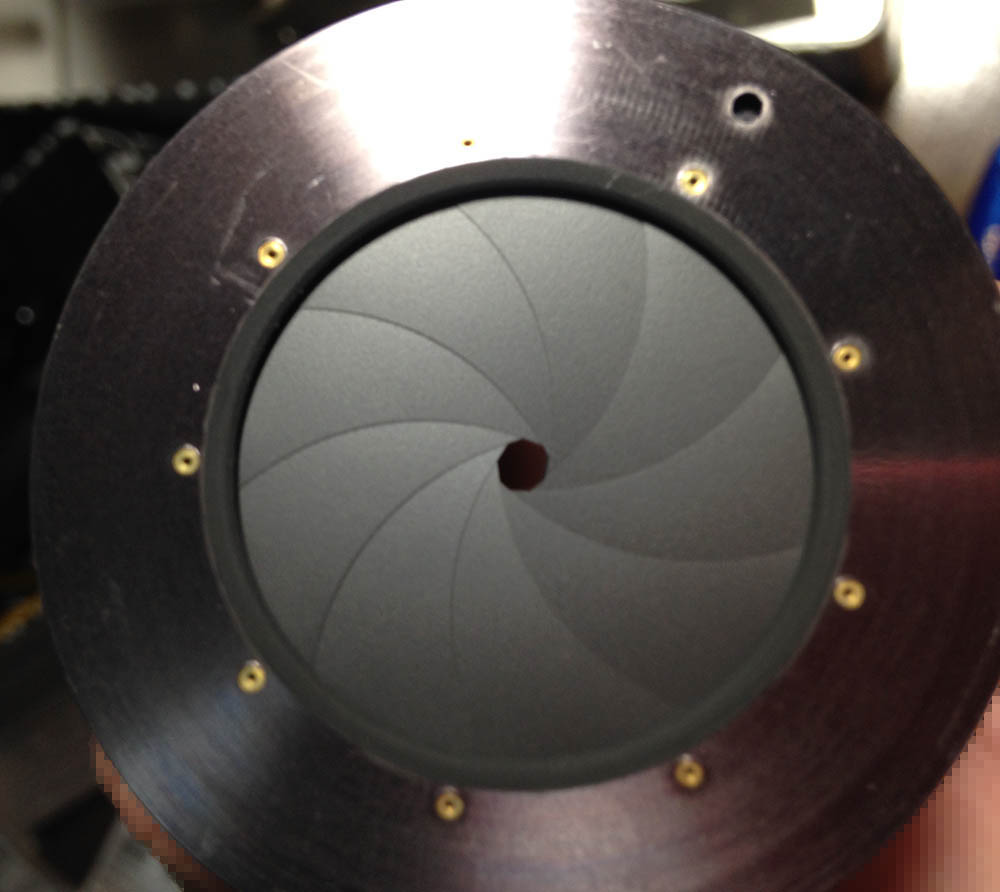
The shape of the iris is sometimes irregular but you shouldn’t be alarmed. If you have to fix yours because the shape looks weird the only way to fix it is to reset it and jumble the order of the blades and see if they will sit better.
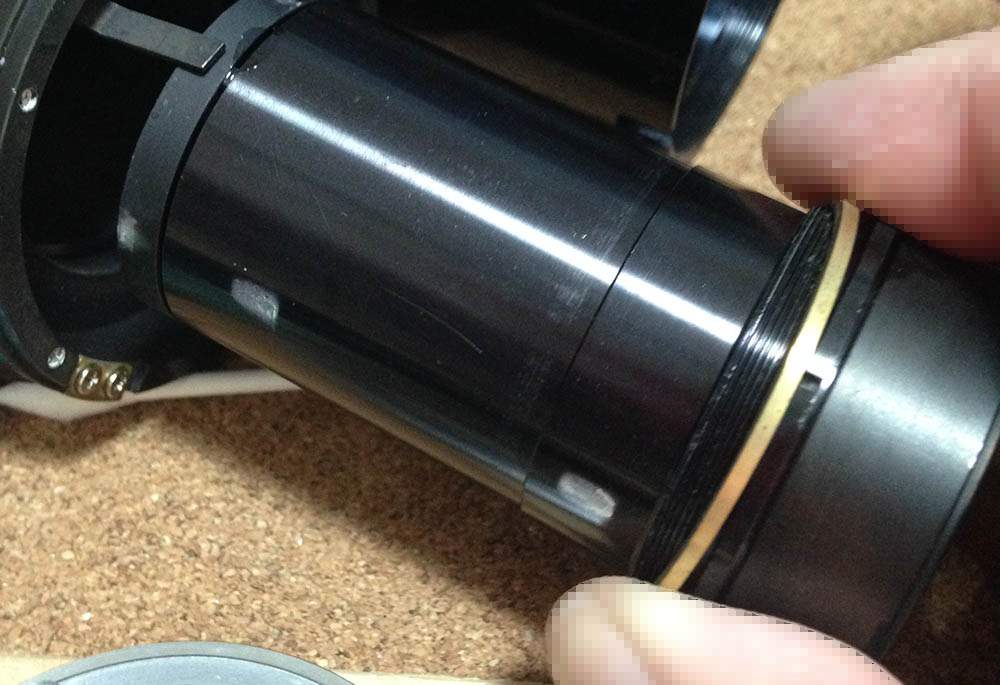
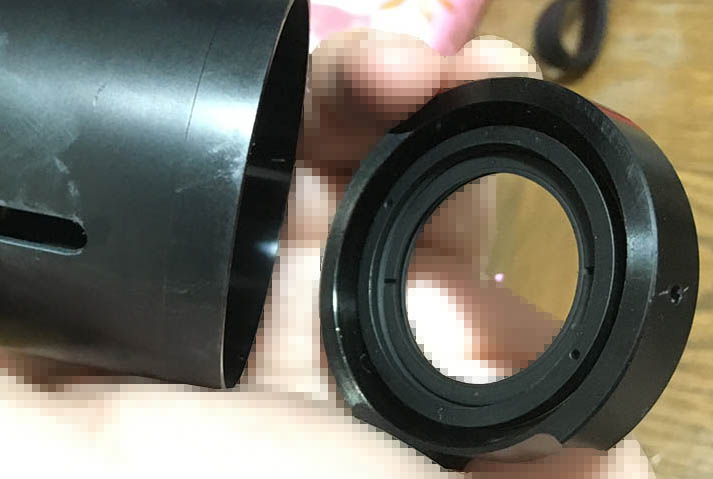
Unscrew the rear optics assembly. Don’t damage or misplace the brass shim, it’s used to adjust the rear focus. Avoid dismantling it as much as possible, the precise alignments of the groups here are important. If you got any of them wrong the image quality will suffer.
Unscrew the collar and use a lens sucker to remove the 6th group. Be sure to note its direction so you won’t put it back facing the wrong way.
The rear element can be extracted after removing its collar. Extract it with a lens sucker.
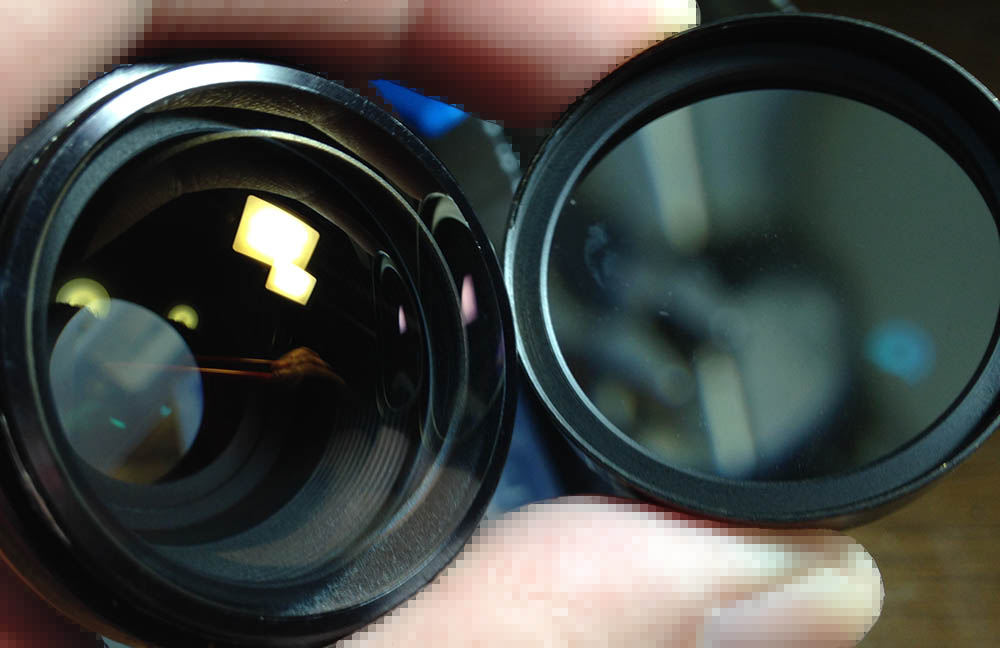
The inner elements can now be accessed.
Don’t dismantle anything that doesn’t need to be repaired. The alignment of the rear optics should be precise, measure their height and positions before you remove them just to be safe. Clean any fungus off, read what I wrote about how to clean fungus to know how I do it.
Disassembly (Front Barrel):
Servicing the front is a common thing for this lens. For many cases this is the only thing you will need to do. It won’t take a lot of time to do this step.
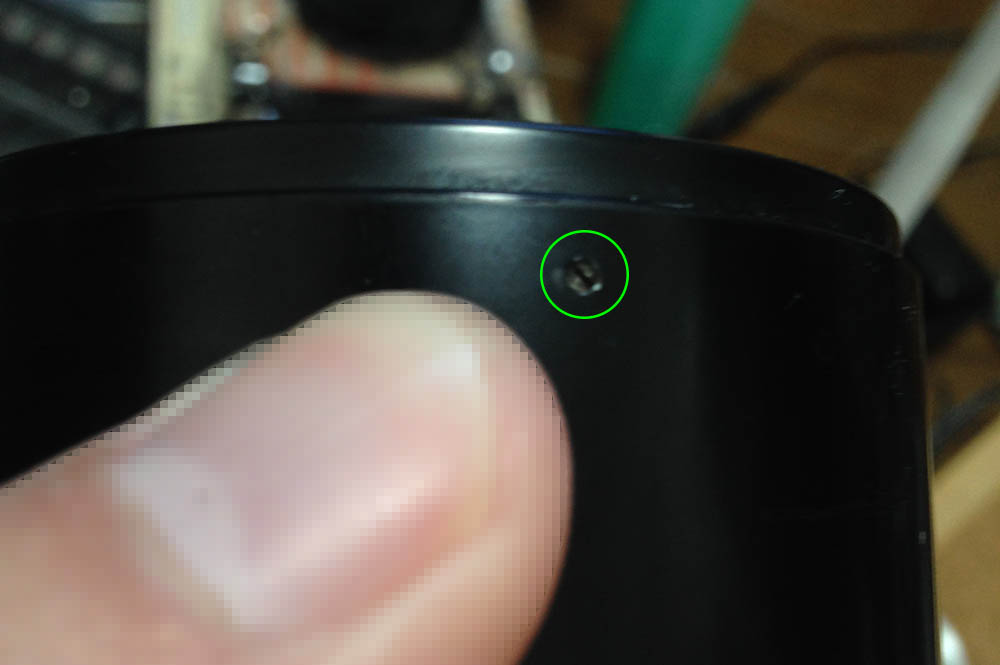
Locate and extract this to remove the front optics assembly.

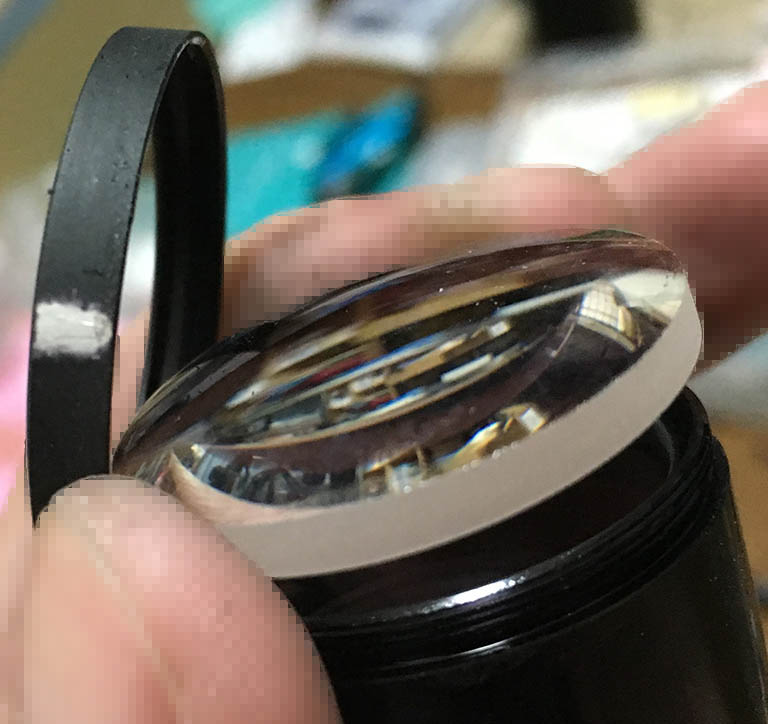
Unscrew it carefully. If it’s stuck apply a drop of alcohol to its threads to dissolve the seal. Do not flood this, the front group is a cemented group.
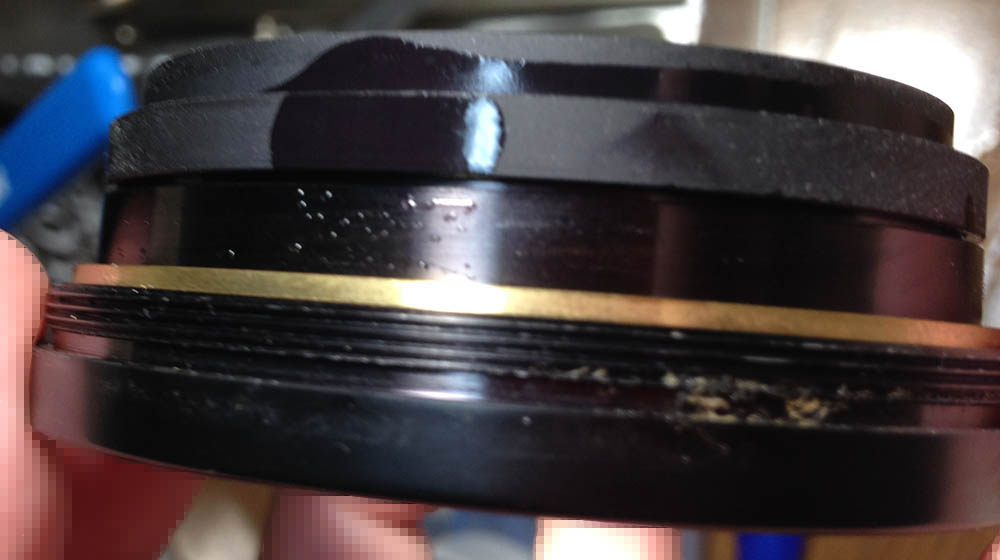
Apply a drop of alcohol to dissolve the seal before you open this. Be sure not to damage or misplace the shim, it’s used to adjust the front focus.
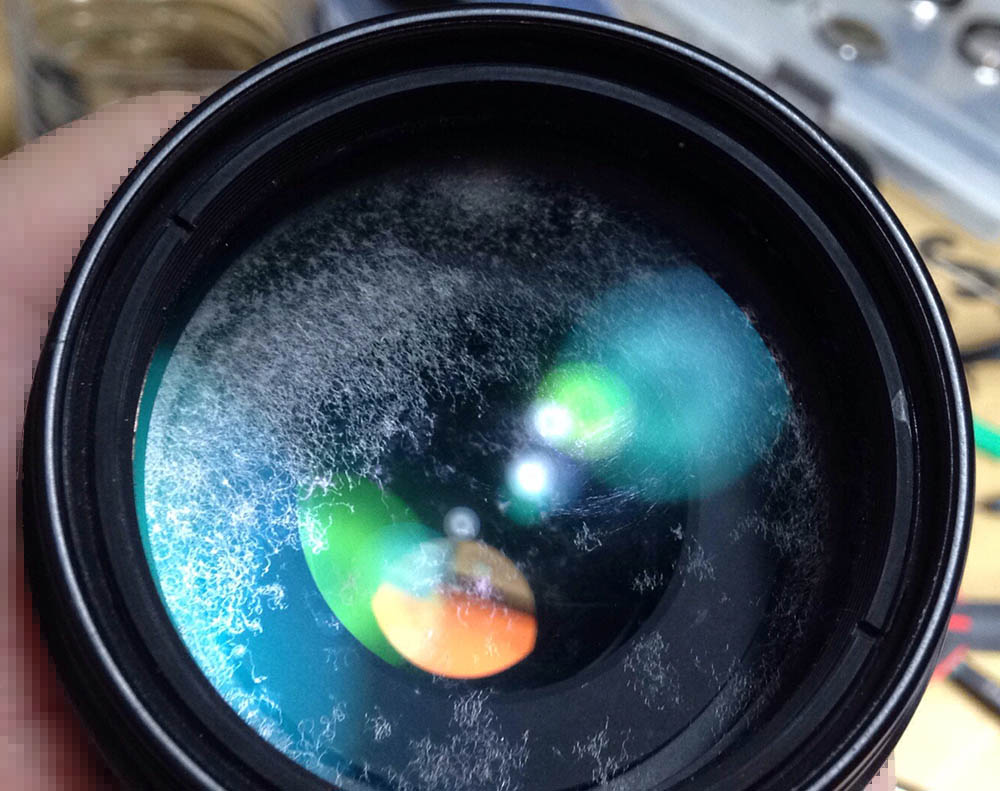
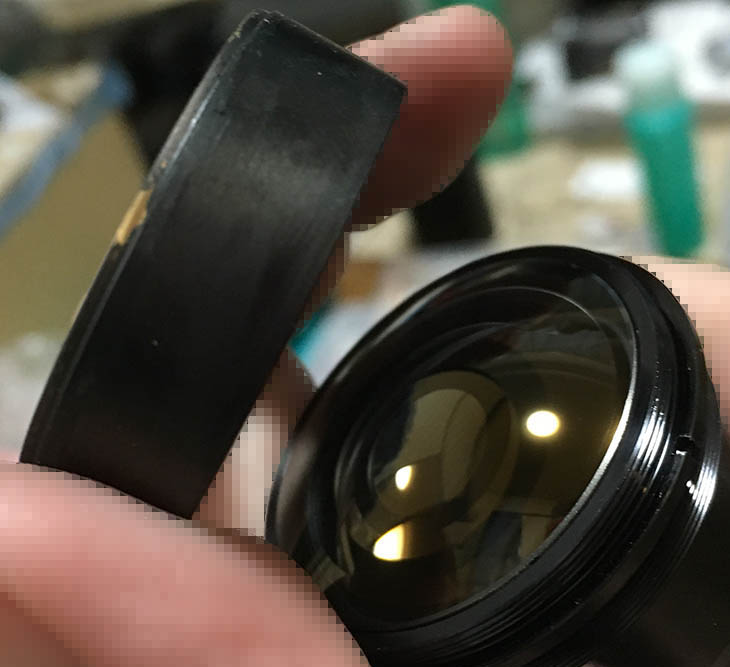
The fungus infection is serious, the coating will certainly have some bald spots.

Carefully extract it with a lens spanner.

The optics inside the barrel is exposed, be careful not to damage it. This thing moves in-and-out, don’t jam it by accident. Dismantle this with a rubber cup to remove the front ring then remove the whole thing with a lens spanner. Never flood this part with alcohol or solvents.

Handle the 3rd group carefully, it’s a cemented group consisting of several elements. Avoid flooding this area with alcohol or solvents, that will damage the optical cement.

Extract this group with a lens sucker. Don’t put this back facing the wrong way, draw a small dot at its wall so you’ll know which edge should be facing the front.
Avoid dismantling the central optical assembly if possible. The height of 2nd group is important, measure its depth so you’ll be able to put it back properly. Clean any fungus off, read my article on lens fungus cleaning to know how I do it. Never use the solution at full-strength, thin it with distilled water or it will etch the coatings and glass.
Disassembly (Main Barrel):
Servicing this is the most time-consuming part of the project. It should never be done unless you have to clean it thoroughly due to bad fungus damage or any serious mechanical faults. Take plenty of notes and photos, it’s important that you put everything back properly. There are several rollers here, be sure to note them all, they aren’t the same so you’ll have to put them back into their correct holes.
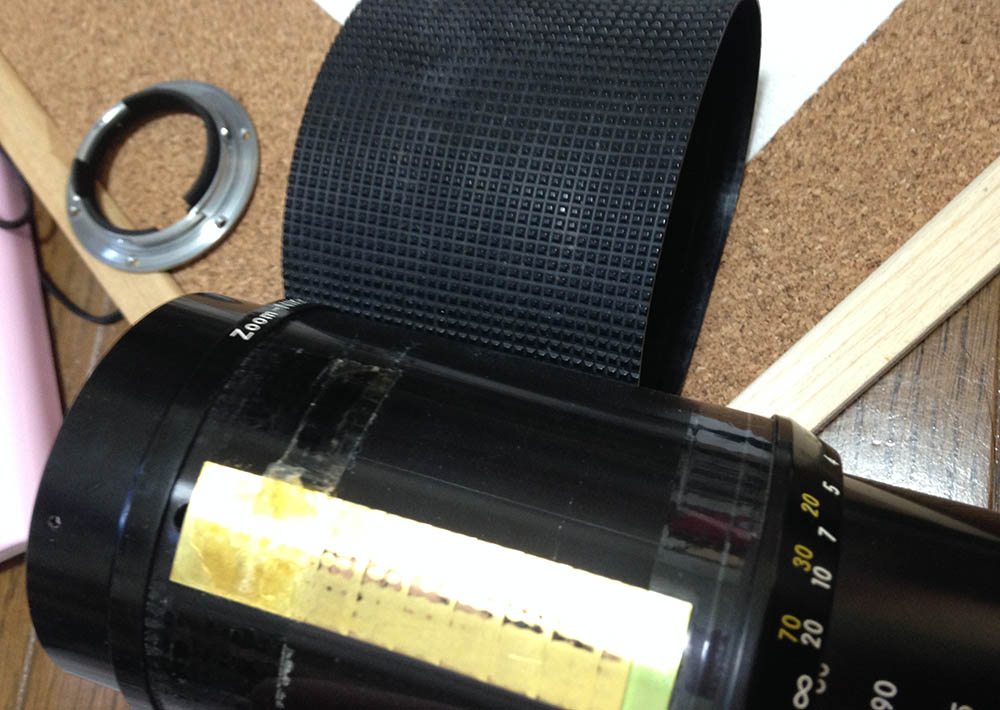
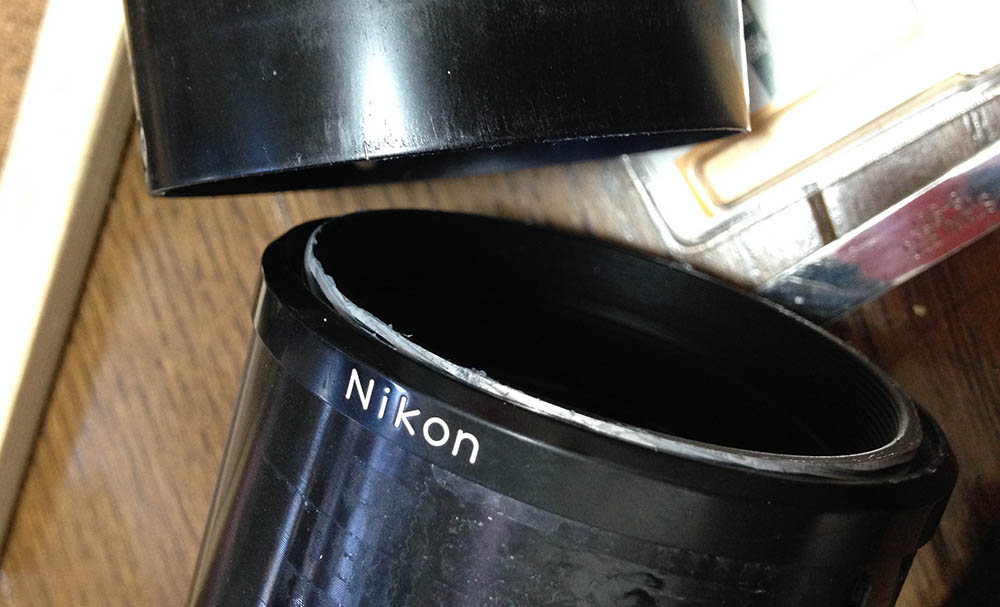
Removing this rubber part isn’t easy, it’s easy to tear it. Remove this by running a thin, round rod underneath it. That will lift it from any adhesives and carefully pull it off.
Make a few marks so you’ll know how things should align.
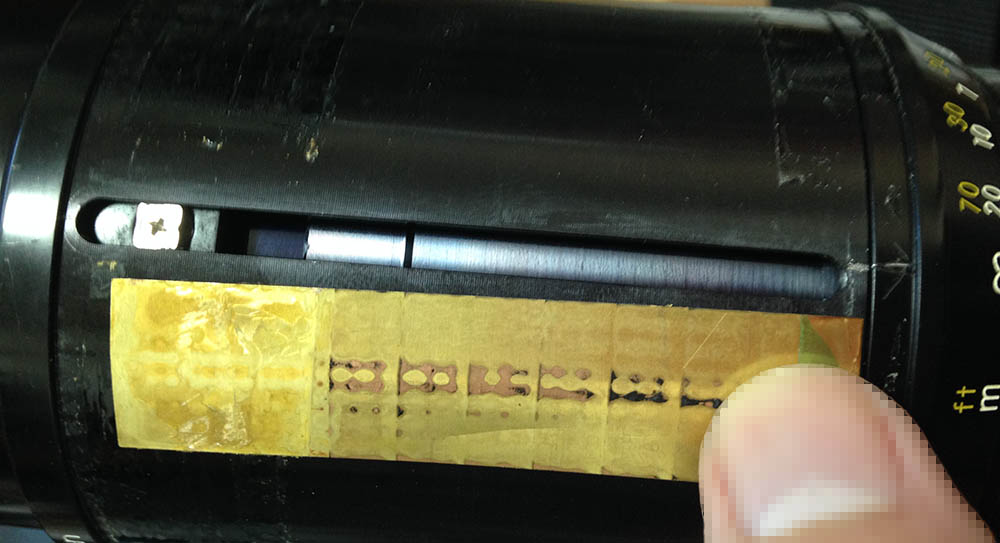
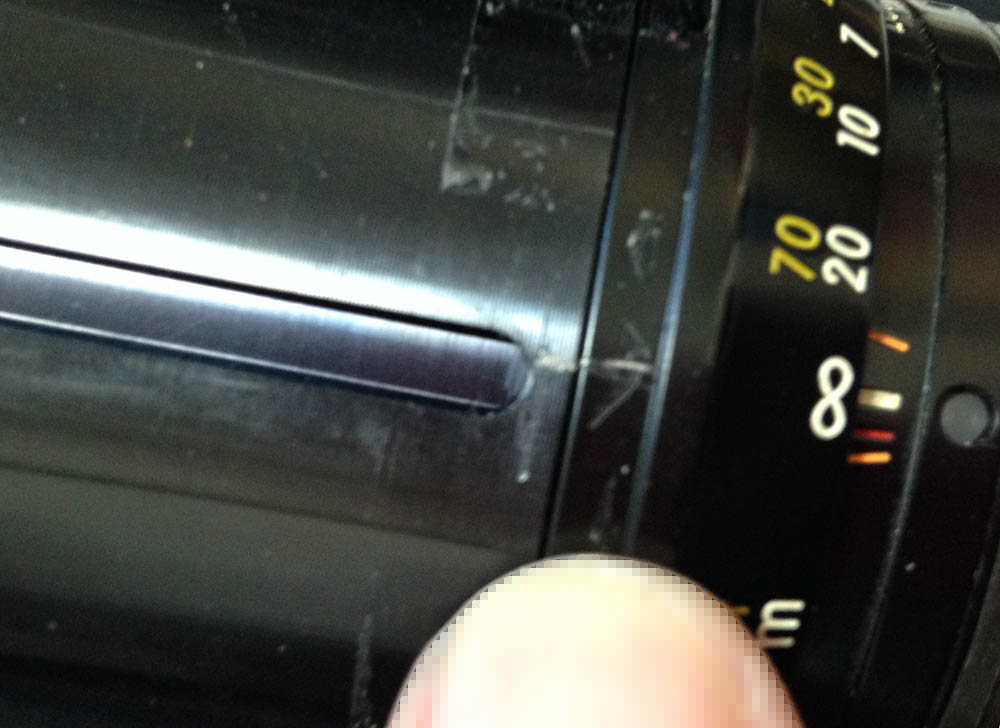
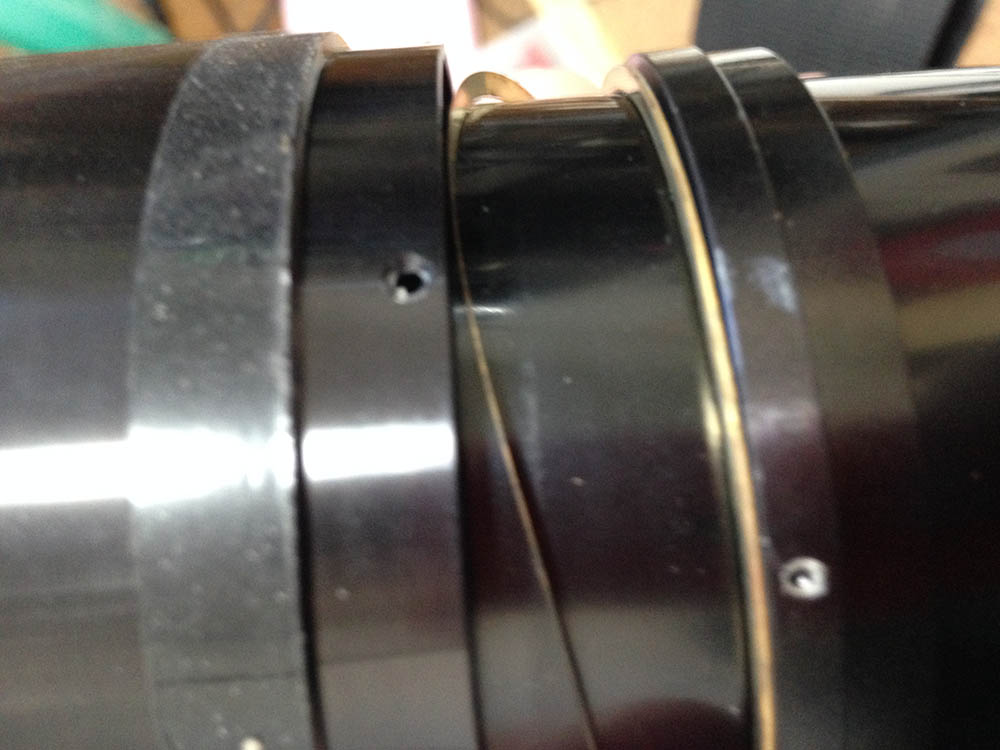
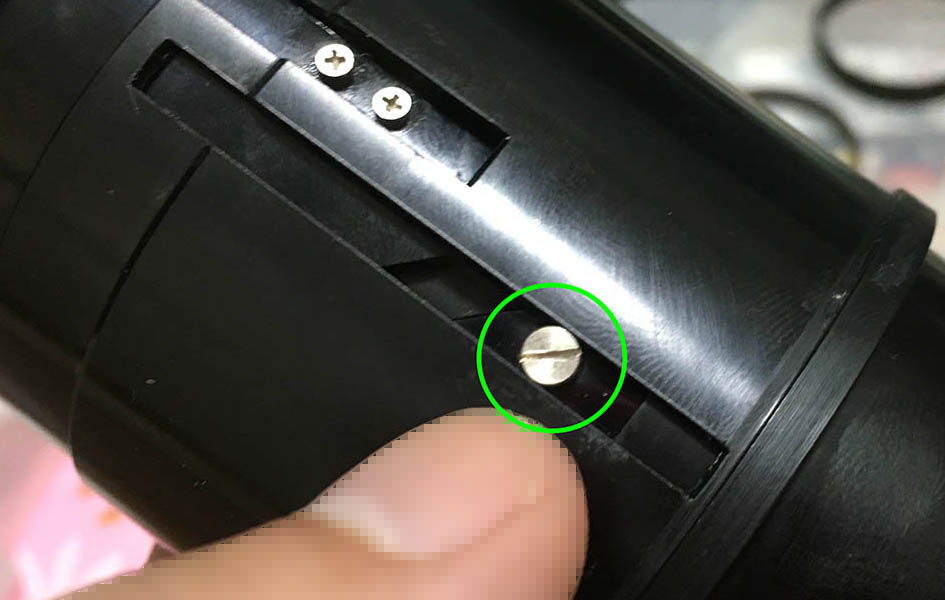
Remove the tapes to remove this brass strip, it covers the slot for the zoom key. This will expose the zoom key, carefully extract and don’t forget to mark its direction. It slides within the slot, don’t overtighten its screw but don’t leave the screw too-loose.
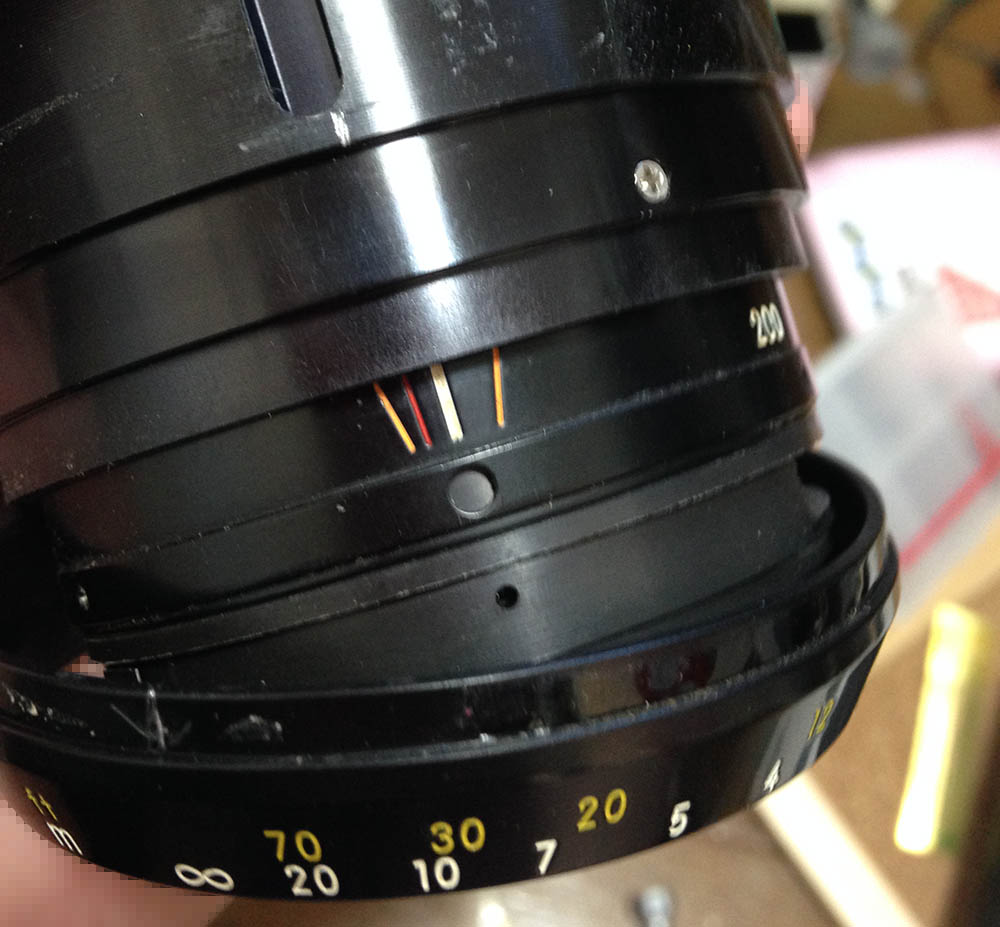
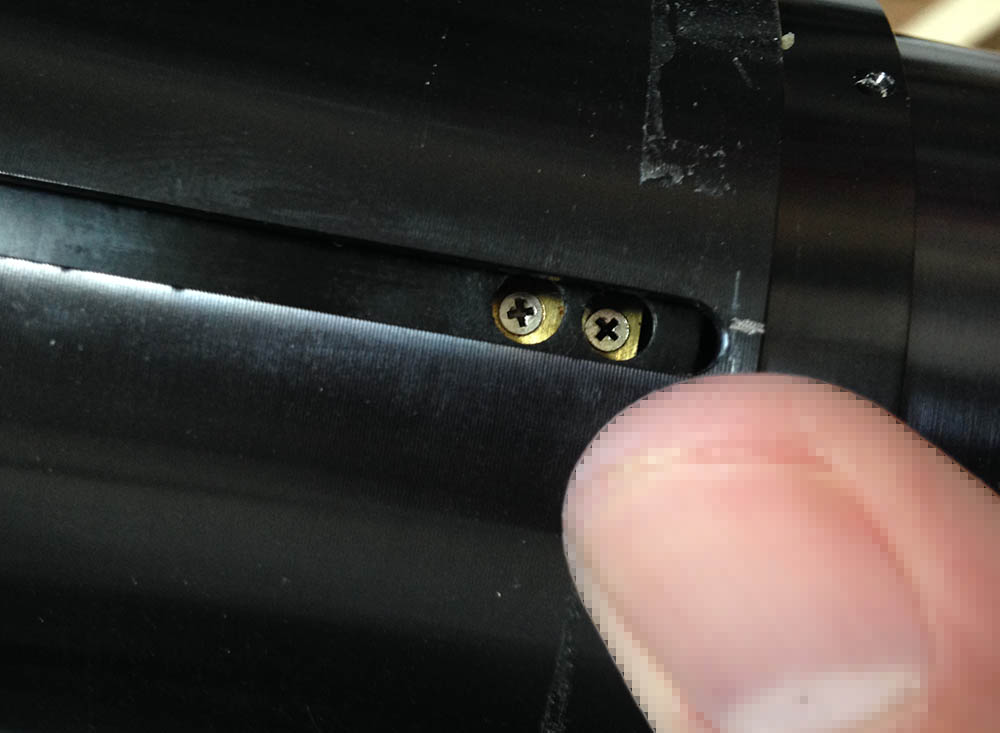
Remove the rings by extracting their screws and separate them all including the distance scale. You can now extract any screws that are accessible here.
This ring secures the thin shims used for adjusting the focus. Don’t damage or lose any of them. Note that this lens will focus-part infinity.
Locate and extract these to remove the helicoid key.
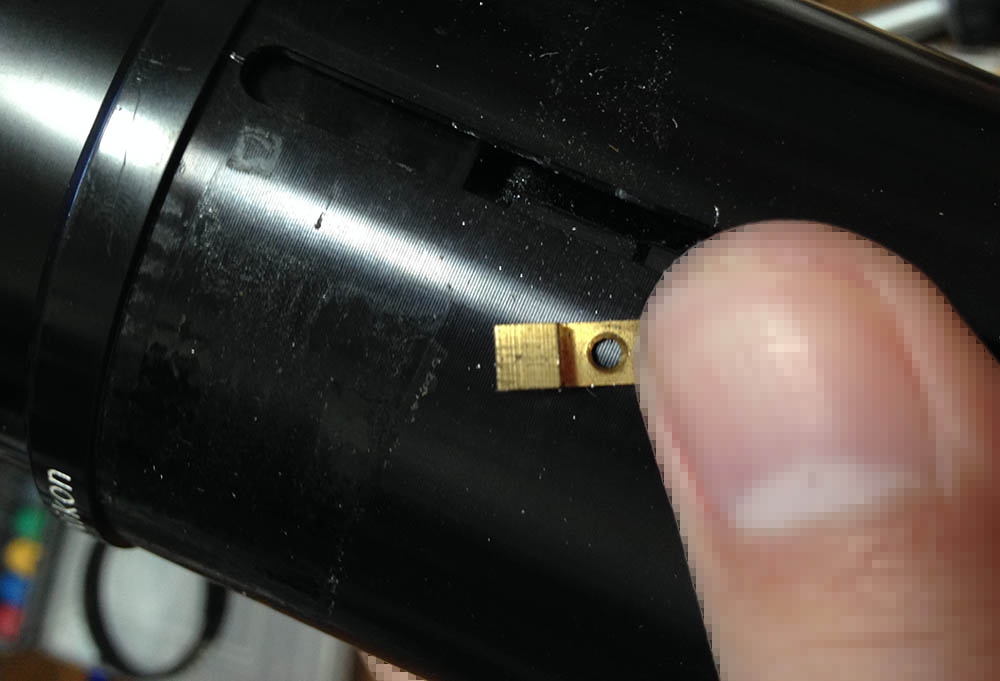
Carefully remove the key but don’t forget to note its direction.
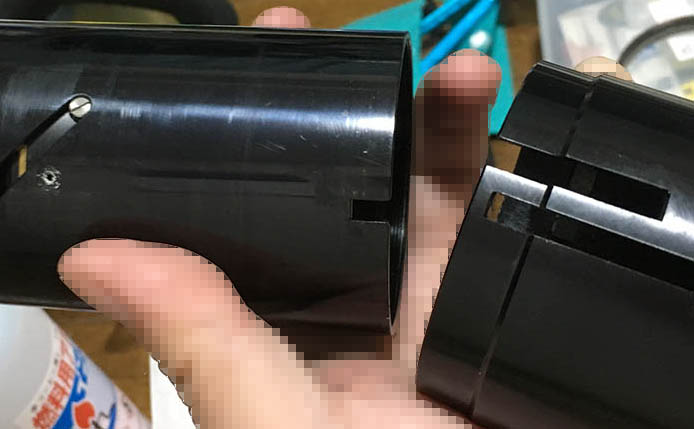
Removing the key will allow you to turn the front barrel beyond its range to remove it. Don’t forget to mark its alignment when it’s collapsed, you should be able to reproduce it after reassembly. Separate it but don’t forget to mark the spot where it parted, many people forget to do this so they end up getting stuck. My article on how to work with helicoids will help guide you so you won’t get stuck.
Wipe the barrel clean.
Extract these rollers carefully. Apply some alcohol to its threads to soften any adhesives. It’s easy to strip these so use a driver that fits the slot perfectly. This roller helps keep the cams synced.
Here’s the guide-roller for the thrust cam.
Be sure to note its alignment before you remove it.
I think these are the shortest ones, they’re for the floating mechanism.
Remove the nylon bushings to be able to clean everything thoroughly.
The internal mechanism houses the internal optics, you can remove it now. Note its alignment before you take it off.
The floating mechanism’s housing can now be removed. Don’t forget to note its alignment before you remove it from the inner tube.

These connect to the rollers, be sure to note which one should go where. These are challenging to put back, it helps to use a bit of lacquer to secure them when it’s time to screw the rollers back.
Clean everything well, never leave any residue. Brush the helicoids with a stiff brush. Polish them with cloth until they’re clean. A toothpick will help you remove any hardened gunk. When putting the rollers back their slots should be parallel to their slots to ensure smooth operation. That way the slots won’t scratch anything. I recommend using a slightly-thick type of grease for the helicoid. Never lubricate anything that’s close to the iris or optics or the oil will migrate to them eventually. Only apply a thin film so you won’t create a mess, it’s better to apply less of it than applying too much. Apply a very thin film of grease to the slots of the rollers or the contact surfaces of the cams.
Conclusion:
Servicing this took me several nights which is normal for zooms. Most of the time was spent cleaning, I had to put everything back properly and making sure that happens also took some time. Beginners should skip this, it’s more than they could handle even if they have the right tools.

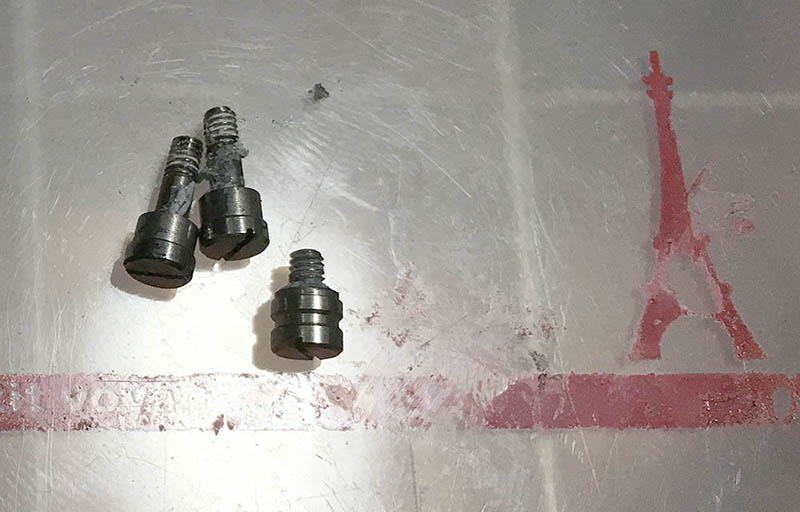
Here are parts of the optics, they’re waiting to be cleaned.
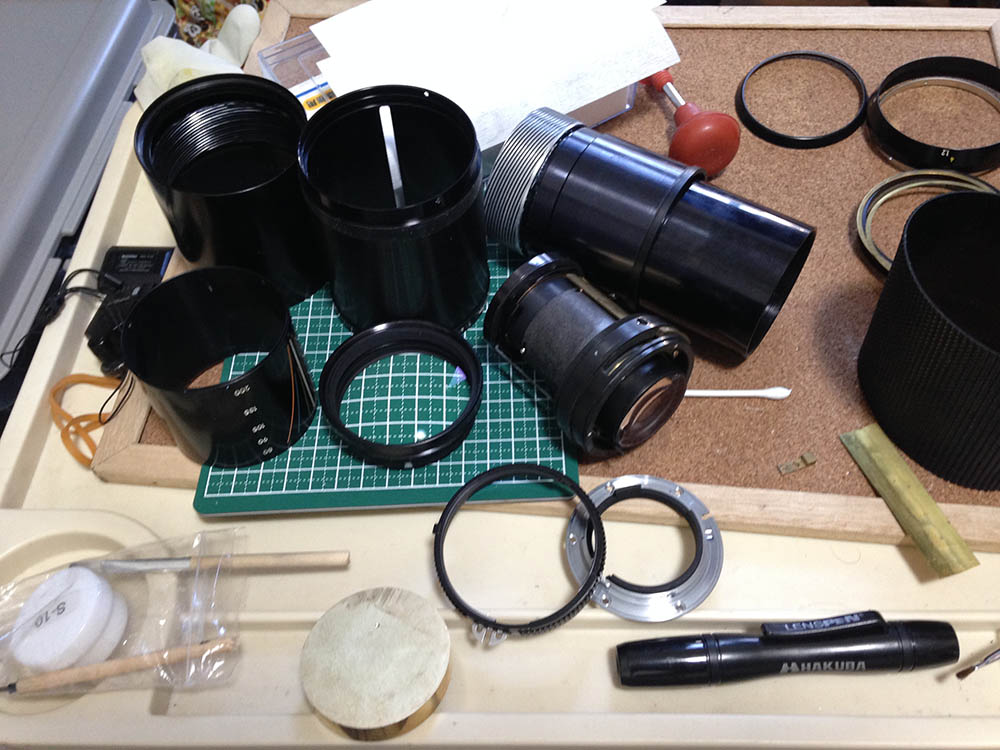
It’s now time to put everything back after cleaning everything.
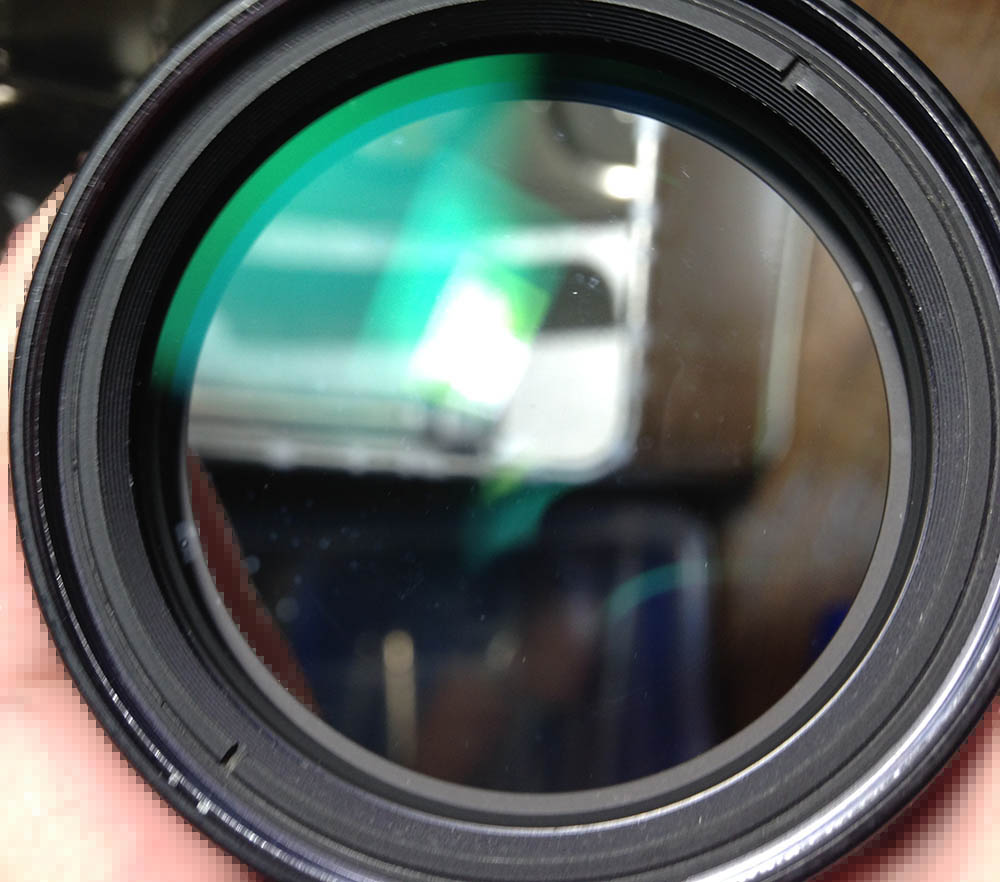
There are no visible signs of fungus after I cleaned it but the coatings were damaged so you could see a couple of bald spots.
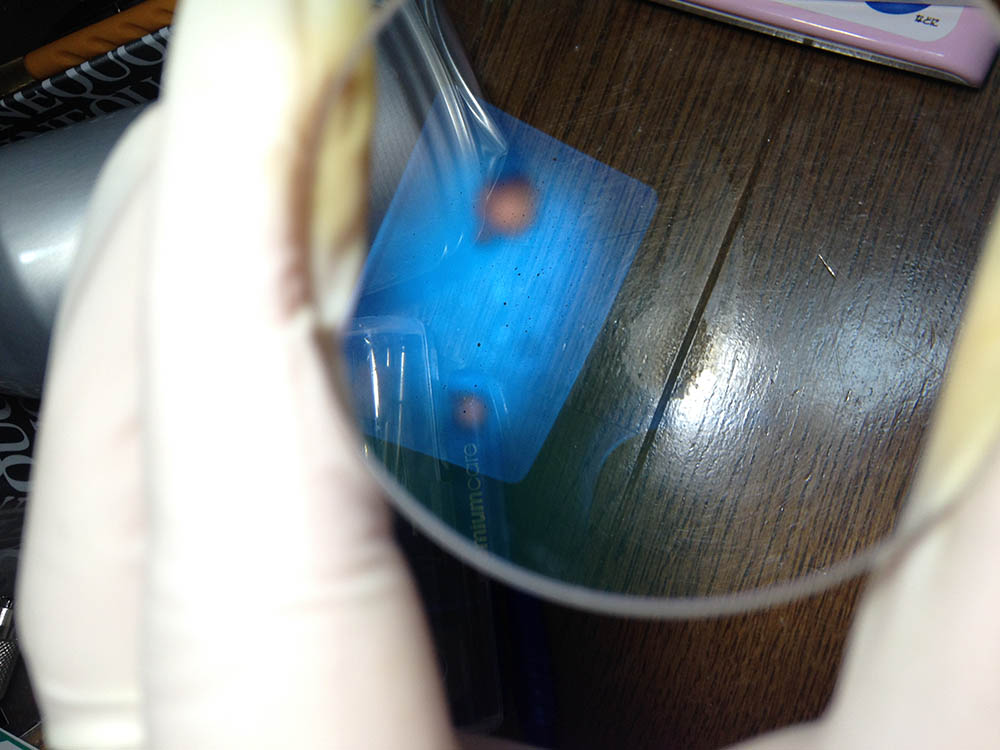
This couldn’t be helped but it won’t affect its optical performance.
Adjusting the focus can be challenging since you’ll have to adjust it at 2 places, the front and rear. Adjusting it requires that you strike a balance between both ends. The rear focus can be adjusted at the base and the front is adjusted with the front assembly. Read my article about focus calibration to know how it’s done with simple tools in a DIY setting.
Once you’re satisfied with your focus adjustments it’s now time to adjust the distance scale. Do note that it will focus-past infinity by a bit, it was designed that way. Secure the scale with a tape to finalize your changes.
Thank you for following and supporting this page, your support helps me because you’re helping me pay for maintaining the blog as well as for the cost of film, development and scanning. This will help make this blog continue to inform, entertain and help people in repairing their lenses, pros and amateurs alike. If you found this helpful, please share it to your friends at social media and camera clubs so that more people will benefit from it. I plan to make this the best resource for many Nikon-related things and I ask you to help me make this possible. Thank you for loving my work, Ric.
Help Support this Blog:
Maintaining this blog requires money to operate. If you think that this site has helped you or you want to show your support by helping with the site’s upkeep, you can make a small donation to my paypal.com (richardHaw888@gmail.com). Money is not my prime motivation for this blog and I believe that I have enough to run this but you can help me make this site (and the companion facebook page) grow.
Buy me a roll of film or a burger?
Thank you very much for your continued support!
$2.00
Helping support this site will ensure that this will be kept going as long as I have the time and energy for this. I would appreciate it if you just leave out your name or details like your country’s name or other information so that the donations will totally be anonymous. This is a labor of love and I intend to keep it that way for as long as I can. Ric.

Aug 05, 2016 @ 03:33:54
Hi does anyone know what size flat head is needed to take the out the screw to get to the front element and where to get one?
Aug 05, 2016 @ 03:52:34
Hello, James.
I am not sure about the size but just be sure that driver is JIS. Check my screwdriver post. Be careful of imitation VESSEL drivers from mainland china or HK. A good alternative is the German WIHA/WERA brand. Ric.
Aug 05, 2016 @ 03:52:57
Just be sure that they are JIS.
Aug 05, 2016 @ 03:35:53
hi does anyone know what size screw is needed to take out the screw to get to the front element and where to get one?
Dec 27, 2016 @ 18:55:26
Hello and good evening Richard. I got nearly the same lens, just the f/4.5n.
It is in an lovely condition. The only lack is its loose focus element which takes control over the zoom function. Other than that really wonderful. Could you have an idea how to fix this issue? Make the zoom element more tight again to get an better control over the focus?
I would love to hear some of your conclusion and waiting to get this beautiful lens on the road again. 🙂
Thanks in advance, marry christmas and a healthy peaceful new year for all of you.
Richard
Feb 02, 2017 @ 07:49:35
Hello, Richard!
Sorry for the late reply, we have the same name so I ignored your comment thinking it was mine.
You need to change the felt lining under the focusing barrel. It can be a little deep so be careful. I will write an article for this one day. Ric
Dec 28, 2016 @ 10:23:09
The flat head driver can be found in any cheap jewellers set. You may find it helpful to get a wetstone and “sharpen” the point a little as they are often a bit on the fat side. For the benefit who can’t help but loose the plot this does not apply to crossheads needless to say. Norman
Jan 14, 2017 @ 14:10:13
Hello, Norman! Yes, I file my drivers now using a file or sandpaper. I got over my cheapness. Ric.
Jan 25, 2017 @ 18:36:58
Thanks for you great Write-Up Richard. I have one of these, but I have a slight problem, it won’t reach infinity. Is this easy to repair?
Feb 02, 2017 @ 07:47:23
Hello, John! Are you the same person as admintheresia? Ric.
Jan 25, 2017 @ 18:40:05
Great Write Up, Richard. I have such a lens but it has a small problem. The lens is in a perfect state and smooth focus but it won’t reach infinity, somehow. Is it easy to repair?
Feb 02, 2017 @ 07:46:43
Thanks! Glad that you liked it!
I would not say that this is easy for a beginner. This lens can be frustrating if you are starting out but it’s perfectly fine once you are moderately experienced. Sorry for the late reply, Ric.
Mar 04, 2017 @ 00:36:57
this is a great article Do you ever intend to take on the 80-200 f4.5 Family and a repair for the lose focus/zoom ring
Mar 04, 2017 @ 00:39:18
Hi, Vince!
Yes, around next month. I still have 2 pending articles to publish. Ric.
Apr 07, 2017 @ 19:31:58
Great article Richard. I was looking for this disassemble, and comes in right time.
Mine Nikon 80-200 doesn’t get infinity focus from 80 to 135 by a tine hair, getting a slightly blur image. At 200 focus perfectly with nice and sharp image, both on my F3 and Sony A7. In order to fix this, it is enough to remove the bottom part and them one or two of those brass shims?
Thank you.
Rol
Apr 09, 2017 @ 09:27:29
Hello, Rolando. You can probably do 2 things:
1: remove one of the brass shims.
2: unscrew the rear element a bit so it is offset to the rear by a hair of a mm.
Be careful,though as both will significantly affect the lens performance. This was probably OK on film. It is very annoying that many of the older zooms change focusing points as you zoom in and out. Ric.
Apr 09, 2017 @ 13:06:51
Thanks Richard. According your experience, it will be enough only dismounting the bottom part to remove the brass shim, or should I dismount too the barrel part?
Apr 12, 2017 @ 07:53:16
Hello, Rolando!
The bottom shims should do fine. I am quite worried because if you messed around with the infinity focus of one end of the lens then it will also affect the other end. Ric
Jun 15, 2017 @ 17:43:35
Thank you for this post Ric. I appreciate the details shown here that might be left out of a youtube video. I would like to know how to stop zoom creep in this lens. Is that caused by a worn shim?
Jun 18, 2017 @ 12:13:17
Hello, Charles.
It is caused by worn felt linings. Ric.
Aug 01, 2017 @ 15:45:10
Very informative and helpful articles, Ric. Thank you. I recently acquired a 80-200mm f/4.5n, the one with the rectangular rear baffle. I need to take it apart to get at the fungus. I’ve read your article as well as the one published by diediemustdive many times over. His is the old f/4.5, yours the f/4. Is my new f/4.5n more similar to the old f/4.5 or is it closer to the f/4? I know it would be too much to ask you to do a repair guide on the f/4.5n, but I do hope you can highlight the dissimilarities. Once again, kudos and thanks. Andrew
Aug 02, 2017 @ 03:22:35
Hello, Andrew.
I think I made one for the 4.5 somewhere. The older 4.5 has nothing much in common with the 4 and it has plenty of differences with the earlier 4.5,too. be careful working on this lens as it can be glued here and there. Ric.
Aug 02, 2017 @ 04:29:05
Hi Ric,
Thanks for the reply. I’ll look again for your f/4.5 article. Hope it’s the same as for the model I bought.
Andrew
Jan 02, 2018 @ 20:49:41
Hi Richard
Just used you guide to remove the front lense to remove to large pieces of dust/debris from one of these that I purchased over Christmas.
Many thanks as without your guide I would have had to send the lense off to a specialist.
Regards
Antony
Jan 03, 2018 @ 01:13:18
Thanks Antony and happy 2018!
Jul 14, 2018 @ 10:00:41
Hi Richard,
A great article. I have tried to unscrew the front element assembly after removing the small screw with no luck. I then noticed that the front of my lens looks different to yours.There appears to be some sort of retaining ring around the lens with the lens detail upon it. I presume this has to be removed first but how?There are no no slots for a removal tool.
James
Jul 16, 2018 @ 15:46:52
Hello, James!
You can try dropping highly diluted oil onto the hole and then try again the next day and see if that helped, otherwise the only way is to drill and tap it. Ric.
Jul 18, 2018 @ 12:01:23
Thanks Richard. I tried the oil with no luck.A profeshional repairer surgested hitting the front ring with a mallet. This took a lot of doing but over a few days of oil and tapping it came out. It seams like the thread about 60 mm dia is damaged.
Thanks
James
Dec 30, 2018 @ 14:55:08
Hello,
Thank you very much Richard for your help in the repair of old lenses. I give you (and all the readers) a solution to unscrew the screws mounted with blocking liquid : heat the head of the screw with the end of a soldering iron for a few seconds. This avoids having to use the extractor. This makes it possible to slightly unscrew the screw, renew the action until completely removing the screw. This is the method used in the industry to unscrew the screws blocked by loctite. use with caution if plastic is near the screw.
it’s nice to be able to give a second life to the good old lenses.
Olivier
Jan 01, 2019 @ 16:09:55
Hello. Yes, I also heat the screws but not so much lately because I have very good drivers now. Ric.
Jun 09, 2019 @ 22:26:51
Hello, I bought this lens for 10 Eurs today at a garage sale. The lens is ok, however the front lens coating has scratches that seem to have no effect whatsoever on the image quality. The only gotcha, there was a small fungus on the bottom element of the front group that I removed following your procedure. This lens is sharp even at f/4, at f/5.6 sharpness increases and at f/8 it is very sharp! Thanks for the good article!
Jul 12, 2020 @ 11:13:43
I have just compared my Nikkor AiS 4/80-200mm (at 200mm/f4) with a few other legendary tele zoom lenses from that time. In fact you are right writing that the Nikkor @ 200mm/f4 is slightly disappointing, at least in the infinity range! Both Carl Zeiss C/Y Vario-Sonnars (the earlier CY 3.5/70-210mm and the later CY 4/80-200mm) have visibly more detail – in the center as well as in the corner of my 24 MP FF camera. The Canon new FD 4/80-200mm L with its Fluorite and ULD lenses has much less longitudinal and lateral CAs than the other three zooms mentioned above. Central resolution of the nFD is excellent, and there’s no color fringing at all. However, the Canon nFD 4/80-200 L must be stopped down to f8 to get really sharp FF corners. Since there are no lateral CAs visible on 24 MP FF, at f8 the Canon has the best image quality of all four lenses mentioned here (remember i’m only talking about 200mm focal length and infinity).