
Hello, everybody! I had dinner and the star was the stew we had last night. Many people don’t know it but I’m quite the cook, too. I sometimes leave a stew to ferment overnight and serve it to people. The result is better since you give the gravy enough time to marinate the meat, tenderizing it. You’ll also notice some enhanced flavors depending on the spice you used. There are times when something gets better when you reheat it. Nikon knew that as well so they updated some of their classic lenses and sold them as new.
Introduction:
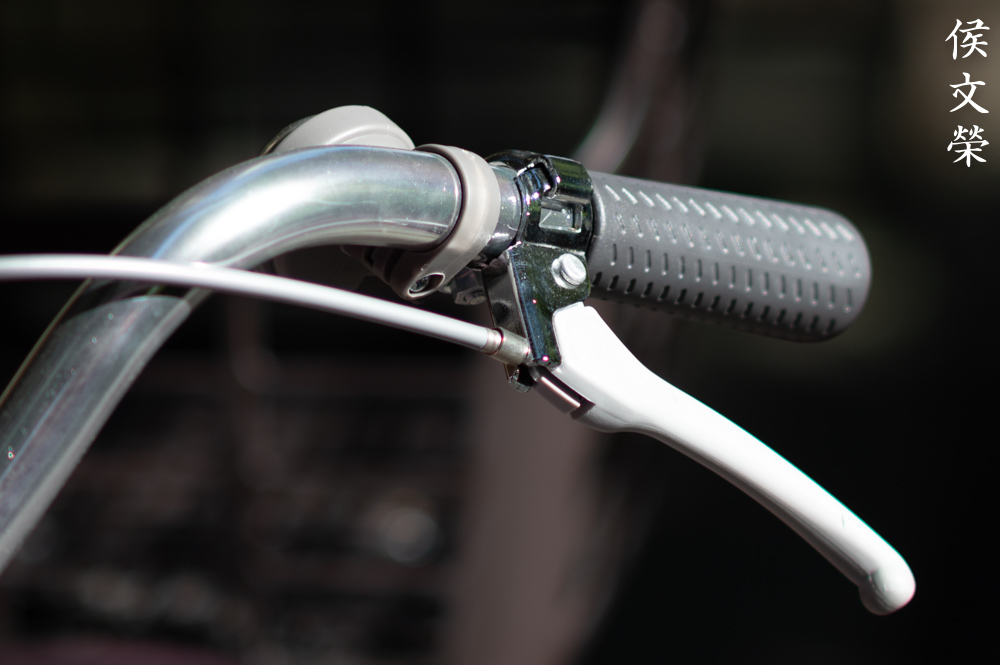
The New-Nikkor 105mm f/2.5 was made from 1974 to 1977 as an upgrade to the Nikkor-P•C. 105mm f/2.5 Auto. The optics remained the same but a new barrel was designed for it. Nikon updated the majority of their lenses so the brand’s image look modern, most of the updates are merely redesigning of the barrels but some came with totally-new optical formulas. This new line of lenses are called “New-Nikkors” or simply “K” versions which stands for “kai” (改), it means “modified” or “improved”. The New-Nikkors all have the now-standard rubber grip, fewer bare-metal surfaces and a modern look. I love these lenses as they’re quite tough, certainly a lot tougher compared to the later Ai-S ones.

It still feels quite dense despite losing the all-metal construction of the older version. The rubberized grip makes it easier to use in colder climates, your fingers won’t feel uncomfortable touching it. The one shown here does not have an Ai-ring so you shouldn’t mount it on a Nikon that has a rigid Ai-tab, doing it will damage the camera and it will cost you a lot of money to fix it.
The optical formula is identical to the Nikkor-P•C. 105mm f/2.5 Auto which is a 5-elements-in-4-groups design of the Gauss-type. I don’t know if Nikon did a few enhancements to the optical formula since it was a chance to improve it but it’s safe to assume that they didn’t. Maybe some optimizations did see implementation to accommodate for better manufacturing standards.

There are 4 major external variations of this lens family, more if you count the numerous sub-variants like the Nikkor-P 10.5cm f/2.5 Auto (tick-mark) or the several minor versions of the Nikkor-P 105mm f/2.5 Auto which all have a silver-nose but the construction differs a bit between batches. I won’t add the Nikkor-P•C 10.5cm f/2.5 since it’s a rangefinder lens despite it being legit in the sense that it’s really a part of this lens family. If you are interested to know everything about this lens family, read all of my articles about them. You’ll know each version and the differences in optical design between the versions.
The 4 major variants are (from left-to-right):
- Nikkor-P 105mm f/2.5 Auto
- Nikkor-P•C. 105mm f/2.5 Auto
- New-Nikkor 105mm f/2.5
- Nikkor 105mm f/2.5 Ai-S
Notice that there’s no Ai version mentioned since this was also sold as the Ai version, the only visible difference is it has a minimum aperture of just f/22 instead of f/32. I don’t know why the minimum aperture was modified but it may have to do with the Ai-coupling tab’s turn-range.

It’s the toughest one in terms of construction. Most of its parts were glued at the factory which makes it annoying to dismantle.

The Gauss-type lenses are a bit taller than their Sonnar-type predecessors. I personally prefer the Sonnar-type in terms of rendering. The differences in terms of character is subtle and you normally shouldn’t care about it.

It balances well with most Nikons. The Nikon F4 and Nikon Df has a foldable Ai-coupling tab so you’re able to mount pre-Ai lenses with them. Be sure to get one with an Ai-ring so you can use it with newer Nikons.
Learning how your lens performs is key to maximizing its use. You’ll learn how to utilize its strengths and avoid its weaknesses. This knowledge helps in determining which lens to bring on assignment.
I shot these from f/2.5, f/4 and f/5.6, these are the most common apertures I assume people would want to use it and we’ll see the most changes happen with these values. The were shot with my Nikon Z6.

(Click to enlarge)
You’ll see some vignetting wide-open but it improves considerably by f/4. It’s gone from f/5.6 and on. Distortion isn’t obvious at all but it’s there. You will not see it much in real-world photos.


(Click to enlarge)
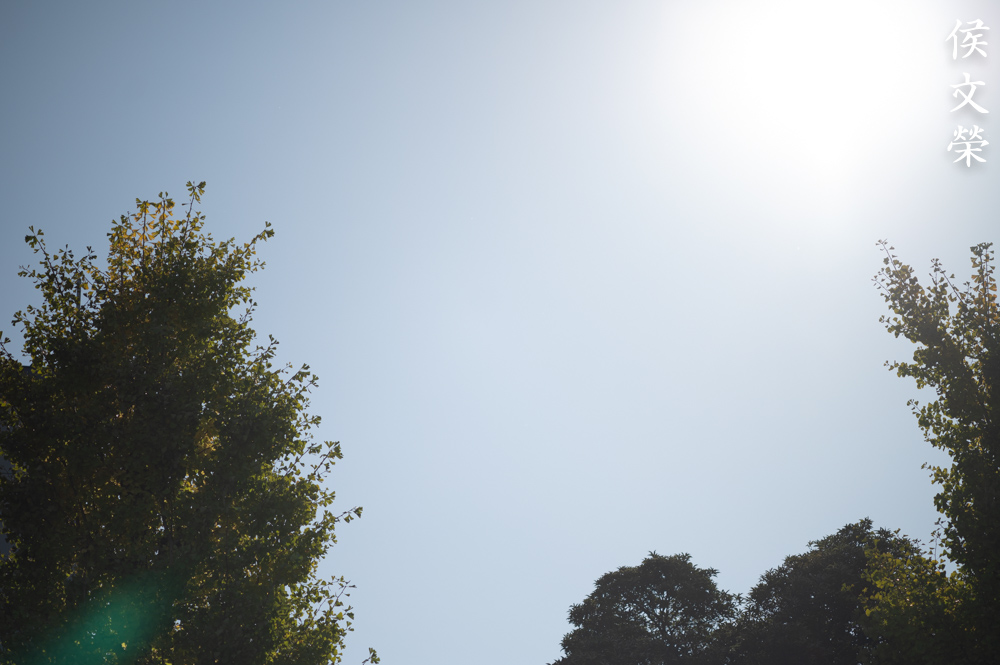
Flare and ghost resistance is average and is typical of Nikkors of its time. It has a tendency to produce ghosts when shot with the sun in the frame. You will notice a bit of flaring as well but it’s not terrible at all.


(Click to enlarge)
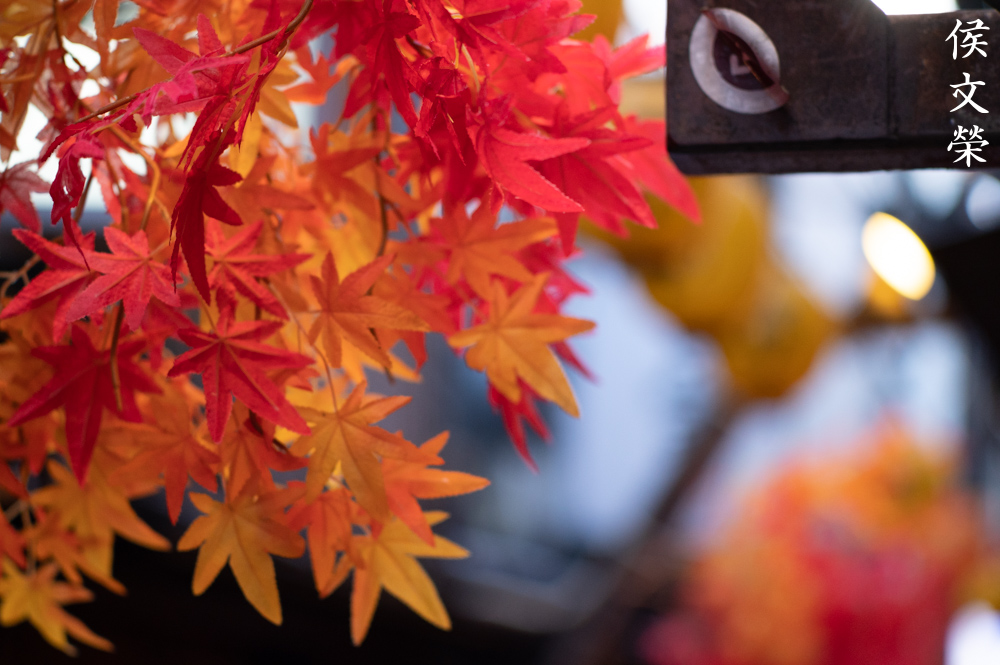
It has excellent bokeh quality like the rest of the 105/2.5 family. The discs are clean, even and there’s no ugly-looking outlines. The outlines don’t look bad but it’s there. Stop the iris down to f/4 to eliminate it. It’s an exceptional lens in terms of bokeh quality.


(Click to enlarge)
Chromatic aberration is quite high wide-open on overblown areas. Stop the iris down to f/4 to alleviate it. Spherical aberration can still be seen even by f/8 on extreme cases like the ones you see here. It’s doesn’t look as ugly but some people may be turned-off by it. I personally don’t mind it at all. These are very difficult examples and you shouldn’t see this happen in real-world photos specially if you exposed your photos properly.


(Click to enlarge)
Sharpness is quite good wide-open but there’s still room for improvement. I like how it renders wide-open, it’s sharp but not too much. Flare will cover your frame and it will subdue contrast and affect sharpness a bit. It’s able to resolve details adequately wide-open at the center and the corners look fine despite not being as sharp as the center by a marginal amount. Stopping the iris down to f/4 increases resolution across the frame. The center looks good and the corners begin to look a bit better. The center is performing at peak-resolution by f/5.6 and corners seem to perform just as well. Air pollution or haze can affect its performance at further distances specially wide-open, it’s important to stop the iris down a bit when shooting at distant objects. You’ll also notice that chromatic aberration makes thing look less-sharp. I think it performs quite well for shooting distant subjects but it performs a bit better on closer subjects. The difference is small and you won’t even notice it.

The character of the bokeh is astounding. Couple that with its ability to take sharp photos wide-open and you get a nice photo. It renders beautifully, an exquisite lens by many standards.

This is quite long for street photography but you can use it to your creative advantage for storytelling. It has enough frame compression so you frame your scene tighter. This wouldn’t be possible with a 50mm lens.

The focus-transition looks natural and smooth. It’s not abrupt so you won’t get that “wall-of-focus” look in your photos, something that many modern lenses tend to exhibit.


(Click to enlarge)
Here are more photos. This is a great lens even with a Nikon Z6, its high-MP sensor renders with it beautifully. It has this “vintage-look” that people love or hate depending on who you ask. I personally like this a lot and that’s why I love shooting with older Nikkors.
Let’s now see how it performs with film. Film has a unique look that is hard to replicate with a digital camera because grain reacts differently to light. It can either mask or amplify a lens’ flaws. Since this was originally made for use with film it’s best that we judge this with its intended medium. This will give us a better assessment of how it really performs. These were shot with my Nikon F4 loaded with Kodak Color Plus 200.

Amazing sharpness even at the center. The warm afternoon sunlight gave it a nice, amber hue. This film is known to give a yellowish-tint so it make this look even warmer. The character of the bokeh is excellent as expected.

The corners don’t look as great wide-open but the shallow depth-of-field at closer distances may have contributed to that, too. This could focus-down to 1m which is a nice feature.

It can be a bit challenging when shooting with not enough light, you’ll need a faster film for this. I’d recommend stopping the iris down to f/4 to get a bit more of your subject in-focus if your film allows you to do that.

It’s a great lens for portraits, 105mm is great for this application because it’s neither too-wide nor too-long. I have missed my focus a bit here, she moved a bit and that thin depth-of-field worked against me.

It’s also a nice lens for events and travel photography so you could get a bit closer to the action without being a part of it. News photographers like this a lot and a 105mm lens used to be part of many journalists’ kits.

Looking at this photo takes me back a few decades back in time. You would think that this was shot in 1980 if not for the bleached kid at the back and a whole crowd of masked people.


(Click to enlarge)
Here are more photos for your enjoyment. I missed my focus on the cat, he doesn’t look so happy about it. It has a unique look to the photos it takes, it’s subtle but it makes your photos look a little bit more special. I love using it with film and I think it’s the right way to go. Many people add filters to their photos to make them look like they were shot with film, why not just shoot with it and get it the authentic way?
I highly recommend this lens to everybody. These are cheaper compared to the Nikkor 105mm f/2.5 Ai-S but it doesn’t have the built-in hood so those of you who couldn’t afford that should buy this one instead so long as you look for one with an Ai-ring. The older versions are nice as well but this model is usually the cheapest since people usually look-past it because it doesn’t look interesting. Their loss is your gain, you can get one for less than $90.00. I got mine for a lot less than that. When looking for one, be sure that the iris isn’t oily and it’s snappy when you actuate it. The glass should be clear and clean as well. Turn all the rings and make sure that they’re smooth. You cannot go wrong with any of these, only budget will dictate which lens you’re going to end up with. Happy hunting.
Before We Begin:
If this is your first attempt at repairing a lens then I suggest that you check my previous posts regarding screws & drivers, grease and other things. Also read what I wrote about the tools that you’ll need to fix your Nikkors.
I suggest that you read these primers before you begin (for beginners):
Reading these primers should lessen the chance of ruining your lens if you are a novice. Before opening up any lens, always look for other people who have done so in YouTube or the internet. Information is scarce, vague and scattered (that is why I started this) but you can still find some information if you search carefully.
I highly recommend that you read my working with helicoids post because this is very important and getting it wrong can ruin your day. If I can force you to read this, I would. It is that important!
For more advanced topics, you can read my fungus removal post as a start. This post has a lot of useful information and it will be beneficial for you to read this.
Disassembly:
Its construction is quite conventional so it didn’t take me a long time to fix it despite all the glue that was used on it. That’s the only annoying thing about working with it, you’ll have to apply heat or alcohol most of the parts before you could separate them safely. Because of that, it isn’t something for a first project. You’ll require special tools, skills and patience for this. If you lens is broken, send it to a repairman and make sure he’s legit.
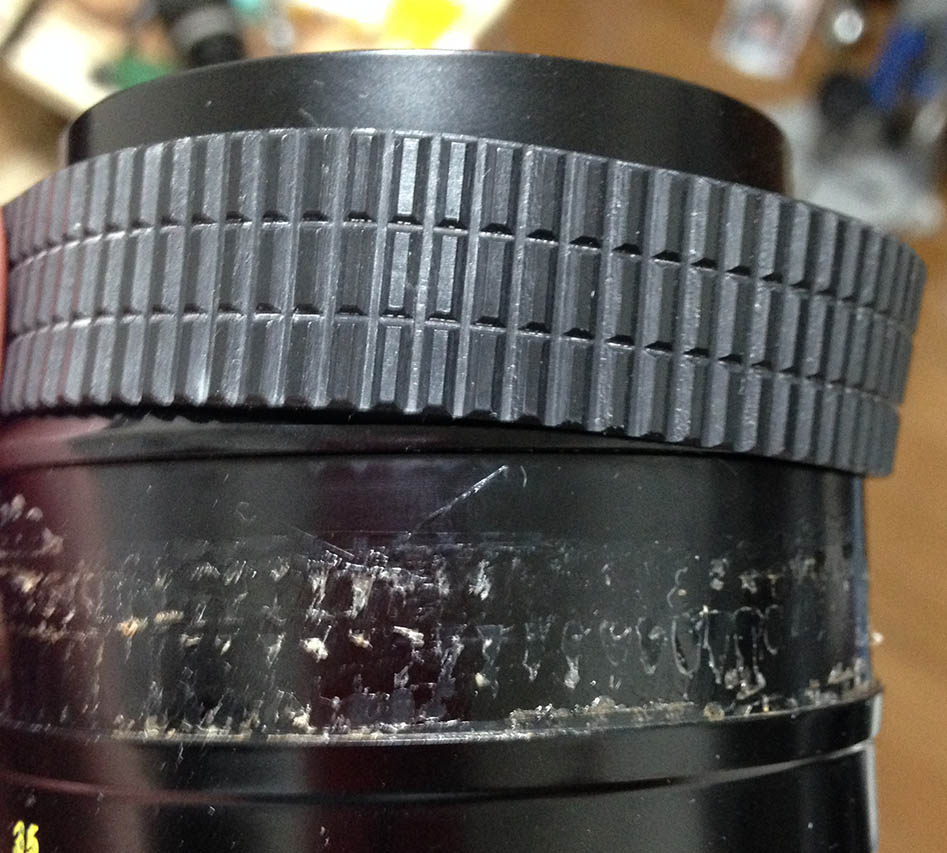
You don’t have to remove the rubber part of the focusing ring but I got it off since I wanted to clean the barrel thoroughly.
Locate and extract a set screw found in the front barrel. You can proceed to unscrewing the front barrel once that screw is gone.

You can remove the bezel if you wish but it’s not necessary.
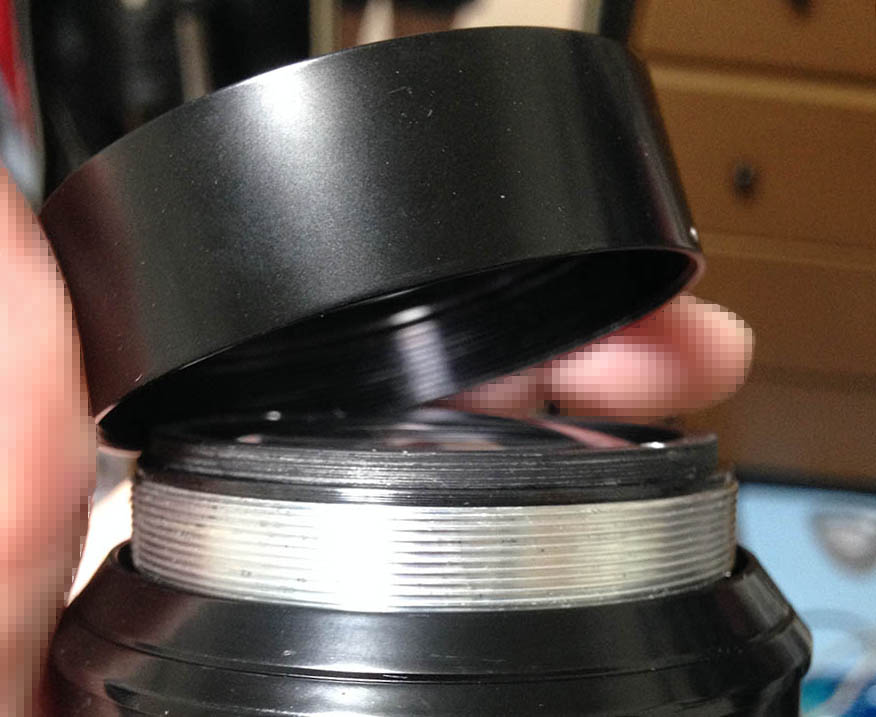
Carefully extract the objective, be sure not to scratch the rear element. Keep it in a safe place while you work on the lens barrel.
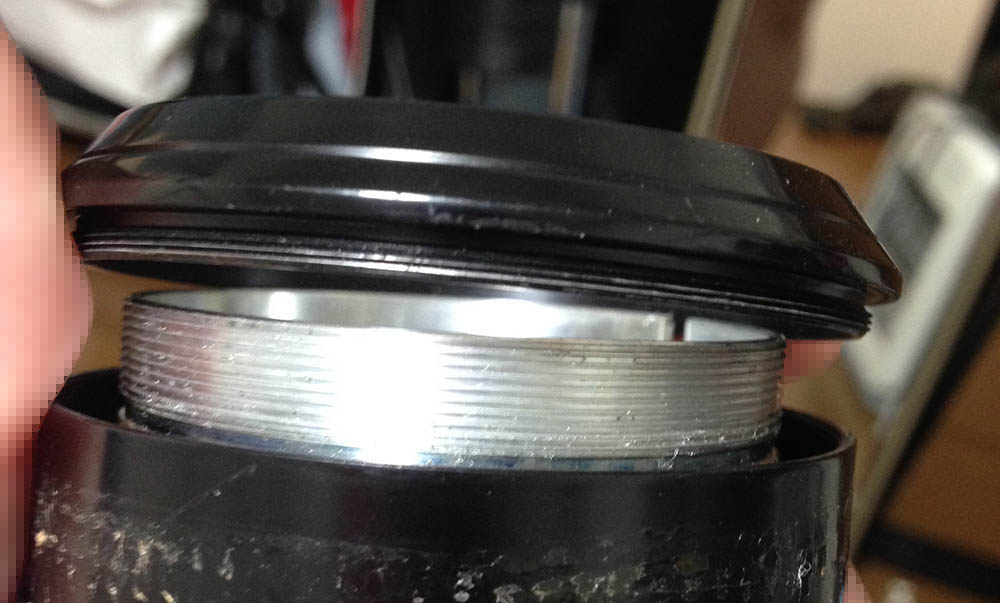
The cover of the focusing ring can be unscrewed. It can be tough to remove and only applying alcohol to its threads will help get the job done. A pair of rubber gloves will help with your grip.

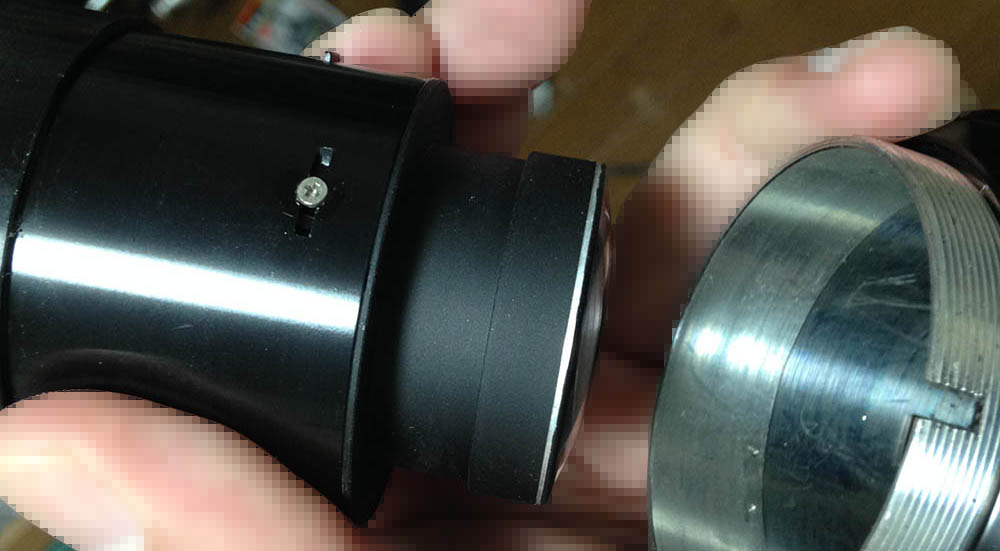
Extract these to remove the focusing ring. This is where you could adjust its focus, you’ll get back to this later when it’s time to calibrate your lens.

Carefully remove the focusing ring. It may be stuck, a few drops of alcohol will help you get it off once it has softened the glue.
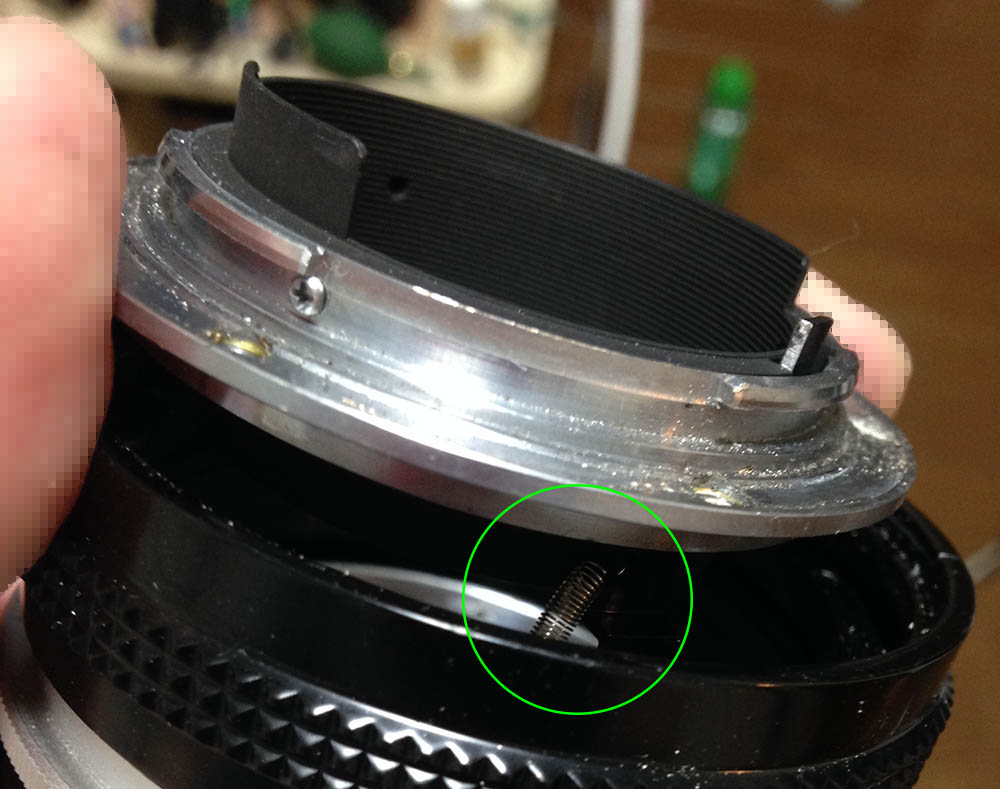
Before you remove the bayonet mount, peek inside the barrel and look for a small spring attached to the stop-down lever mechanism. Decouple it so it’s safe, it may get damaged when you remove the bayonet mount.
Extract the screws of the bayonet mount so you can remove it. Many people get stuck here because they have stripped these. To prevent this happening, read my article on how to remove bayonet screws. Use the correct driver, the screws are JIS so you should only use a JIS driver for them.
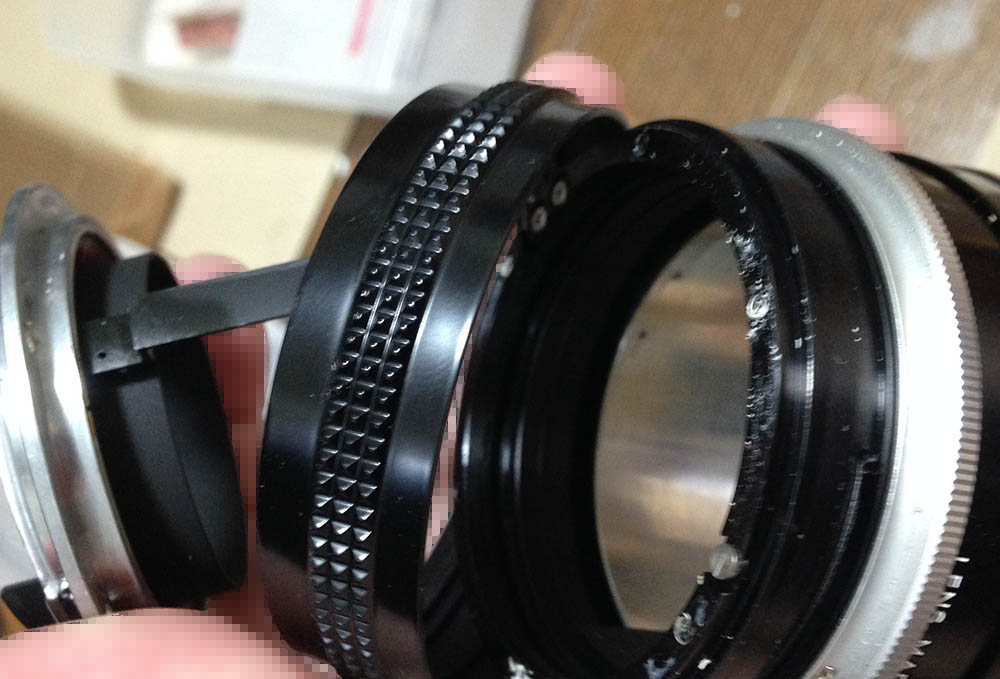
Remove the bayonet mount and the aperture ring.
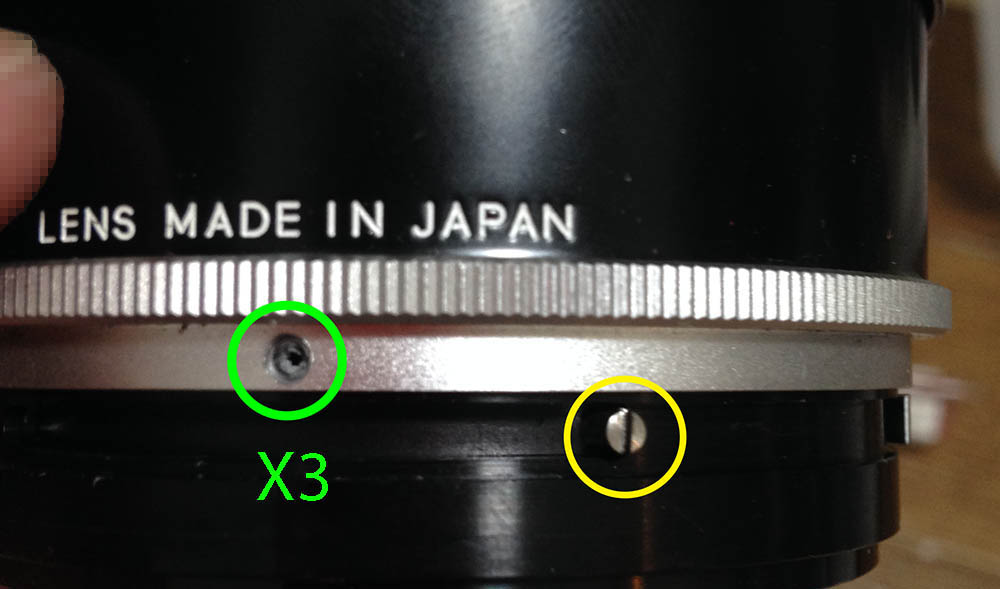
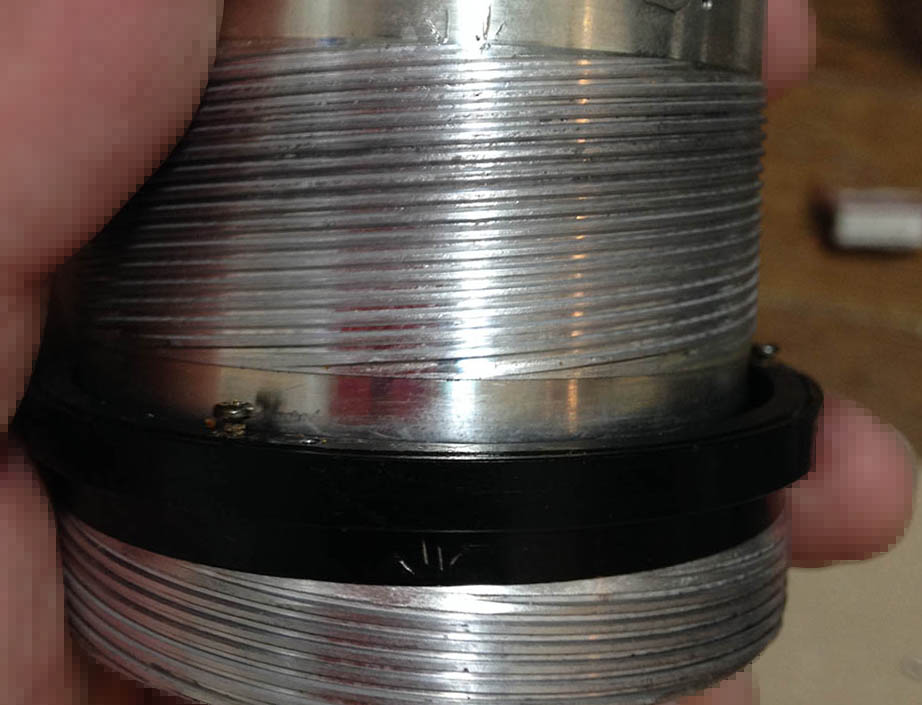
Extract the screws of the chrome grip (green) and the pin (yellow). The pin couples the aperture ring to its fork so turning it will control the iris inside of the objective. It’s delicate so be sure not to snap it. You may want to apply a bit of heat to it to soften any seals.
Carefully remove the grip and the sleeve. These are sometimes glued at the factory, if it’s stuck, apply some alcohol to help you get it off.
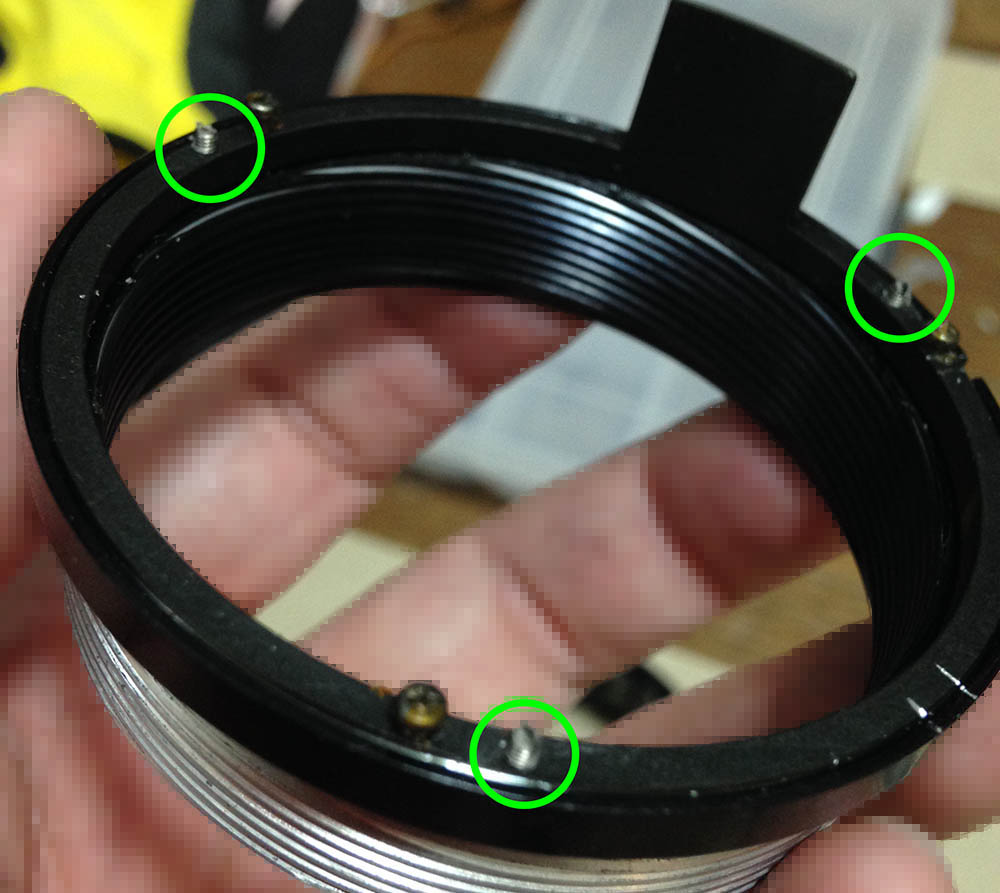
Extract these to remove the helicoid key. It keeps the helicoids’ synced and it also prevents them from undoing themselves. Turning the central helicoid will allow you to extend-or-retract the barrel because of it. Before you get it off, take plenty of notes about the helicoids’ alignments so you’ll know how to put them back again later.
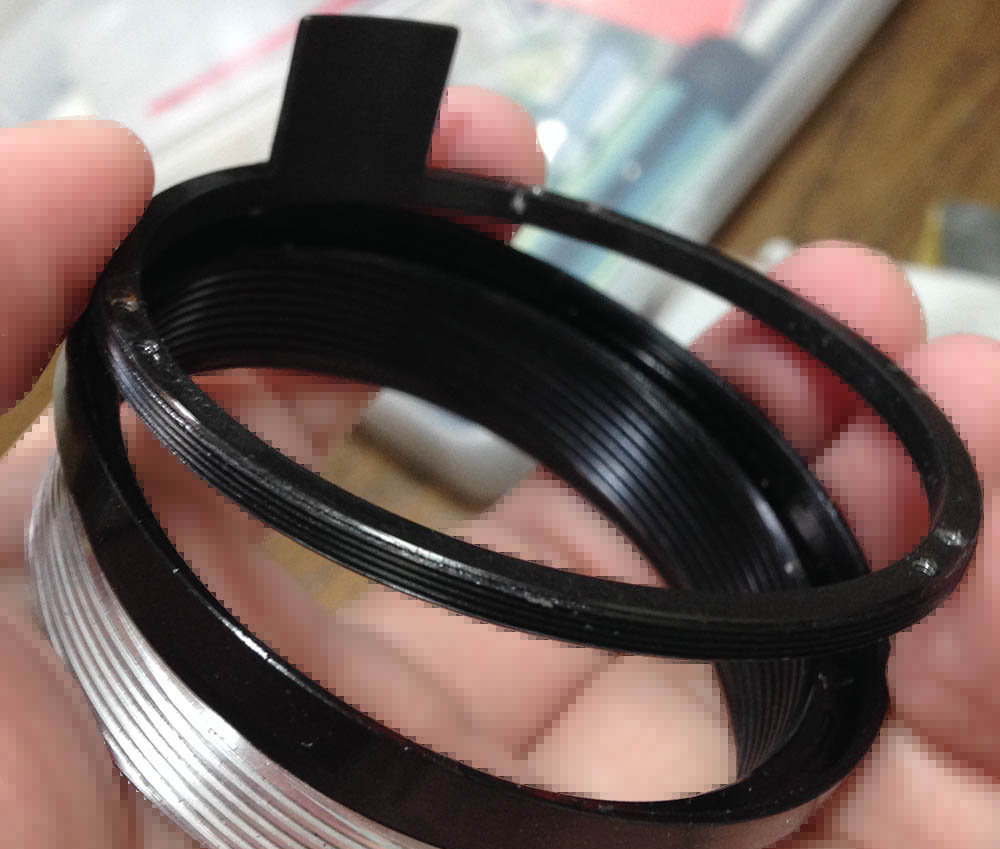
Separate the central helicoid from the outer one and never forget to make a small mark to know where they separated as they should mesh at the same spot, too. Many people forget to do this so they waste a lot of time guessing. Read my article on working with helicoids to prevent this from happening to you.
The helicoid stop will prevent you from going further, extract its screws so you can remove it. I usually heat these since they’re nearly-always glued at the back with contact cement.
Separate the inner helicoid and never forget to mark where it parted.
There’s an adjuster ring at the central helicoid. This is where you adjust the lens’ focus. I usually pickle this assembly in an alcohol bath overnight to get the seals off before I even attempt removing it. Before you remove it, make a small mark so you’ll know its alignment. Loosen its 3 set screws then turn it until its off. It should unscrew effortlessly, if it won’t then you should put it back in the alcohol bath to pickle some more. Be careful unscrewing this, the threads are fine so it’s easy to cross-thread it.
The threads are really fine. Be careful when removing or putting this back.
I didn’t have to dismantle the iris mechanism since it’s still clean. If yours is dirty, watch Kenneth’s video to help guide you through the process. Like and follow his channel, he’s an amazing individual with plenty of useful tips.
The optics are still clean so I didn’t have to open mine up. Read my article of the Nikkor-P•C. 105mm f/2.5 Auto, the objective is similar so you can use that as a guide, too.
Clean the parts thoroughly and don’t leave any residue. I scrub the helicoids with a strong detergent and pickle them in an alcohol bath to remove grime and other hardened gunk. Only apply a thin film of grease to the helicoids, I use something that is neither light nor thick since this lens has a long focus-throw. Never lubricate anything that is close to the iris mechanism. Putting excessive amounts of grease will lead to a bigger mess later and you’ll have to open the lens again for an overhaul.
Conclusion:
It took me about 2-3 hours to service this. Most of my time was used to clean the parts thoroughly. It’s an easy lens to service despite all the glue, it would have taken me less time otherwise. Backtrack all of the steps to reassemble the lens. Putting the objective back can be difficult because you will have to align all of its pins properly to their respective forks inside the barrel. Just lower it carefully and be sure that they engage properly.
Before you reassemble everything make sure to leave the focusing ring off. Adjust the focus using the adjuster ring then install the focusing ring back if you’re satisfied with your adjustments. Read my article on focus adjustment to know how I do it in a DIY setting.
It’s now time to shoot with it. I am glad that I spent the time to repair it, this is such a wonderful lens and it’s a shame that people don’t give it the proper respect it deserves these days.
Thanks for following my work, if you liked this article please share this with your friends so it will get more views. This site earns around $0.30 a day, it’s totally reliant on views. You can also support this site, it helps me offset the cost of maintenance and hosting. You are also helping me purchase, process and scan film. This site promotes the use of film so we’re all in this together. See you again in the next article, Ric.
Help Support this Blog:
Maintaining this blog requires money to operate. If you think that this site has helped you or you want to show your support by helping with the site’s upkeep, you can make a small donation to my paypal.com (richardHaw888@gmail.com). Money is not my prime motivation for this blog and I believe that I have enough to run this but you can help me make this site (and the companion facebook page) grow.
Buy me a roll of film or a burger?
Thank you very much for your continued support!
$2.00
Helping support this site will ensure that this will be kept going as long as I have the time and energy for this. I would appreciate it if you just leave out your name or details like your country’s name or other information so that the donations will totally be anonymous. This is a labor of love and I intend to keep it that way for as long as I can. Ric.

Oct 26, 2017 @ 15:59:52
Great articles -thanks! Have you thought about doing YouTube videos? I’m sure these would be popular. Cheers.
Oct 28, 2017 @ 04:42:55
Hello, John!
Sorry for the late reply I was busy. I make videos sometimes but I prefer writing. Check Mikeno62’s channel. He has an awesome video channel!
Oct 29, 2017 @ 19:08:31
Thank you Richard, this was a great article, I have the same lens so maybe I should make a film about it, because my lens need some new grease, and I would like to try the Helimax-XP grease just to see how good or bad it will work, compare to the Tri-Flow I normally use in Nikkor lenses.
Best regards
Kenneth
(mikeno62 on YouTube)
Nov 03, 2017 @ 13:26:15
Thanks, Kenneth!
Nov 02, 2017 @ 02:11:48
Hi Richard. as always, your articles are very informative. Would the 105 F2.5 Ai have the same disassembly procedure? Thanks!
Nov 02, 2017 @ 07:47:21
Hello, Bernard.
Yes, I think so. They look very similar. Ric
Dec 09, 2024 @ 10:20:20
I’m really struggeling to get the stop down spring back. Any tips how to do this?