
Hello, everybody! I am currently very tired and stressed from work and all this repairs and camera blogging thing that is a huge part of my life. We all strive to perfect ourselves with practice and research. Nobody was born a master and we must all pass through these hardships in order to reach our goal. While we can argue that nothing is perfect, we can all agree that there are many things which we can consider to be near-perfect. I know a Nikkor lens family that can claim to be that and that is our subject this week, a lens family that’s close to perfection that it has become a timeless classic.
Introduction:
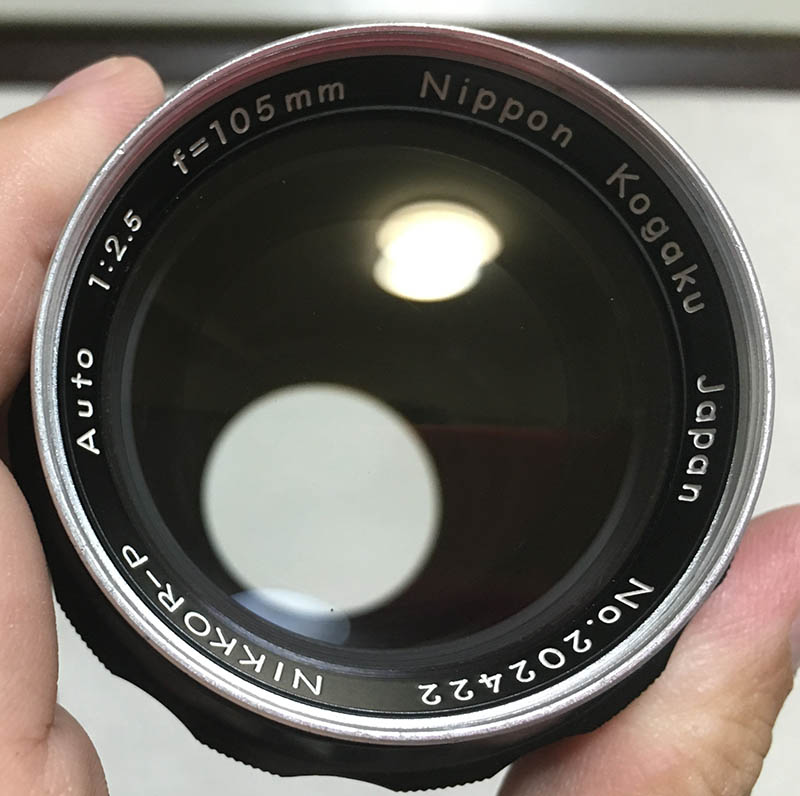
Today, I’m going to introduce to you the amazing Nikkor-P 105mm f/2.5 Auto lens! This is spectacular and it’s one of my favorite lenses, I don’t know why it took me so long to write this article. This lens is the stuff that dreams are made of, how it renders a photo is fantastic, it’s sharp, exquisite and smooth where it needs to be. I’m going to use plenty of superlatives to describe this and I am sure that many of you who are familiar with this lens will agree.
This is one of the legendary Nikkors of old, if you are into collecting Nikkors then I assume that you already have this in your collection. If not then you should go out and buy one, you’re collection is nothing without it.
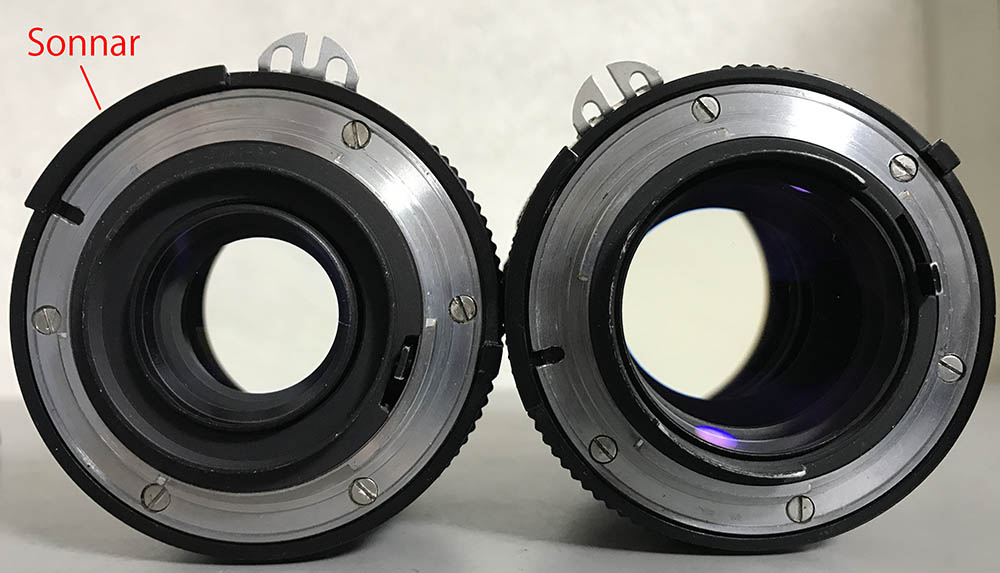
The first version appeared as a telephoto for the Nikon S line of rangefinder cameras in 1953. It was designed by no other than Wakimoto Zenji himself, the best optical designer in Japan at that time. The original optical formula largely remained the same (Sonnar-type) between these versions except the F-mount version had the rear element shortened by about 1mm in order to accommodate the reflex mirror of the Nikon F. The performance remained largely the same according to the Nikon’s 1001 nights article so you can take this as official. I had the chance to overhaul both versions and I can tell you myself that this is indeed the case.
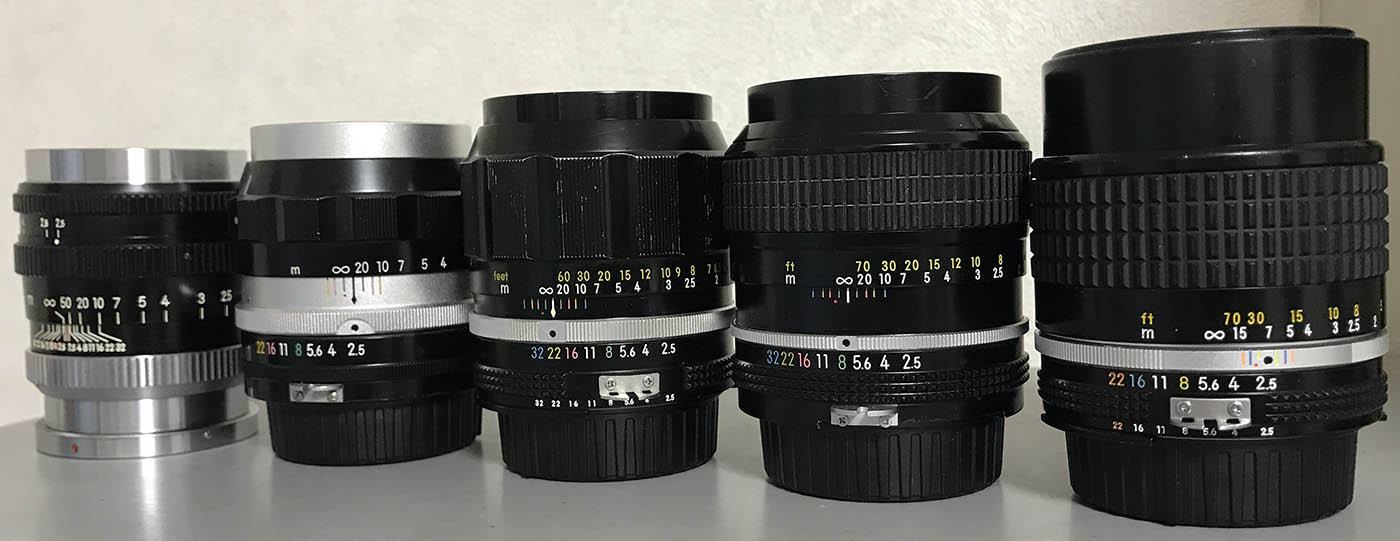
This lens line was produced from 1953 to around 2005. In the picture above you can see the major cosmetic variants of this lens family. While there are numerous sub-variants in-between these ones the main ones can be filtered down to these versions.
Here is the earliest type for the F-mount versions, known as the “tick-mark” version to collectors and hobbyists. It came with the designation of 10.5cm since Nikon was using centimeters before. There are some differences with this version’s construction but the main scheme remained mostly the same.
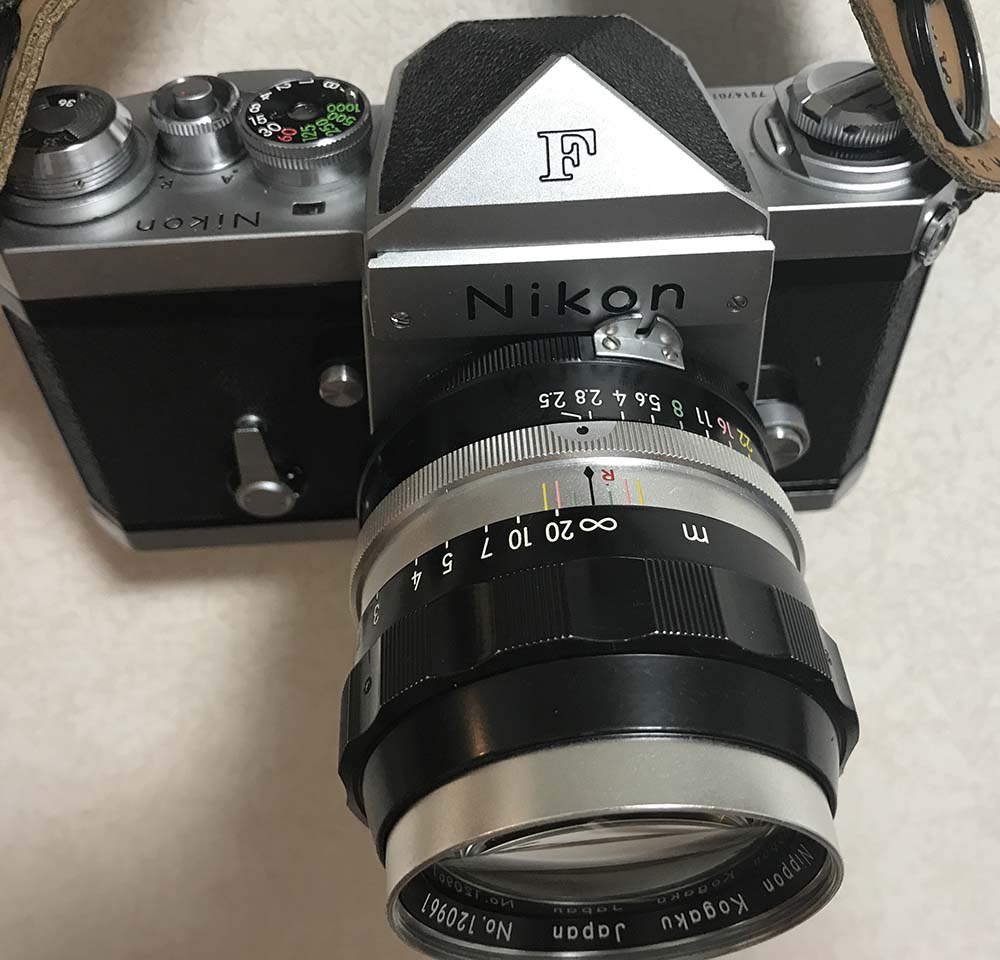
Here it is mounted on a Nikon F. The “tick-mark” version has an iris with 9 blades. This scheme went on for a short time before Nikon changed it to the more common 6-7 blades because of cost-cutting, the 9-bladed iris is also so delicate that it can be prone to damage. I should know, I have experience on several Auto-Nikkors with 9-bladed irises. I can only imagine how difficult it was at the factory back then just making sure that the iris worked.
These “tick-mark” lenses and most of the early F-mount Nikkors made from 1959 to about the early 1960s usually have a lip around the aperture ring to cover the gap between the lens and the camera. This raised lip will prevent them from mounting with Nikons made from the late 1970s and later since the mount at the camera-side is a bit wider. The radius is about 1mm wider, this is enough to prevent you from mounting it. Do not brute-force it or you will damages both the lens and your camera. Also note that the mechanical Nikkormats won’t allow you to mount these, too. While their mounts will fit the height is too-shallow so the lens won’t turn and engage the locks.
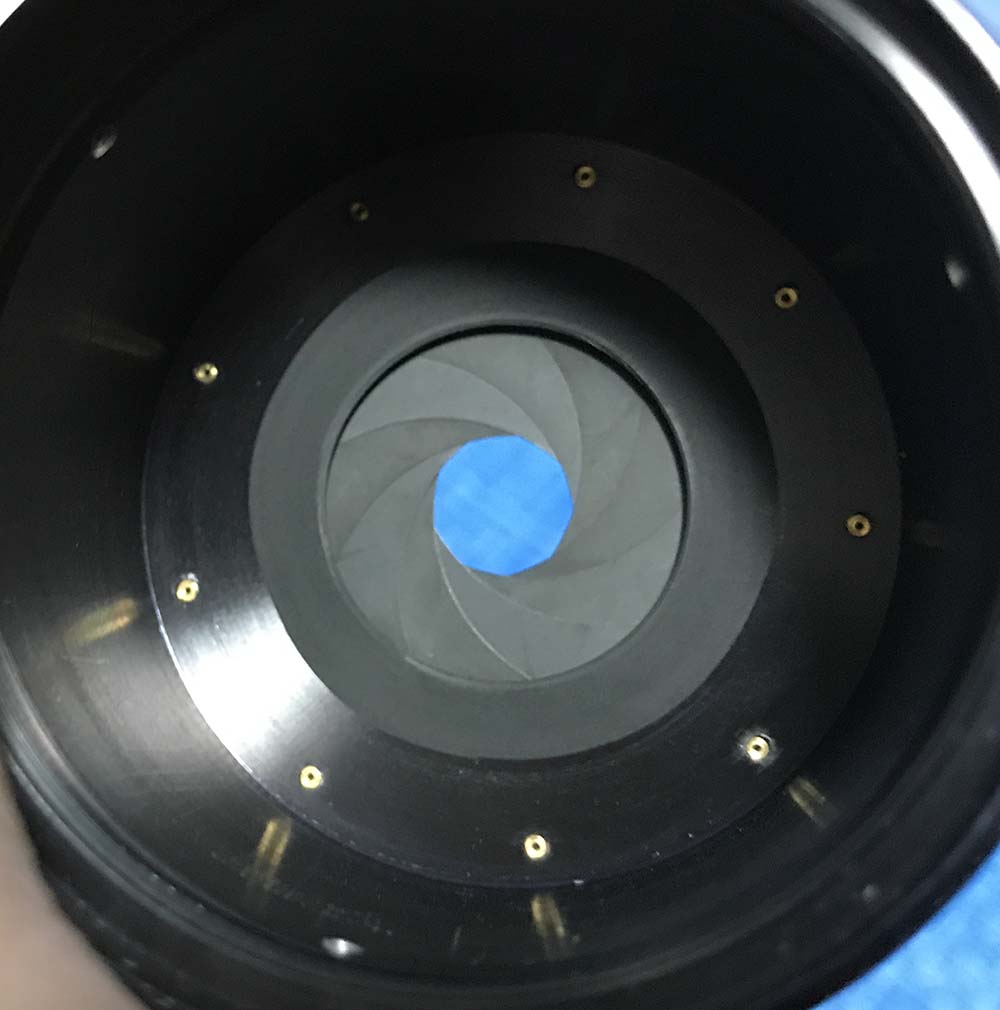
This is an example of a 9-bladed iris that’s stopped-down. Notice how much rounder it is compared the the 6-bladed iris shown below. This can be very appealing for the “bokeh-nut”. A rounded iris shape will ensure that the look of the bokeh is smooth. An angular one may result in ugly, clumpy details in the blurred portions of the photo.
(Click to enlarge)
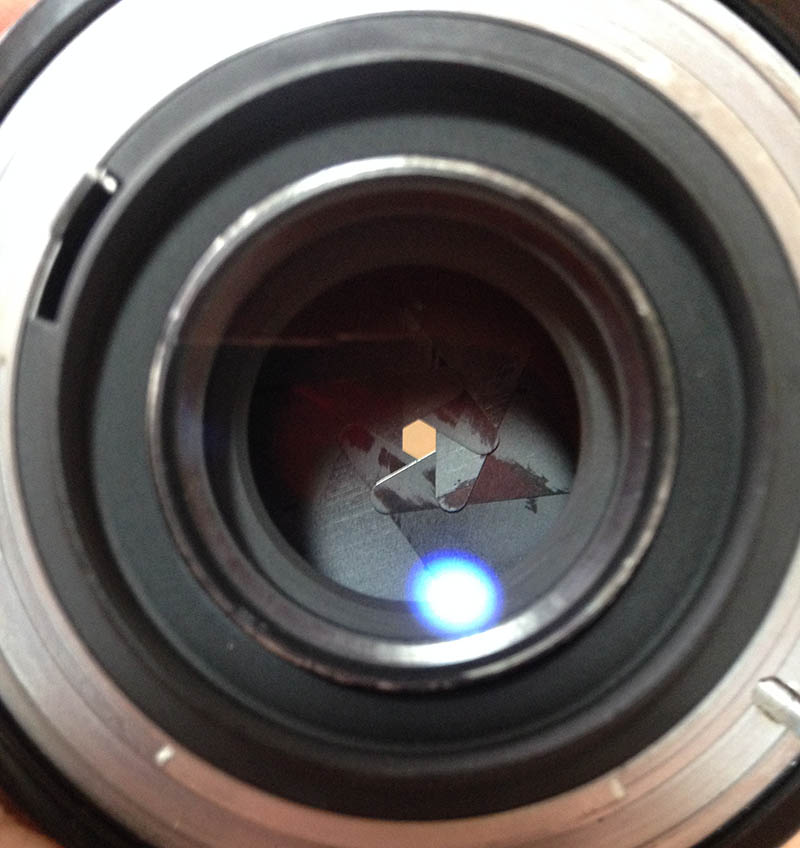
The lens looks OK externally but closer inspection reveals that this lens has an oily iris, this has to be fixed. Oily irises are merely a symptom of a much larger issue, it’s prudent that you should overhaul the lens ASAP.
The video shows what an oily iris can do. A clean iris will snap-shut as soon as you have actuated the stop-down lever, an oily one will retard a bit since oil is slowing the iris down. It should be snappy on a clean iris mechanism.
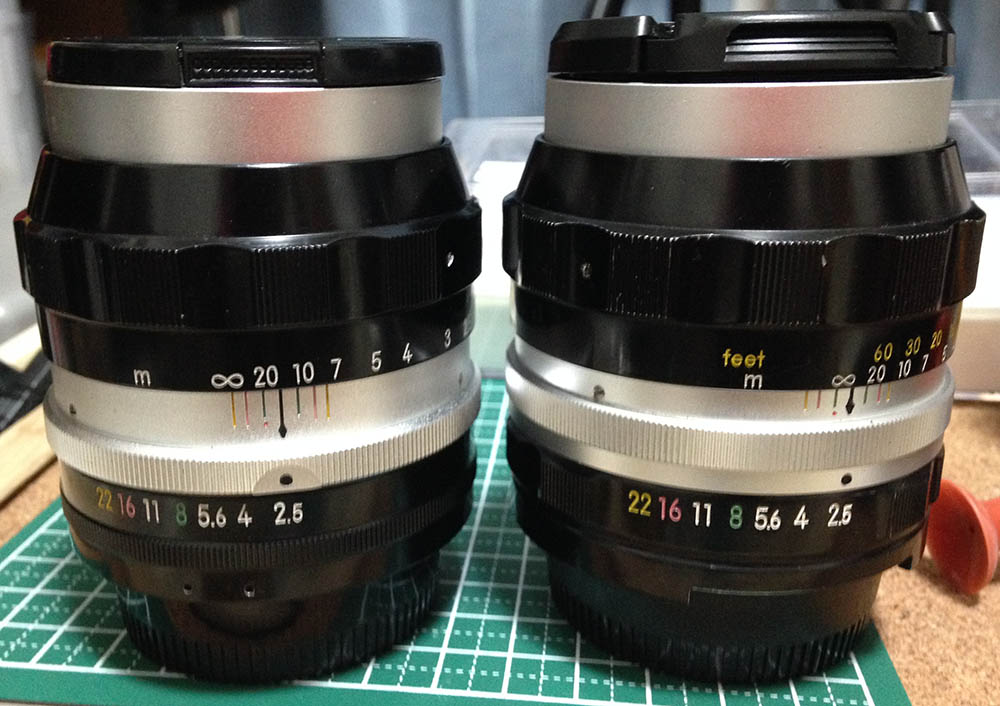
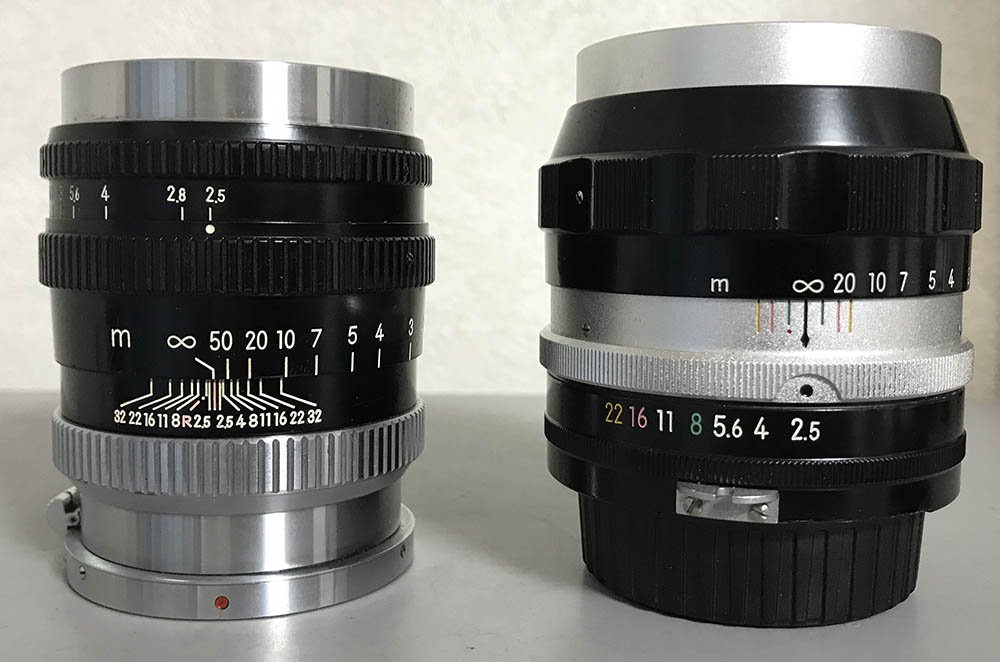
The later one looks a bit different. They were made with small variations so collectors love to collect them. The barrel has undergone several changes to it, some minor while some are totally-different but the theme remained the same with the silver and black accents.
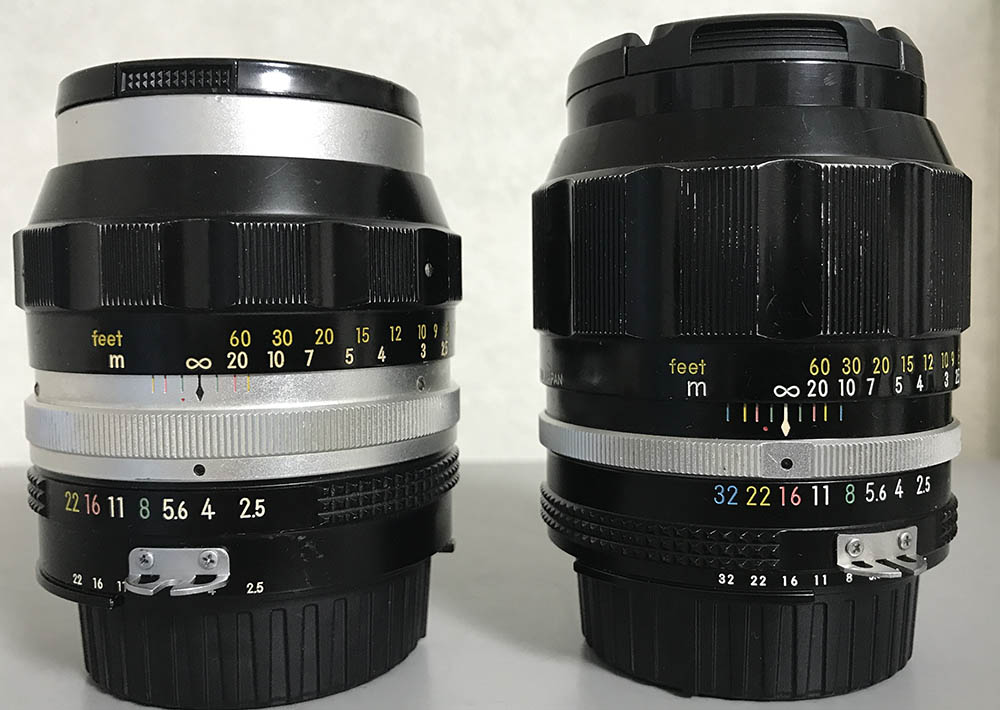
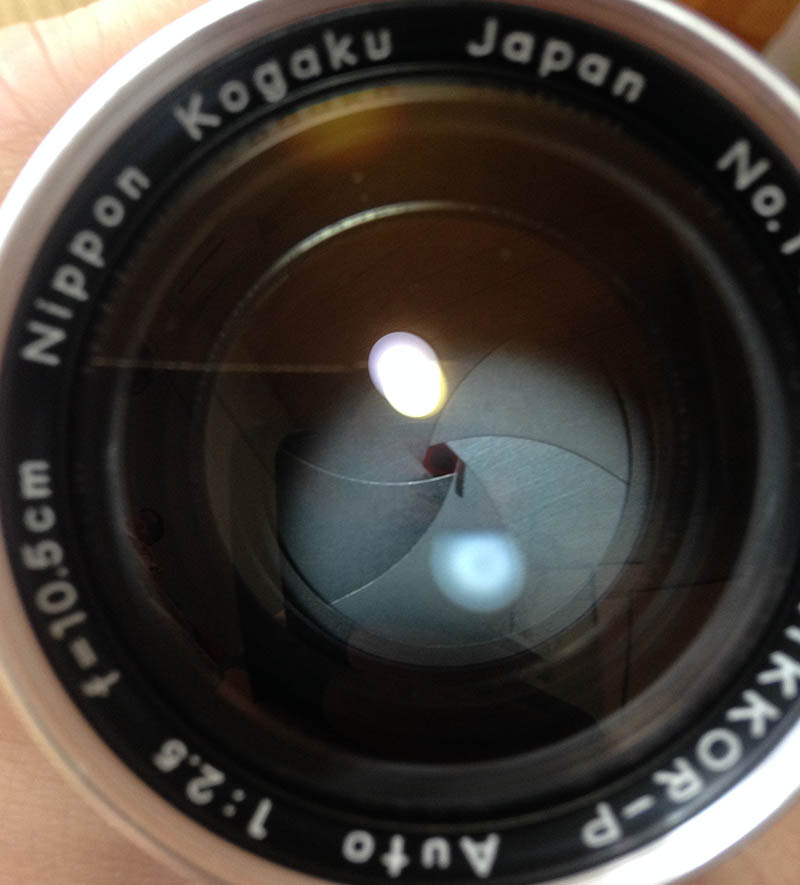
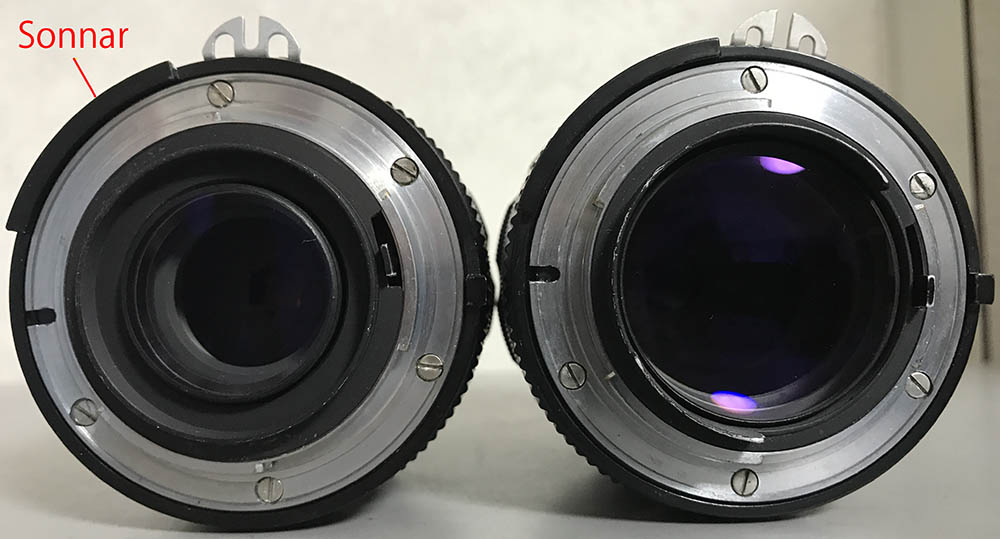
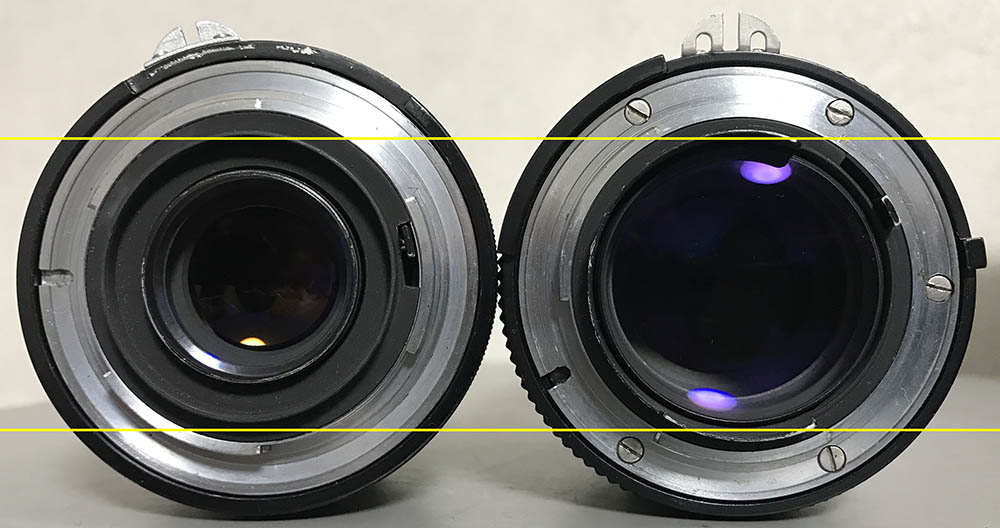
Its optical formula largely remained untouched until the introduction of the Nikkor-P•C 105mm f/2.5 Auto in the early 1970s. The newer optical formula was perfected by Wakimoto Zenji’s prodigy, the original Sonnar-type design was replaced by a Xenotar-type design that’s more widely known now as the “Gauss” version. The later “Gauss” variant can be easily identified by its lens barrel design but most importantly you can identify which one is which by simply looking at the size of the rear element.
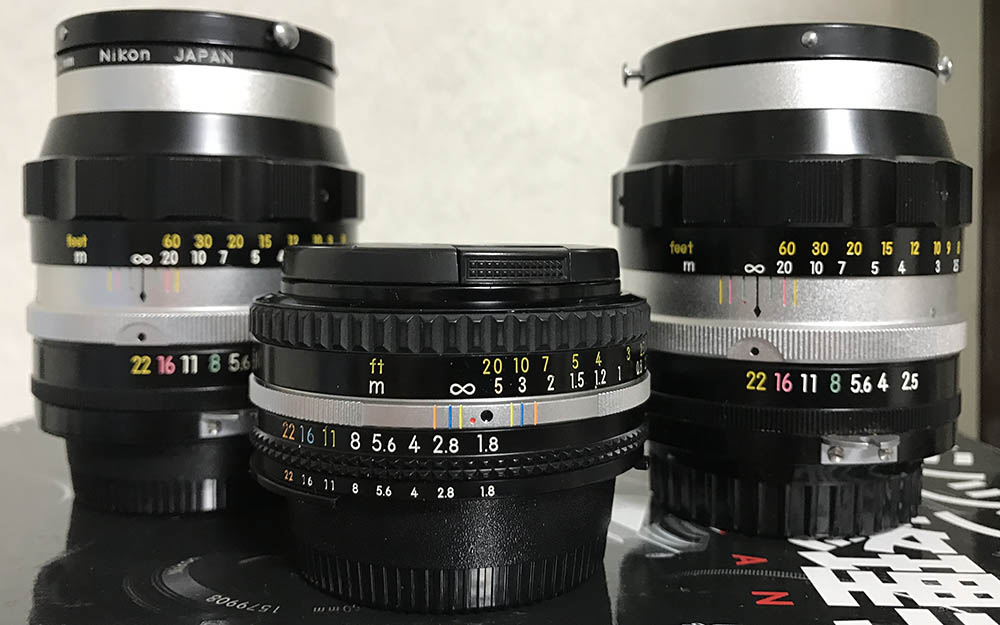
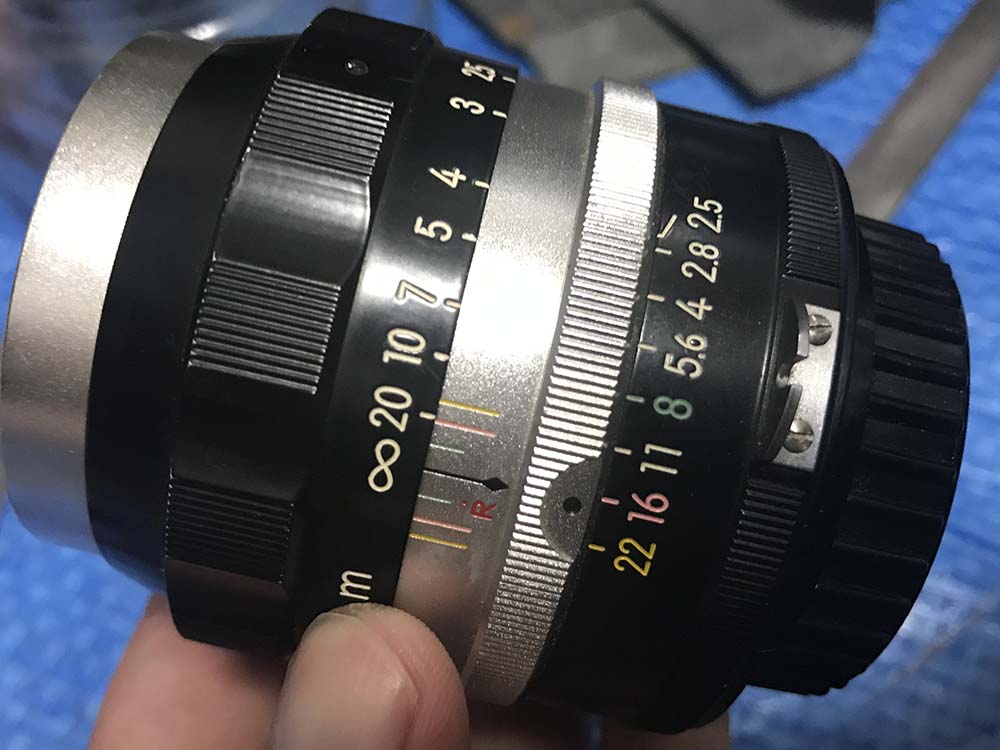
Here are more Nikkor-P 105mm f/2.5 Autos. These are the earlier ones with the 9-bladed iris and cm used instead of mm so Nikkor-P 10.5cm f/2.5 Auto should be a more accurate name for these. These lenses came from one of our readers, I wish they were mine.
(Click to enlarge)
The earlier Sonnar-type has a smaller rear element compared to the “Gauss” version. The coating is different as you can see from the picture above. Both versions render images almost identically but there are some subtle points if you care to look for them, I will write an article about that in the future. I will tell you now that there isn’t much difference between the output of the two and most of the differences can be seen in the transition between what is focused to what’s not, that’s about it.
Let’s now see some photos that were taken with this lens. Knowing how the lens works is key to maximizing it. You’ll know how to exploit its strengths and workaround its weaknesses. The following photos were shot from f/2.5, f/4, f/5.6 and f/8 with a Nikon Z6. These apertures are the most common ones people would use and they show the most changes, too. That’s why we want to study how they look. These were taken with the usual 6-bladed version, I just want to make it clear so you won’t get confused since the iris comes in 2 different versions, the 6-bladed one and the rare 9-bladed types.


(Click to enlarge)
It’s sharp wide-open, the contrast is wonderful, too. There are feint hints of chromatic aberration but nothing too serious. This looks great coming from an old lens that was made in the 1960s. The bokeh quality is smooth, refined and looks really good despite having only 6 straight blades. Its resolution is good from the start and will only get better as you stop the iris down. At f/4, sharpness and contrast improves a bit because of deeper depth-of-field. The image is crisp, clean and clear. The edges looks better but it’s already nice at f/2.5 despite some aberrations. Stopping it down to f/5.6 will give you better corners but the center is at its peak, I will say that the corners are just a stop or less behind the center. Things look great at f/8, the corners look amazing and the quality of the bokeh didn’t change much despite having more things in-focus. The focus transition is still smooth unlike what some lenses tend to do, giving you an abrupt transition, making the photo look “fake”.


(Click to enlarge)
Here’s how the discs look like. Notice that the 6-sided iris creates angular or lozenge-shaped discs, the better one is the 9-sided version, it creates nearly-circular discs. Apart from the look of the discs, the shape of the iris has a big influence on the feel of the bokeh, specially when stopped-down around 1-2 stops. I have observed that the less blades an iris has the more likely it will create “chunky” looking bokeh. It will depend on which lens we are talking about but it happens more often with slower designs such as the Nikkor-Q 135mm f/3.5 Auto. This is subjective, I can be wrong with my observations so do your own research. This one is great, it was never known to produce ugly-looking bokeh. It’s hard to make this lens render harsh-looking bokeh.

This should show how exquisite this lens is. That razor-thin slice of focus is sharp when viewed in a large monitor. This is beautiful, the rendering looks great and you can see how smooth the transition is between what is focused and what’s not.

Here’s another example of how nice this lens is, the bokeh quality is some of the smoothest that I have seen. What I meant by smooth is not how blurry it looks but the overall character of the bokeh.

The 105mm focal length is great for taking environmental portraits.
Focusing with this lens can be difficult at times because the depth-of-field is not as shallow as what you would get with a faster lens but you can still get high rates of focused pictures. A really fast lens will be difficult to focus like the Nikkor 105mm f/1.8 Ai-S, this one is f/2.5 wide-open so it allows you a bit of room for focusing errors unlike faster lenses which is less-forgiving.
The next sets of photos were taken with a Nikon Df. Using this on a DSLR is a better idea because you’re seeing-through the lens wide-open all-the-time. It can be hard to focus when you stop the iris down on a mirrorless camera, I hate viewing through a dark EVF and not seeing that thin slice of DOF.


(Click to enlarge)
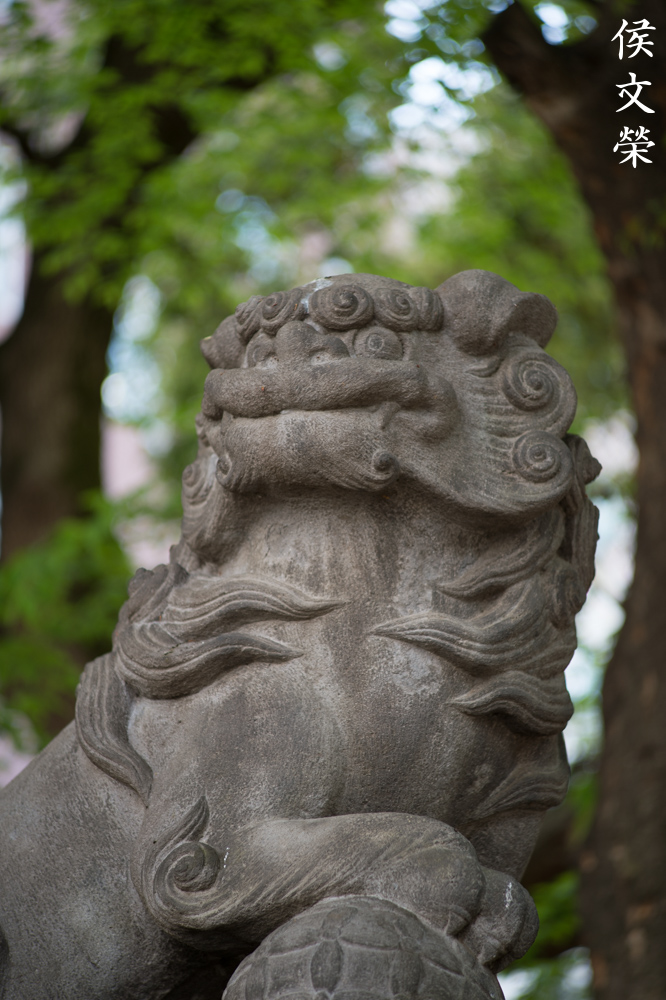
Here are some photos taken from around the minimum focusing distance to around the 2-3m mark. You can see how good this lens is at these distances. These were shot wide-open to show you how the bokeh quality is. It’s sharp wide-open and the rendering is exquisite. While modern lenses will out-do this when it comes to sharpness, I can say that few lenses will come close to this when it comes to the way this renders. The latest Nikkor 105mm f/1.4E can definitely top this but for less than 1/10 of the price this older lens from the early 1960s is hard to beat.


(Click to enlarge)
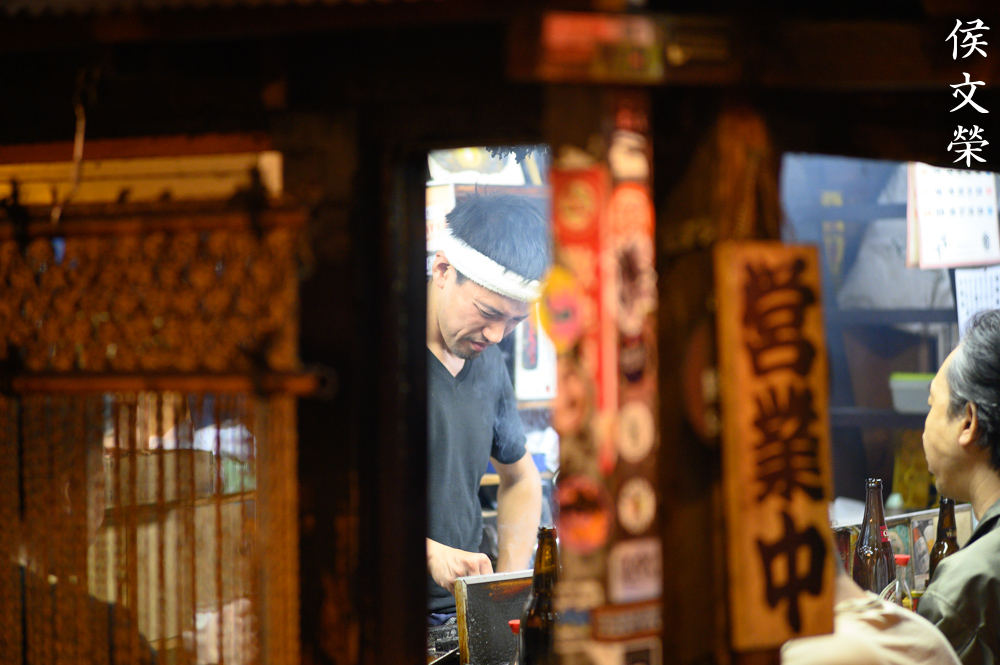
Now for some photos taken from mid to far ranges, around the 4-40m mark. To me, these are the distances where this lens excels. This family of lenses is exceptional at these distances because they can still give you great subject isolation at these distances (specially below 5m). You can literally focus on a subject that is 20m away and still get the foreground blurred, the transition will still be smooth between what is focused to what’s not.
Let’s now see some photos that were taken with film. This was designed at a time when film was the only practical medium for photography so it is only fitting that we see some photos that were taken with it. Film has a different look that’s hard to simulate with a sensor because of film grain. It can help mask flaws or alter a lens’ rendering characteristics. This is why we want to see these so we can better assess the lens with its intended medium. These were shot using a Nikon FM3A loaded with Fujifilm Industrial 100.

Here’s a very good example of how exquisite the bokeh quality is and how it looks like with film. The discs look clean, mostly even and smooth. It’s hard to find another lens this good at this price point today.

This lens is a portrait photographer’s favorite. This was shot wide-open and you can see just how sharp it is and how well it can isolate your subject. It’s a very good example showing just how good this lens is for portraiture.
This was shot wide-open at its closest focusing distance. It’s sharp where it’s focused, the thin slice of depth-of-field is hard to work with at this distance, you will have to be careful with your movements when shooting without a tripod.

This photo of a sugar glider was probably taken stopped-down at around f/8 or at least f/5.6, this doesn’t seem like it was taken wide-open. It’s difficult to focus this lens at this distance when your subject is a nervous critter. You’ll get the hang of it after a couple of hours shooting with manual lenses.

This is the special quality of this lens that I was talking about. It’s capable of isolating your subjects even at further distances wide-open since it’s sharp wide-open and the focus transition is so smooth, giving you a 3D-like photo. The resolution is more than decent wide-open.
Here’s how the bokeh quality looks like with elements that are closer to you than your subject. Foreground elements look just as good as the background when blurred, some lenses fail in this aspect but this one is perfect. What is disturbing is the chromatic aberration around the cables but that is part of the deal anyway and the sky is over-exposed.


(Click to enlarge)
Here are more photos that were taken with film. You can click on these and see how good the lens is for yourself. This is an amazing lens and it’s a great lens for people who want to shoot portraits but don’t have the budget to buy the latest and greatest. You do not need expensive gear to produce beautiful photos so long as you know your gear and how to use it properly.
I highly recommend this to everyone looking for a nice, cheap and excellent lens in the 100mm or so range. They’re usually sold under $150 and beaters can be had for much less. The special 9-bladed ones are the best but they’re more expensive, sometimes costing 2-3x the price of the pedestrian variety. If you have the money, look for the 9-bladed ones but if you don’t then these 6-bladed ones will fit your budget. If you want to use it with modern Nikons that have the Ai interface, make sure to look for the ones that come with the factory Ai-ring. They usually cost $30 more but it’s worth it because you can use them with newer Nikons. The non-Ai ones cannot be safely mounted to cameras that have the Ai-tab, they will seriously damage them if you try to mount these. These will never get old, I can imagine people still using these for many decades to come. Autofocus and VR are important innovations but nothing still beats a great manual focus lens.
Before We Begin:
If this is your first attempt at repairing a lens then I suggest that you check my previous posts regarding screws & drivers, grease and other things. Also read what I wrote about the tools that you’ll need to fix your Nikkors.
I suggest that you read these primers before you begin (for beginners):
Reading these primers should lessen the chance of ruining your lens if you are a novice. Before opening up any lens, always look for other people who have done so in Youtube or the internet. Information is scarce, vague and scattered (that is why I started this) but you can still find some information if you search carefully.
I highly recommend that you read my working with helicoids post because this is very important and getting it wrong can ruin your day. If I can force you to read this, I would. It is that important!
For more advanced topics, you can read my fungus removal post as a start. This post has a lot of useful information and it will be beneficial for you to read this.
Disassembly (Main Barrel):
This is an easy lens to repair since I know these inside and out. Just like the Micro-Nikkor 55mm f/3.5 Auto, I have opened and overhauled these lenses more times than I can remember. This lens is simple to service and it can be worked on by a novice who has become proficient or familiar with the basic skills needed to fix a lens such as working with screws and helicoids. Their construction is simple but you’ll have to be careful with the order in which you remove the components, so pay attention.
Just like most small Nikkor primes in this size and category, you’ll first need to separate the objective so that you can safely work with the barrel without worrying about damaging the glass. This is easy but you must pay attention and not drop anything.
If all you want to do is to clean one or two elements then you do not need to open it like this to access them, use your common sense, study how you can get to those elements without having to do this. The least that you will have to do is to get the objective out of the lens barrel.
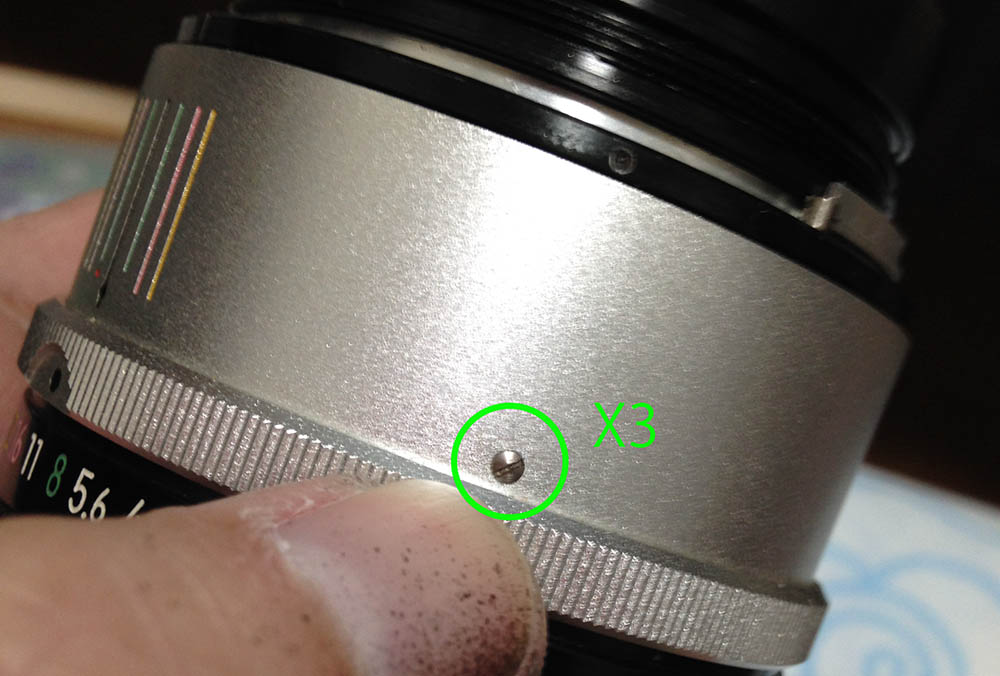
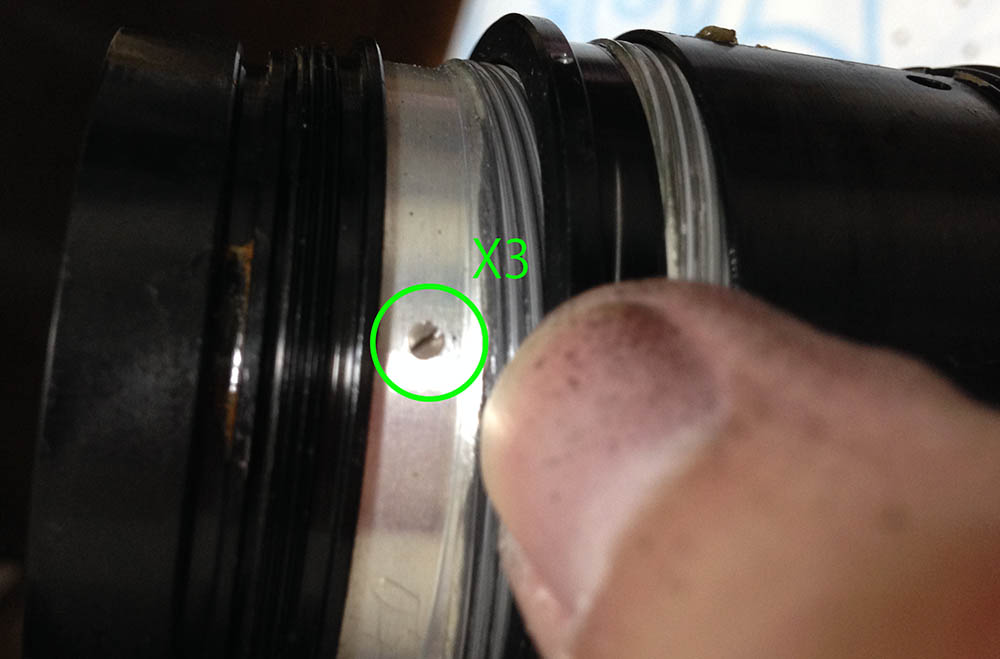
Remove these 3 screws from the focusing ring. These screws hold it in place and be sure to use a driver that properly fits to prevent damaging them. The screws are so prominent, it would be a shame to see these stripped.
The focusing ring comes off once the screws are gone.
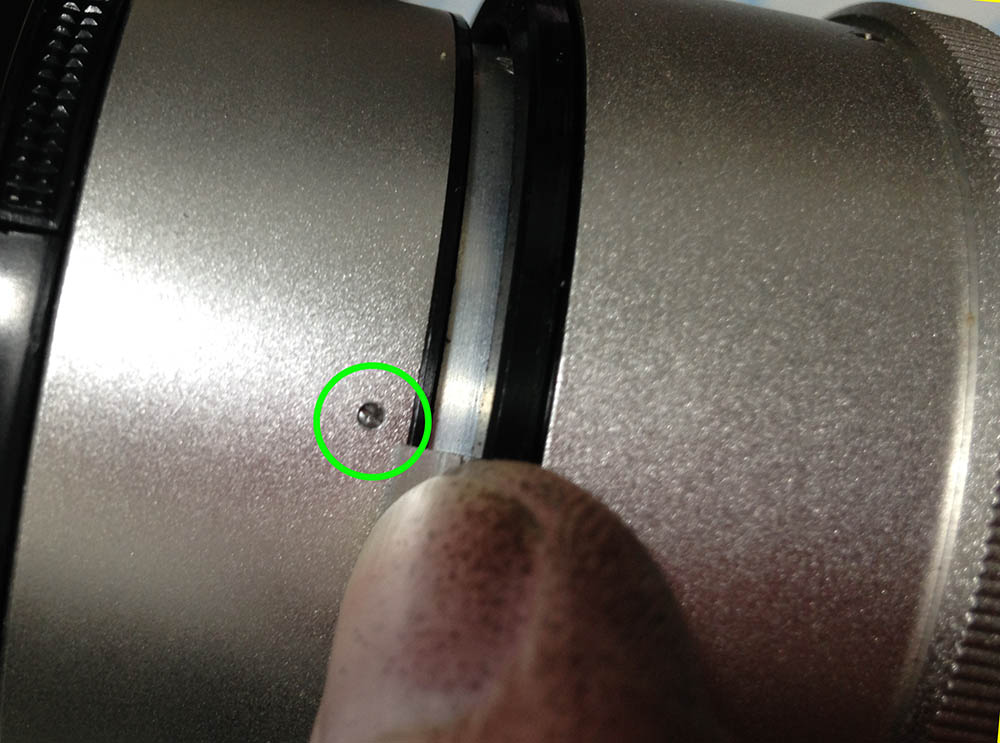
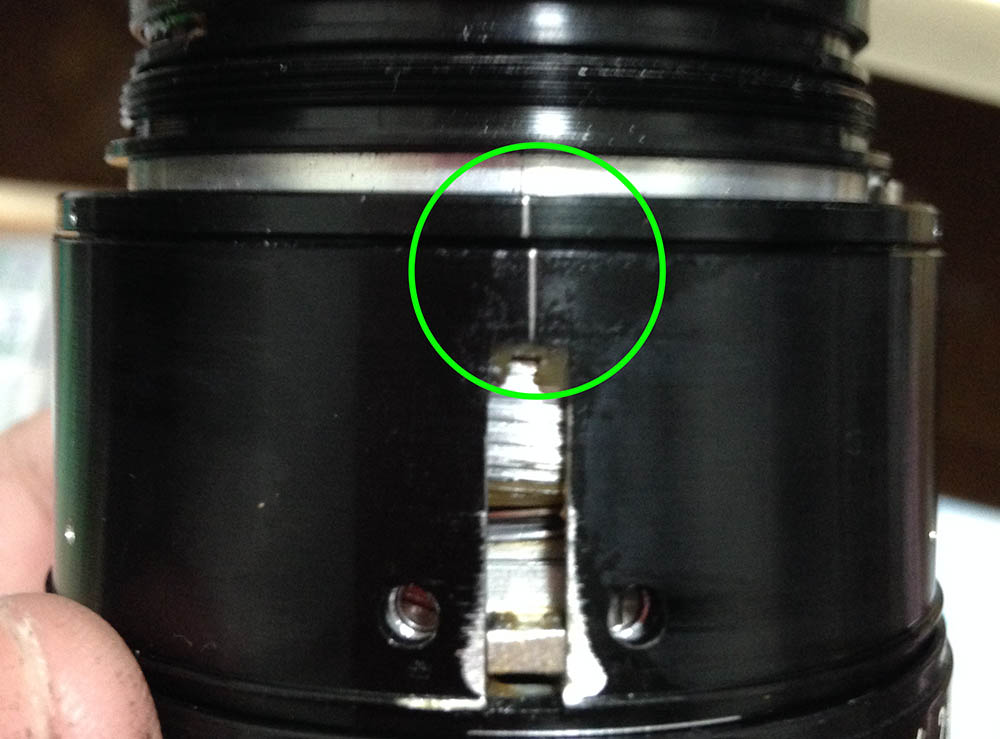
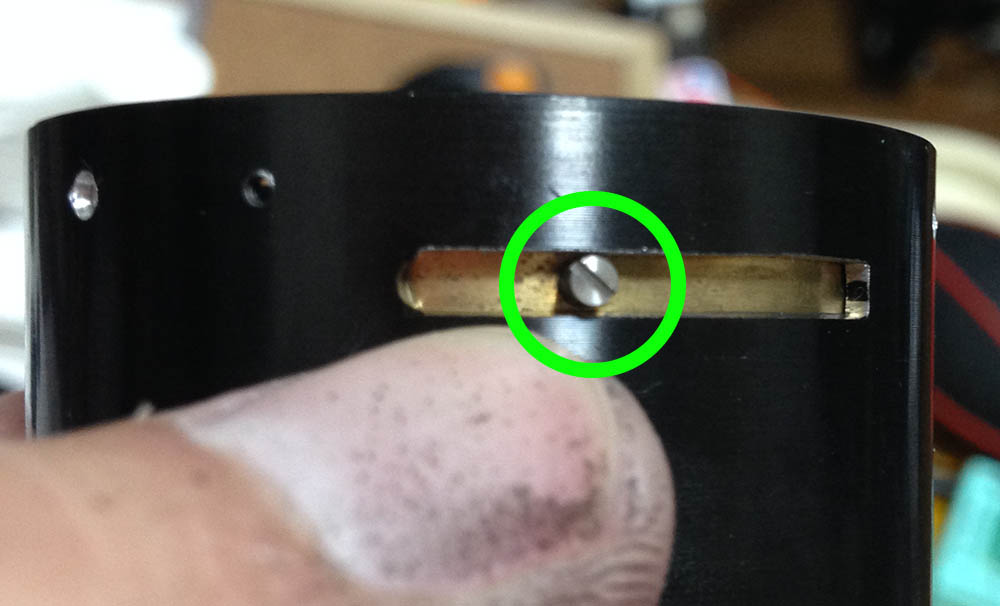
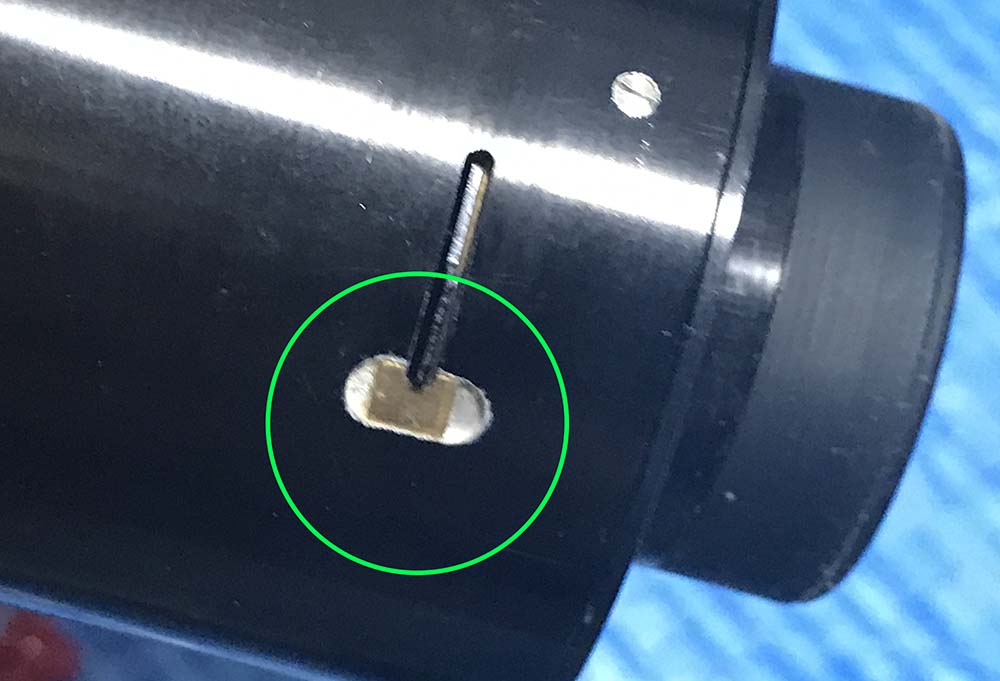
This tiny set screw can now be accessed. Use a small precision screwdriver for this. These are easily damaged so be careful.
Once it’s gone you can remove the front barrel by unscrewing it. Notice the hole inside the circle. The screw sinks into this and this is how it secures the front barrel. When you reassemble the lens, make sure that the set screw is placed properly inside this or your barrel won’t turn smoothly. Do not over-tighten this, you may damage it or the front ring will be offset a bit.
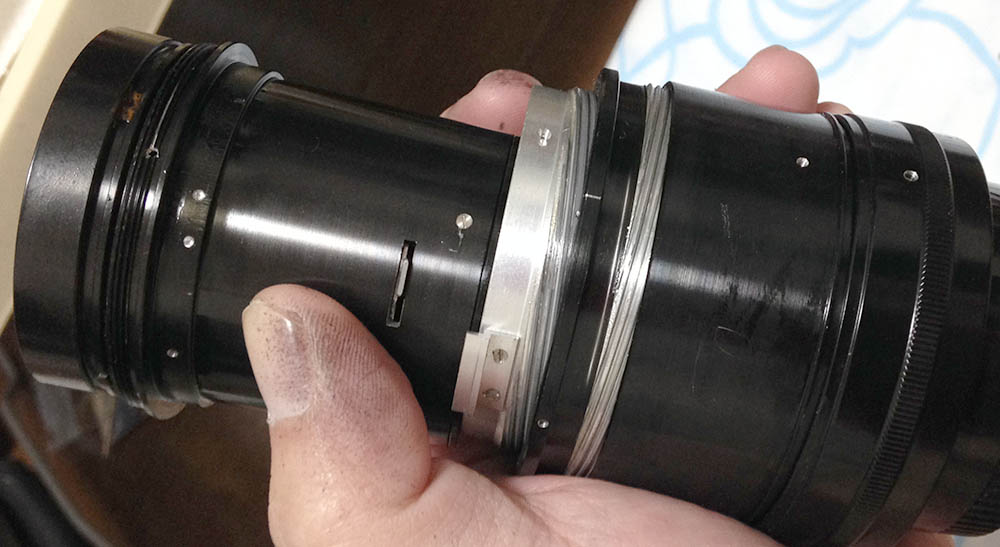
Carefully remove these screws that secure the aluminum sleeve.
The sleeve should come off easily, notice the oil and gunk underneath it.
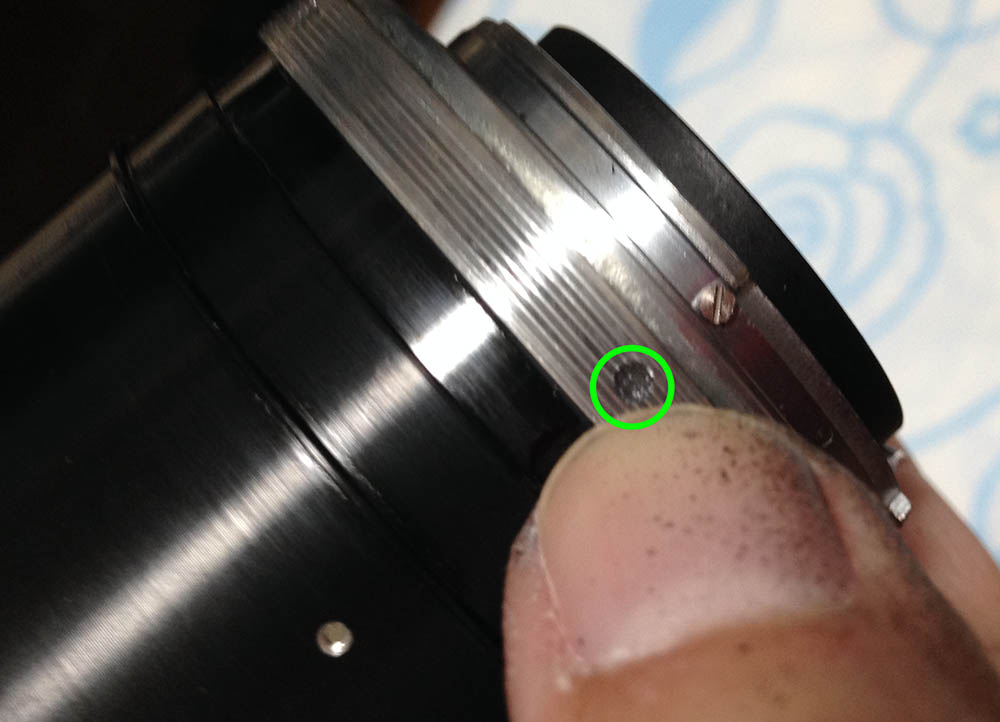
The moment I saw these marks I knew that someone had been here before. These were made by a repairman who worked on this previously and these marks just shows how these parts should align when the barrel is collapsed and focused all-the-way to infinity. It’s very important to make these marks as reference so you will know how things should be when you re-assemble this. As much as possible, work on the barrel while it’s in the configuration above (infinity) so that you will have a clear point of reference.
You can do this before the previous step. Remove these so you can pull the objective off. You’ll need to turn the barrel to reveal these.
Be careful with the objective’s orientation as you pull it out from the barrel. Once it’s gone, you should turn the barrel back to infinity.

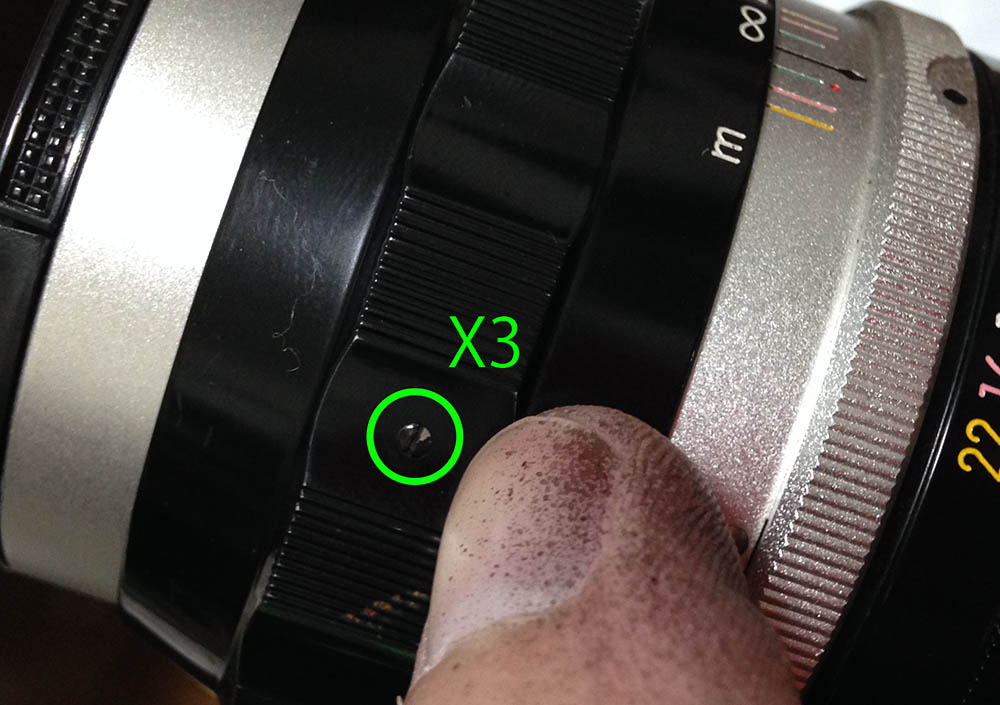
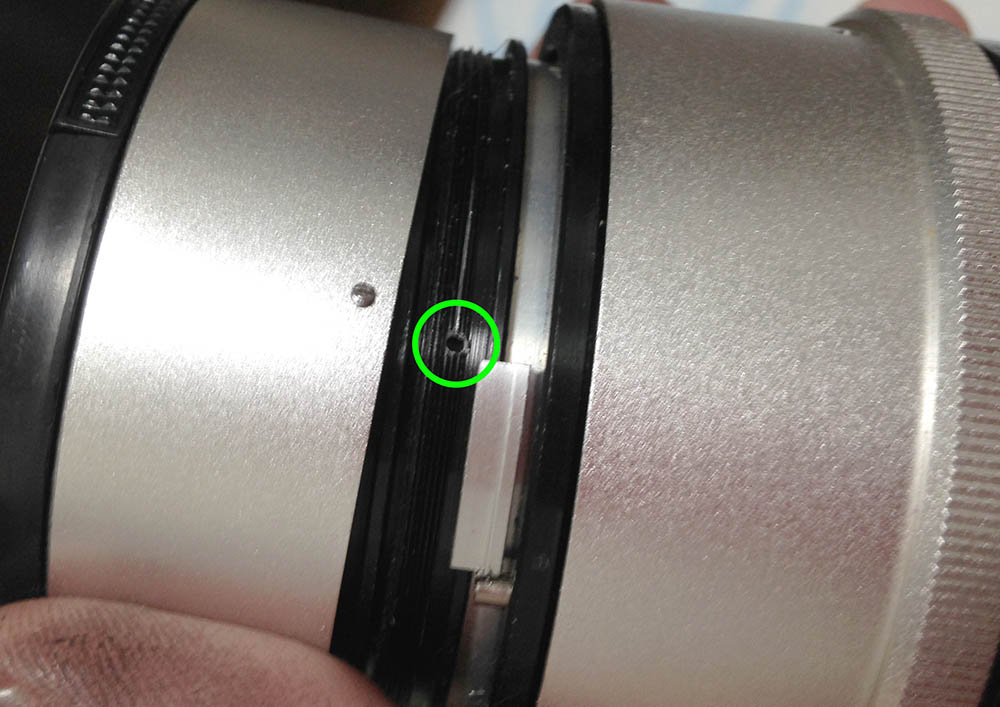
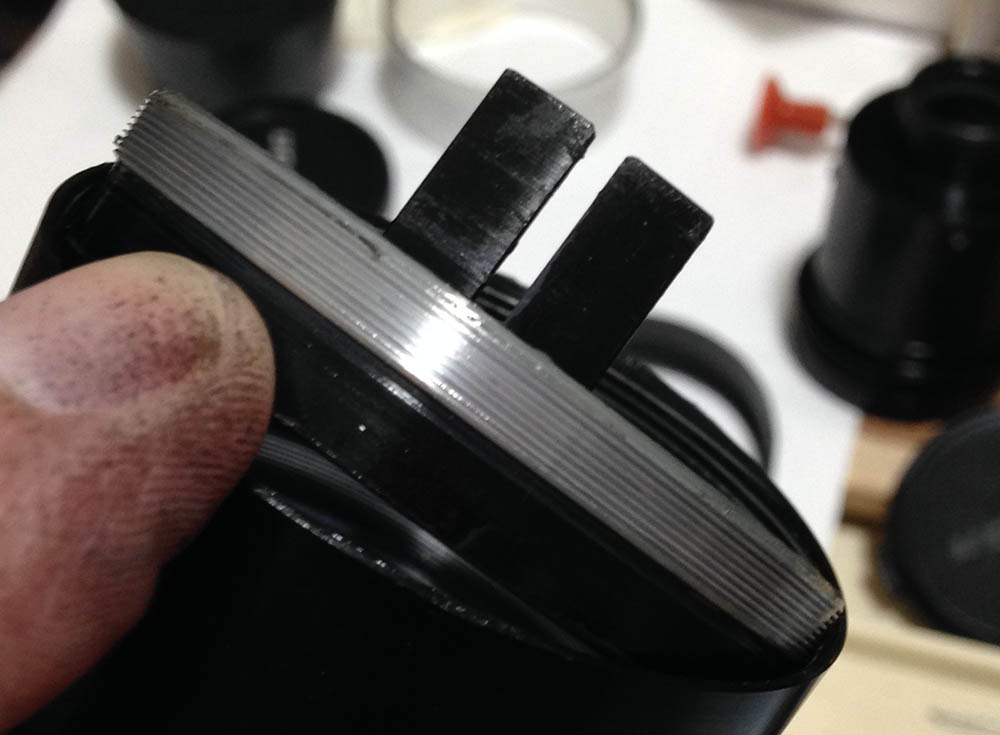
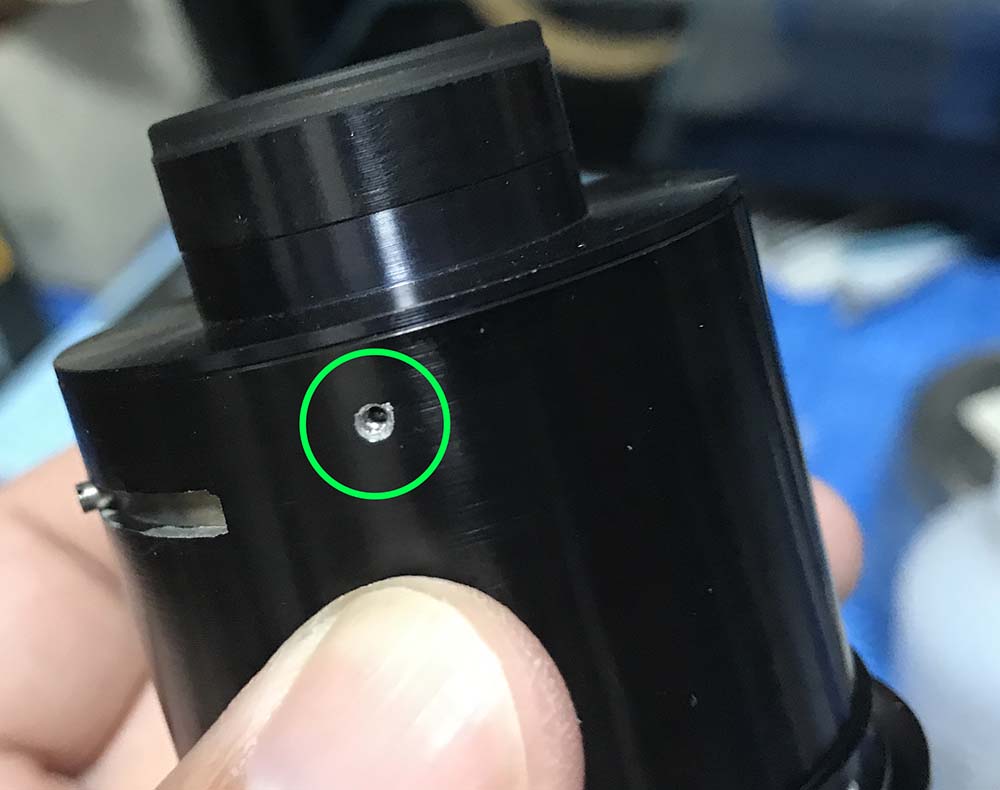
Before you remove the aperture ring, remove the screw found on the other side of all the numbers first. That big screw serves like a pin to connect the aperture ring to the aperture fork inside the barrel. I don’t have a picture of that screw but it should be easy to locate since it is the only big screw found on the aperture ring.
Now that the aperture ring is off you can now access these screws securing the bayonet mount. Use a screwdriver that fits into these hole, if you used a driver that’s even a small fraction of a millimeter larger then it can ruin the threads surrounding the hole. You can flush it with naphtha to reveal their heads so you can properly fit the drivers to the slots. There is lots of gunk in here so be prepared.
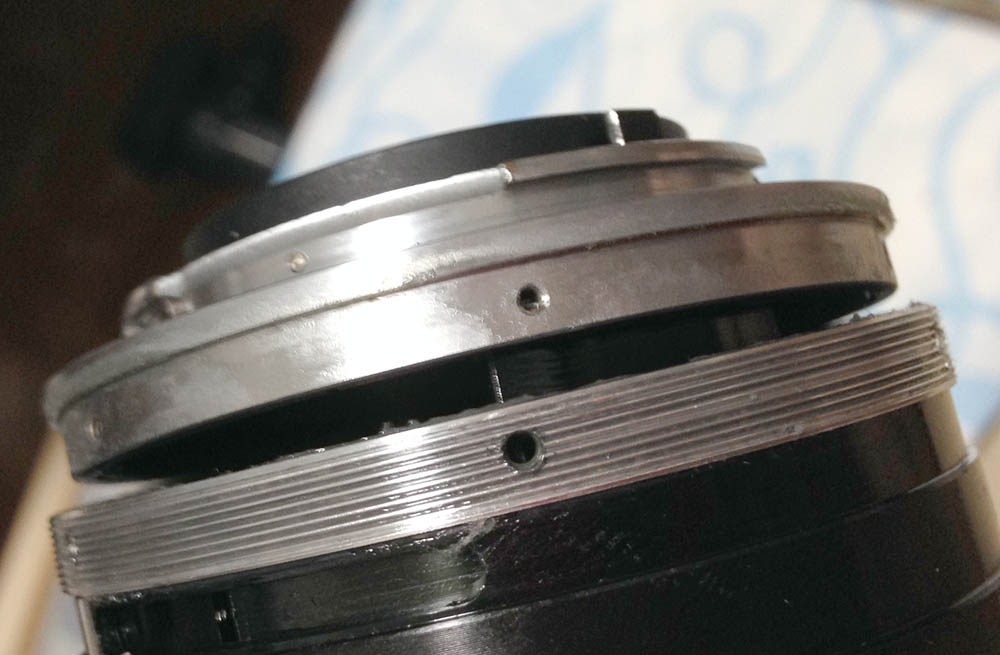
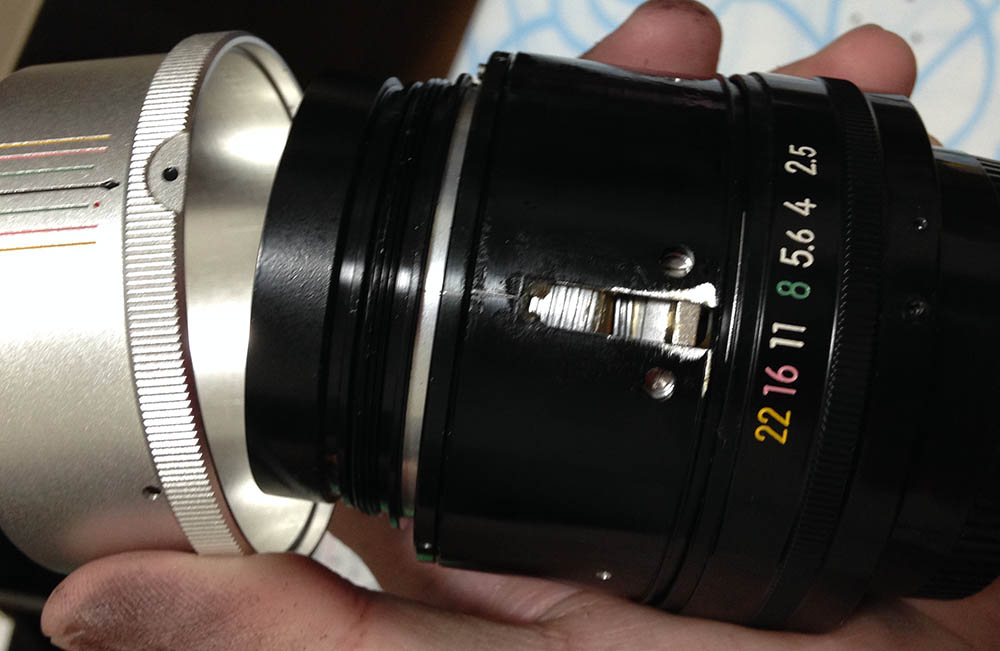
The bayonet mount should come off just like this. Don’t force it, you’ll easily damage this part. There’s a spring connecting the stop-down mechanism, be careful not to pull this part too far or it will stress the spring. if the spring is damaged then it holds no tension, a useless spring by any account. A sharp tweezer is handy to safely uncouple the spring.

It’s finally time to separate the helicoids. Remove these 2 flat-headed screws to free the helicoid key. It keeps the helicoids synced as you turn the central one.
Here’s the key once it has been extracted. You will have to clean this really well before you re-install this. Always clean away all signs of the old grease before you put them beck together or it will contaminate the fresh grease.
This is where the central helicoid and the outer helicoid parted. Notice that the guy who worked on this previously really loves to make marks which is great but he was too enthusiastic and these could have been more discreet. It was convenient, though.
Never forget to do these marks so you’ll know how these should mate. You’ll have a terrible time figuring this one out if you didn’t take notes. If you are new to lens repair, read my article on how to work with helicoids.

Separate the central helicoid and the inner helicoid and don’t forget to note where they parted. These marks were made by someone else.
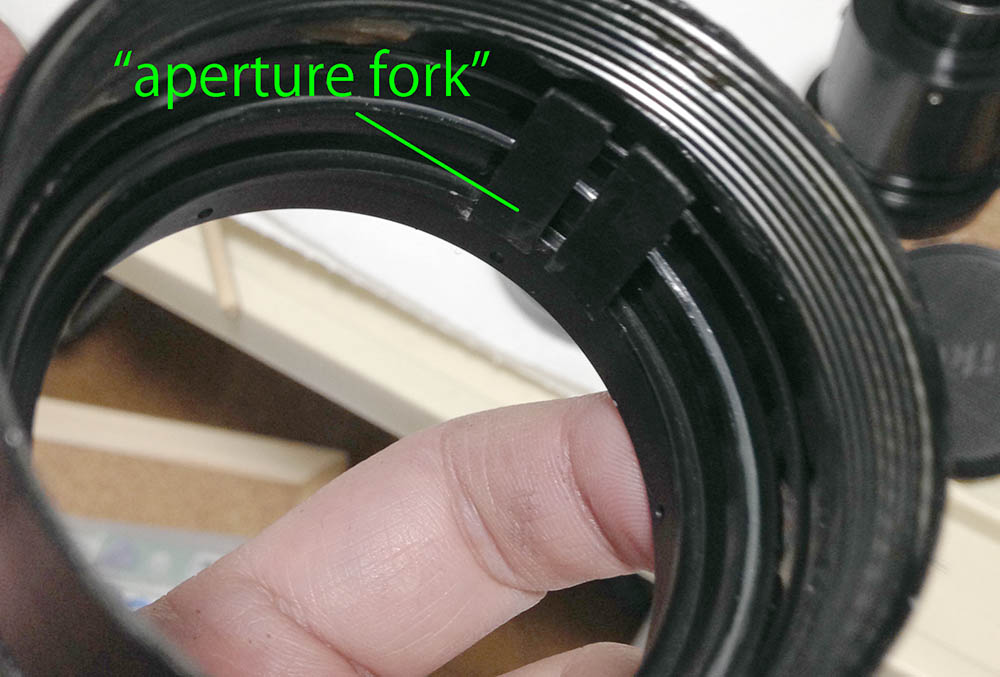
Now that the outer helicoid is free, you can access what’s inside the barrel. The aperture fork and its ring can be unscrewed when you turn it counter-clockwise.
Be careful when handling this so you won’t damage the delicate threads on the ring.
Clean the helicoids really well and don’t leave any residue. You do not want your fresh grease to get contaminated by the old one. Don’t apply too much grease so it won’t make a puddle, that excess grease will end up fouling-up your iris in the future or just create a mess inside of the barrel.
Disassembly (Objective):
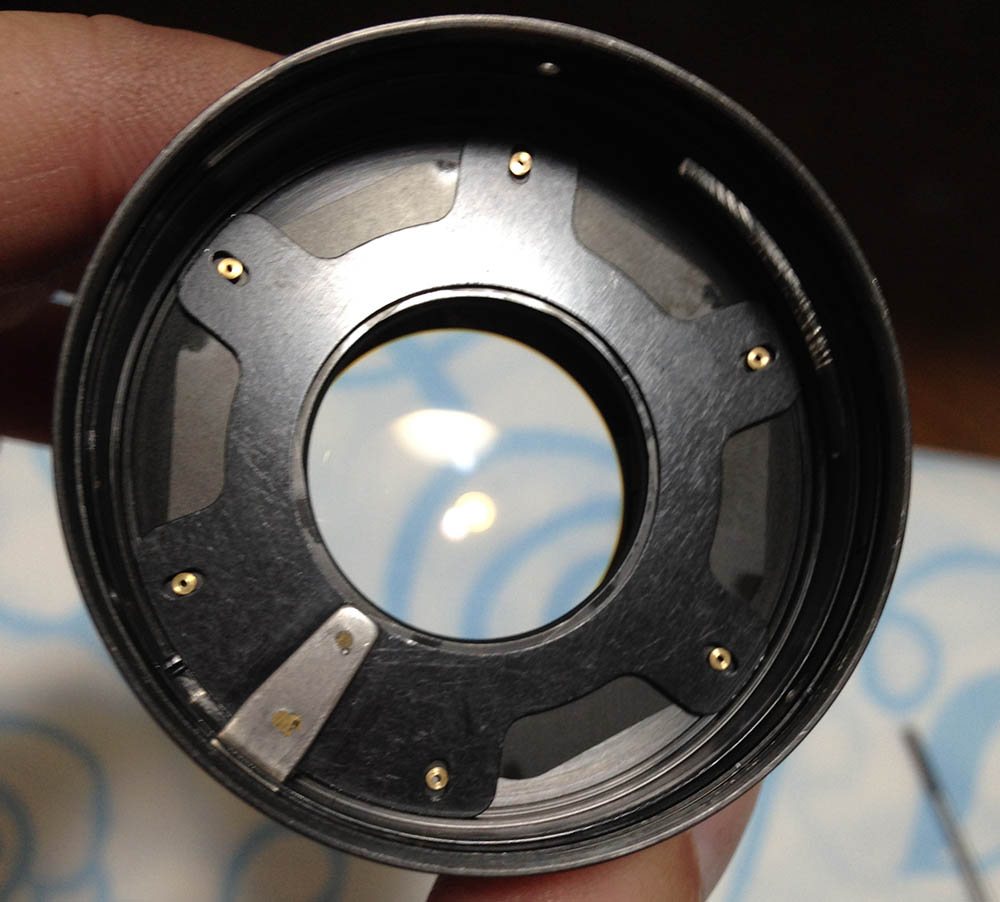
This lens is prone to the oily iris syndrome, if the iris is oily then there is no better way to fix it but to open it and clean it the proper way. It’s safe to say that the construction of the objective is similar to other Nikkors of the time and this should be easy to work with for those who are familiar with small Nikkor primes. All we need to be careful about are the elements in the front optical assembly. If you have to remove the doublet (2nd and 3rd elements) then carefully push it from the front. This is usually so tight that it creates a vacuum if you didn’t remove the front element. The doublet is a cemented group so you’ll want to handle this with care, do not let solvents dissolve the cement, it’s best not to use solvents near this part.
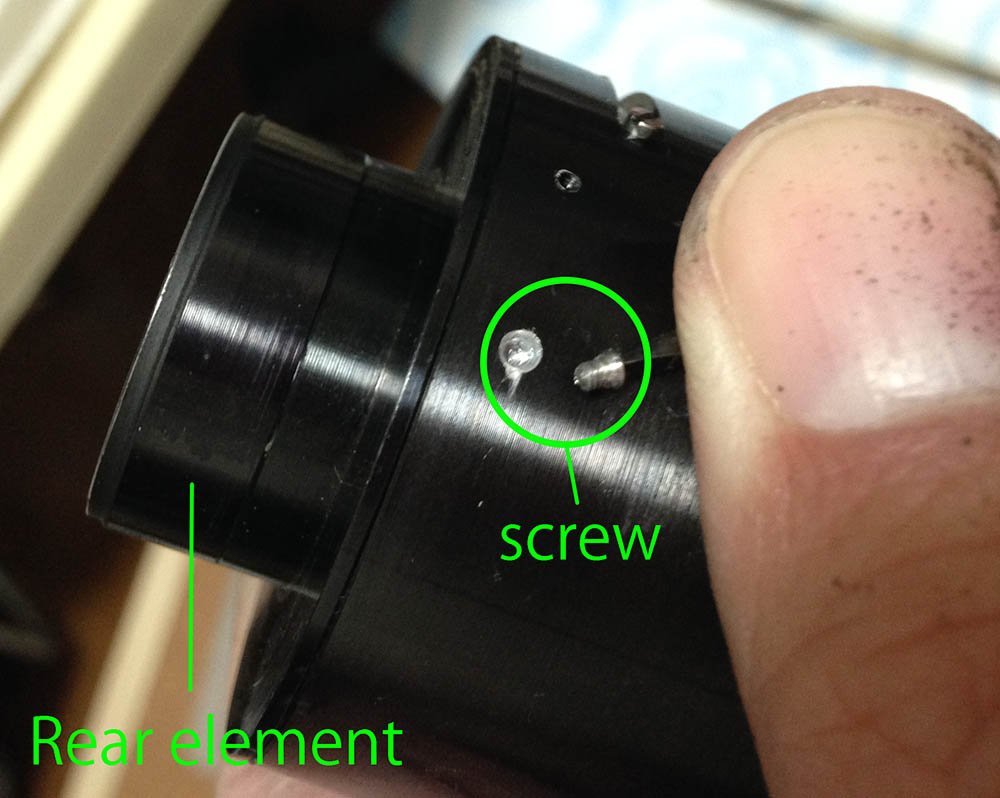
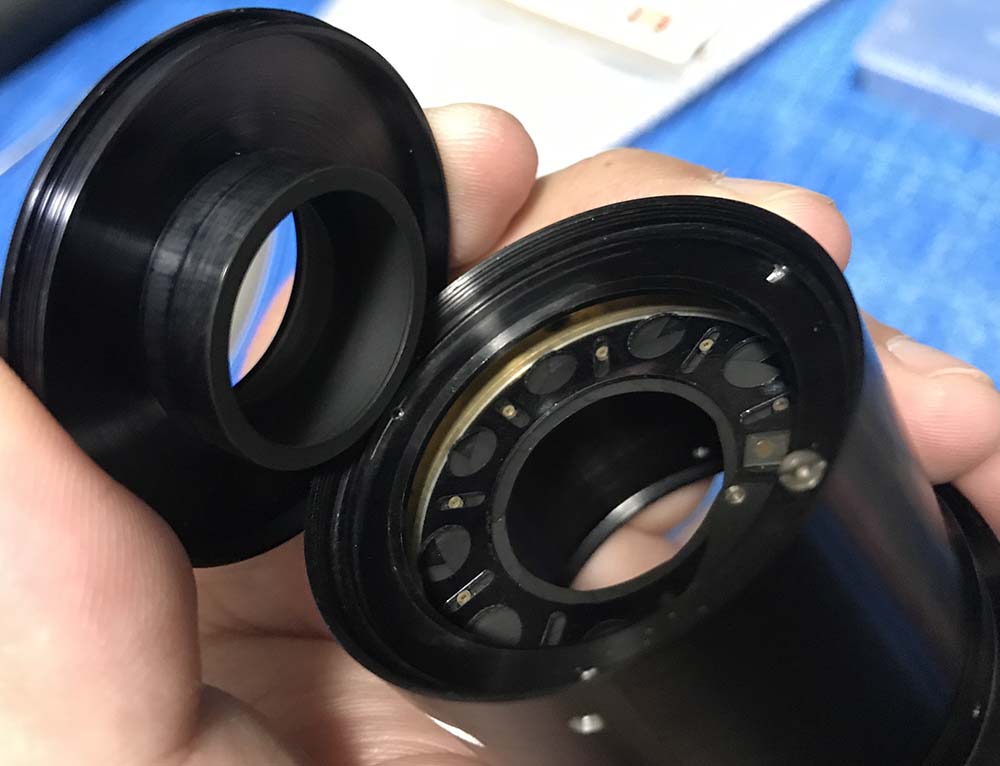
The rear optical assembly can be unscrewed with your barehands. If yours is stuck, simply drop a small amount of acetone or alcohol at the seam and let capillary action take the solvent into the thread. The screws (encircled) secures part of the iris mechanism, you don’t have to remove them now just like in the picture.
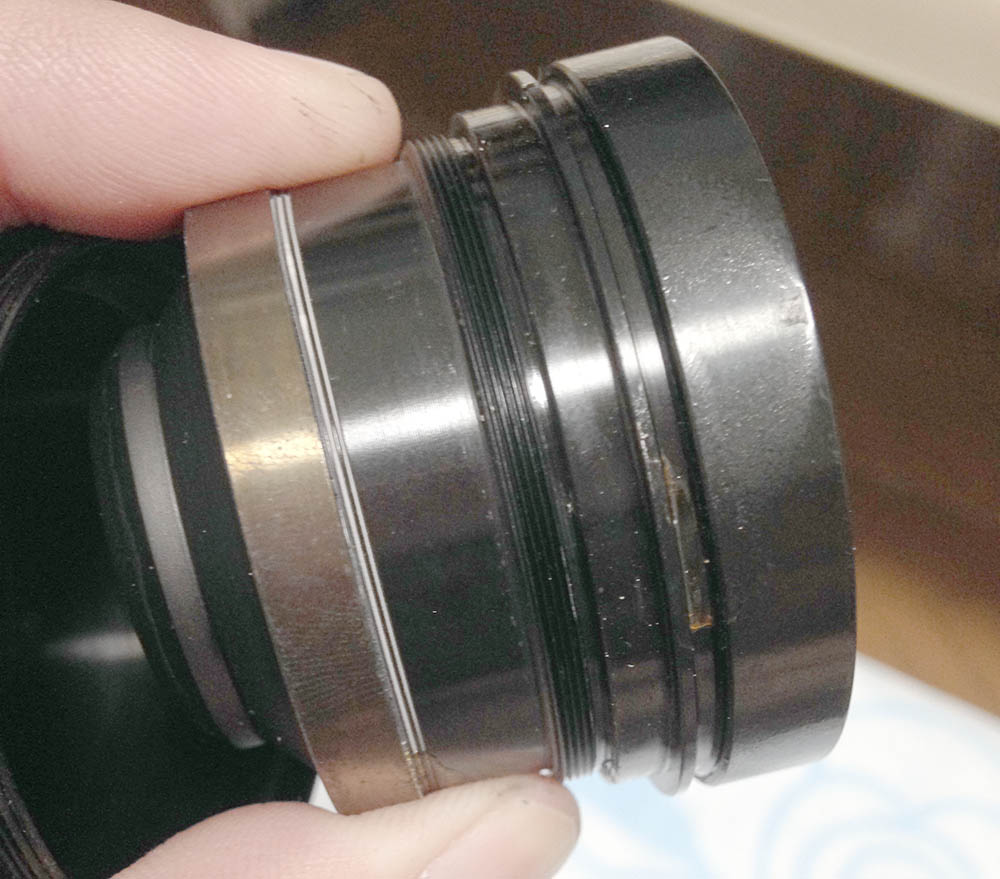
The front optics assembly can be unscrewed from the casing. Notice all the glue at the exterior of the assembly? If yours won’t budge then it was glued, simply do the alcohol routine again and let that work on the glue before you try it again. Store this big and heavy part somewhere safe where there is no danger of it rolling-off or getting damaged from anything.
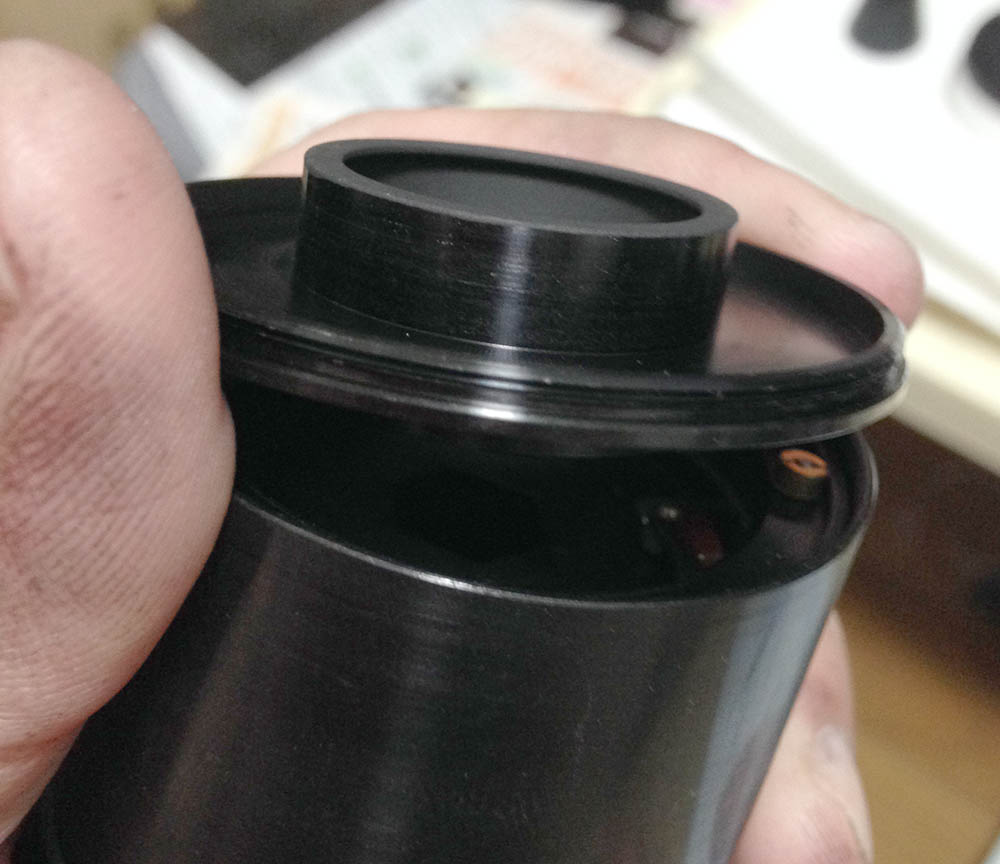
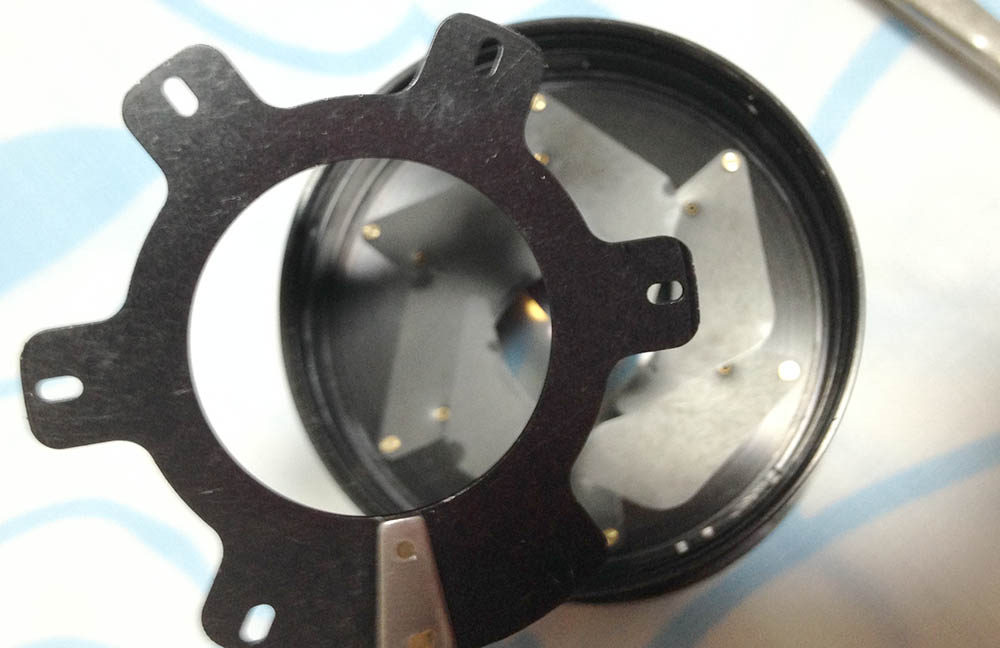
The rear plate can be unscrewed. If it won’t move just use a pair of rubber gloves for extra grip.

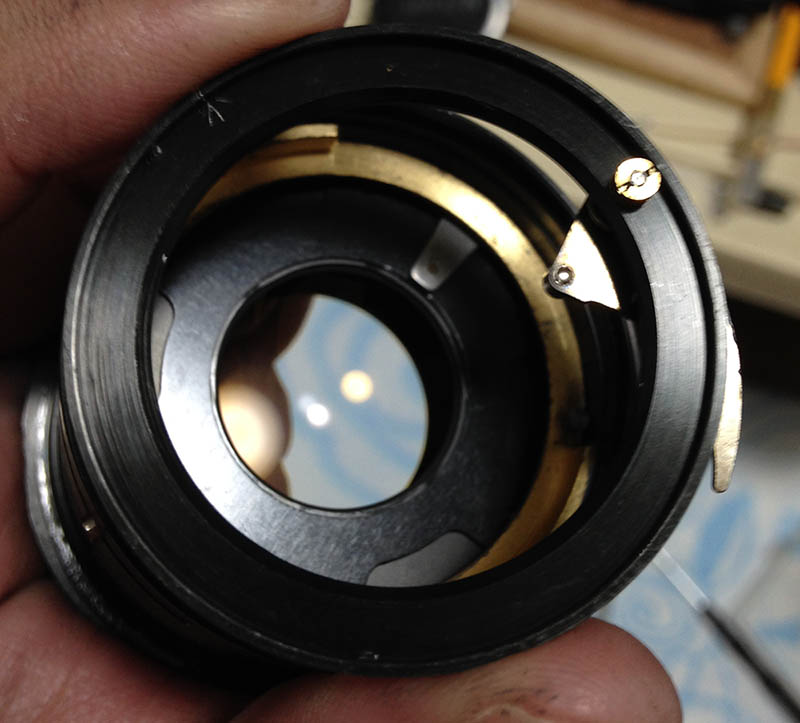
Remember the screws I showed a few steps back? Those screws hold this in place. I made a mark to make sure that the orientation of this part is correct once I put the part back. Note that the front optical assembly is still attached in the photo, just ignore this.
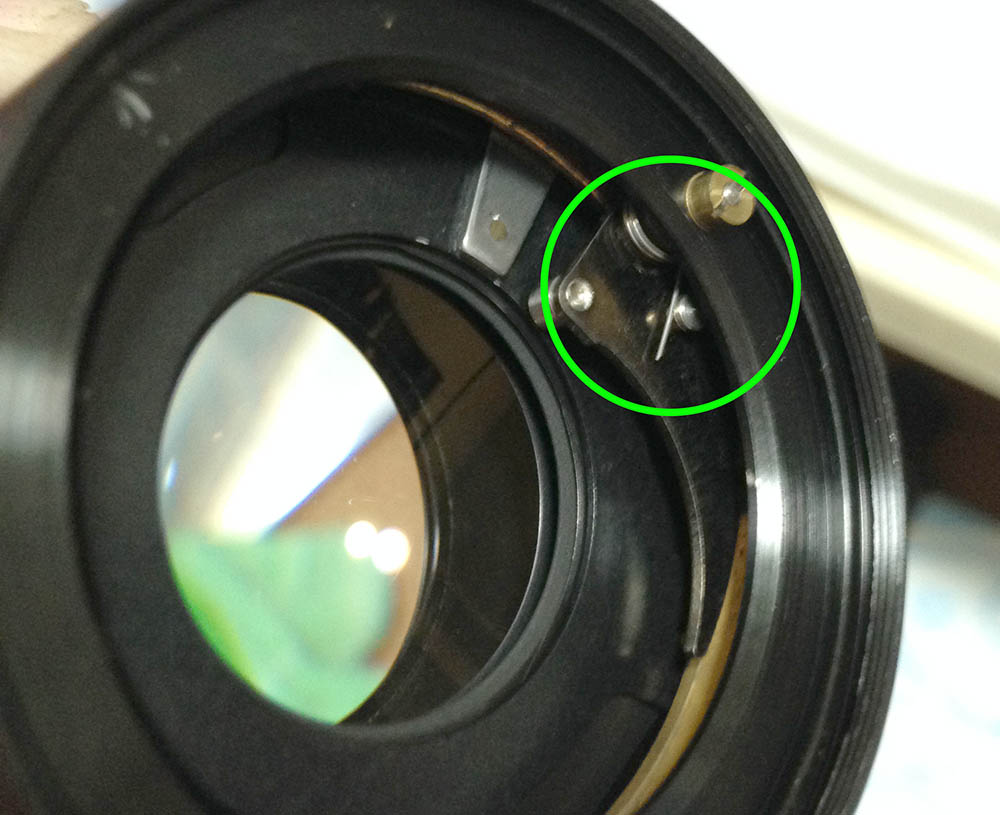
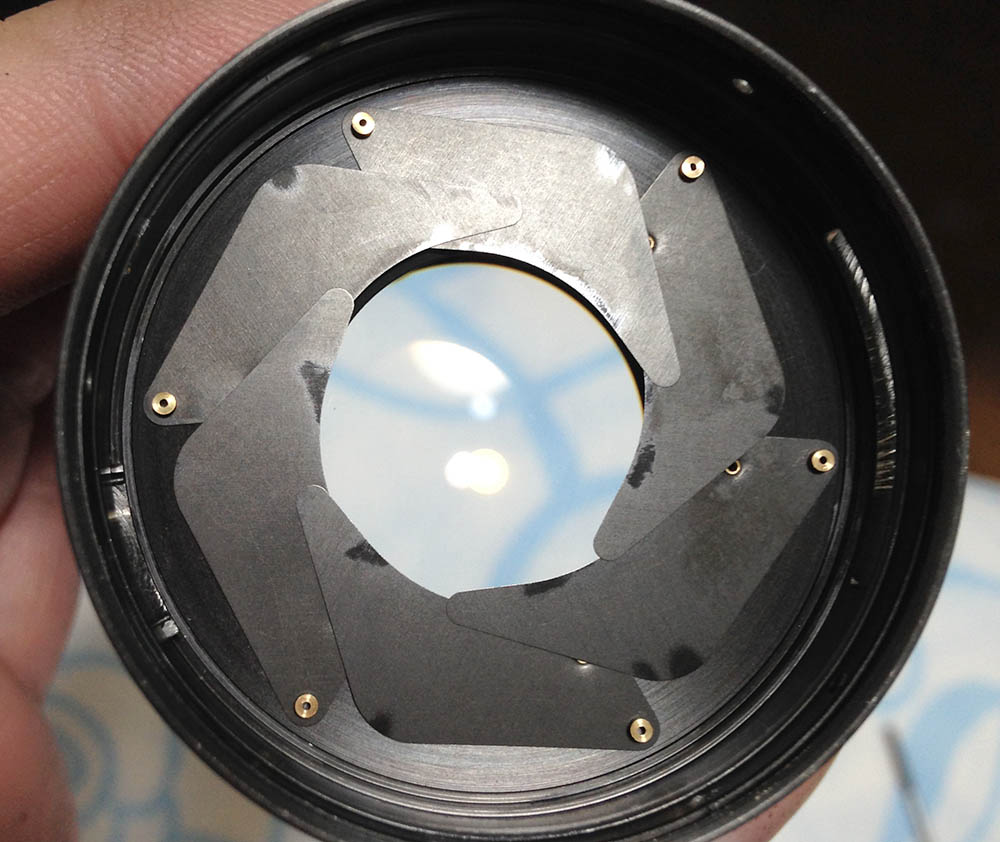
Here is another view of the iris mechanism before I dismantle it. Be sure to take lots of notes before you take anything apart. Note the spring’s position, remember this when it’s time to put it back. This part is easily damaged so be careful.
The ring was pried-out of the casing with my fingers, it can be a really snug fit so go about it slowly. I do not recommend using any tools for this because you may accidentally damage the blades underneath it. As far as automatic irises go, a damaged blade will make the iris useless.
To further dismantle this, remove this tall-headed screw (pillar screw). This part connects to the aperture fork so it can control the iris.
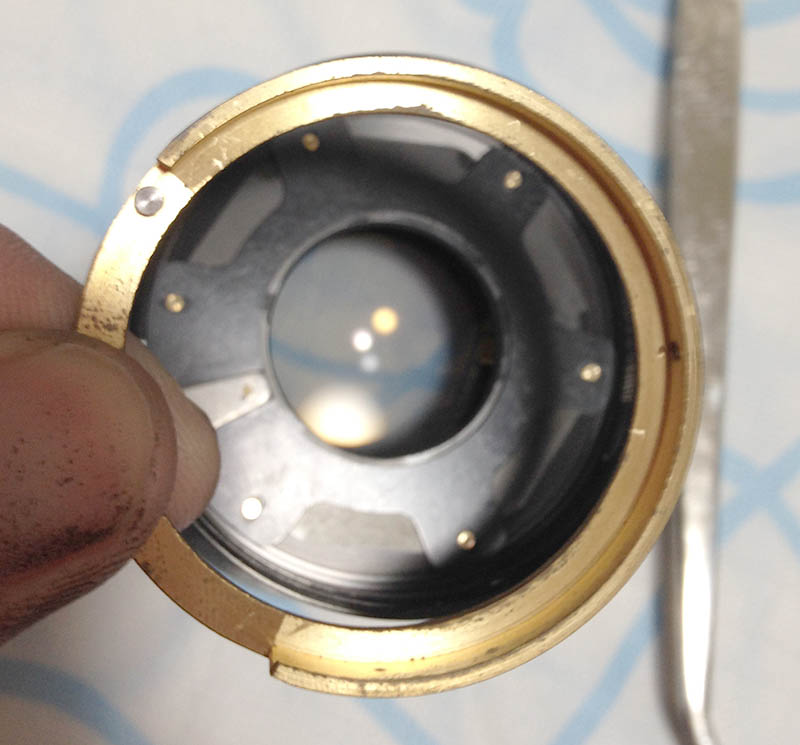
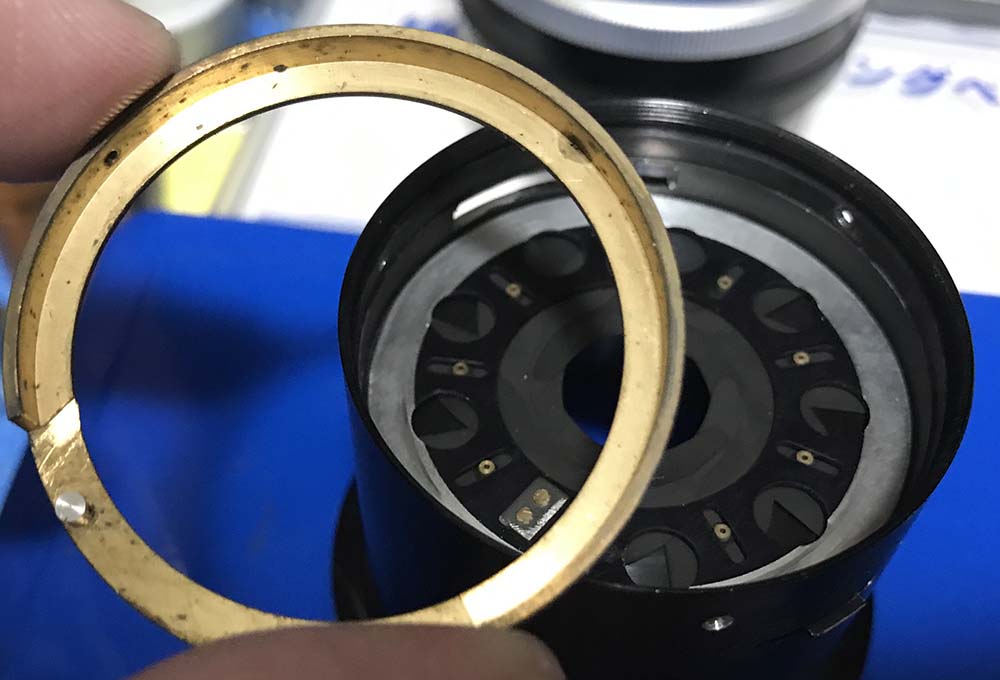
Now that the screw is gone you can remove this brass ring. This part keeps the iris from falling apart, do this with the housing facing down to prevent the iris from dropping to the floor.
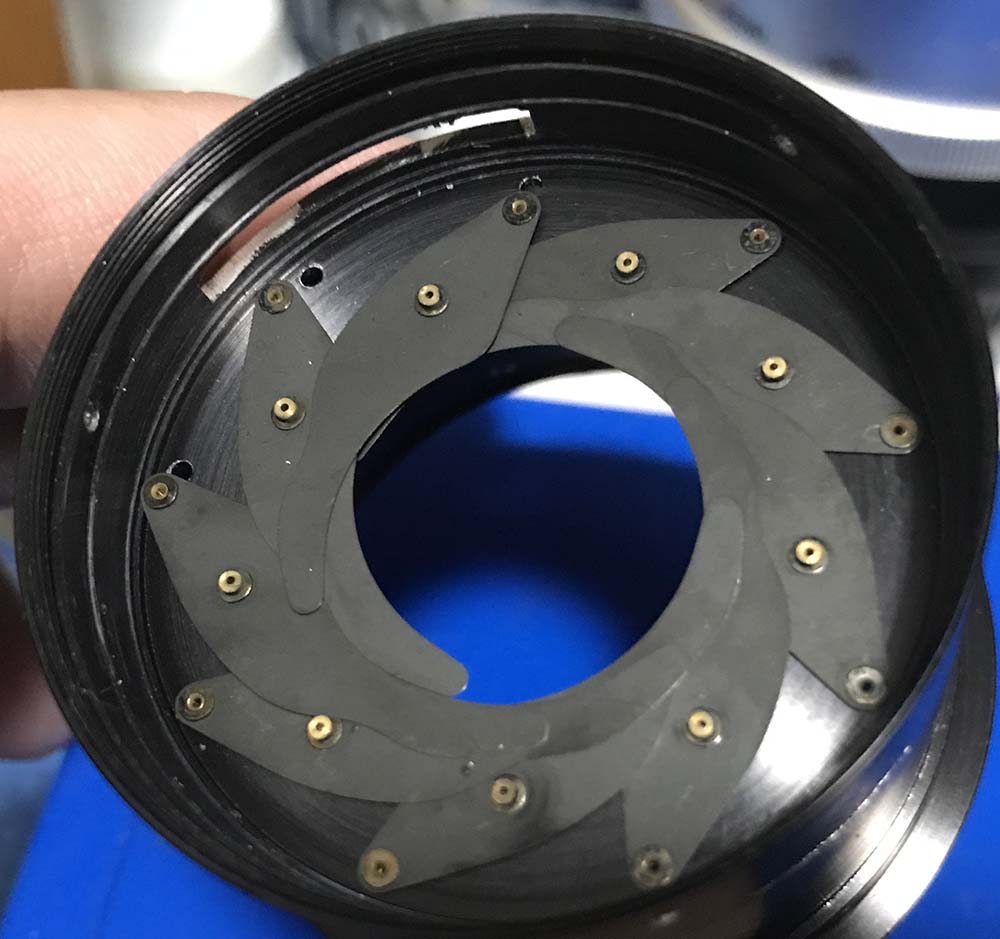
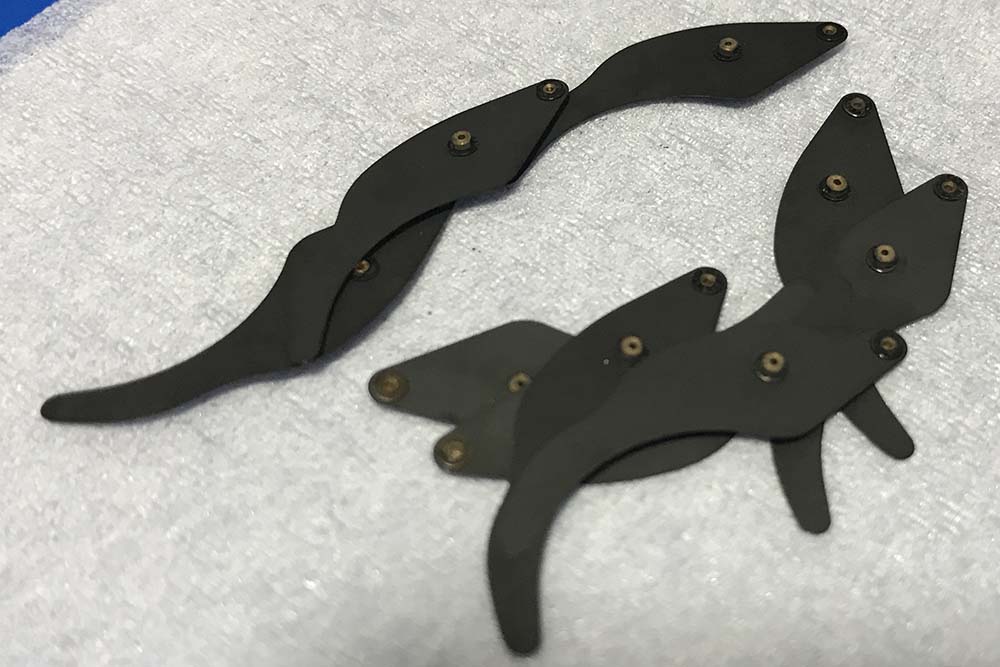
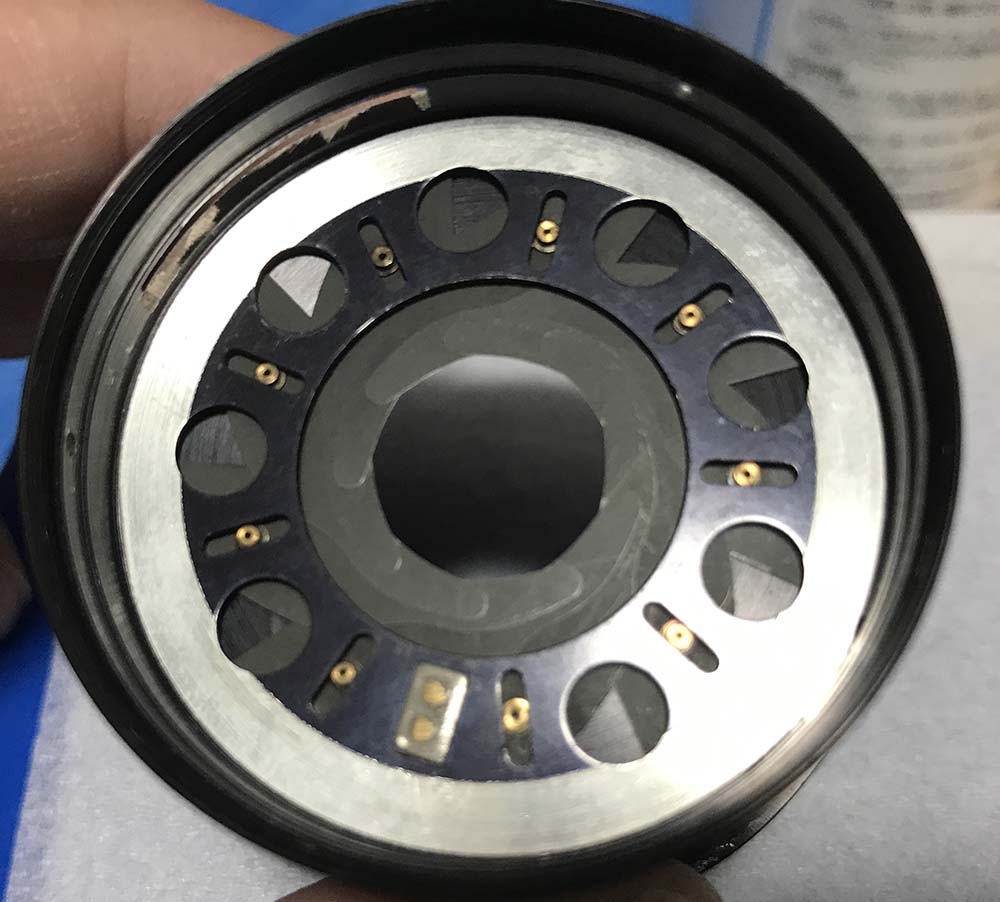
Here’s the iris.
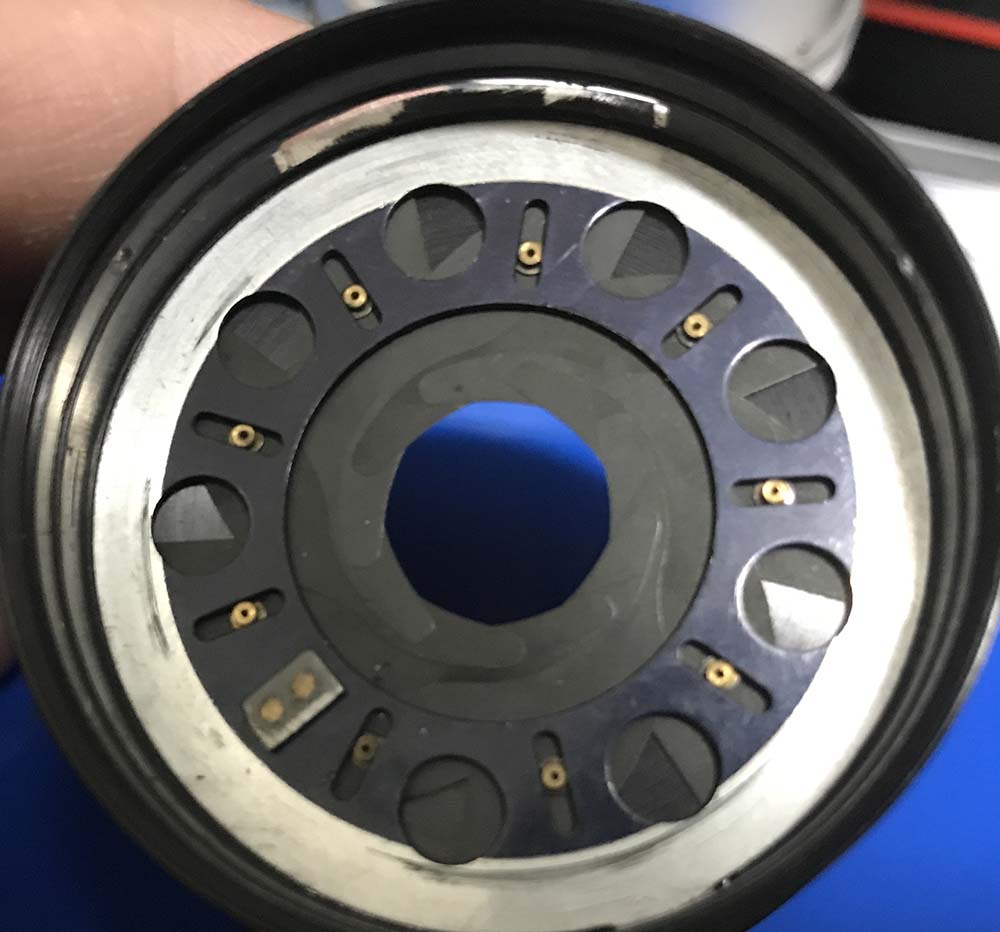
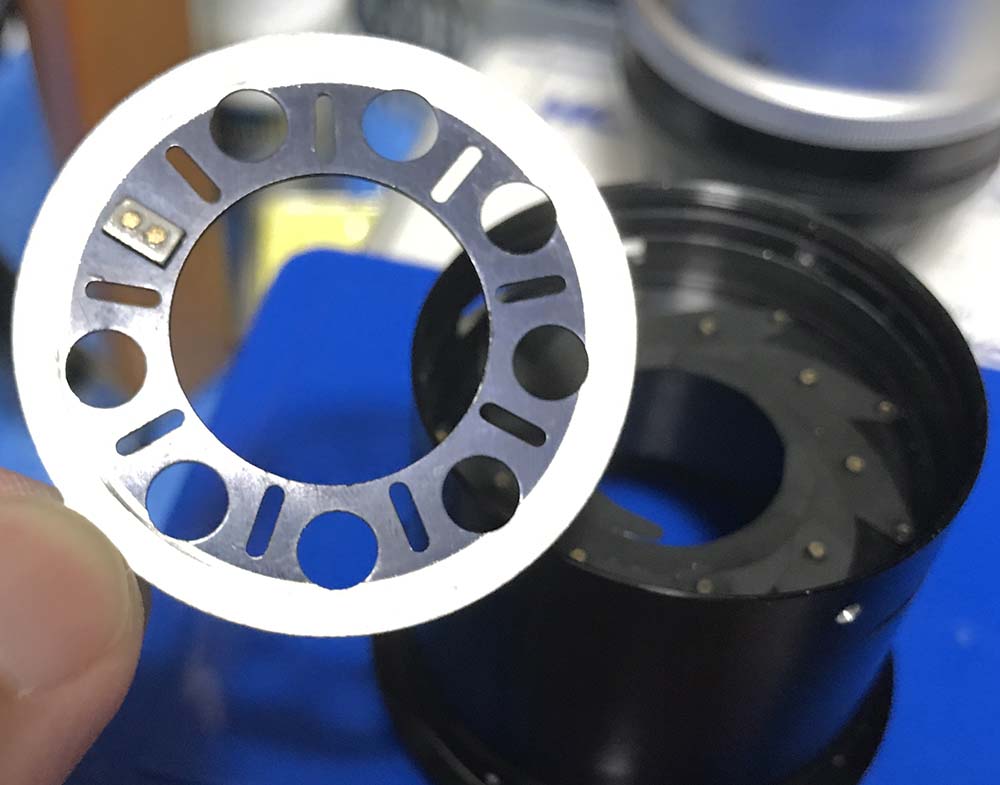
Remove the rotator plate by pressing on its tab from the outside. The tab is the silver part on the 6 o’clock position in the photo. The tab is connected to the stop-down mechanism on the bayonet mount and it actuates this part so that it will open and close as you press the shutter button. This part should never be greased. If you think you need to lubricate this, use pure graphite powder but do not put too much. The rotator plate has slots for each blade so rotating it will open or close the iris as the pins travel up and down their slots.
Note how a small amount of oil is enough to foul-up the iris. I have worked on even oilier ones. This lens is prone to this problem, I suspect that the oil travels from the stop-down lever into the iris mechanism. If your iris is oily then it is a symptom of a much bigger problem, it’s best to overhaul the lens rather than just fixing the iris alone.
The blades were cleaned by wiping them clean with naphtha and lens tissue to prevent any damage. Be sure the housing, blades and holes are all clean. I also blew air with a blower to remove any dusts before I reassemble it. This was easy for me to put back because there’s only 6 blades.
The iris now operates perfectly, it’s snappy when actuated and there’s no oil anywhere to be found. If you need to lubricate the iris, use graphite powder but don’t apply too much.
Disassembly (9-bladed Iris Version):
Here’s a bonus, I’ll show you how to service the 9-bladed iris version. This is similar to the 6-bladed one but having 9 blades instead of just 6 complicates things. Also include the fact that each individual blade is lighter and thinner so they’re delicate. I’m experienced in this, I can put this back in one try but there are times when this may take longer than an hour because I found out for myself that the 105mm/10.5cm with 9-bladed irises tend to have shabby workmanship. There were holes that were made at the factory and later left there unused since they’re not in the right places. The plates were rough on some parts and impeded the blades’ movement, causing the iris to retard. It was suggested to me that perhaps Nikon at those times had to employ fresh staff just to fill job orders, this made a lot of sense seeing how the mistakes looked like. Nikon was new to this auto-actuating aperture thing when they were doing thing in 1959 so it’s understandable that they were still dealing with new tooling and techniques, this requires some time to master, too.
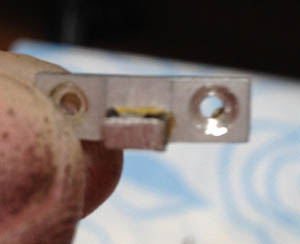
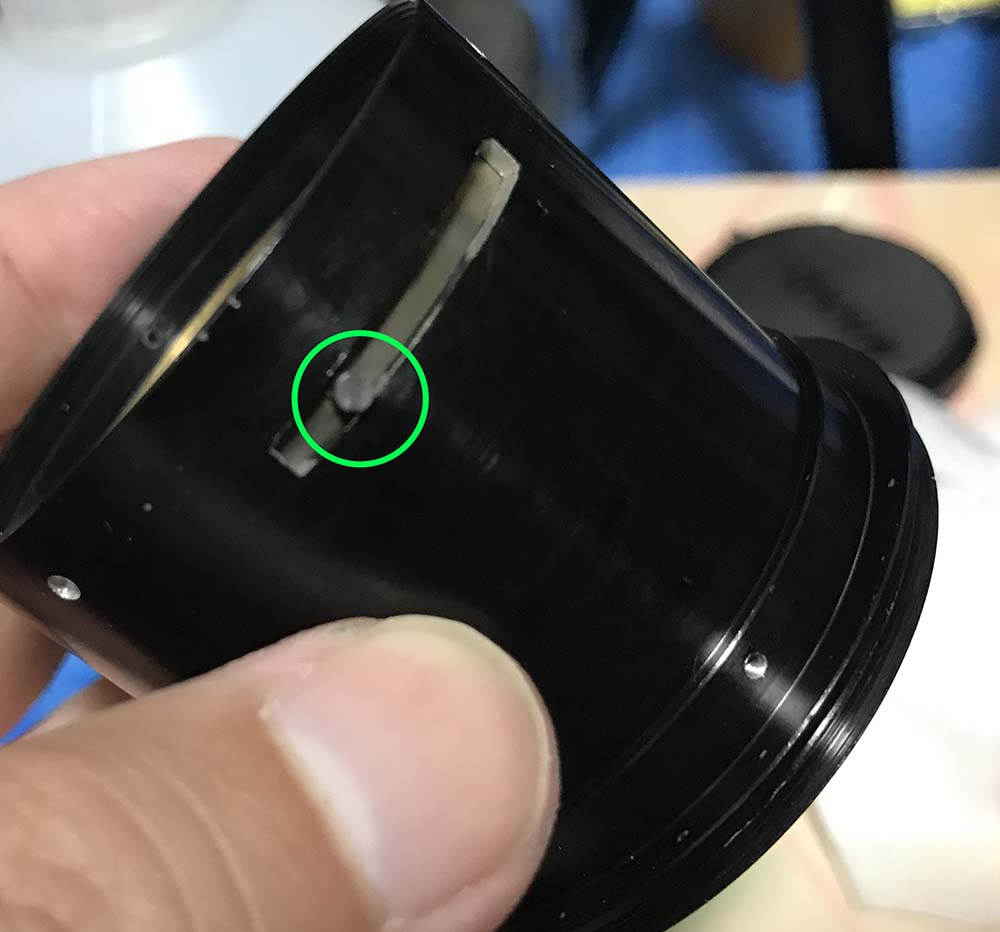
Here is one example of a corrected mistake. Somebody milled the slit a little bit too far, it had to be filled with a piece of brass that was soldered with tin just to compensate for the missing material. This one is from my “tick-mark” version.
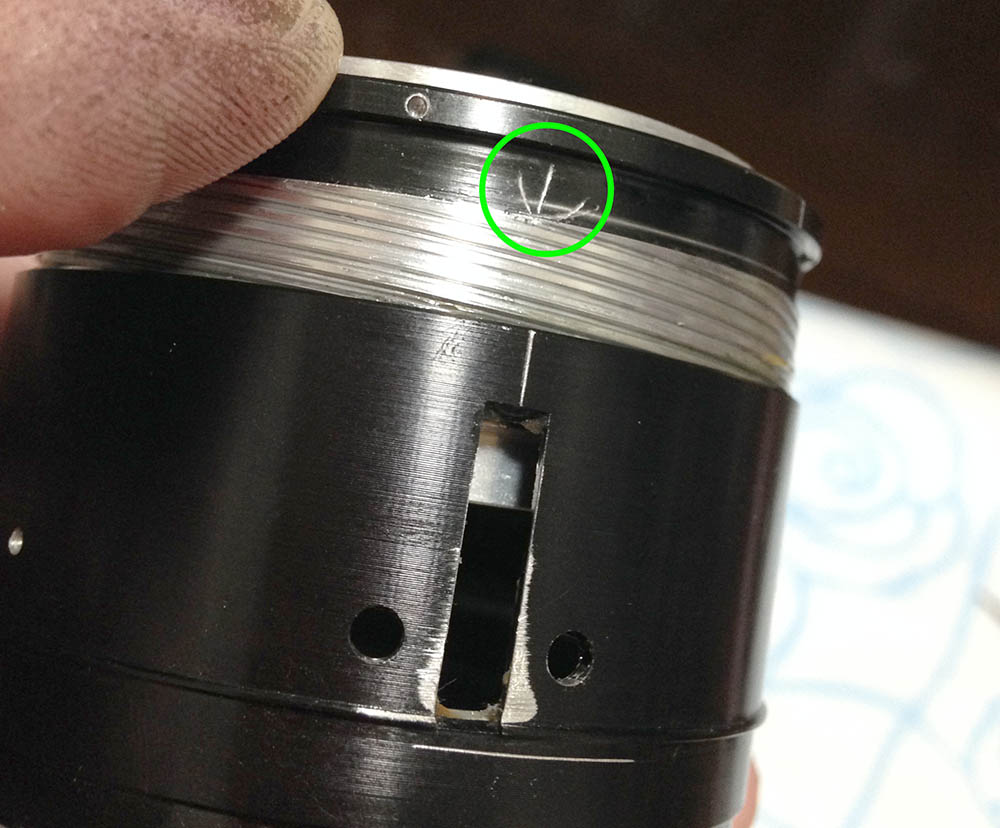
Just like the 6-bladed ones, you must first remove these. Notice that the hole looks worn. These were ruined either at the factory or sometime during its long history when this was serviced. The rear element’s housing is secured differently, it’s properly secured with a sealed collar, fancy. This lens is from a friend by the way. It is an early “non-tick-mark” version with 9-bladed iris.
As usual, remove the rear portion to access what’s underneath it.

Those screws secure this mechanism, it constrains the iris’ movement via a lever with a spring. Be careful not to damage the delicate spring when you reinstall this later. This ring can be tightly-fitted to the casing so be careful.
Remove this screw so you can remove the brass rotator ring inside.
This ring holds the iris together, it also serves as some kind of limiter for the iris.
Here’s the iris. See the grime? It’s basically dirt that’s caked with oil.
Carefully remove this plate by carefully pressing on its tab on the outside of the casing to lift it slightly and use a pair of sharp tweezers to extract it. My nails were long enough so I used my fingers instead. Be careful not to harm the iris since it’s vulnerable at this point.
Note how these were put together before you dismantle it. Only handle the blades via their pins, they’re dainty and easily warped. If you damaged any one of them then you’ll end up with a defective iris mechanism.
Extract these carefully.
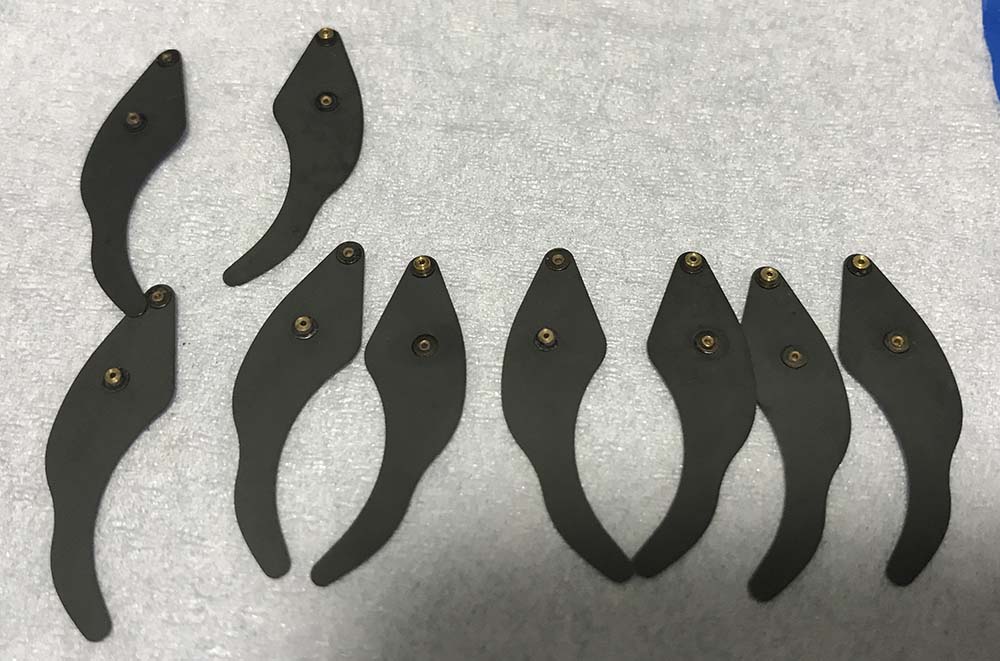
Here they are after carefully wiping them with naphtha and a soft, lint-free tissue. It is important that you clean these properly especially at the base of the pins where grime tends to accumulate. Some soak these in alcohol just to soften-up any dirt and that’s fine.
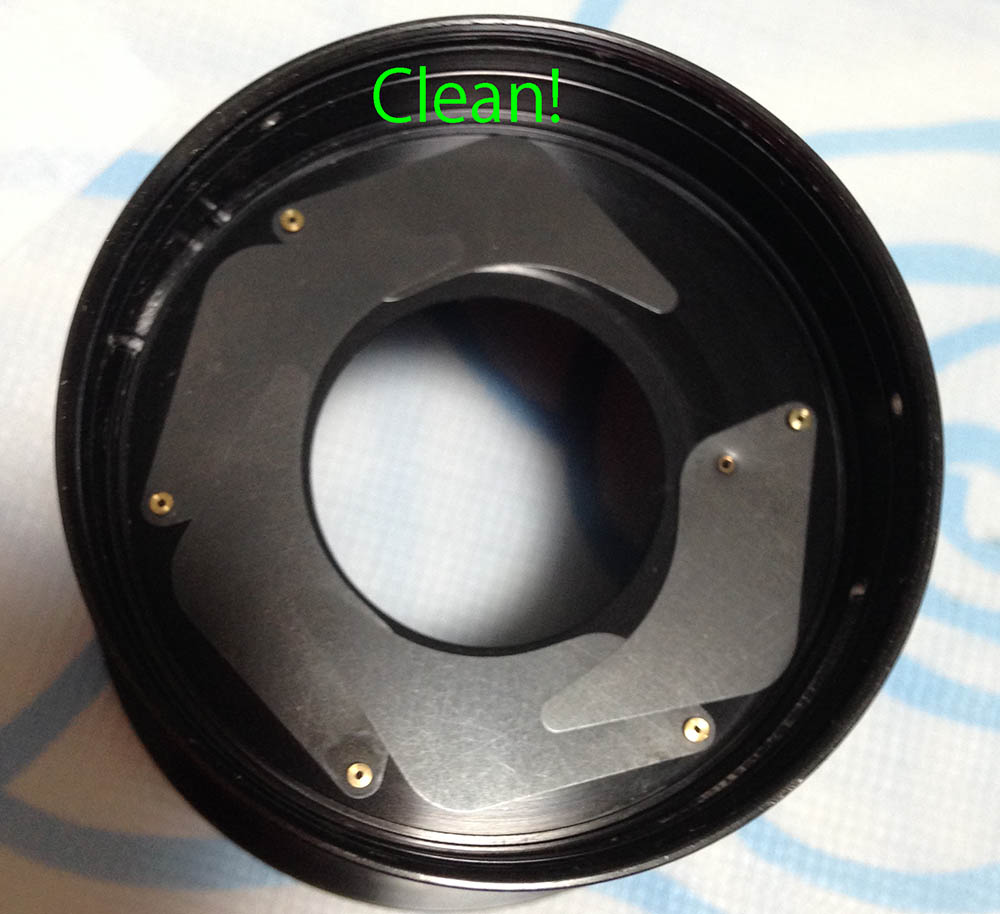
Here it is after a thorough cleaning. Note that the grime is now all gone. The case had to be cleaned properly, especially near the slits because this is how the oil gets into contact with the iris.
It can be more complicated to service the 9-bladed iris version and if you’re a bit insecure about your skills just send your lens to somebody who knows what they’re doing. It’s better to spend money than ending up with a useless lens and these aren’t cheap. The 9-bladed ones cost more than the common 6-bladed ones and the “tick-mark” version is very expensive owing to their rarity, these were only produced for a very short time.
Conclusion:
This is another Nikkor that was saved. As far as I am concerned, this is just a simple routine. I have serviced this lens numerous times in the past and I still have a few here waiting to be fixed. This can be serviced by a novice so long as he or she followed my steps carefully. It is also advisable to work on cheaper lenses first as practice. If you think you are not up for this then just leave this to the professionals. A properly serviced lens is going to last more than a lifetime so long as you take good care of it by not exposing it to water and dust, things that will surely foul the grease.
It took me the whole afternoon to work on this but I could’ve work faster if I was not taking all of the pictures for this blog. I am so familiar with this lens now that I rarely take notes at all.
To prevent the oil problem from ever happening again, I applied the grease sparingly so I am sure that excess grease will not migrate to places that they are not welcome. It’s also very important that you store the lens pointing up so gravity won’t make the grease migrate towards the middle where the iris is, this ensures that your lens will last a long time before needing repairs.

Here is my “tick-mark” version after the fungus and dirt were cleaned. The fungus left some damage but it isn’t really terrible.
That’s it for this week, did you enjoy this teardown? For such a popular lens amongst the Nikon community, I wonder why I didn’t make this one earlier. This is one of my most-requested lenses but it seems that I am too familiar with this to write about it.
Thank you again for your support! If you enjoyed this article, please share it with your friends on social media so that more and more people will follow this. I’m now hitting around 32,000 visits per month, this is impressive for a small site that’s maintained by somebody on his free time. Thank you very much, Peter (Nikon Rumors), you are helping this blog gain more exposure. See you all again next time and I will again post something that you will not find anywhere on the net. Please do not get tired of sharing and reading my blog, Ric.
Help Support this Blog:
Maintaining this blog requires money to operate. If you think that this site has helped you or you want to show your support by helping with the site’s upkeep, you can make a small donation to my paypal.com (richardHaw888@gmail.com). Money is not my prime motivation for this blog and I believe that I have enough to run this but you can help me make this site (and the companion facebook page) grow.
Buy me a roll of film or a burger?
Thank you very much for your continued support!
2.00 $
Helping support this site will ensure that this will be kept going as long as I have the time and energy for this. I would appreciate it if you just leave out your name or details like your country’s name or other information so that the donations will totally be anonymous. This is a labor of love and I intend to keep it that way for as long as I can. Ric.

Aug 28, 2017 @ 19:46:27
Hello
I bought a Nikkor 105mm f/2.5 K version from a guy on the internet and it was all fine as I tested, no fungus, no haze, no oily blades, aperture ring and focus ring working like a charm. However, as soon I got home I noticed the lens won’t focus to infinity. I go all the way through with the ring but I can never achieve perfect focus in long distances. It’s possible to repair myself? Or it’s too hard?
I know it’s probably not the place to ask for help, but it looks like you know what you’re doing.
Thanks anyway
Aug 28, 2017 @ 22:52:21
Hello, Christian.
Since you got it from the net it is best to send it back or ask a big discount. This is not hard to fix if you are experienced. I think I have a guide here somewhere on how to calibrate the infinity focus. Ric.
Aug 30, 2017 @ 13:08:41
Thanks for answering!
I got it cheap and I really liked the lens. It works fine inside the 70ft scale, so I’ll probably keep it anyway.
About the fix, I’ve been reading some of your posts to learn something, but I’ll look into it.
Great job btw!
Aug 30, 2017 @ 15:14:34
Hello.
Are you sure? Anyway, just look at my blog and see how much you can adjust that thing. Ric.
May 31, 2019 @ 02:27:17
Great post with nice attention to detail. I have gone through this, and unfortunately lost the aperture ring screw 😦 I saw your advice about getting screw types M2 and M1.4 of lengths between 2-4mm. I’m wondering if you have any more specific advice for this screw in particular? .
Oct 13, 2019 @ 03:11:35
First of all I want to say excellent blog! I
had a quick question that I’d like to ask if you
do not mind. I was curious to know how you center yourself and clear your head prior to
writing. I’ve had trouble clearing my mind in getting my ideas out there.
I do enjoy writing however it just seems like the first 10 to 15 minutes tend to
be lost just trying to figure out how to begin. Any suggestions or tips?
Cheers!
Apr 28, 2020 @ 07:49:11
Thank you very much for your indespensable informations (I do have a 105 mm from early ’70s and eventually I decided to curry out some maintenance work myself) . Paolo Messeca
Dec 04, 2020 @ 23:41:26
Hi. Thank you for this site! I have a NIKKOR-P Auto 1:2.8 f=1.5mm, 457209. I don’t know a lot — but every time I count my aperture blades I see 7 (seven). Do I have a version you haven’t heard of or am I counting wrong?
Dec 04, 2020 @ 23:43:52
105mm, of course. Typo
Oct 12, 2021 @ 04:13:33
I enjoyed reeading this
Mar 16, 2022 @ 23:41:12
Ok I just want to make a ai conversion,looks like I can remove aperature ring,before bayonet mount,which I guess can stay on,,is there any hidden springs as the kind found on 50 f1.4, where I when removing mount screws left screw alone this spring was attach,so any spring I need watch for removing aperature ring,,looks to screw off.
Mar 16, 2022 @ 23:55:28
My comment above my lens working on type hasNO mount screws