
Hello, everybody! It’s starting to get a lot colder now and the bugs have all crept back to their hiding places to wait for the coming spring next year. I love bugs, they’re tiny but their bodies consists of many interesting parts. I am always amazed by how intricate they can be, even a boring beetle has a few things that makes them interesting when viewed up-closed. Today, I am going to show you a little lens and just like bugs, it’s intricate inside and the construction is wonderful to marvel at.
Introduction:
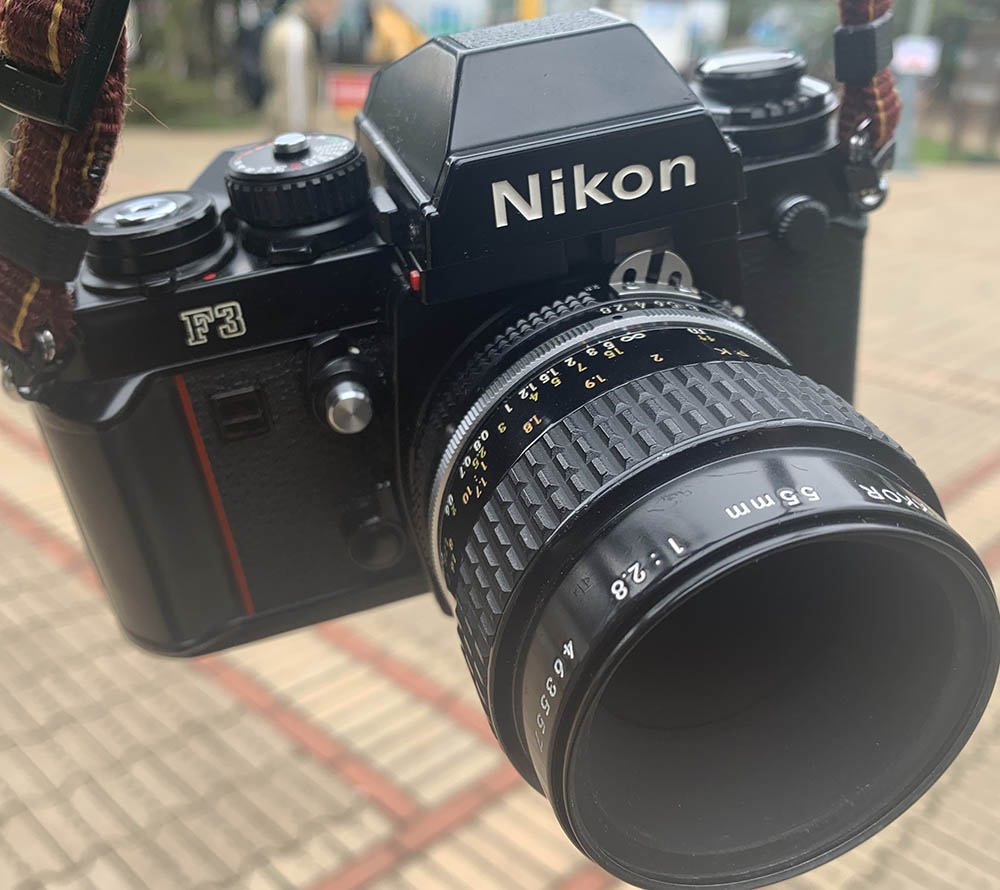
The Micro-Nikkor 55mm f/2.8 Ai-S was sold from 1979 to 2020, it succeeded the then-aging line of 55/3.5 Micro-Nikkors which never saw any significant optical change for nearly 20 years. It’s a popular lens, it’s one of Nikon’s all-time best lenses so it was only discontinued recently, some 41 years after it debuted. It has a special place in Nikon’s lineup despite being succeeded by 3 other lenses. People sometimes require a simple, manual solution to their problems and this lens supplied that. People like scientists or engineers will require it for exact-reproduction. I won’t be shy to admit that this is one of my favorite lenses, if I were given a chance to only use a lens for the rest of my life I would probably have this on my top-3 list.

This is one of Nikon’s masterpieces, it works great with every Nikon. It has a compact barrel despite being a bit longer than its predecessors. Optically, it is quite good and many people use it for scientific and industrial purposes even today. Modern high-MP cameras won’t out-resolve it, it was made for reproduction so its resolving power is quite high.
It has a totally-new 6-elements-in-5-groups design with CRC implemented. It is a simple, elegant optical formula that could produce great photos thanks to the addition of CRC. Compared to the older versions, its bright maximum aperture is helpful when you use it with extension tubes or when you focus at closer distances so the barrel is extended. It helps keep your view bright. Another bonus is you’ll get shallower depth-of-field which aids in focusing. I would advise against using a split-screen with these since the center will be dark when there’s not enough light reaching the prism despite it having an f/2.8 maximum aperture.

The 55mm line of Micro-Nikkors have a long history starting from 1961. The lens underwent a couple of changes since. I have documented them all here in our blog, here are the major versions of this lens family.
- Micro-Nikkor 5.5cm f/3.5 1961-1963
- Micro-Nikkor-P 55mm f/3.5 Auto 1963-1973
- Micro-Nikkor-P•C 55mm f/3.5 Auto 1973-1975
- Micro-Nikkor 55mm f/3.5K/Ai 1977-1979
- Micro-Nikkor 55mm f/2.8 Ai-S 1979-2020
- AF-Micro-Nikkor 55mm f/2.8 1986-1989
Its long pedigree began with the now-legendary Micro-Nikkor 5cm f/3.5. It’s made for rangefinder cameras in 1956 for high-resolution photography. The optical performance is excellent so it gained star-status. The optics had to be modified somewhat for use with the F-mount and that resulted in the Micro-Nikkor 5.5cm f/3.5 which has the ability to get to 1:1 magnification natively but without the ability to automatically-actuate its iris. This made it limited in use so the more practical Micro-Nikkor-P 55mm f/3.5 Auto was introduced to solve that problem but it lost the ability to get to 1:1 magnification. It uses extension rings to achieve that so it’s a good compromise. The lens line was updated with minor optical upgrades, better coatings and new barrels but it retained the same basic optical design throughout its production. It changed when the brighter Micro-Nikkor 55mm f/2.8 Ai-S was introduced and finally reacquired the ability to get to 1:1 magnification again plus autofocus when the AF-Micro-Nikkor 55mm f/2.8 debuted. The lens line is now retired but its spiritual successor is the AF-Micro-Nikkor 60mm f/2.8D and the current AF-S Micro NIKKOR 60mm f/2.8G ED.
Handling is excellent. It balances perfectly with any Nikon. The 55mm focal length is great for a lot of applications but it’s not suited for taking pictures of bugs since the working distance at higher magnification isn’t sufficient. I often managed to bump my little subjects since the tip of the lens is close to them. This makes it difficult for lighting, too. You’ll get in the light’s way so a specialized lighting solution has to be used such as remote-triggered flashes or LEDs. The Micro-Nikkor 105mm f/2.8 Ai-S is a better choice for shooting a lot of smaller creatures since it provides you adequate working distance.
This is great for food or toy photography, the 55mm focal length won’t make your subjects look flat because of foreshortening. This is the reason to use it and you should know how to use focal lengths to your advantage so you can take better photos.

The beautiful and informative scale shows its optimal settings when this is used with extension rings. This is a nice touch, something that is useful for high-magnification photography during the film days.

It’s quite compact and not a lot bigger than the usual Nikkor prime. It’s not heavy either so you could carry one all-day without getting tired. It’s great how Nikon managed to keep the barrel small despite implementing CRC in it. The benefits of CRC can be seen at the far-corners at closer distances. It’s going to give you better performance there specially and you can easily see it when shooting wide-open.

This is how it looks fully-extended. You can only reach 1:2 magnification on its own, you will need to attach a Nikon PK tube to get it to achieve life-size or 1:1 magnification. The Nikon PK tubes were sold with it but usually gets misplaced by the owner. The correct model for it is the Nikon PK-13. Those aren’t cheap, even the used ones cost more than the other models.

The front element is seated with a deep barrel. You won’t need a hood with it. This is one of the traits of this lens family.
This lens is so good that it’s said that some companies use this for industrial purposes. Its sharpness and flatness of field is perfect for industrial use that even NASA had a special version made for them to bring to space.


(Click to enlarge)
Here area some pictures of the customized NASA models. Check this special article and see lots of NASA-related Nikon equipment and their differences compared to the standard production models. I wish to own one of them in the future.
Learning how your lens performs is key to maximizing its use. You’ll learn how to utilize its strengths and avoid its weaknesses. This knowledge helps in determining which lens to bring on assignment.
I shot these from f/2.8, f/4 and f/5.6, these are the most common apertures that people would want to use it and we’ll see the most changes with these values. For more depth-of-field for shooting at higher magnifications I use this from f/8 to f/16. Here’s a spoiler, it’s still quite good at f/11 but I would avoid shooting this at smaller apertures since the effects of diffraction will be noticeable and you’ll notice a drop in performance.


(Click to enlarge)
Vignetting can be seen wide-open. Stop it down to f/4 and the frame looks a lot brighter but you’ll still see traces of it. You won’t get any of it from f/5.6. I didn’t take any samples showing its distortion profile, it’s near-absent and I couldn’t see it at all. Most, if not all lenses in this family have low distortion levels since they were made for reproduction.

All Micro-Nikkors have smooth bokeh quality as far as I know and this is no exception. It’s superb, you won’t see any ugly, smeared artifacts at all but it is inferior compared to the older Micro-Nikkor 55mm f/3.5 Ai.

This is probably the worst result that I could get. You’ll see some smudging in the twigs, this was shot at f/5.6 which I consider to be an awkward value for rendering background blur for this lens at moderate distances because the details couldn’t be blurred to indistinguishable forms.


(Click to enlarge)
It’s very sharp wide-open but the thin depth-of-field makes it appear softer. Resolution isn’t the best wide-open but it’s adequate. Sharpness improves a lot once you stop it down to f/4 thanks to its improved resolution. It operates at peak-performance at the center by f/5.6.
Chromatic aberration can be seen in small amounts but it’s not something I would consider terrible. It performs marginally-weaker at further distances which is not something I’ll fault it for since it’s assumed to be optimized for close-up photography. My sample was in terrible shape so that might be an important factor for my results.

I couldn’t see any chromatic aberration here at all, this was shot at f/2.8.

Another shot taken at f/2.8. The depth-of-field is very shallow so it’s difficult to get more things in-focus at closer distances. Inspect the stamen, its details were rendered beautifully. It could produce delicate pictures with a natural look thanks to its smooth focus-transition.

It’s able to render a painterly-look. Not only is this lens technically excellent it’s also a great artists’ tool. The subtlety of the tones and the softness of the blur makes this a nice photo.
Let’s now see how it performs with film. Film has a unique look that is hard to replicate with a digital camera because grain reacts differently to light. It can either mask or amplify a lens’ flaws. Since this was originally made for use with film it’s best that we judge this with its intended medium. This will give us a better assessment of how it really performs. These were shot with Fujifilm Industrial 100.

It’s overexposed but it’s good for illustrating its bokeh quality. It isn’t bad at all but it’s not the best either.
There’s minimal traces of chromatic aberration in this photo, you won’t see it unless you looked for it. The depth-of-field is quite thin even at f/5.6 and it was focused to around 5m. The sakura blossoms look “clumpy”, this isn’t the best aperture for producing nice backgrounds as far as my experience with this lens goes.

It’s a great lens for general photography, too. The details of the buildings are sharp and they look great. I think I shot this at f/5.6 where sharpness peaks. One of the best features of this lens family is you can use them as standard lenses, too.


(Click to enlarge)
These were focused at 10-20m. It’s still sharp at moderate distances which is quite useful for general photography. Flare resistance isn’t the best but that can be attributed to my lens’ poor condition.


(Click to enlarge)
These were taken from about 1m or closer. Its low distortion profile makes it a great choice for taking photos of art and architecture. Of course, this is sharp at closer distances.

This was taken with the iris stopped-down a bit. It’s incredibly sharp, you’re able to see the pollen dusts individually despite being shot with cheap film. The details of the petals look great, too.

The droplets look sharp and juxtaposed against the velvet-looking petals of the pansies. You won’t get the velvet-look if a lens was over-corrected.


(Click to enlarge)
Here are more flower photos. This is great for flower photography, it has an ability to render them beautifully thanks to its natural-looking rendering. It is important that you portray flowers to soft and delicate, this lens is able to do that perfectly.

Wilted sakura blossoms. Despite being shot at about f/4 or so, the depth-of-field is thin so you will want to stop the lens down to around f/8 or more if you want to get the blossoms at the back to be sharper.

This is great for toy or product photography. A shorter focal length makes it harder to portray your subjects faithfully since foreshortening exaggerates their size. A longer lens will make them appear smaller, which is not good. I think this is the best focal length for these types of photos.


(Click to enlarge)
I love how it renders with film. It makes photos taken with cheap film look like they’re shot with more expensive stocks thanks to its high resolution. I love how it handles with film cameras, too. Its bright maximum aperture is helpful, it makes this lens more practical specially for low-light scenarios. I won’t hesitate to recommend this lens for film enthusiasts.
This is still an awesome lens even today. Despite its lack of autofocus or the ability to focus to 1:1 magnification on its own it will still give you excellent photos when you know how to use it. If you want something that is tougher and a bit cheaper, the Micro-Nikkor 55mm f/3.5 Ai is a great alternative. It is not as fast as this one so you will get a darker view but it’s optically better at high-magnification in my opinion. It’s tougher since its construction is a lot simpler, too. You can’t go wrong with either one, if you’ve decided to get this instead, be sure to check its iris, it should be dry and snappy when actuated. Turn the rings and be sure that they operate smoothly, too. The optics needs to be clean and clear as well. Don’t hesitate to buy one, these are nice lenses with plenty of applications and they are not expensive either depending on condition. Price ranges from $20.00 for a junk but the average is usually at $150.00 for a clean one. Just be patient and you’ll get a good copy for a nice price. Happy hunting.
Before We Begin:
If this is your first attempt at repairing a lens then I suggest that you check my previous posts regarding screws & drivers, grease and other things. Also read what I wrote about the tools that you’ll need to fix your Nikkors.
I suggest that you read these primers before you begin (for beginners):
Reading these primers should lessen the chance of ruining your lens if you are a novice. Before opening up any lens, always look for other people who have done so in YouTube or the internet. Information is scarce, vague and scattered (that is why I started this) but you can still find some information if you search carefully.
I highly recommend that you read my working with helicoids post because this is very important and getting it wrong can ruin your day. If I can force you to read this, I would. It is that important!
For more advanced topics, you can read my fungus removal post as a start. This post has a lot of useful information and it will be beneficial for you to read this.
Disassembly (CRC Unit):
This is one of the more complicated manual Nikkors ever made because of the CRC mechanism. You couldn’t simply remove the objective just like most smaller Nikkor primes would allow you to. This is why I have separated the disassembly section into a couple of parts.
This is not something for a beginner to work on as their first project. It has a lot of small things that you should consider when disassembling it. There are precise adjustment points that you should measure and take notes of. It also requires special tools to service on top of the skills needed to safely do an overhaul. If your lens needs repair, send it to a qualified repairman.
This section is broken-down into these parts:
- CRC
- Main Barrel
- Objective
- Iris Mechanism
This lens has seized helicoids, a common problem with this lens. That’s why I couldn’t remove its parts in proper sequence. I’ll outline them properly so it will make sense to you but the pictures may confuse you so pay attention to what I’m saying.

Extract these so you can remove the bayonet mount. Many people get stuck here because they have stripped them. To prevent this happening, read my article on how to remove bayonet screws. Use the correct type of driver, the screws are JIS so you should only use a JIS driver for them.

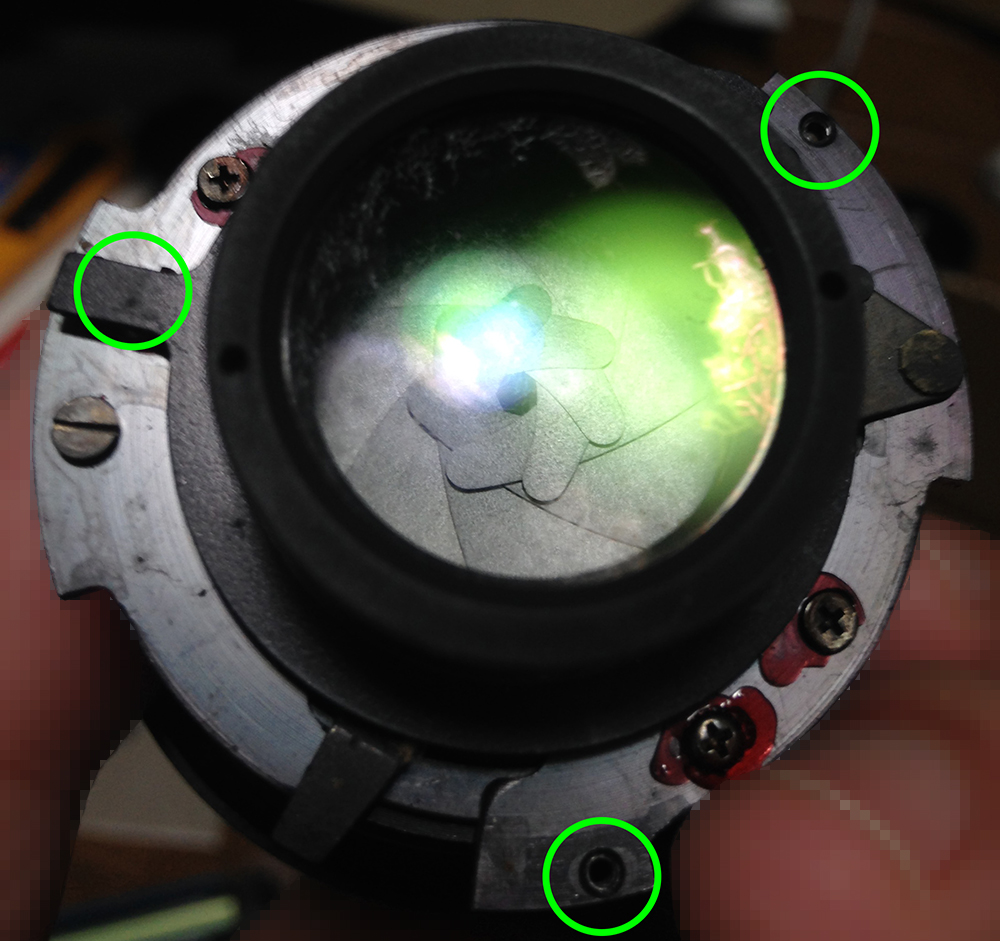
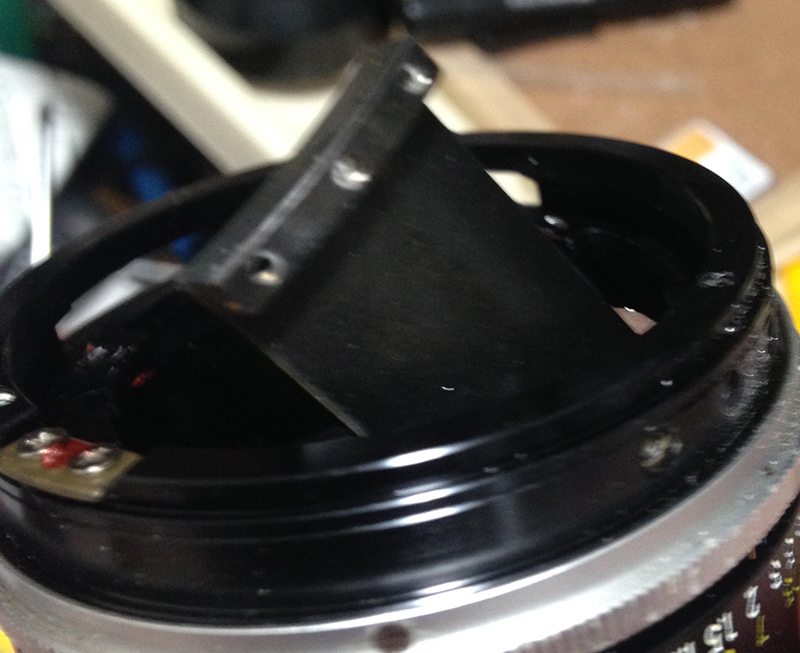
Extract these to remove the objective. Before doing so, turn the barrel so the lens is focused at infinity. Be sure that you don’t disturb it while you remove anything so you’ll have a point of reference.

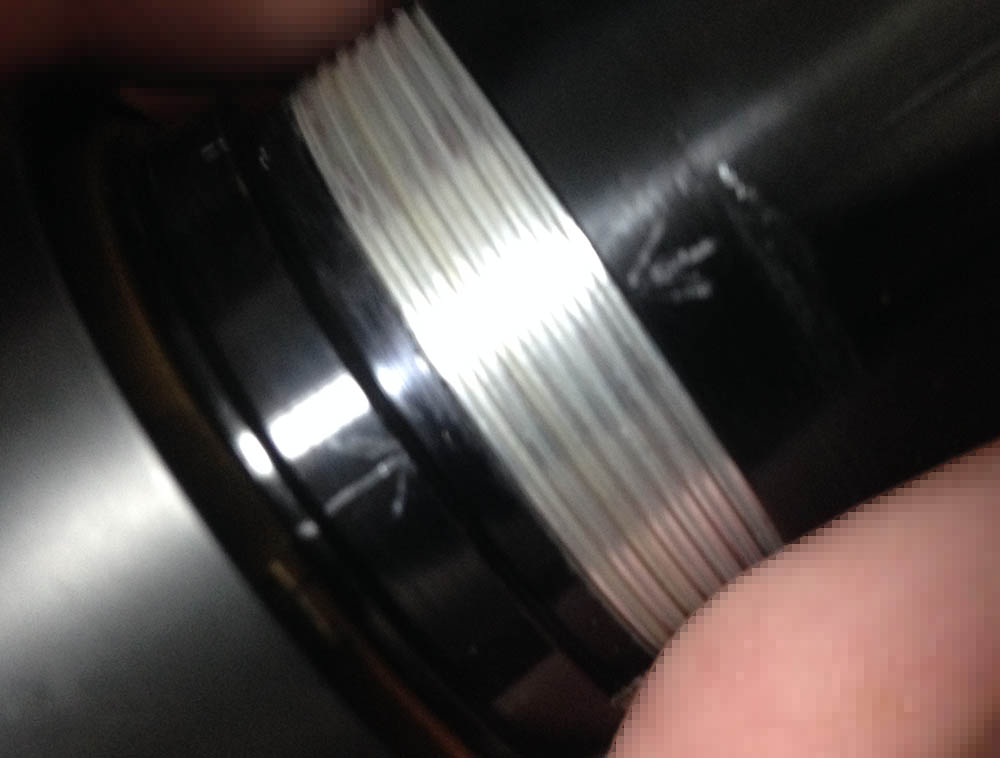
While the barrel is still at infinity, carefully pull the objective off and be sure not to knock or turn anything on it, you’ll need to document the position or alignment of its parts.
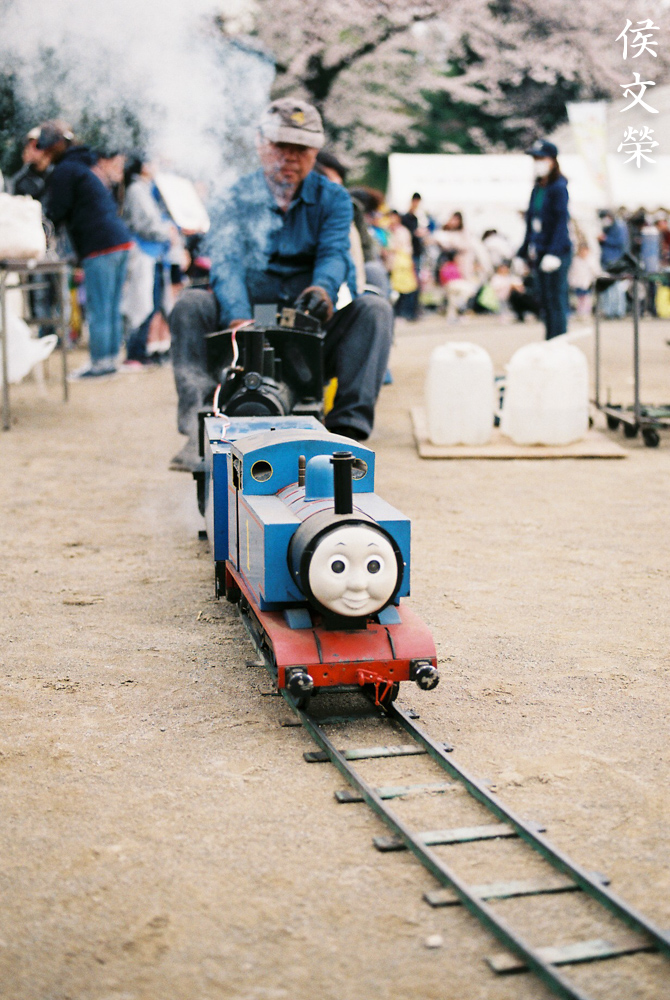
I made a few marks to serve as keys so I’ll know how they should align later when it’s time to reassemble them. I should be able to reproduce these later while the barrel and objective are both set to infinity.
The helicoid stop for the CRC mechanism (encircled) was documented by a series of small scratches and the alignment of the front part is also marked with a line. Measuring the gaps also work and that’s also what I did.
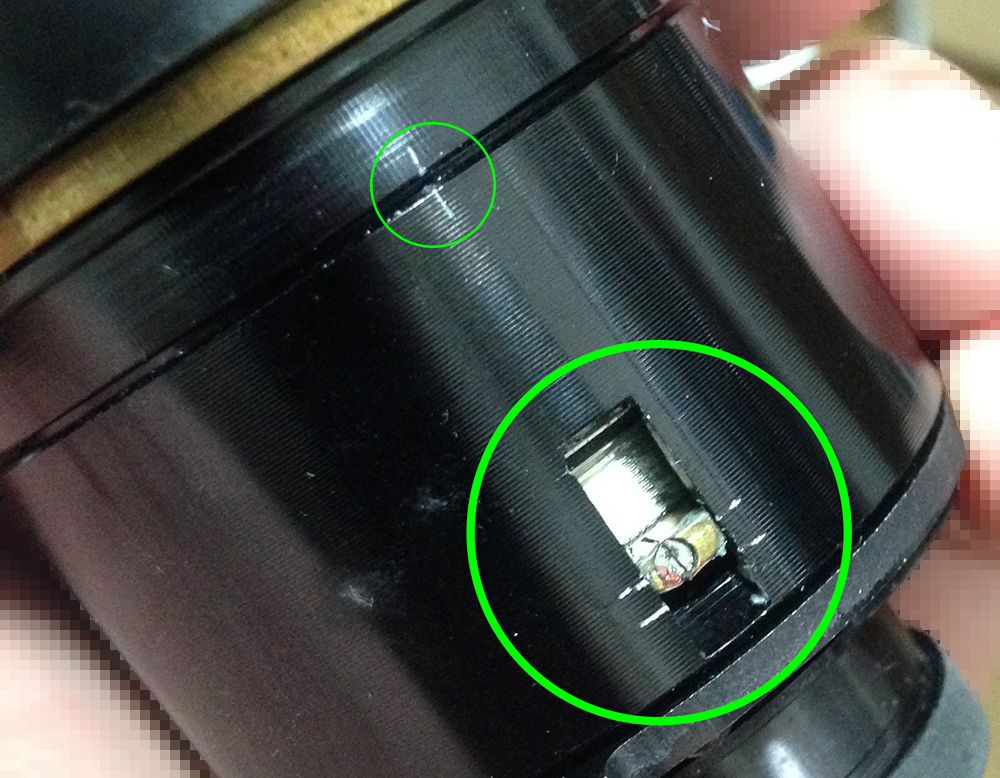
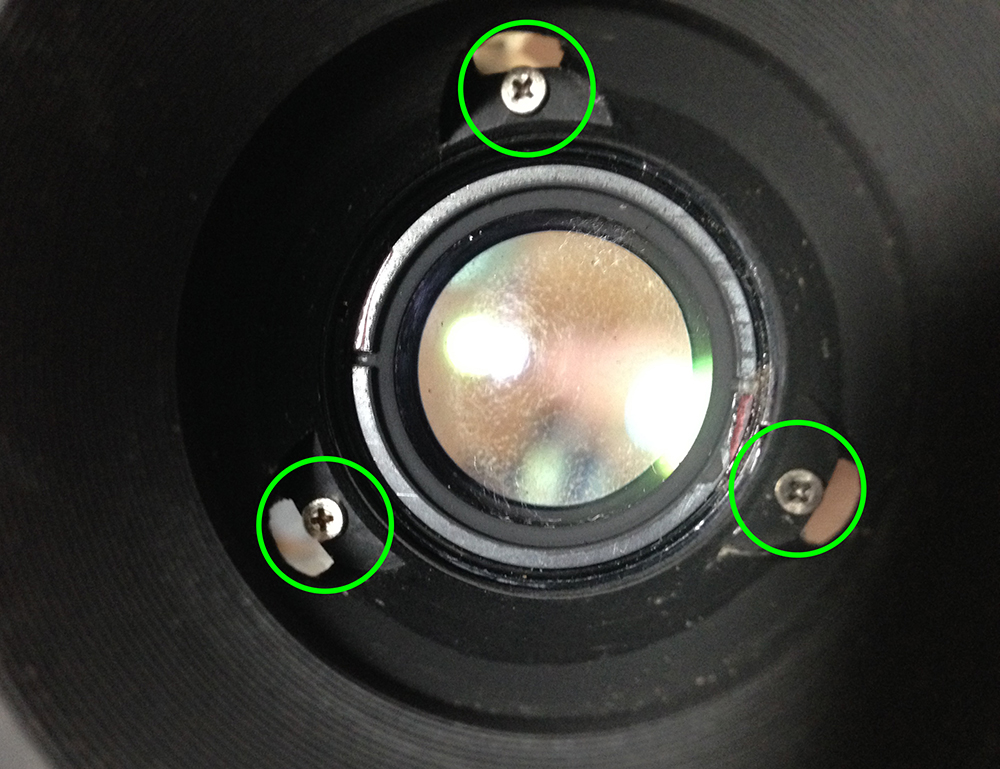
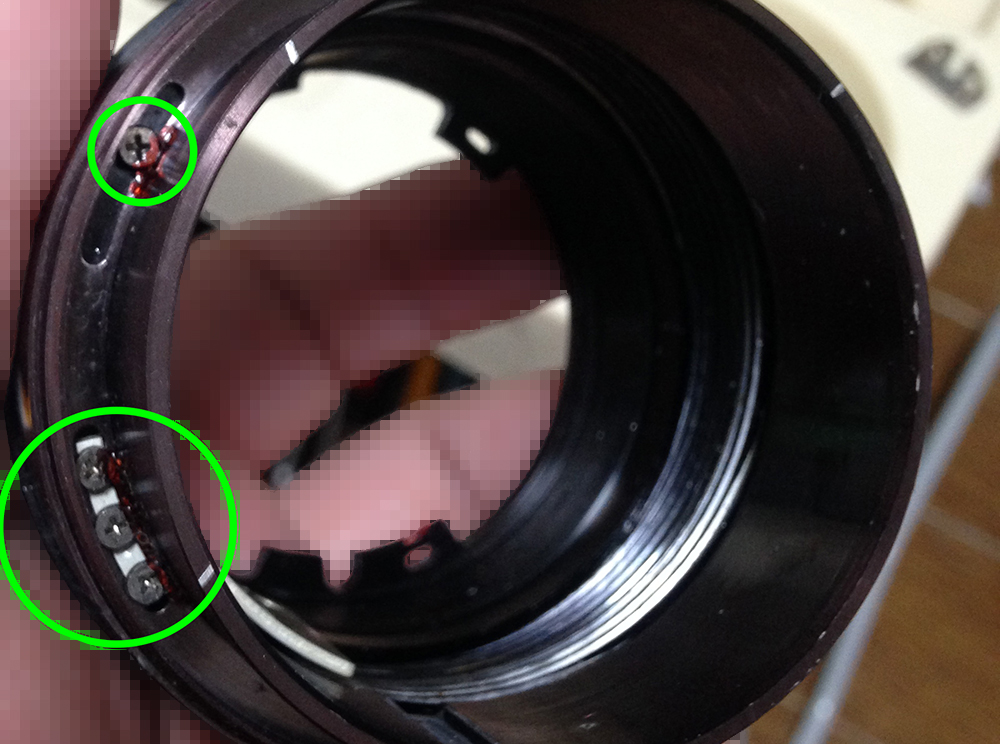
Extract the screws found in these parts to remove the iris mechanism from the objective’s housing. One of them may be obscured by a lever so just look for it and turn the lever to access it.

Carefully remove the iris mechanism while being careful not to disturb the alignment of the other parts.

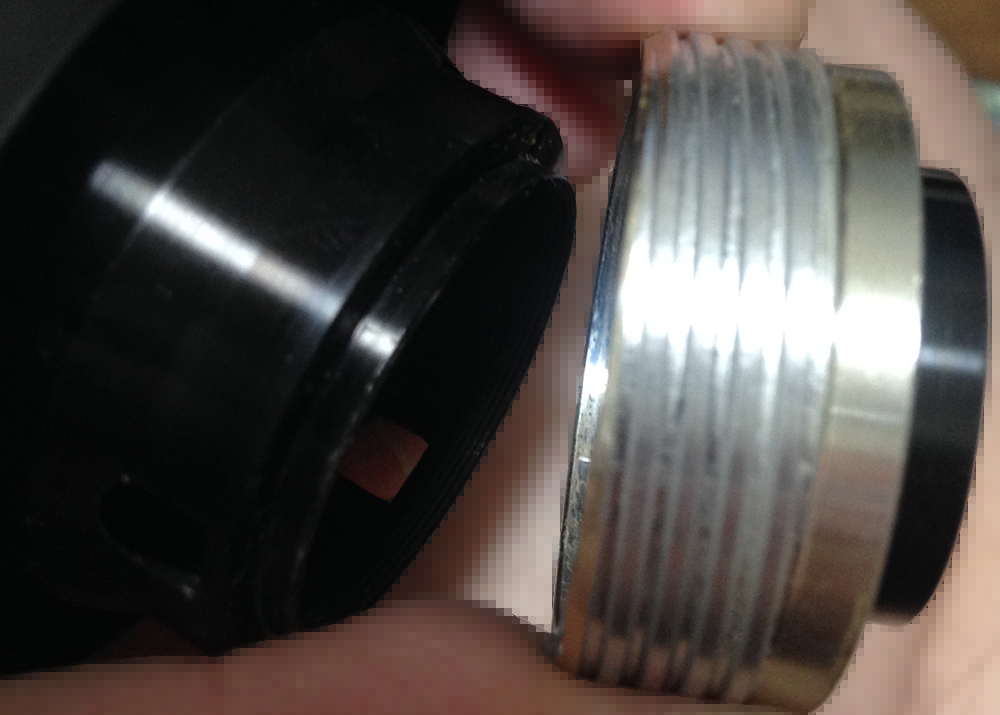
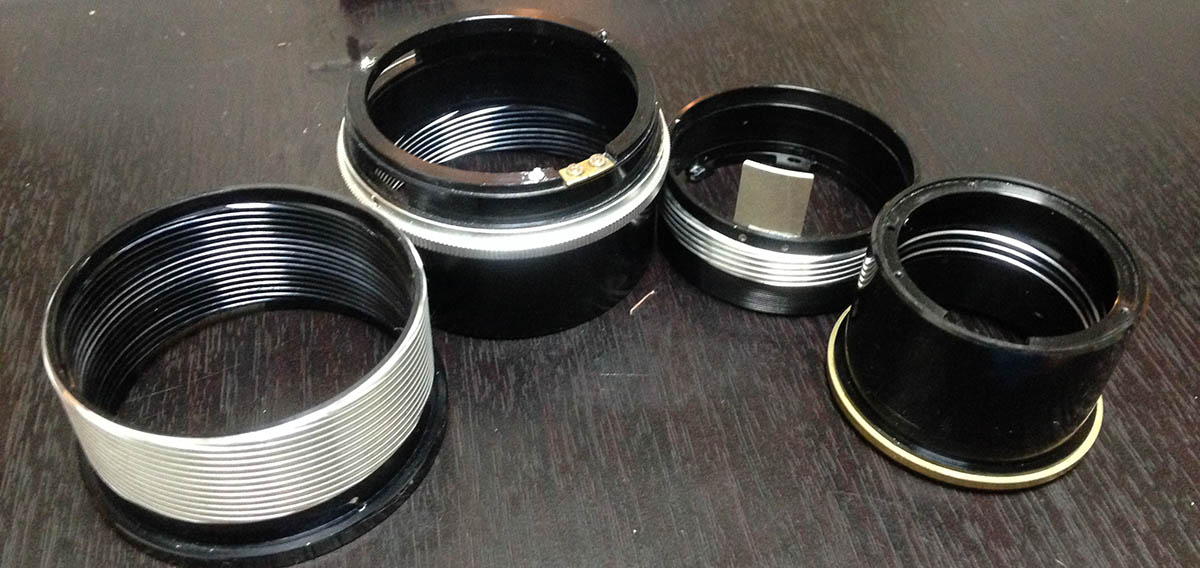
Extract these and remove the key to further dismantle the CRC mechanism.
Separate the helicoids of the CRC mechanism and don’t forget to mark their separation point since this is also the spot where they should mesh later. If you haven’t seen my article about working with helicoids, read that now.

Remove the CRC helicoid, note where the notch of the brass ring should be. You’ll have to align this perfectly later again. Your lens won’t focus properly if you get this wrong.
This is the most delicate part of the lens so you must document everything to help you reassemble it properly later. Clean the helicoids thoroughly, do not apply too much grease, only apply a thin film of fresh grease. Never use a heavy-type of grease for this, a thin application of a light-type of grease is all you’ll need. Never forget to clean the helicoids very well and don’t leave any residue on them before you apply your fresh grease.
Disassembly (Objective):
The optics are easy to take-apart, it’s simple and it only has a few parts. Do not forget to note the position of each element so you won’t put them back facing the wrong way.

Unscrew the baffle with a rubber tool to reveal the screws underneath it.
Carefully extract these to remove the larger baffle. Be careful not to scratch the front element.
Carefully remove the baffle.

The front optics assembly can be unscrewed but it’s sealed with lacquer at the factory. Place a drop of acetone to the threads to dissolve the seal. Note how deep the assembly is before you remove it so you will know how to put this back again later.

Carefully unscrew it off with a lens spanner once the seals are dissolved.

This retainer secures the front element. It’s usually sealed so a small drop of alcohol at the threads is needed to dissolve it.

The rear optics assembly is attached to the iris mechanism’s housing. Twist this to unscrew it off. It could be dismantled further by unscrewing a ring to remove the rear element.
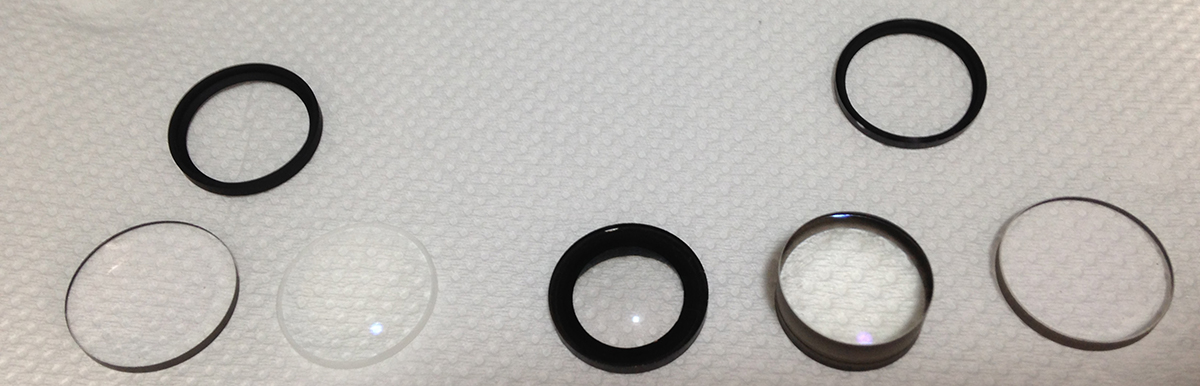
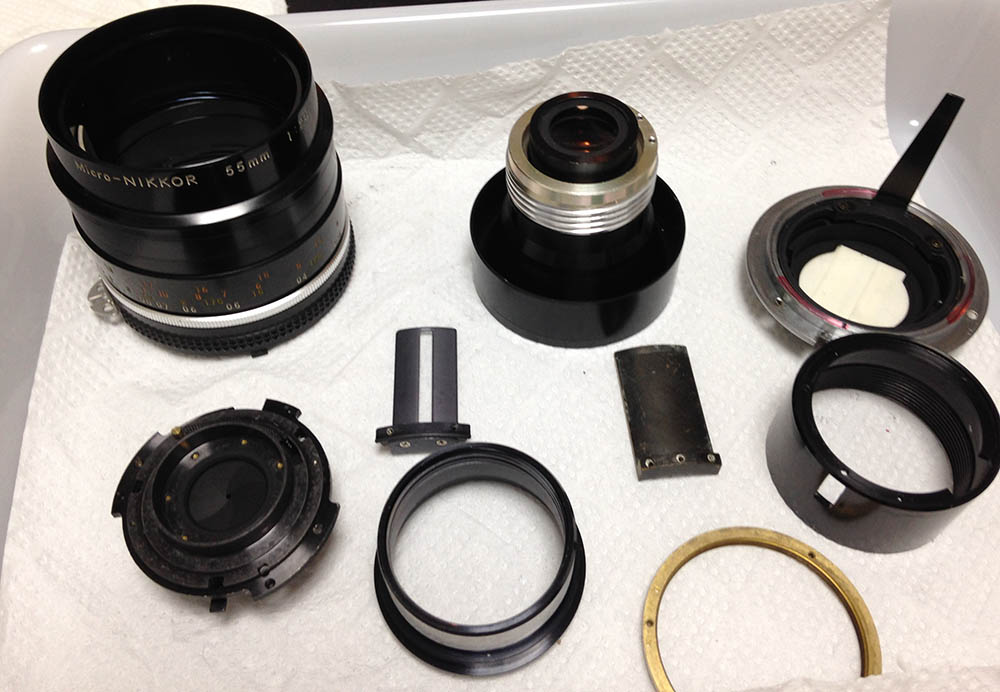
These are all of the groups laid-out in proper order. Don’t forget to mark the walls of the groups so you’ll know which way should be facing the front and also mark their order with a series of dots, too. I use a permanent marker to draw the small dots.
Clean the glass carefully. If your lens has fungus, read my article on how to clean lens fungus. Don’t use the solution at full-strength, thin it with distilled water. Don’t soak the elements in the solution for too long or it will dissolve the coatings. The cemented group is fragile so handle it with a lot of care.
Be careful when putting things back so you won’t put them back facing the wrong way and damage your lens. Note their order to prevent confusion.
Disassembly (Lens Barrel):
Dismantling the barrel is the easiest part, it’s not too-different compared to most lenses apart from the unusually-long helicoids. Take plenty of notes to help you reassemble it later.

Extract these to separate the aperture ring from its fork. These can be tough to extract so I heat these from behind before unscrewing them. These are a bit more delicate compared to other ones so take care not to snap them. You can remove the aperture ring once the screws are gone.

Remove the aperture fork. It couples the iris assembly to the aperture ring.

Extract these to remove the helicoid key. These are tough to remove so I use a torch to heat these from behind before I could remove them. These were secured with epoxy, I could tell by the smell it emits when heated.
You can remove the helicoid key once the screws are gone. It syncs the turn of all helicoids so turning the central one will extend-or-retract the barrel. It also keeps the helicoids together, preventing them from getting undone.

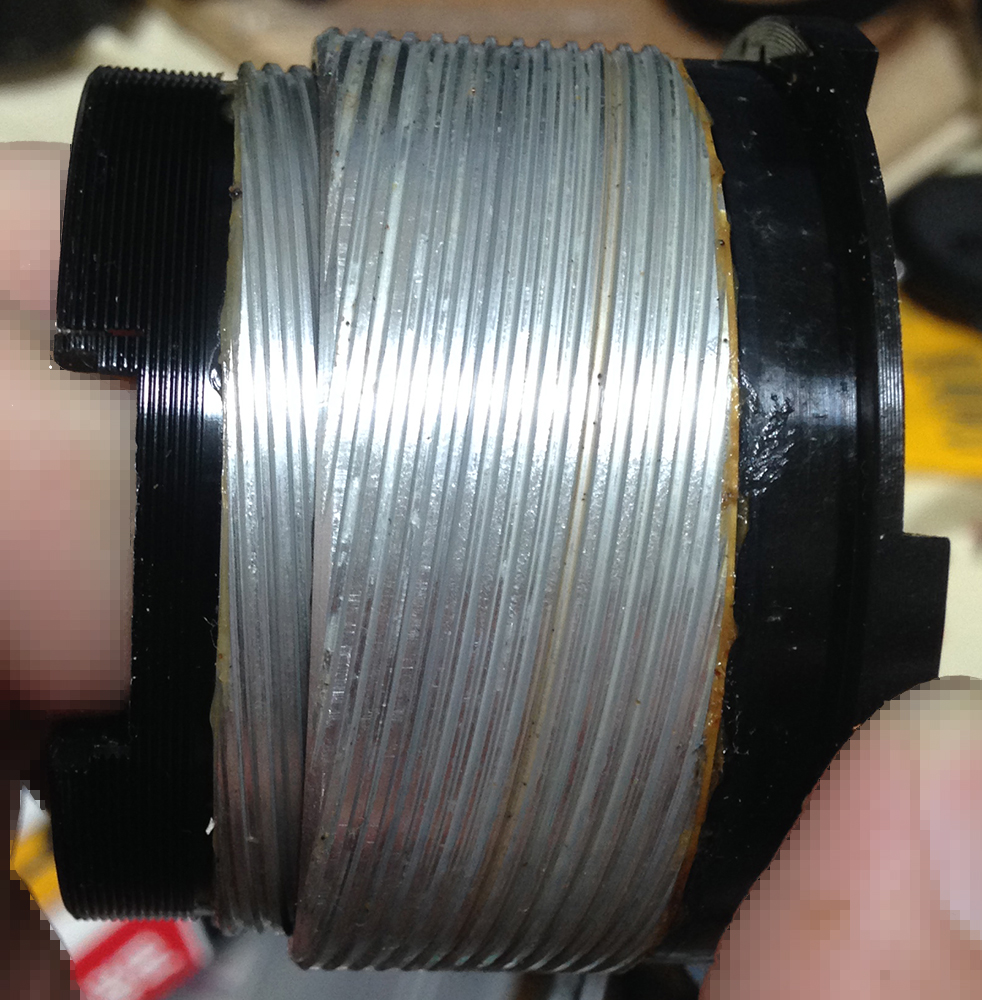
Separate the central helicoid from the outer one and never forget to make a small mark to know where they separated as they should mesh at the same spot, too. Many people forget to do this so they waste a lot of time guessing. Read my article on working with helicoids to prevent this from happening.
Mine separated at this point. If you removed the focusing ring before this, it is easier to mark where they parted. That is actually the ideal sequence for dismantling the barrel. I would’ve done it that way if this lens wasn’t seized.

Remove the rubber part of the focusing ring carefully and be careful not to tear it.

Unscrew the nose of the focusing ring. It may be sealed with lacquer so use alcohol to dissolve it. This is a thin part, be sure not to warp it or your lens won’t be able to focus smoothly.
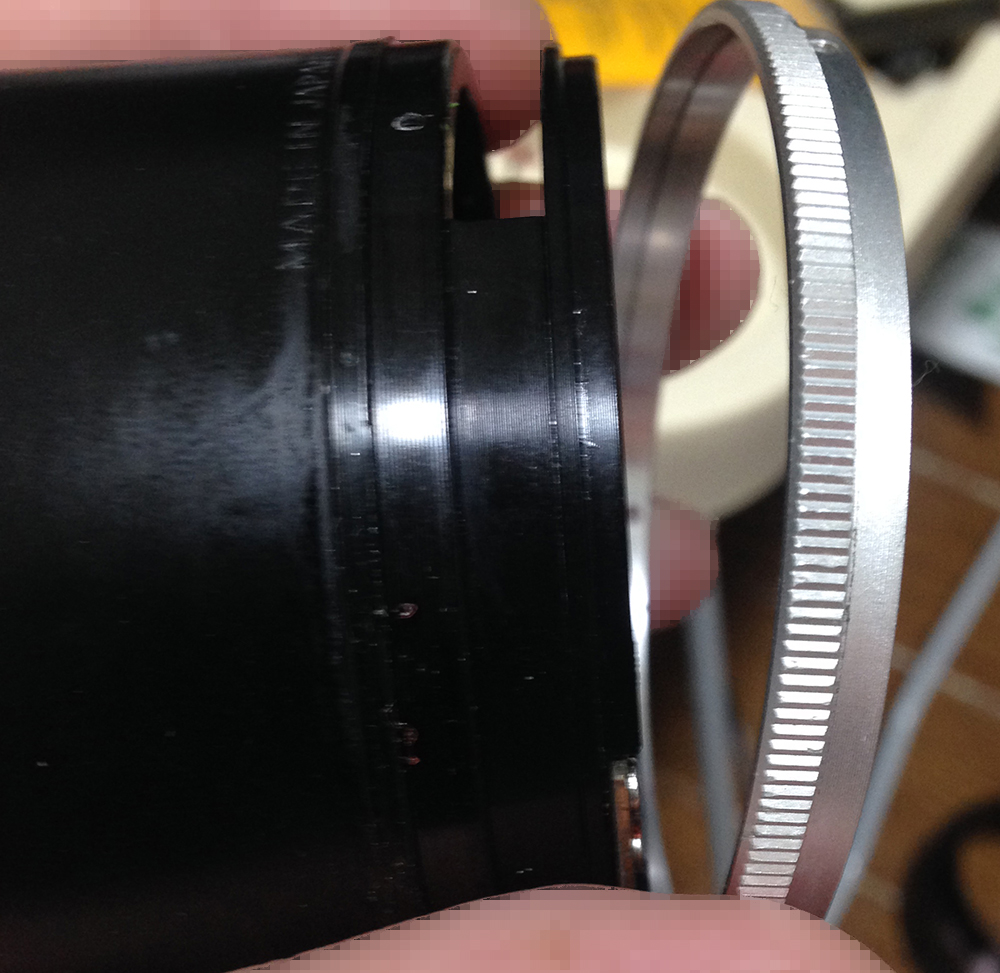
Extract these (smaller circle) to remove the focusing ring. The distance scale can be adjusted by loosening these. The series of 3 screws at the bottom are used to secure the helicoid stop, you adjust the focus by loosening these. It’s not necessary to remove them unless you want to disinfect this thoroughly. Be sure to mark its position carefully if you chose to remove it.

Remove the focusing ring.
Separate the inner helicoid and never forget to mark where it parted.
Extract the screws of the grip to remove it along with the sleeve. The sleeve can be difficult to remove at times since it’s glued to the barrel. Acetone will help you dissolve the seal and remove it safely. Germs and grease get stuck underneath it so it’s always a good idea to clean it thoroughly.
It’s now ready for a thorough cleaning.
Clean the parts thoroughly and don’t leave any residue. I scrub the helicoids with a strong detergent and pickle them in an alcohol bath to remove grime and other hardened gunk. Only apply a thin film of grease to the helicoids, I use something that is light since this lens has a long focus-throw. It has two sets of helicoids, one on the barrel and another one for the CRC mechanism so all that torque will add-up later when you turn the focusing ring. Do not apply too much grease or it will create a mess inside, it may migrate into its iris, too. Avoid lubricating anything that’s close to the iris mechanism. Only apply a very thin film to the slots of the helicoid keys for the barrel and the CRC mechanism, actually even less for the latter. Doing this will prevent the lens from squeaking when you turn the focusing ring.
Disassembly (Iris Mechanism):
This is easy to service, it’s the most-common issue with this lens along with the tendency to developed a seized focusing ring. I normally wouldn’t do it if I don’t have to clean the iris mechanism so I didn’t take mine apart. When a lens starts to develop an oily iris it’s time to overhaul the helicoids since it is the root of the problem, not doing it will just mask the root cause and it’s going to happen again in the future since the grease has already gone bad.
Watch this video to see how our buddy Kenneth does it. Like and subscribe to his channel, he has lots of interesting videos.

Clean the blades thoroughly with naphtha and lens tissue. Be careful when handling them, only handle them through their pins.

Secure both ends of the spring with a bit of lacquer.
Never lubricate the iris, it’s supposed to operate with any oil. Be sure that it is seated properly when you put it back. It’s adjustable, if you misaligned it you won’t get an accurate exposure with it since the aperture size is wrong.
Conclusion:
This lens always takes longer to overhaul properly compared to most lenses due to its complexity. I certainly wouldn’t recommend this to a beginner. Its internal mechanisms are complicated to dismantle, it’s even more tricky to put them back properly. One way to prevent the oily iris problem is to store it facing-up so gravity won’t allow the grease to migrate to the iris.
Make sure everything is clean and ready before you reassemble your lens.

Reassemble the everything by backtracking your steps but don’t reinstall its focusing ring yet so you could adjust its focus. Read my article on adjusting a lens’ focus so you’ll know how this is done in a DIY setting.

It’s now working perfectly. It feels so good to be able to rebuild a lens. I was able to save some money and use that instead to buy more film. I also saved the planet by recycling. This is what makes me happy.
Thanks for following my work, if you liked this article please share this with your friends so it will get more views. This site earns around $0.30 a day, it’s totally reliant on views. You can also support this site, it helps me offset the cost of maintenance and hosting. You are also helping me purchase, process and scan film. This site promotes the use of film so we’re all in this together. See you again in the next article, Ric.
Help Support this Blog:
Maintaining this blog requires money to operate. If you think that this site has helped you or you want to show your support by helping with the site’s upkeep, you can make a small donation to my paypal.com (richardHaw888@gmail.com). Money is not my prime motivation for this blog and I believe that I have enough to run this but you can help me make this site (and the companion facebook page) grow.
Buy me a roll of film or a burger?
$2.00
Helping support this site will ensure that this will be kept going as long as I have the time and energy for this. I would appreciate it if you just leave out your name or details like your country’s name or other information so that the donations will totally be anonymous. This is a labor of love and I intend to keep it that way for as long as I can. Ric.

Feb 23, 2016 @ 20:21:12
Again…………….excellent work Rick, much appreciated.
These lenses are well known for having helicoid issues………….mainly the grease solidifying over time.
This article has given me the encouragement I needed to pull my sample apart.
Feb 24, 2016 @ 02:54:21
Thanks! this is not difficult to be honest. a 55mm is probably one of the first lenses that i took apart. (1st one was a Sigma super 24mm from the 80s). I am thinking of adding some exotic lenses like the GN and the 5.5cm f/3.5 here because their engineering is just so different from what you usually see from Nikon!
May 10, 2016 @ 14:00:56
Excellent guide Rick. I just bought a cheap 55/2.8 with stuck iris so im about to follow your guide.
Thanks!
May 10, 2016 @ 14:09:36
Thanks, Angel! Just ask if you are stuck with this lens.
May 25, 2016 @ 11:31:06
Hi Richard, i just received the 55/2.8 and im gonna disassemble it this evening. At first sight the aperture cannot be fully closed. Also, the DOF pin is freely floating. Does it have а spring to keep it in position?
Jun 06, 2016 @ 18:23:59
Hi Richard,
I screwed this part “Next, to separate the helicoids, you have to first remove the helicoid key by removing the 3 screws that secure it to the lens chassis.” I removed one but the others are wasted. Not acetone nor soldering iron did the job, they are just completely stuck in place.
Jun 07, 2016 @ 01:22:19
Hello, Angel. Those screws are epoxied. Did you damage the screw head? What kind of screw driver were you using? If it is damaged, the only way to get that out is using a screw extractor. Read my essential tools and best practices posts as the screw extractor was discussed in detail there. These screws will sometimes snap, it happened to me on a few occasions because the metal has corroded.
Jun 07, 2016 @ 06:56:48
Yes, i damaged two screws completely. Im using the vessel’s but didnt help. They are just strongly glued and very old. Acetone and desoldering didnt help too. I’ve read about the screw extractor but cannot find such a small size (<2mm) even in ebay. Also, do you know the exact size of those 3 screws? I must replace them.
Thank you very much for your help!
Jun 07, 2016 @ 07:00:31
Hello, Angel. When removing these screws always use sufficient pressure. Sometimes, I would even use my elbow. Maybe for next time. The screw extractors can also be bought from ebay. Be sure you know how to use one. Ric.
https://www.google.co.jp/url?sa=i&rct=j&q=&esrc=s&source=images&cd=&cad=rja&uact=8&ved=0ahUKEwiRy_Xcq5XNAhWKm5QKHeruBskQjxwIAw&url=http%3A%2F%2Fwww.ebay.co.uk%2Fitm%2FY-SK11-screw-vent-bit-NO-4-set-from-Japan-new-%2F111759605626&bvm=bv.123664746,d.dGY&psig=AFQjCNFtKhiA-Tz6cj62FrxR4skI7hrQMg&ust=1465369175488355
or find something similar. SK11 screw extractor
Jun 09, 2016 @ 04:51:56
Hi Richard,
I finally extracted the screws. So the only <2mm extractor in the WORLD is that one in your link 😀 but its too expensive if i order it from Europe so i improvised. Second screw i removed using a torx bit and strong pressure http://imgur.com/9pPkwdw
The third was so stuck that the torx did nothing. I drilled its head. Now i have to find new screws the same size and step.
Thanks for the help!
Jun 09, 2016 @ 04:55:37
Oh, jesus. Well, so long as it is out. They are expensive becausenthey cone in a set hut they are very good. I might sell them too for cheap
Jun 09, 2016 @ 05:34:35
If you sell them for better price i will bw the first to buy 🙂 So send me an email when you decide to do it.
Thanks!
Jun 09, 2016 @ 06:44:56
Sure!
May 28, 2016 @ 14:07:31
Hello, Angel!
Sorry for the late reply. The aperture not closing may be a sign of oil in the aperture blades. I do not understand what you mean by the DOF pin.
May 28, 2016 @ 19:12:35
I meant the aperture lever but later i found that its normal on some versions. Today i tested it and this lens is wonderful!
May 29, 2016 @ 00:07:47
Hello, Angel.
I am not sure about that, it should spring back all the time when the lens is assembled. the lens is amazingly sharp. it is also very useful as a normal lens. Ric.
Aug 09, 2016 @ 16:51:58
Hi Richard, I went through you’re procedure and all is well but for one tiny thing that I can’t figure out. I removed the rear lens elements for cleaning but upon assembly, it looks as though the two elements touch each other when I tightened the outer retention ring. I didn’t notice this at first so it could have already been like this. Are there any shims or other spacers in the rear lens group besides the one you show? Thanks again for making tutorial, helped a bunch
Aug 10, 2016 @ 00:35:24
Hi! Sorry but I do not remember that part of the lens very well. Are you sure that what you heard is the apex of the lens coming in contact with each other? Or is it just the sides. be careful as you might break the glass. Ric.
Aug 10, 2016 @ 00:49:58
Hi Ric thanks, yes it is making contact. I can see a sort of spot forming right in the middle as I tighten the retention ring. If I leave the ring slightly loose, the center of the lens remains clear and the images I make are sharp. If I tighten the ring hand tight, the spit appears and images have a fuzzy look in the center. Guess I can save it as a paper weight. Thanks again.
Don
Aug 11, 2016 @ 13:58:30
Hi, sorry for the late reply. I am quite busy these days. You have to be careful as you may have the rear elements in the wrong order/direction. I am not sure but this is a very common mistake. Ric.
Jan 06, 2017 @ 11:38:50
Great article, thanks. Do you have a recommendation for lube for the outer main focus helicoid? I have a couple which have gone stiff (105 the same).
I’d better buy a screw extractor kit – insurance!
Jan 14, 2017 @ 14:06:21
Hello, Chris! Sorry for the late reply. I tend to use the same grease for the whole lens to avoid mixing the grease’s chemistry and foul up the helicoids as time goes by. I use a thin type of grease sparingly to prevent the grease from migrating into the iris. Ric.
Jul 30, 2017 @ 01:21:54
Hi Ric, Thanks for the good info. and good looking pictures. I wish I’d seen this site before I took my lens apart.I’d only found one for removing and cleaning the aperture.This aperture was fine but the focus ring took Superman to turn. So I disassembled to the aperture and then kept disassembling. But I marked nothing. (Live and Learn). I cleaned and greased lightly (using a silicone brake parts grease from an auto parts store). Now when I reassemble the two CRC components making up the front lens assembly (one R.H. threads, one L.H.), they turn nice and easy until I reinstall the piece held by two screws with projection on it that goes into a slot. The projection has a slotted screw in it. Then it locks up tight. Any suggestions? (I don’t know what anything’s called except what I’ve on this and one other post). Thank You, Mike
Jul 31, 2017 @ 08:20:52
Hello, Michael.
I am not sure what you really mean but if you read my article, I remember mentioning that I use a lighter grease for this lens because it has so many helicoids. Ric.
Jul 31, 2017 @ 19:28:52
Ric, Yes, I read that. This silicone grease and so little of it cannot be the problem. Even when everything’s clean and no grease it positively locks. Can I send pictures to show the problem? Mike
Sep 28, 2017 @ 17:41:08
Michael, I think you are referring to the cam follower on the CRC, if so it is meant have this apparent effect so that the front element group rotates internally causing it to move back and forth.
Oct 02, 2017 @ 02:55:13
Thanks Norman for the info. Fortunately I got this back together and working fine just last week. After weeks and an awful lot of deliberation and talking to myself (should I just toss it?, I wanna keep it – it’s so good, etc., etc.) Mostly from seeing pictures online. This site and others. Mike
Oct 04, 2017 @ 09:56:11
this lens is a keeper
Sep 28, 2017 @ 18:02:03
Richard, I noticed that the two screws holding the back and front of the aperture assembly together go through slotted holes and that, though its fiddly, this allows adjustment of the aperture at 2.8 so it is fully open on the click stop as opposed to being slightly closed and only fully open when the ring is moved slightly/fully past the click stop. Not important but interesting, maybe other lenses are similar.
Norman
Oct 01, 2017 @ 02:02:17
Yes, Norman. I adjust these sometimes depending on the lens. It is very common and many Nikkors have adjustments for that. Ric.
Nov 23, 2024 @ 12:03:06
I also recently noticed that the flat asymmetric screw that acts a locating stud for the optical block also provides a small aperture adjustment when rotated – the 3 securing screws (slackened) sit in oval slots to facilitate. Same on other lenses I’d guess.
Jun 05, 2018 @ 00:22:56
Richard,
Thank you very much for your great repair tutorials! I have a little different problem.
My 55mm F2.8 Micro Nikkor focuses to 30m, but not to infinity on my D300 when I manually focus to infinity. What steps should I take to fix it? The lube and iris are in great shape and do not need work. Thanks.
Bruce
Jun 21, 2018 @ 16:06:59
Hello.
I remember mentioning in the site that site for the 55/2.8 that the helicoids need to be reset properly. If you read and saw my video, I showed a way there for guessing where the helicoids should mate. The article also showed how to adjust the focusing scale of the lens. Ric.
Jul 29, 2018 @ 13:15:33
Hi Richard
I could revive one 55 mm aperture that was stuck easily because screws had already been removed.
I bought another one that has a very good aperture but focus was difficult . I regret I destroyed 2 of the 3 screws of the bayonet . Then tried to dril it and destroyed the bayonet !
So I can remount only 2 of the 3 screws. Do you know where I could find just the bayonet ?
Then internally several screws broke ( no chance)
So I bought a cheap new 55 mm in which Just the aperture is blocked.
Do you have any spare screwdrivers and screws before I made again stupid operations ?
Thanks
Regards from France
PHILIPPE
Aug 10, 2018 @ 11:37:50
Help
I received my Brand new screwdrivers from Vessel as advised in those tutos
But it is impossible to remove the 3 screws from the bayonet . I even tried to heat the screw with à solder iron to brake the epoxy .
Now the 3 screws are already destroyed … and I ca not put any torque
What the solution ? Destroy the screws with the risk again to let them in the body
Any other ?
In any cases I will need new screws
Please help
Regards
PHILIPPE q
Aug 16, 2018 @ 22:16:15
Hello Richard,
Thank you for sharing this very interesting article!
I have recently purchased a very nice copy of the Nikkor 55mm f2.8 Micro. Unfortunately there is some contaminent on the lens surface facing the aperture blades of the rear lens element group. Is it possible to remove the rear lens element group with i.e. a friction torque, without removing the bayonet?
Sep 03, 2018 @ 00:16:48
Hello!
Yes, you can in theory but I will not advise it unless you have special tools. There isnt much room to work inside that. Ric,
Mar 30, 2019 @ 11:21:57
Thank you very much for this great tutorial. I am being repaired from my 55mm. I totally dismounted it. No problem for the re-assembly of the diaphragm part but I am now stuck with the re-assembly of the parts of the focus ring. Do you have a little tutorial to help me? Thank you and sorry for my poor Englishman. Fabien
Oct 21, 2019 @ 08:15:43
Hi Richard,
Awesome article thanks. Bought a bunch of old Nikkors for a bargain but all had fungus and the 55mm Micro was also jambed on all the helicoids. Followed your procedure and managed to get it perfectly clean and functioning. Had a few issues fixing the objective to the body as the objective was moving okay till I fixed it in position. After 4 goes I then realised that I was clamping it hard on infinity. So slackened the screws, moved the focus a bit and retightened to the body and it works well. Bit of locking right on infinity but that is set okay. Did a test on a Sony Nex and I cannot believe just how good the clarity of the infinity shots from such a small lens. I need to do a better clean on the helicoids as still a bit sticky but it is a great result so far. Looking forward to using it on my old film Nikons. Cheers. Robin.
Sep 06, 2020 @ 12:59:00
Hello Richard,
Thanks for this article. It saved me and this AI 55 2.8 Micro lens.
As a first foray into the world of lens repair, I found your wealth of practical hints a priceless asset. I will augment your two dollar request with another ten. Have two cups of coffee!
I took the bayonet-screw comments seriously and went straight to using my ox-acetylene micro jeweler’s torch to heat them. That worked great. Your advice about Vessel screwdrivers is spot on. They are a total pleasure to use, and I had no problems with screws whatever.
Perhaps you should mention somewhere that the word helicoid starts with “hell”.
Also, if I had followed your advice about copious notes I could have saved about an hour of time during re-assembly.
I have a new appreciation for Nikon and I am loving using this lens. Thanks again.
Apr 15, 2026 @ 10:39:34
Hei! I believe you circled the wrong screws that hold the aperture group, the holes circled in green are from the screws holding the whole “objective” group (one of them is also hidden by the same lever). I can send an image showing the diaphragm screws if you want 🙂
Anyways, I can’t emphasize it enough, but thank you so much for the work you’re doing here, your website is really the best ressource I found around alongside with Mikeno’s videos.