Hello, everybody! I’m now down with the flu so I’m going to keep this brief. I am usually resistant to sickness but lately stress from work has been getting to me so that probably affected my resistances somewhat. I’m feeling a lot better now but I will need to take the doctor’s recommended rest period of 5 days. After that, I’ll assure you that I’ll be back to my usual health and even better, I will practice kung fu again this coming spring so that my body will regain my old resilience to sickness. This is a tale of redemption for me and this also happens with lenses so read on!
Introduction:
Today’s topic is about a lens that many would consider fit for nothing but parts due to its heavy fungal infection but I will show you that almost nothing is not worth a try as far as old Nikkors are concerned! Ladies and gentlemen, may I introduce to you this little gem, the Zoom-Nikkor 43-86 f/3.5 Ai lens!
It looks really great on a camera of the same vintage, don’t you think it looks sexy on this Nikon F3HP? I love the Nikon F3 and for me, this is the best manual SLR ever made. You may have heard about this lens and read reviews about it. Some people will claim that it is useless due to a variety of reasons such as optical performance and ergonomics as well as the unfortunate pedigree of being part of the 43-86 family. There are some lens review writers on the net and they gave the Zoom-Nikkor-Auto 43-86mm f/3.5a bad name. Sure, I won’t deny that the Zoom-Nikkor-Auto 43-86mm f/3.5sucks but you’ll have to put things in context and then you will realize how good that lens really is and what it stood for. It’s the first zoom lens that was made affordably with a lot of compromises due to the time it was made but it’s a decent performer then. This lens redeemed the 43-86 family because its optical performace is quite good for its time and category. For a cheap lens that came with many cameras in a kit, this lens sure is a decent performer with no compromise in build quality. I will show you some samples here to back-up my claim but please do not set your expectations too high and remember that this is a cheap zoom lens thats made to give the economically-challenged photographer a zoom lens that they can use for fun and work. Yes, you heard me right – I said work. For some pros who can’t afford much, it was all they had and it sure help paid the bills!
Hello, everybody! I’m craving for some doughnuts today. I like them a lot, it can be eaten with breakfast, lunch or dinner. They can also be served from the simplest of settings up to the fancier presentations that can be found at the expensive restaurants. They also come in many different flavors, too. If you don’t prefer sweets like me, you can just enjoy the plain and un-glazed version which I consider to be the best because it’s the most versatile. I love that version a lot and I judge a shop by how delicious their plane version is. If you can’t make one the right way then there’s no point masking the taste with other flavors. Speaking about the basics and versatility, I’ll show you a lens today that’s the pinnacle of simplicity and and it does the basics right. It’s so good at the latter that it was used as the lens to judge other lenses in terms of sharpness. Its versatility cannot be denied and it does everything really well. Let me present to you one of the best Nikkors ever made.
Introduction:
The Micro-Nikkor-P 55mm f/3.5 Auto is one of the most influential Nikkors. It was so successful that it influenced a lot of copy-cats from other brands and its legacy still lasts to this day in the AF-S Micro NIKKOR 60mm f/2.8G ED. It’s one of Nikon’s best contributions to the photography world since it turned a specialized lens into something that you can use regularly for taking almost everything thanks to its practical design. Its predecessor is the Micro-Nikkor 5.5cm f/3.5 which is exceptional in its own right but its use is limited due to its quirky handling. It does not have an automatic iris but it can focus down to 1:1 magnification but it’s tricky to use outside of its own field and you’ll have to make a lot of compromises. It can’t be coupled to a camera’s meter, too. These were addressed by the Micro-Nikkor-P 55mm f/3.5 Auto. It turned it into a more useful lens but it lost the ability to focus down to 1:1. This was remedied by the included M-ring that’s sold with it as a kit. It’s just a simple extension tube but it allows the lens to be coupled to the camera’s meter. Its length is enough to get you down to 1:1 so you don’t lose anything with this new setup so long as you have the M-ring with you.
The build is perfect, it can withstand the tortures of professional use. It can last for generations so long as you maintain it properly. It’s so simple that it can’t get broken in the field so long as you keep it clean. Its core design did not change much from its debut in 1963 to its last version that came out in 1979. Even the Micro-Nikkor 55mm f/2.8 Ai-S which is still being made today didn’t deviate much from this design. The design lasted the test of time and I don’t see any point in changing it because simplicity akin reliability. More
Hello, everybody! I am getting kind of addicted to boba tea or tapioca as the thing is called here. It’s refreshing and it reminds me of home. It’s also kind of expensive at about $5 a cup. This makes it profitable for the vendors and even the mobsters are into this according to news, which isn’t a bad thing at all because it’s an honest way to make money. It’s not cheap at all but there is a way for you to save money and that’s to make them yourself. They won’t need any special equipment at all and all you have to do is buy the required ingredients and follow a recipe. This will save you roughly $4 a cup because the ingredients are quite cheap. Today, I’m going to show you a way to save money on lenses so long as you’re fine with a little bit of hassle. It’s not the best when it comes to comfort but its performance-to-price ratio is going to make a lot of cheap photographers happy.
Introduction:
The Nikkor-Q 20cm f/4 Auto is a historically-significant lens. It made the SLR the best system to use for shooting with telephoto lenses because of its size which for its time was considered to be really compact for such a long lens. It gave the F-mount a big boost in prestige because of its performance. This lens can be seen being used by newsmen during the Vietnam War due to its ruggedness and sharp pictures. These were also favorites of sports shooters and nature photographers alike because they’re compact and you can shoot with it without the need for a tripod.
The earliest version of this lens debuted in 1961 to compliment the Nikon F and its growing collection of telephoto lenses. It’s a very old design but it’s a good one because it’s still quite nice today despite the fact that better lenses are available to us now and they have the advantage of using better coating technologies, autofocus and other refinements.
Hello, everybody! I often see people talk about how blemishes on a lens won’t affect the resulting photos. This is often mentioned by sellers as a pitch in order to sell something for a better price or assure the buyer that the item works. It’s not totally true that these won’t affect your photos, it may seem like it but there are certain conditions that will trigger any artifacts resulting from a lens having a single or multiple elements having less-than-perfect condition. Let’s study a few photos that I have here so you’ll know these blemishes will affect your phots and from what means.
Dirty Bokeh:
Some damages that are too feint to see with the naked eye without using the help of a light source such as a torch can fool you into thinking that nothing is wrong with a lens but this simple bokeh test can help you determine if the lens is still fine or not. This test only works in the dark so I do this at night or inside a dark room.
First, focus your lens to it’s minimum focusing distance, stand 1.5m-2m away from some point lights or any bright light sources. This also works on light sources that are distant like street lamps 60m meters away from you. So long as you could produce clean and clear bokeh discs you are on the right track.
Second, set the iris wide-open then set your exposure settings so that you’ll get a nice picture with clear bokeh discs, ISO400 at 1/250s usually works for me. The key to this is to underexpose the bokeh discs a bit so that things will show up.
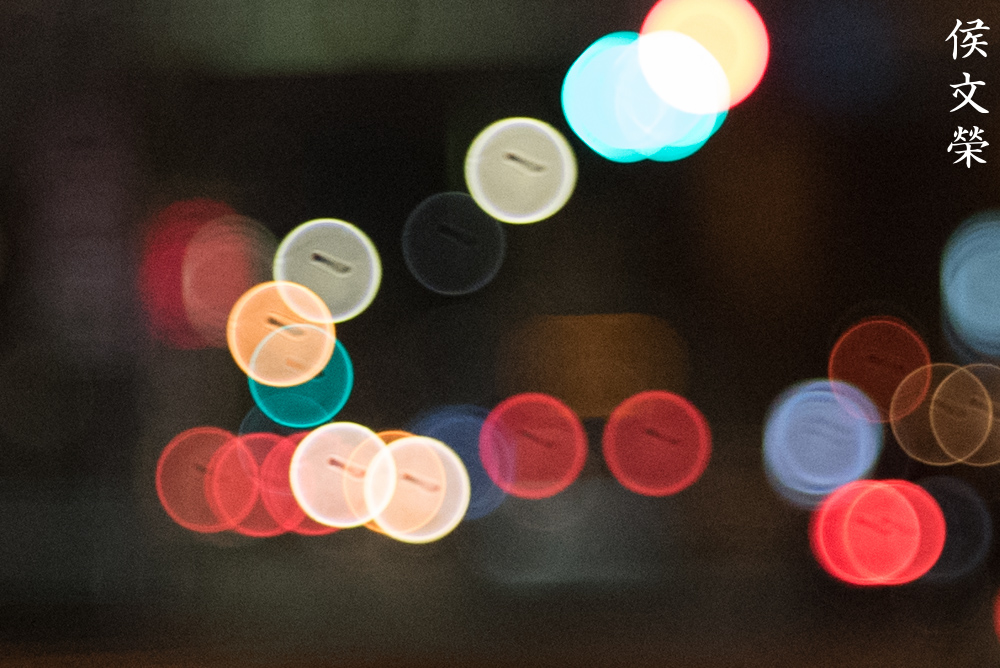
Examine your pictures and zoom into the discs to look for artifacts. The following images show a few examples of bad bokeh from some of the lenses that I’ve encountered.
Dirt or a bad scratch can cause these to appear. Depending on the cause, this can easily be corrected with cleaning in case of dirt or having a professional re-polish the problem element for you and recoat it after. This particular lens looks immaculately clean but as you can see from the picture above, it produces these lines. It may be caused by the cement deteriorating, this is known as balsam separation.
Hello, everybody! Sorry for skipping the past couple of weeks as I was busy with work. It was a very unremarkable month and all I did was work work and work. Couple that with a cold front and you get a very lazy and tired me. Apart from people messaging me that they saw my name in the latest Final Fantasy credits, this month passed on unremarkably and I would like to continue on that tangent by talking about an unremarkable lens today.
Introduction:
Today, we’ll be talking about the Nikkor 50mm f/2K (New-Nikkor) lens! I was busy in the past few weeks and I cannot decide on which lens I should make a teardown of so I made a poll and this one got the 2nd highest vote. It was such a boring month anyway and it’s just fitting that I make a teardown of a boring (but excellent) lens.
The New-Nikkor 50mm f/2 feels heavy and well-built. This feels pleasant in the hands so I would sometimes use this lens just for the heck of it. It has the right heft and balances so well on all cameras without a built-in motor drive/grip. More
Hello, everybody! I am down with a cold and I had to work yesterday (Saturday) so I do not have much time to update this blog but this morning, I found that somebody donated to the upkeep of this blog and that gave me the will to write this down. Whoever you are, thank you very much for the encouragement! It will be a short one this time. The usual lens tear-downs require around 2-3 nights to write but this should be easier.
Introduction:
We are going to look into a common (and expensive) item for the Nikon F2 camera today – the Nikon DE-1 Eye level finder!
This is just a standard finder for the Nikon F2 camera. It is really the cheapest option that you could buy back in the days because it is unmetered but since people wanted the ones with the built-in meters for obvious reasons so this one was made is smaller quantities. As time goes by, these finders age and degrade and the prism don’t hold up very well so good ones end up being expensive. The ones that have bad prisms still fetch a nice sum, I think that the cause of this artificial price is collectors. I do not remember these being sold at the current prices 4-5 years ago. More
Hello, everybody. I am kind of busy today so I will not be making any posts about repairs or anything. I would just like to show you an old image that I have here that I found in my old folders and thought that this would make for a nice discussion piece.
What you are seeing here is the front element of the Sigma 50mm f/1.4 DG HSM “ART” lens. I really liked this lens a lot and cannot find any crippling faults with it but one thing that’s a big issue with this lens has always been the lack of weather sealing. More
Hello, everybody! It is the middle of autumn but the trees here in have not reached their peak autumn colors yet. This is starting to get frustrating for me because this is the only time of the year that I can justify shooting with FujifilmVelvia. Autumn is about the time I use my wide lenses for landscape photography and I will show you one of my favorite lenses for shooting the gorgeous colors of autumn.
Introduction:
The Nikkor 28mm f/3.5 Ai-S is one of Nikon’s cheaper but better-performing wide-angle lenses, you’ll want to shoot with it as soon as you see what this little thing could do. It was made from 1981 up until 1989 and it’s the last of the beloved 28/3.5 family that started in 1960 with the Nikkor-H•C 28m f/3.5 Auto. For many, these represent a time when lens speed isn’t the only thing that mattered but what a lens could do despite not having a fast maximum aperture value. People back then were less-concerned with the charts than they are today so these sold really well. These were loved for their value, a good ratio of price-over-performance that’s hard to beat. These aren’t really dirt-cheap when they were new but they’re certainly cheaper compared to their faster siblings and that meant a lot for some people.
The 28mm focal length is one of my favorites and I own many 28mm lenses. Here’s the Nikkor 28mm f/3.5 Ai-S with a Micro-Nikkor 55mm f/2.8 Ai-S. They make for a good setup for general photography since they compliment each other well in terms of focal length and use. You can take plenty of beautiful pictures with just these lenses and make a whole career out of them.
Hello, my friends and readers! It is getting really cold these days and I am getting lazier to do even the most basic of tasks and prefer to just hide under the thick blanket. I was really thinking of skipping this week’s post but I saw people clicking on my site just to see if any posts got published and this gave me the strength to write this. My readers usually come from Indonesia, Philippines and the EU and for you, I will dedicate this week’s post.
Introduction:
Last time, we talked about the marvellous Nikkor-O 35mm f/2 lens. I also mentioned that I got the lens from the junker and that the middle element had some cosmetic problems but since it was being sold for an agreeable price and the problem doesn’t affect the images it makes then it was a fair purchase for me.
Here is a closer look of the lens element that is going to be the topic of this week’s article. I am sure that some of you guys have seen this and wonder what this is and how do these affect the lens and the images it captures.
It’s starting to get really cold now, so cold that sitting on the wooden floor of my workshop makes my ass numb after a few minutes and we’re still at the early weeks of Autumn! The sun now sets at around 4:30PM and it gets dark around 5:00PM so taking photos during the night is fast becoming one of my primary considerations as far as making a choice as to which lens I should bring for the day. Today, I’ll show you one of the lenses that I love to use for taking photos in dark situations. It’s not the fastest lens available to me but I like it because of its practical specs. It’s an old lens that’s still useful today, it can be bought for not a lot of money these days so it’s a good choice for the cheap photographer.
Introduction:
Today’s lens is the amazing Nikkor-O 35mm f/2! This was introduced back in 1966, it was Nikon’s fastest 35mm lens for a few years until the even faster Nikkor-N 35mm f/1.4Auto was introduced in 1970. Not only was this fast at f/2, the minimum focus distance is also very short at just 0.35m. This allows for really close focusing and combine it with the shallow depth-of-field that an f/2 lens would give you wide-open and you can get creative with its use. I love how practical it is for both day-time and night photography and people throughout the decades swore by its utility so this is certainly one of Nikon’s more popular lenses.
The Nikkor-O 35mm f/2Auto is rather big for a smaller Nikkor prime but not so big as to make it look and feel unbalanced. It is common knowledge that this lens was rather difficult to manufacture for its time because it is a bit complicated but this design stood the test of time, the optical formula stayed for quite some time until the advent of the AF model lens and that says a lot.
Help support this site by donating to richardHaw888@gmail.com over at Paypal! If you want to buy me a beer or a roll of film then that would be great,too!

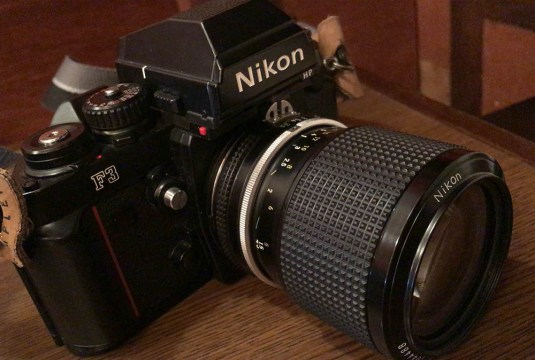 It looks really great on a camera of the same vintage, don’t you think it looks sexy on this Nikon F3HP? I love the Nikon F3 and for me, this is the best manual SLR ever made. You may have heard about this lens and read reviews about it. Some people will claim that it is useless due to a variety of reasons such as optical performance and ergonomics as well as the unfortunate pedigree of being part of the 43-86 family. There are some lens review writers on the net and they gave the Zoom-Nikkor-Auto 43-86mm f/3.5 a bad name. Sure, I won’t deny that the Zoom-Nikkor-Auto 43-86mm f/3.5 sucks but you’ll have to put things in context and then you will realize how good that lens really is and what it stood for. It’s the first zoom lens that was made affordably with a lot of compromises due to the time it was made but it’s a decent performer then. This lens redeemed the 43-86 family because its optical performace is quite good for its time and category. For a cheap lens that came with many cameras in a kit, this lens sure is a decent performer with no compromise in build quality. I will show you some samples here to back-up my claim but please do not set your expectations too high and remember that this is a cheap zoom lens thats made to give the economically-challenged photographer a zoom lens that they can use for fun and work. Yes, you heard me right – I said work. For some pros who can’t afford much, it was all they had and it sure help paid the bills!
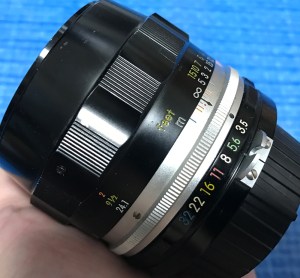 The build is perfect, it can withstand the tortures of professional use. It can last for generations so long as you maintain it properly. It’s so simple that it can’t get broken in the field so long as you keep it clean. Its core design did not change much from its debut in 1963 to its last version that came out in 1979. Even the

 This is just a standard finder for the Nikon F2 camera. It is really the cheapest option that you could buy back in the days because it is unmetered but since people wanted the ones with the built-in meters for obvious reasons so this one was made is smaller quantities. As time goes by, these finders age and degrade and the prism don’t hold up very well so good ones end up being expensive. The ones that have bad prisms still fetch a nice sum, I think that the cause of this artificial price is collectors. I do not remember these being sold at the current prices 4-5 years ago.
 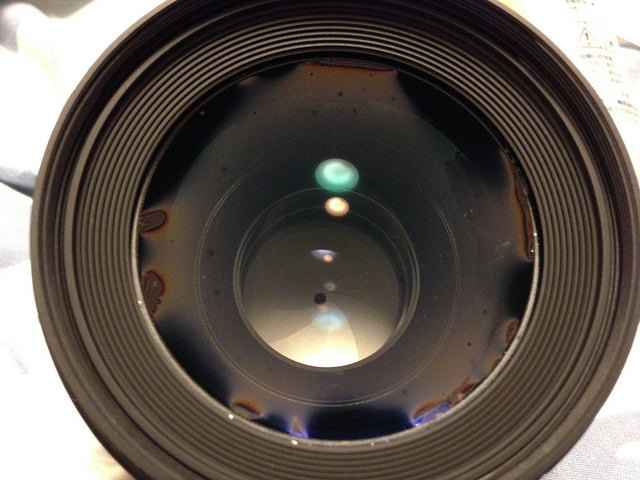 What you are seeing here is the front element of the Sigma 50mm f/1.4 DG HSM “ART” lens. I really liked this lens a lot and cannot find any crippling faults with it but one thing that’s a big issue with this lens has always been the lack of weather sealing.
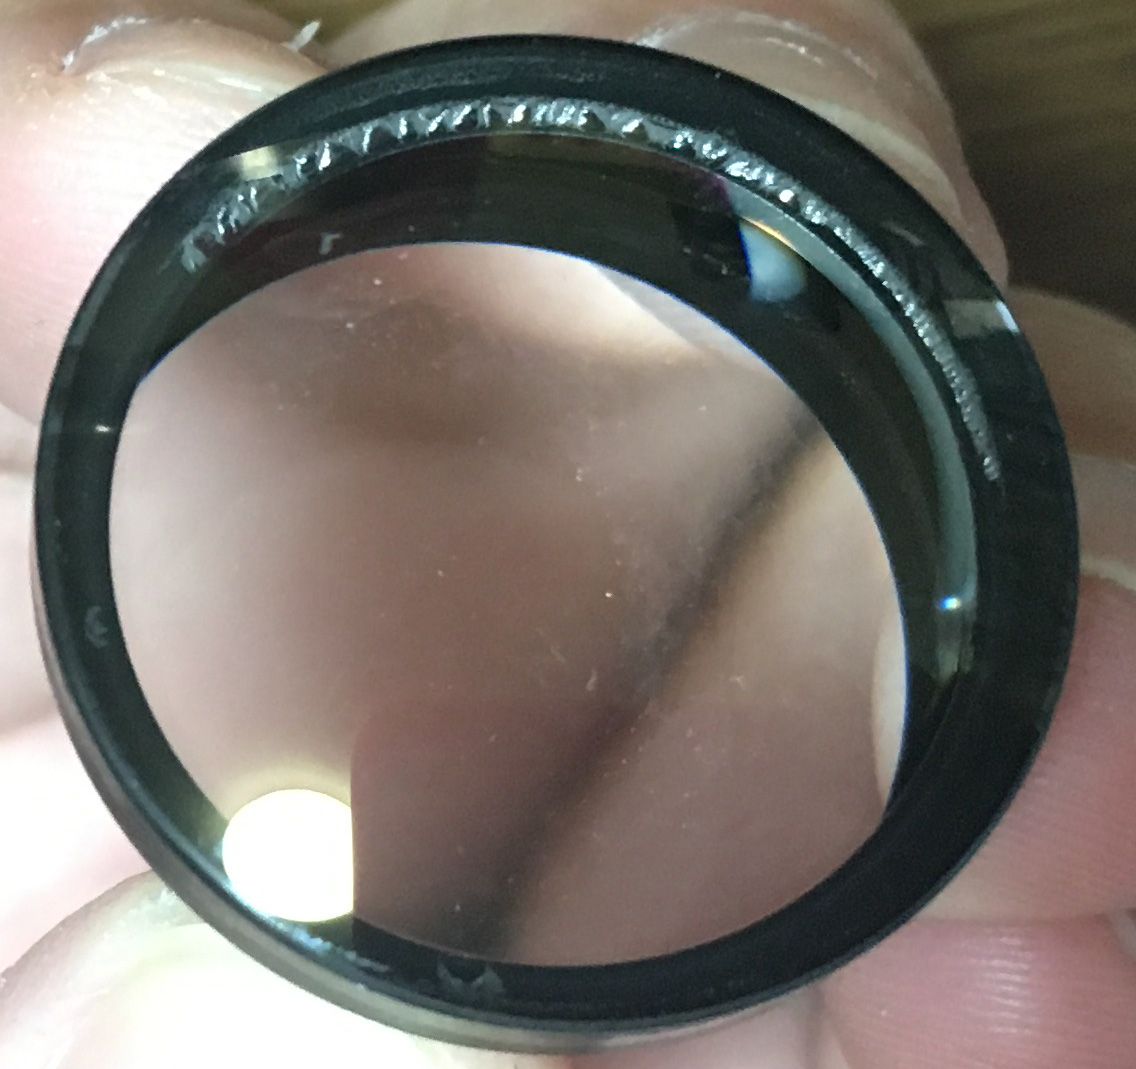 Here is a closer look of the lens element that is going to be the topic of this week’s article. I am sure that some of you guys have seen this and wonder what this is and how do these affect the lens and the images it captures.
 Richard Haw's Classic Nikon Repair and Review