
Hello, everybody! I was a bit busy with a wedding yesterday as photographer#2 so I did not have the time to prepare for a complete article. I decided to write something else instead. It dawned to me that in order to keep this blog alive, I should not post a repair article every week because I will quickly run out of items to write about! A balance has to be struck so I will write filler posts like this in between the repair articles. I hope that you don’t mind.
Introduction:
I have some people ask me about how to deal with fungus. This is also a niche topic that is not commonly discussed and even if you have found some information it is usually vague or false, so you will have to do your own tests. For this reason, I will share with you my fungus removal techniques. This is something that I have been doing to any lens that I bought that has fungus. It has worked so far and the lenses stay clean and clear.
Fungus in a lens is something that all photographers try to avoid as much as possible. It’s something that is impossible to avoid because fungus spores are everywhere, from the air we breath to every surface that we touch. The only way to keep this from happening is to not provide them any chance to germinate by depriving them of nutrients and other essentials for them to thrive.
The spores are microscopic so what you’re seeing are just the tendrils. These tendrils spread out to gather nutrients back to the fungal growth. It dies when the source of the nutrients have been exhausted, leaving behind the etchings made by the tendrils. When the fungus has not exhausted the nutrient source before it expires, it is going to spore the next generation, and so the cycle goes on.
Factors that promote fungal growth are:
- Lack of direct sunlight
- A source of nutrients
- Humidity
The nutrients can come from a multitude of sources, from the minerals used on the glass to contaminants like finger oils, dead organic material and organic fibers. These are impossible to avoid, some even come with the lens itself. Trying to prevent these foreign objects from settling inside your lens is futile. While we are on the topic, it is important to note that different species of fungus will thrive on different conditions. What you are seeing may be a mix of multiple species.
Humidity is also something that is impossible to avoid, one way to get it and other foreign contaminants into your lens is by cleaning them. By rubbing the lens’ surface or blowing air to it, you’re leaving behind particles and humidity on the surface and if the burst of air is strong enough, you may deposit these even further into the inner corners of the lens. Zooming pumps air in-and-out of a lens, it is also unavoidable.
Finally, storing your lens inside a dark place or cabinet for a long time without any preventative measures will give the fungus a great environment to thrive. Fungus hates light, especially sunlight.
Specimen:
I will now show you some of the worst cases that I have handled. These are disgusting and I would never buy anything like this unless it’s really cheap. Damage like this does not occur overnight as far as I know and these specimens are indicating that these were left in a dark and damp place over a period of months to years (even decades) as far as the climate of Eastern Japan is concerned.
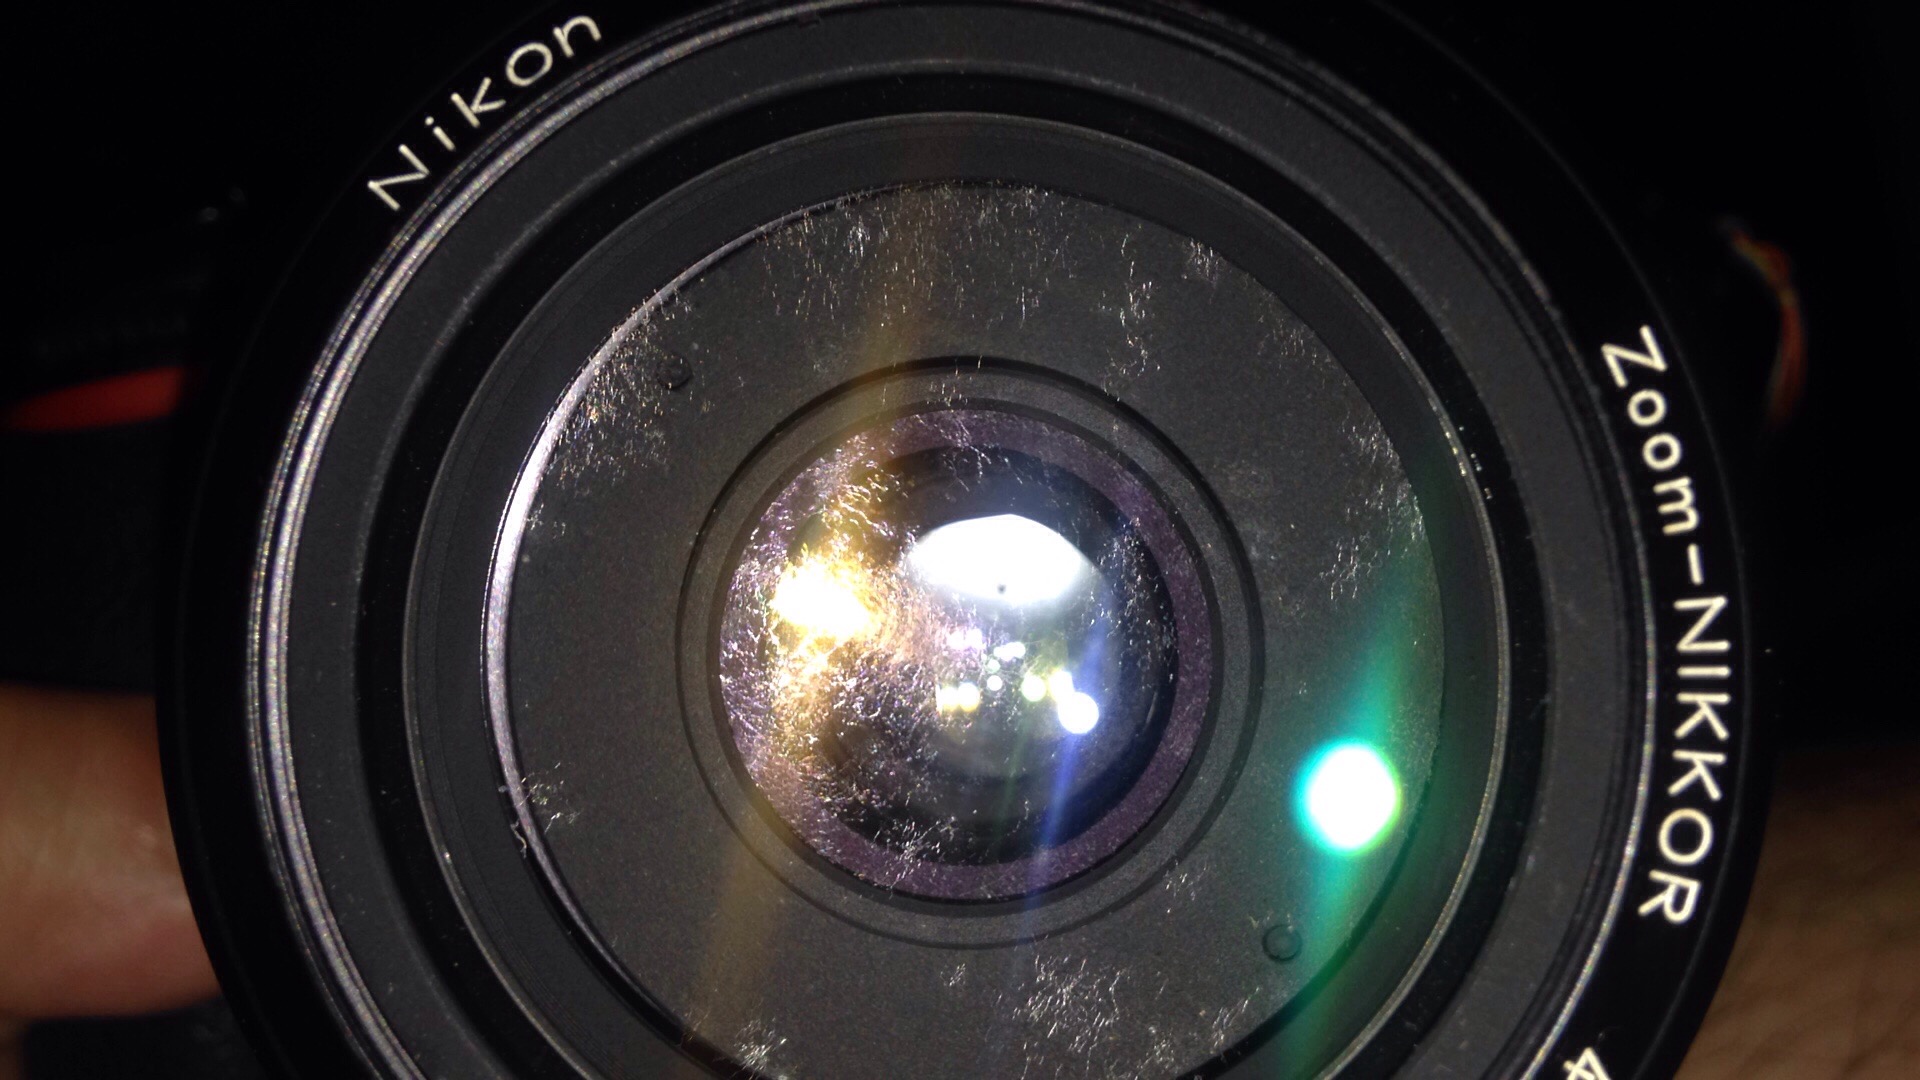
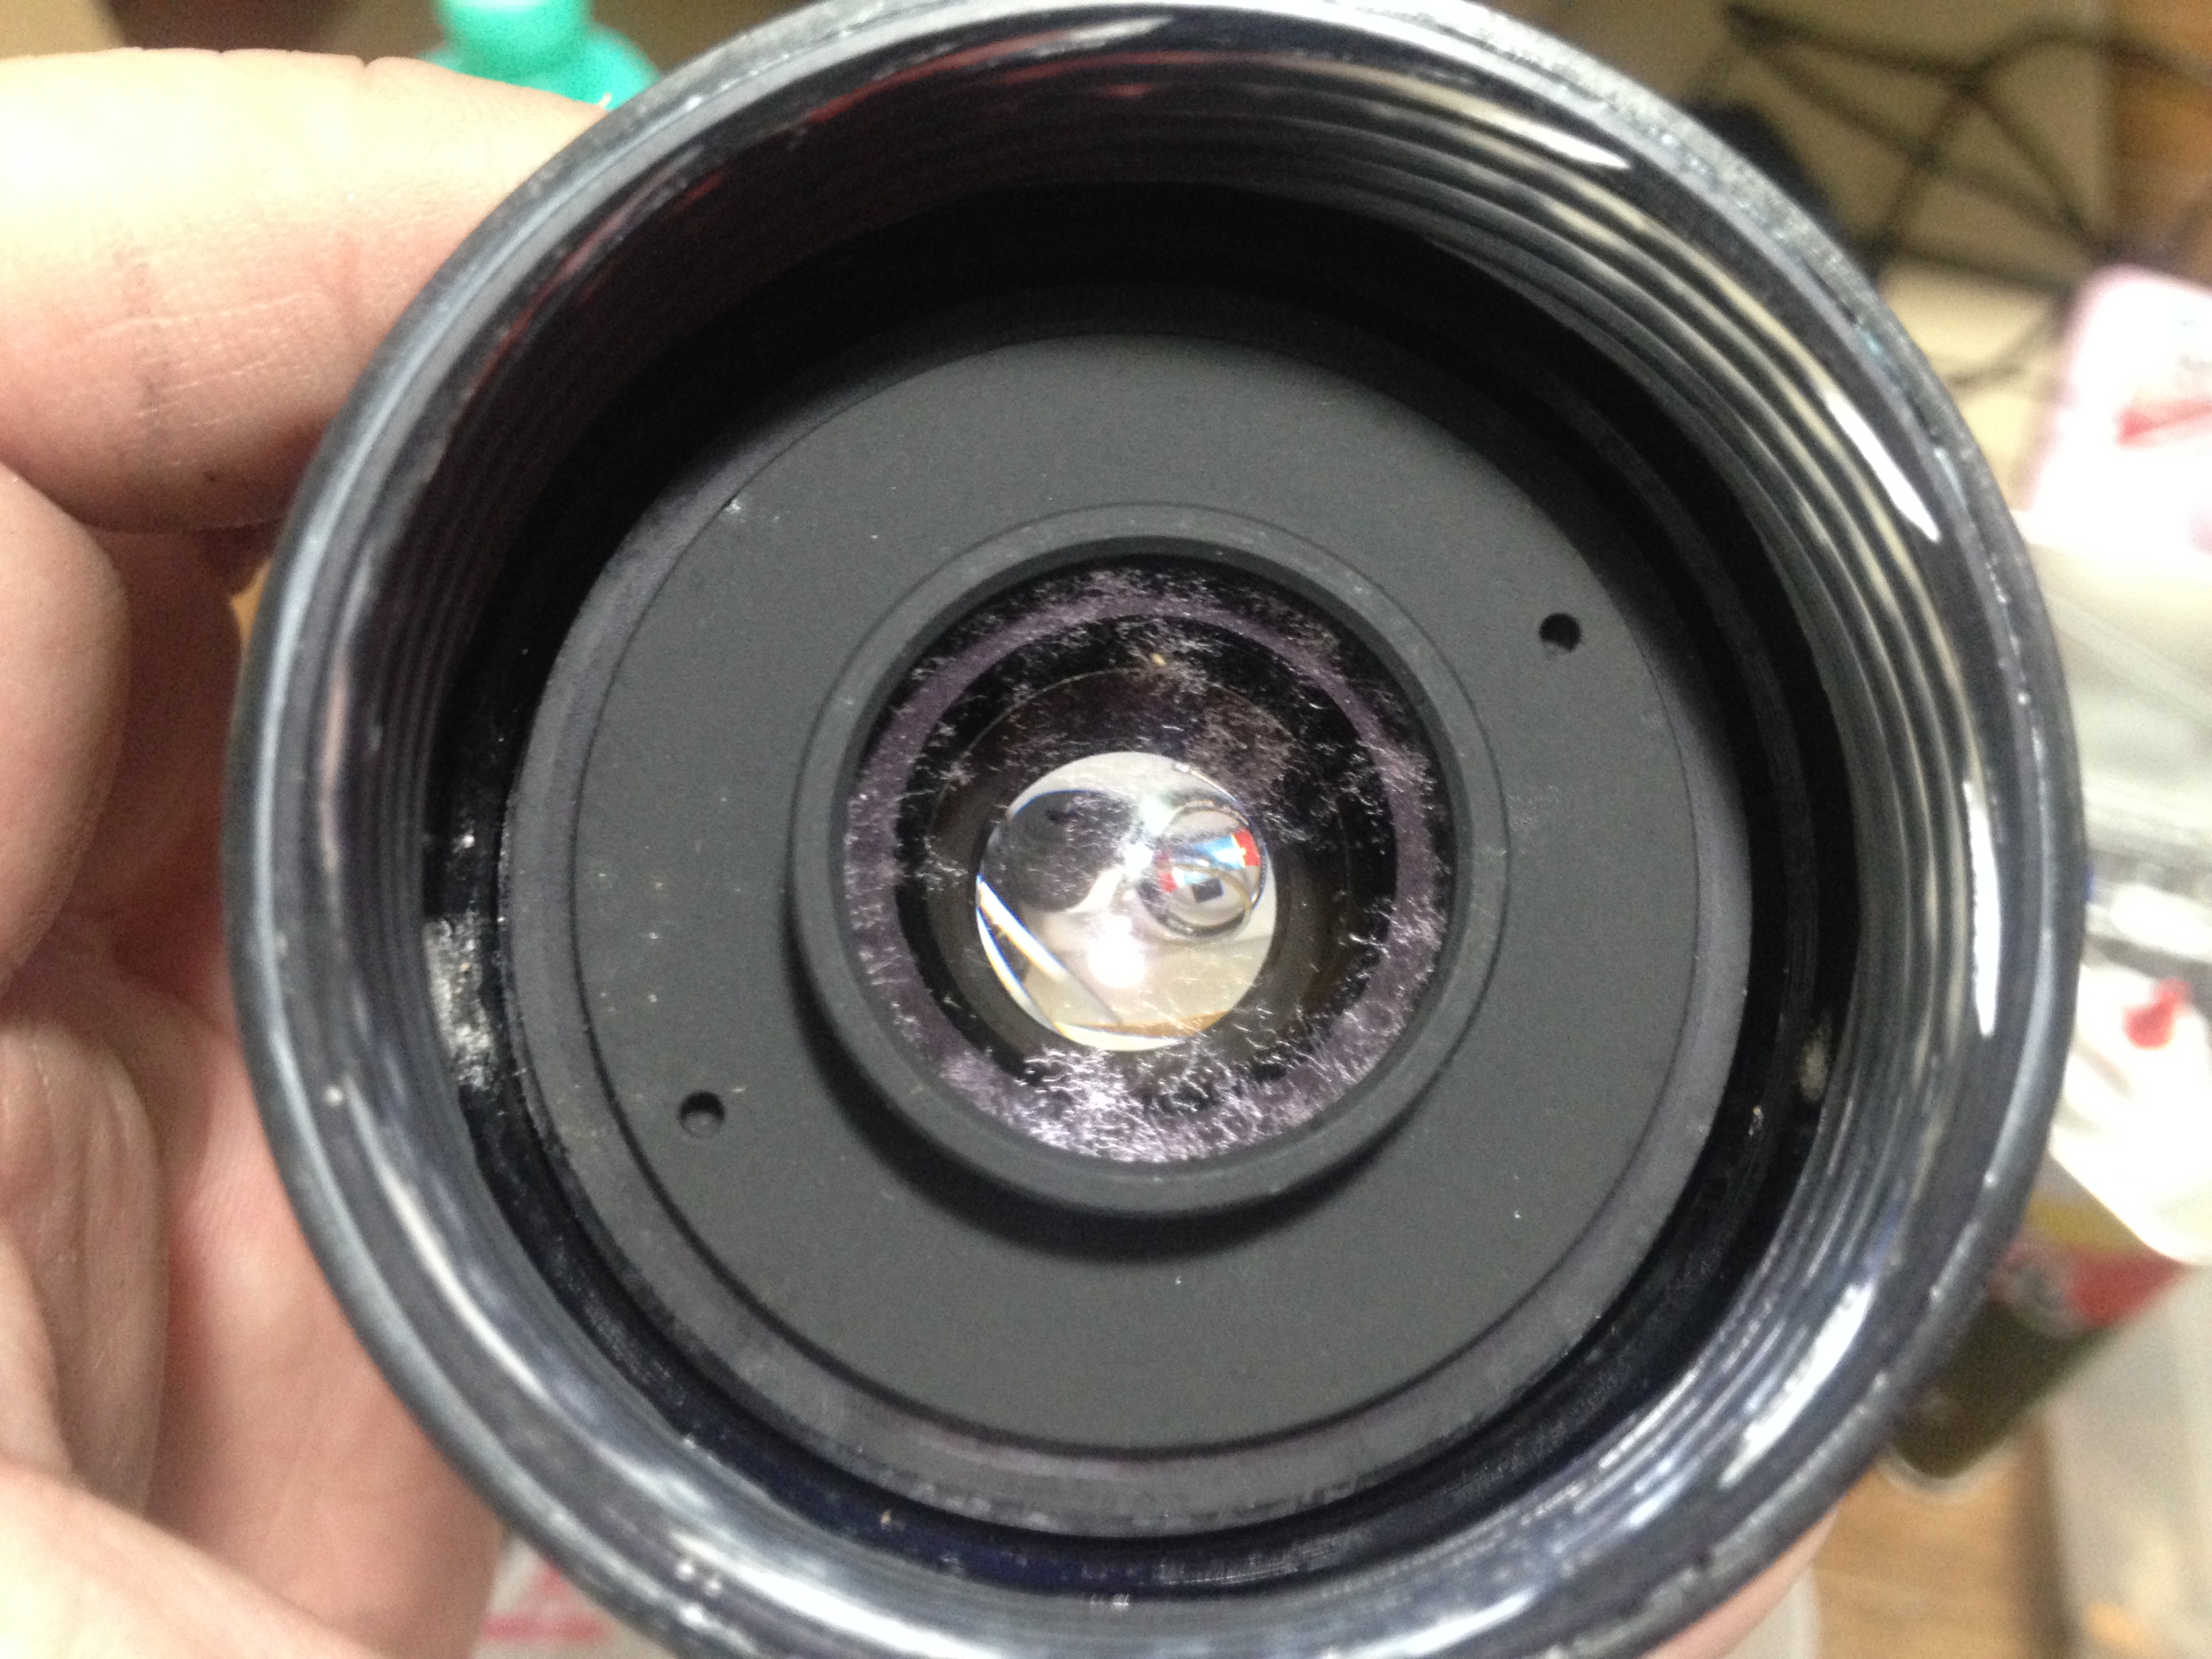
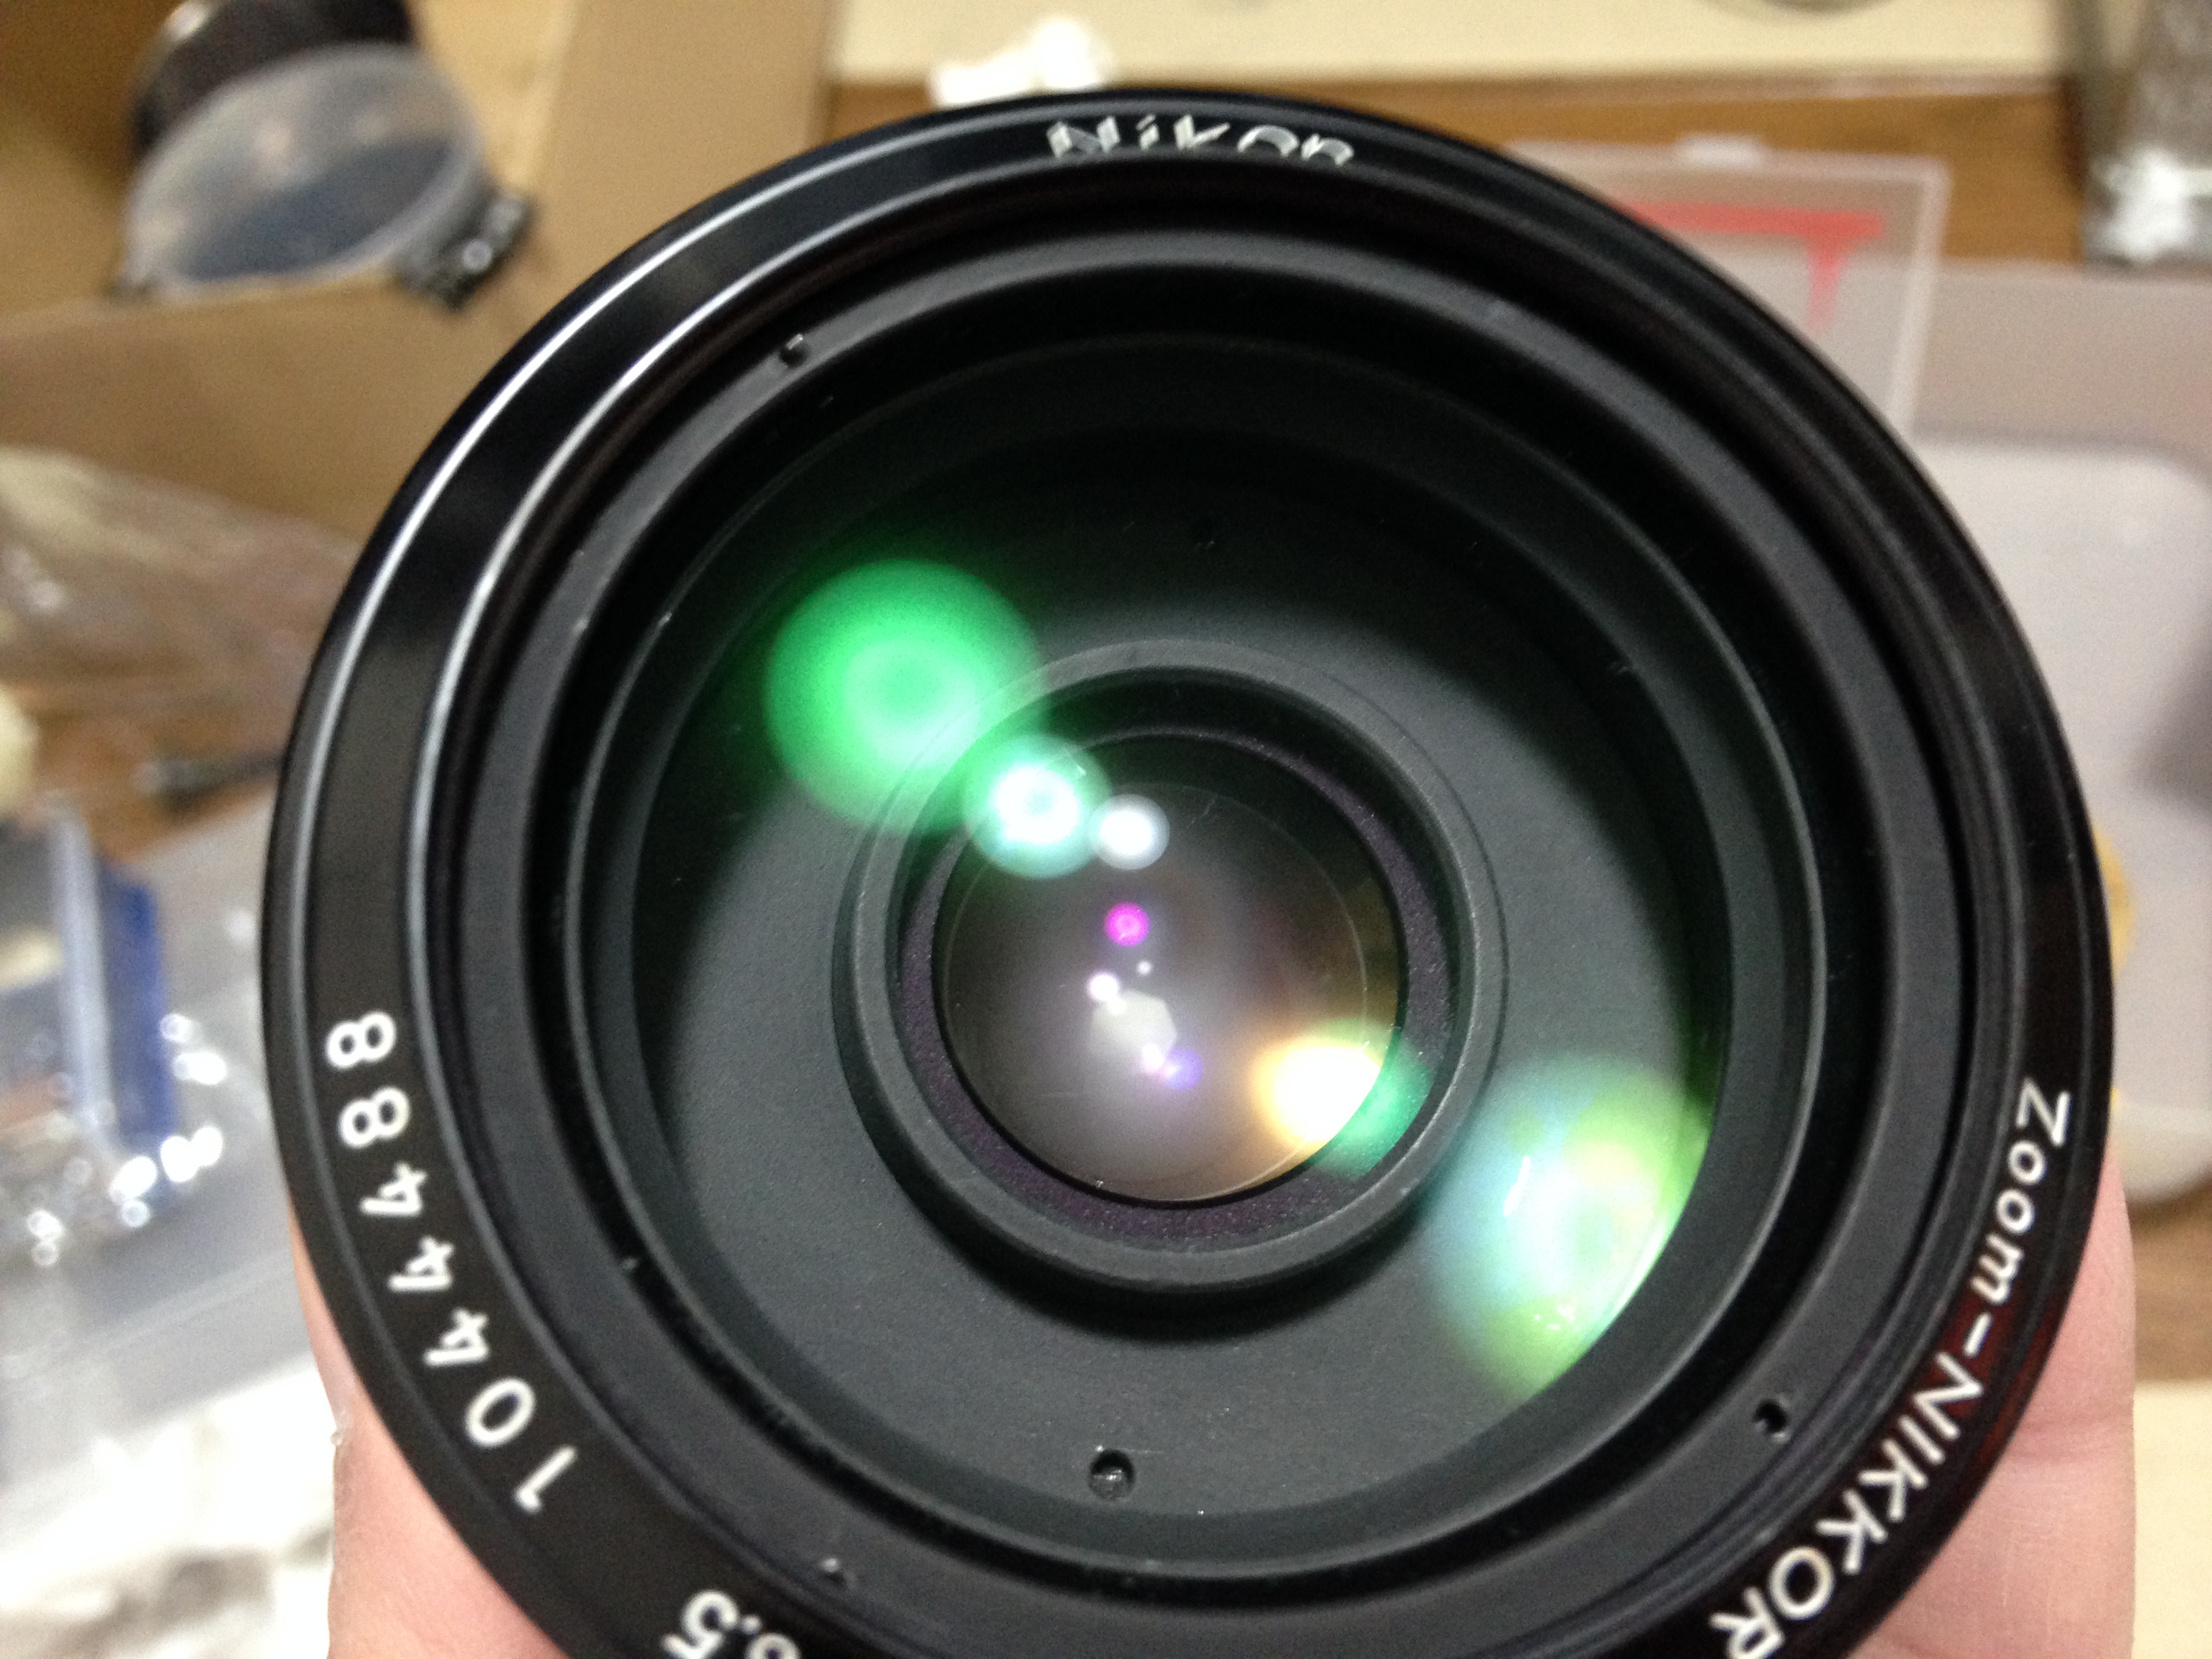
Check this Zoom-Nikkor 43-86mm f/3.5 Ai out, this is probably the worst that I ever took apart. Not only were the elements heavily infested with fungus but some of the metal parts were also affected by it.
Here’s another case, the tangles are still alive.
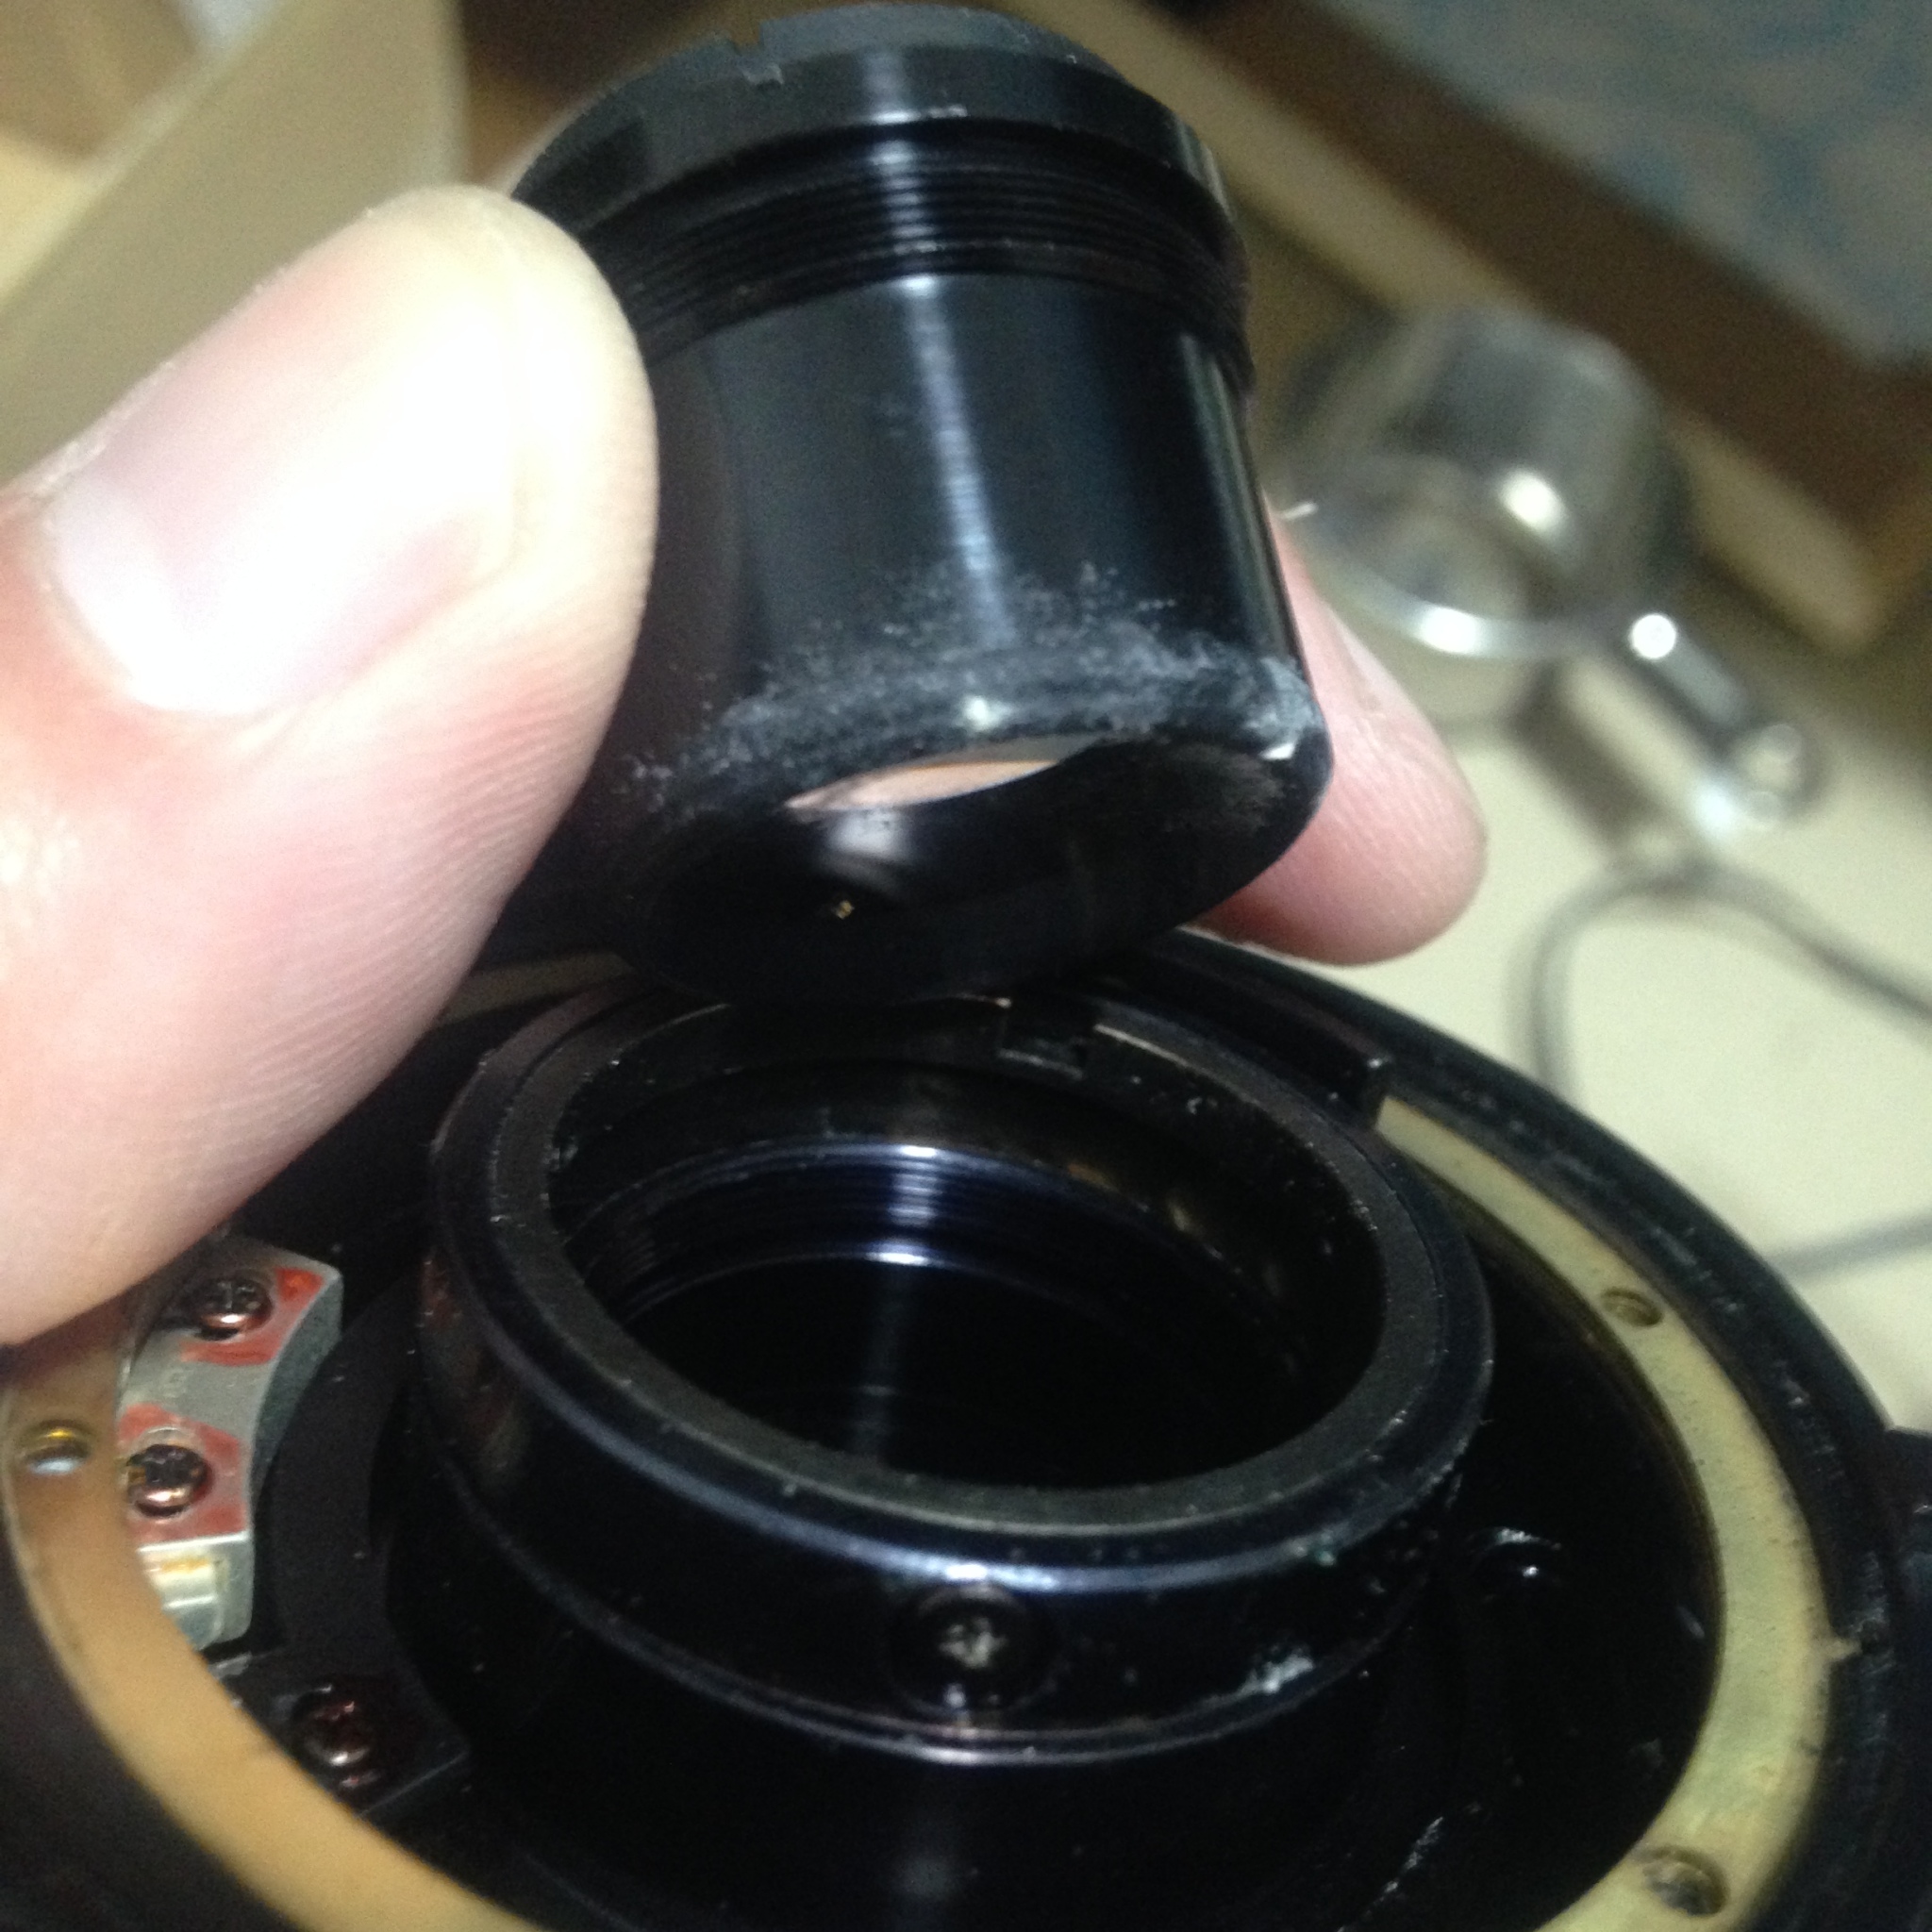
It seems that the ones that affected the metal parts were feeding off from the lubrication. Thankfully, the fungus did not leave any permanent damage to the lens or coatings, at least it’s nothing serious.
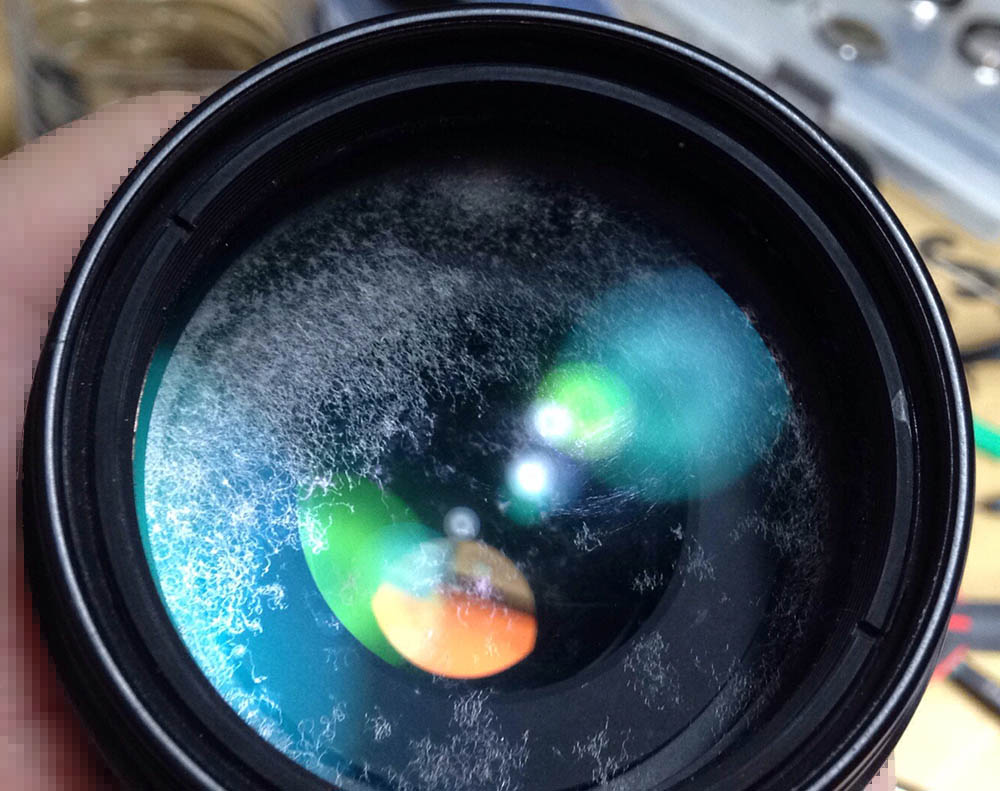
I got this Nikkor-Q 200mm f/4 Auto for the price of 3 cans of Coke! This was heavily infested with fungus but as you can see in this article, the damage was repaired and the lens never looked as good as this for many years.
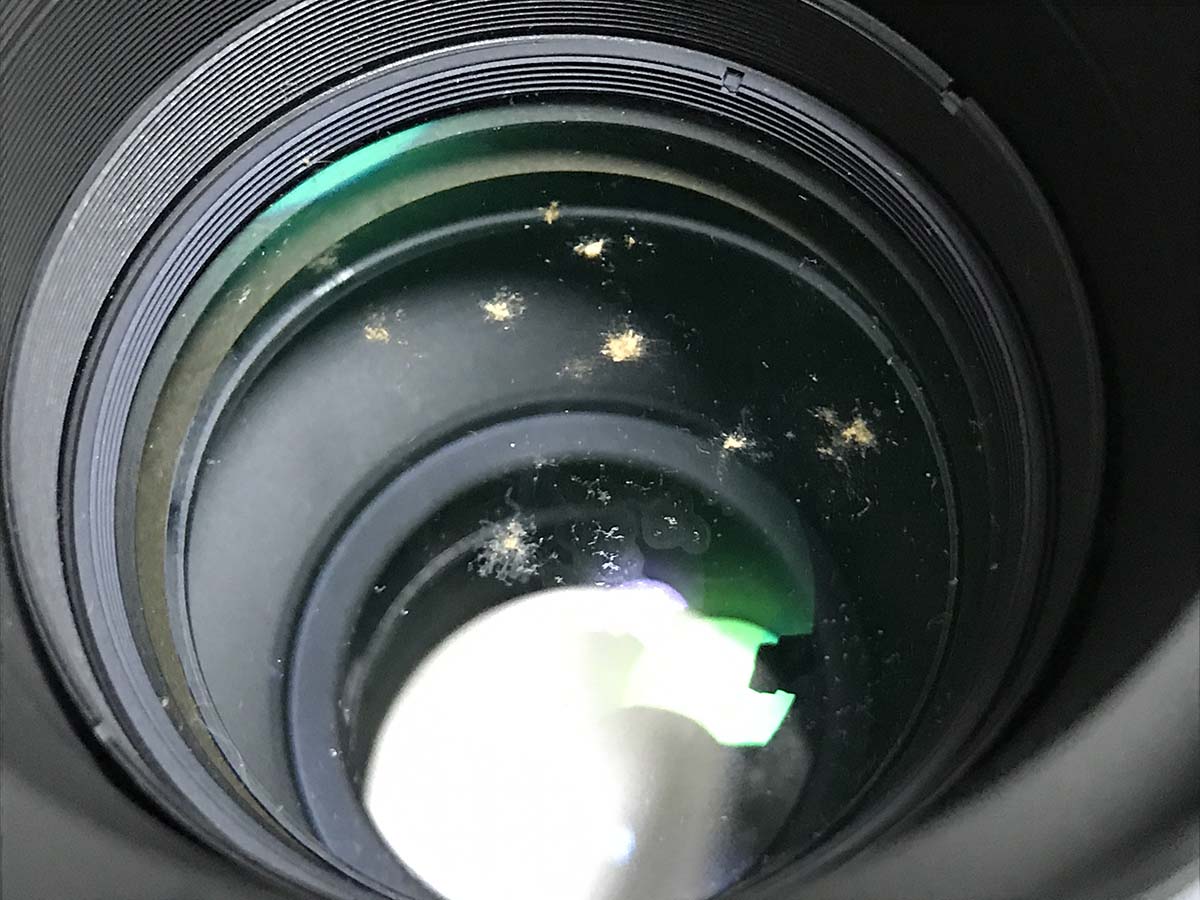
I name this type of fungus “Nescafé“, I think it’s yeast. Not because it is something that’ll keep you awake but because it looks powdery in appearance. It has began eating-away parts of the coating. This variety is usually not that destructive at earlier stages. This is an advanced case, it is the worst that I have ever seen. This was found on a 60-year-old Nikkor for the Bronica.
Having shown you these, I will tell you that there is still hope for them as you’ll see later. Luckily, the fungi haven’t etched away the surface and left any damage that’s deep enough for my fingernails to feel. If that is the case then it might affect the optical performance of these lenses.
Prevention:
You can prevent fungus from germinating by depriving it of the things that it needs to grow:
- Always store your lenses in a dry box or dry cabinet and make sure that the humidity is very low when you check the hygrometer.
- Avoid using canned air to blow the front or rear lens elements, it’s strong enough to send particles inside the lens. A good generic bulb blower is more than adequate so long as the pressure is strong enough. Canned air isn’t a good choice in the long run since it’s consumable, an additional cost.
- After shooting outside in the rain or any wet environment like the sea, be sure to dry your setup well before you store it. Wipe the excess moisture with a dry, clean towel, leave it on a zip-lock bag with plenty of desiccant like silica gel.
- Make sure that your desiccant is dry and charged. Leaving several bags of retardants is a good idea. Here in Japan, α-Bromocinnamaldehyde can be easily bought from camera stores and it is a known fungal growth retardant. Just refill or buy new ones every year, they are cheap anyway.
- Be sure that you use your lenses occasionally in sunny weather, take it for a walk. The sun’s radiation is powerful and will help prevent an infestation.
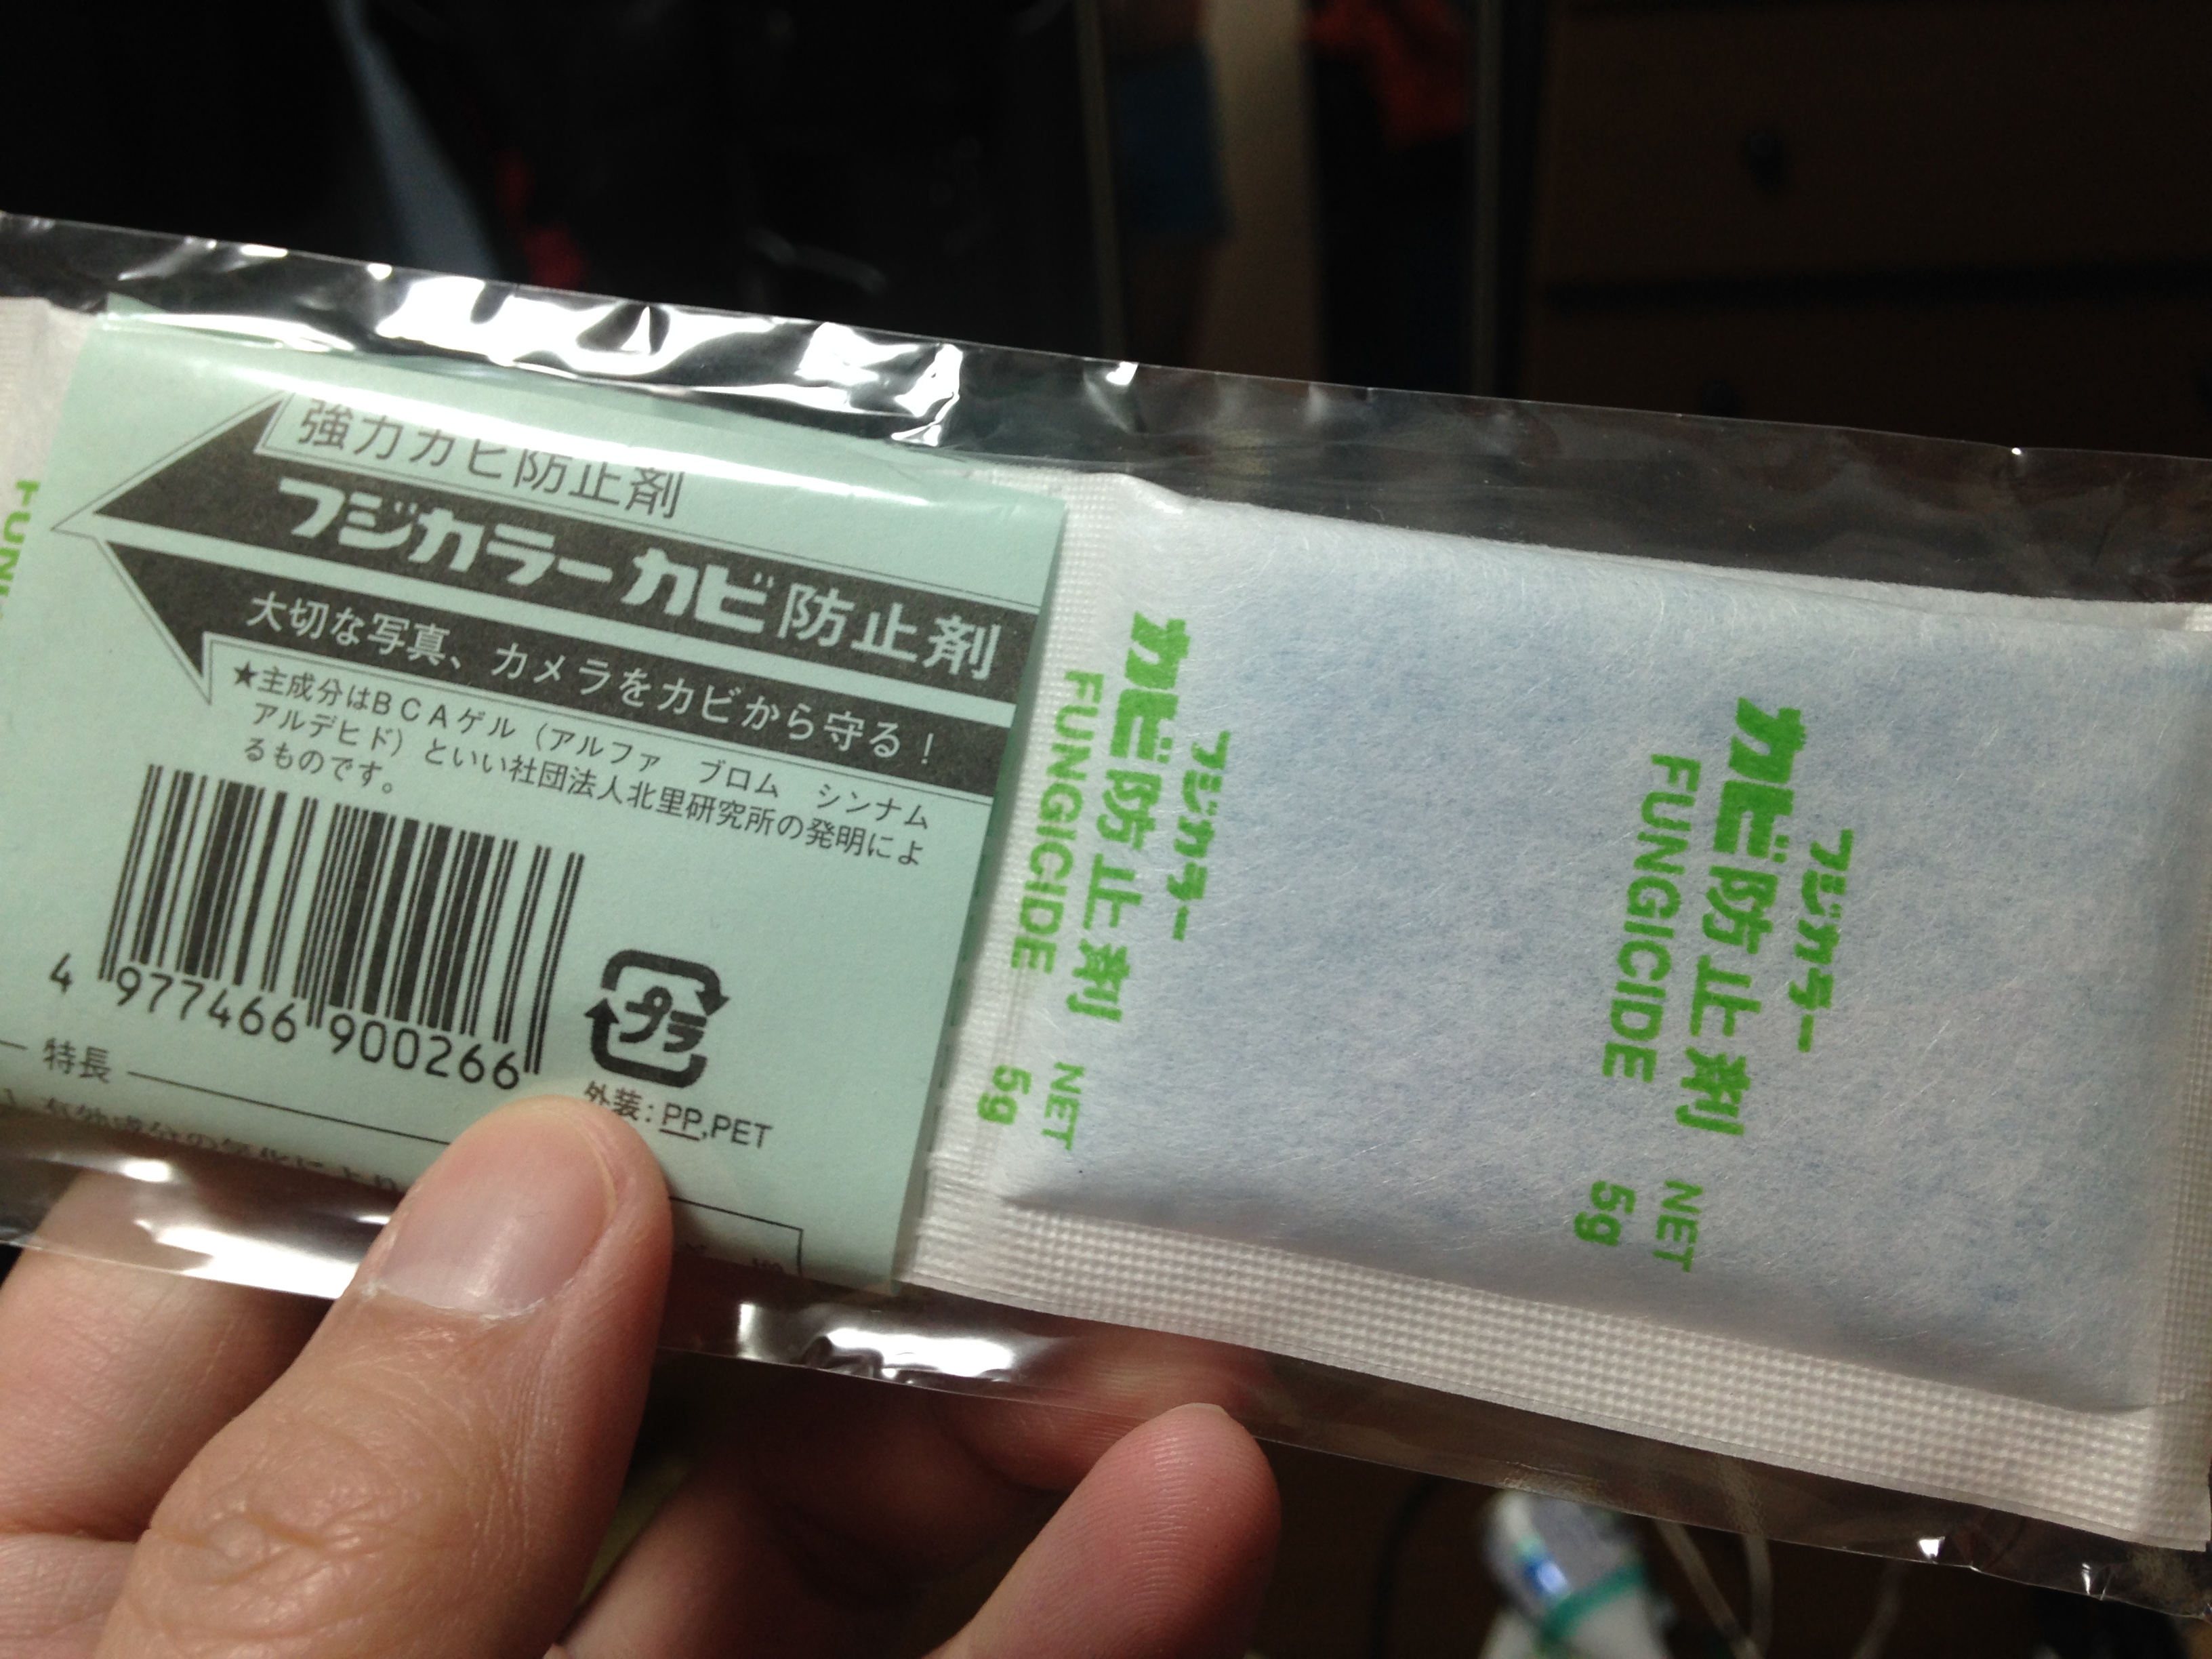
Packets of “alpha bromo cinnamic aldehyde” or α-Bromocinnamaldehyde is effective for preventing fungus from going out of control and they are very cheap, too. Contrary to what’s printed (fungicide), these won’t kill any fungus, they only keep their growth in check.
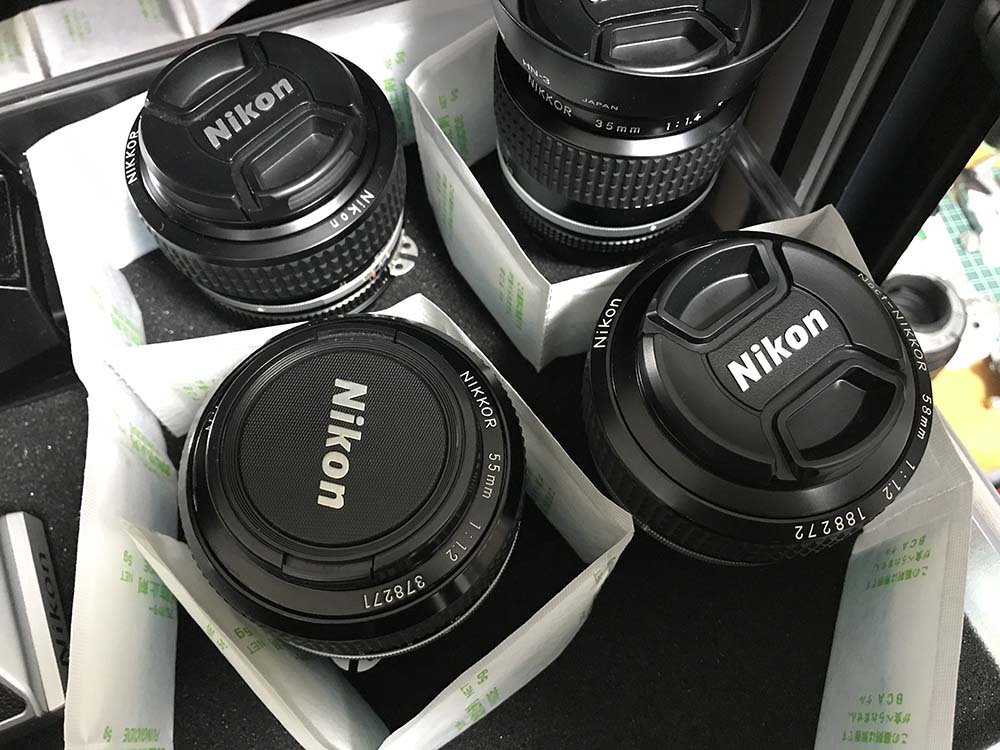
This is the best way to protect your lenses with α-Bromocinnamaldehyde. They have to be spaced around 5-10cm of each other. Since the packets are connected like this, I simply wrapped them around my lenses.
Here is an example of a lens that was blown directly with canned air, this is the Sigma 50mm f/1.4 ART. The lens is not sold as weather sealed but I do expect more from Sigma. They could have simply applied some glue or sealant to seal the front element like what Tamron did on the 70-300 VC lens. The moisture that you see here came from my lens cleaning solution by the way, so it’s just alcohol.
These are just some of the ways that I know of for preventing fungus infestation. If you know something that works, please feel free to mention that in the comments.
Repair Tools:
You don’t need any special equipment to clean fungus. Most, if not all of the things that you will need can be bought from the pharmacy or from your local camera store, they are relatively cheap as well.
Cleaning fungus form your lens is easy but you’ll need to be comfortable enough at opening lenses since in order to get to the deepest parts of the optics, you need to be able to dismantle the lens to access the problematic areas. That’s something that is beyond the scope of this article.


Cleaning solution. The ones that I use is an equal mix of ammonia, hydrogen peroxide and concentrated vinegar, these are all known to kill fungus. These are used to treat dogs with fungal skin infection to your own case of athlete’s foot! These will melt fungi with ease and help prevent them from returning.
Die, fungus! Here’s a video of the solution in action. It will just fizzle for a short time as the solution works on the fungi. This is safe for the coatings on Nikkors but may damage the coatings from other brands.
Never soak your glass in the solution for longer than 3 minutes, cemented lens groups should never be soaked as well. Simply moisten a piece of cotton and then wipe the lens using it. If you think that it is too strong then cut this solution with distilled or purified water.
WARNING: As with all chemicals, use common sense when handling and mixing them because this is a potent mix! If you have athlete’s foot this will cure it in one application! I will not be held responsible for anything that will happen to you. Always use protection when handling them and work in a ventilated place. Exercise caution!

Windex is very good for smaller pieces of glass that you can’t remove from its housing, such as the lenses found in viewfinders. It’s good because it has ammonia but what I do not like about it is the soapy suds it leaves behind as residue. It’s easy to clean or rinse it’s just another step that you need to think about.
Lens Tissue. These are different from your usual Kleenex in that it has not a lot of lint and this will not tear. These tissues are also soft and will not abrade with the surface of your lens elements.
These are also great for wet cleaning of general camera parts, just put a couple of drops of lighter fluid or denatured alcohol on it and use it to wipe away oil and dirt from any hard surfaces like metal and plastic.
Always remember to never reuse a tissue that has been used to wipe a dirty surface. Use a clean tissue to wipe your lens element every time.
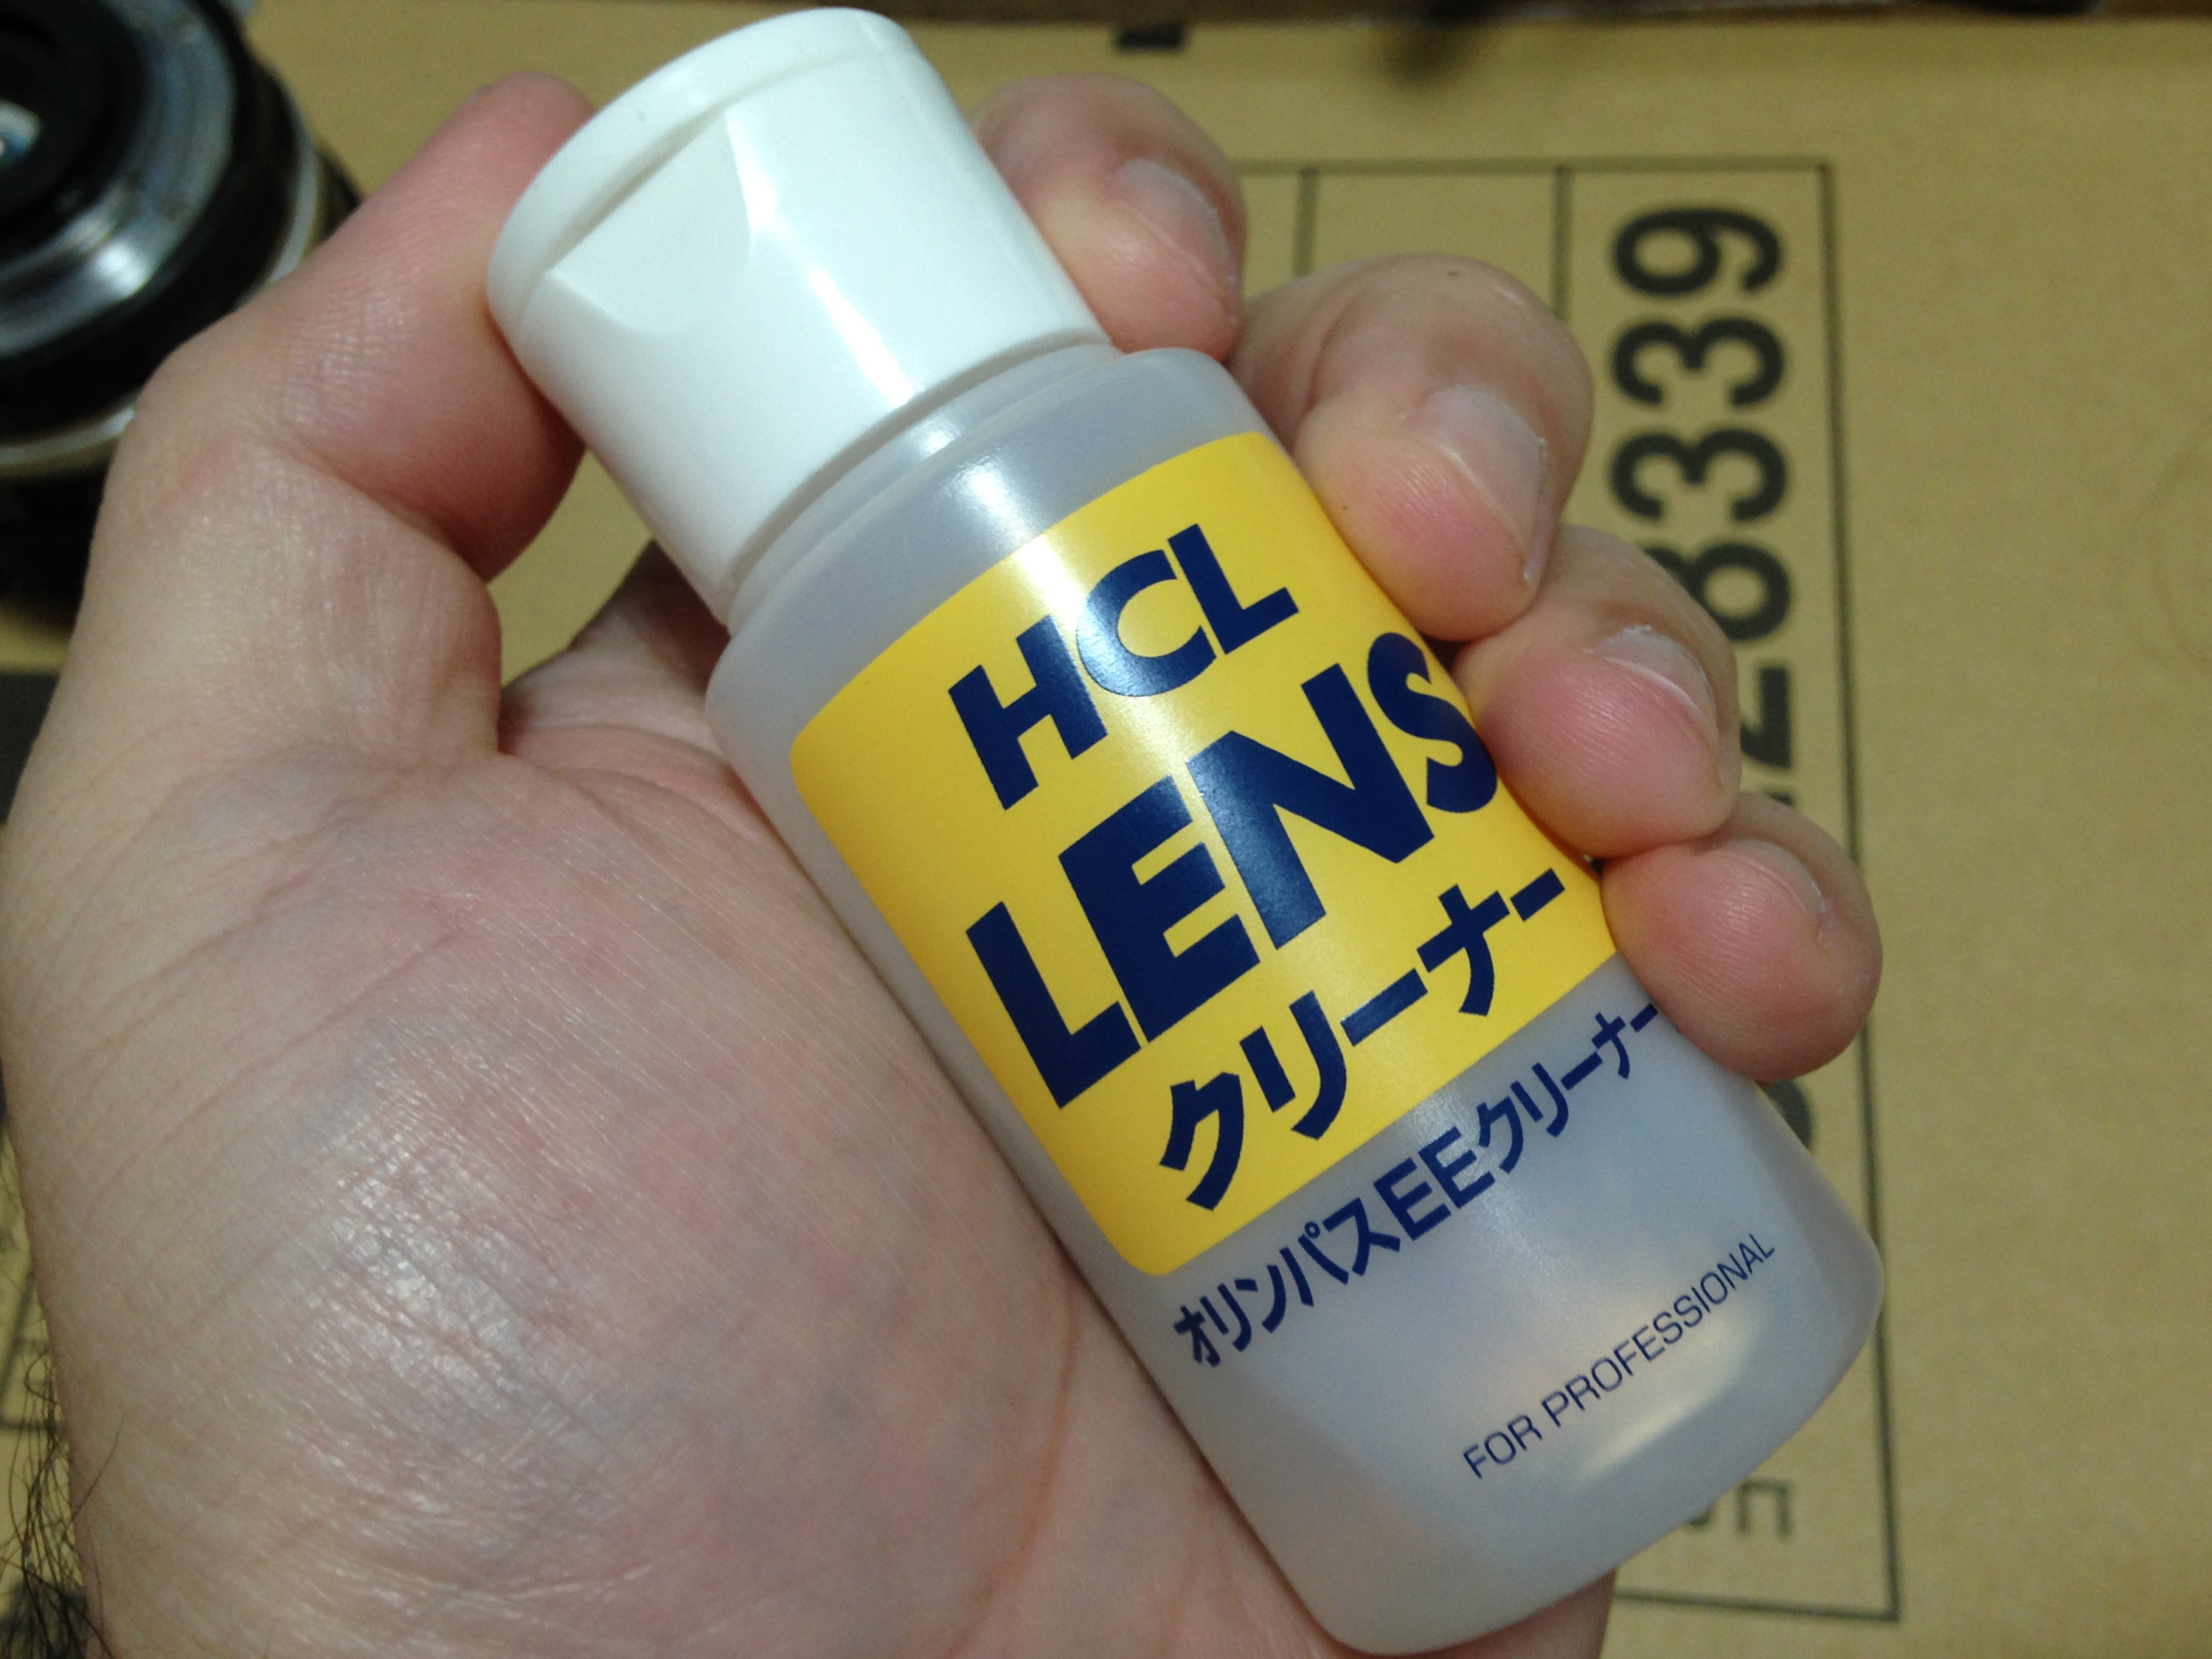
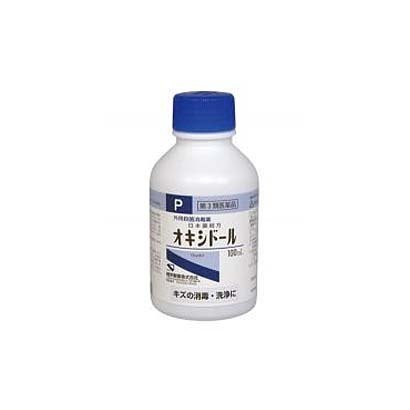
Lens cleaning fluid. These are just some kind of alcohol and other solvents mixed with distilled water and sold at a high price. These are great for cleaning fingerprints and other oils from your lens because they evaporate really quick and will never leave a puddle unless you use too much of it.
A good alternative to this is to just use your breath to fog up your lens’ surface and wipe the moisture off before it evaporates. While this will work and has served many people well, I won’t use it if I have a bottle of lighter fluid available. Your breath is basically just water vapor but you might contaminate the lens with your spittle and that tiny droplet of spittle is a good enough source of nutrients for fungus to germinate.
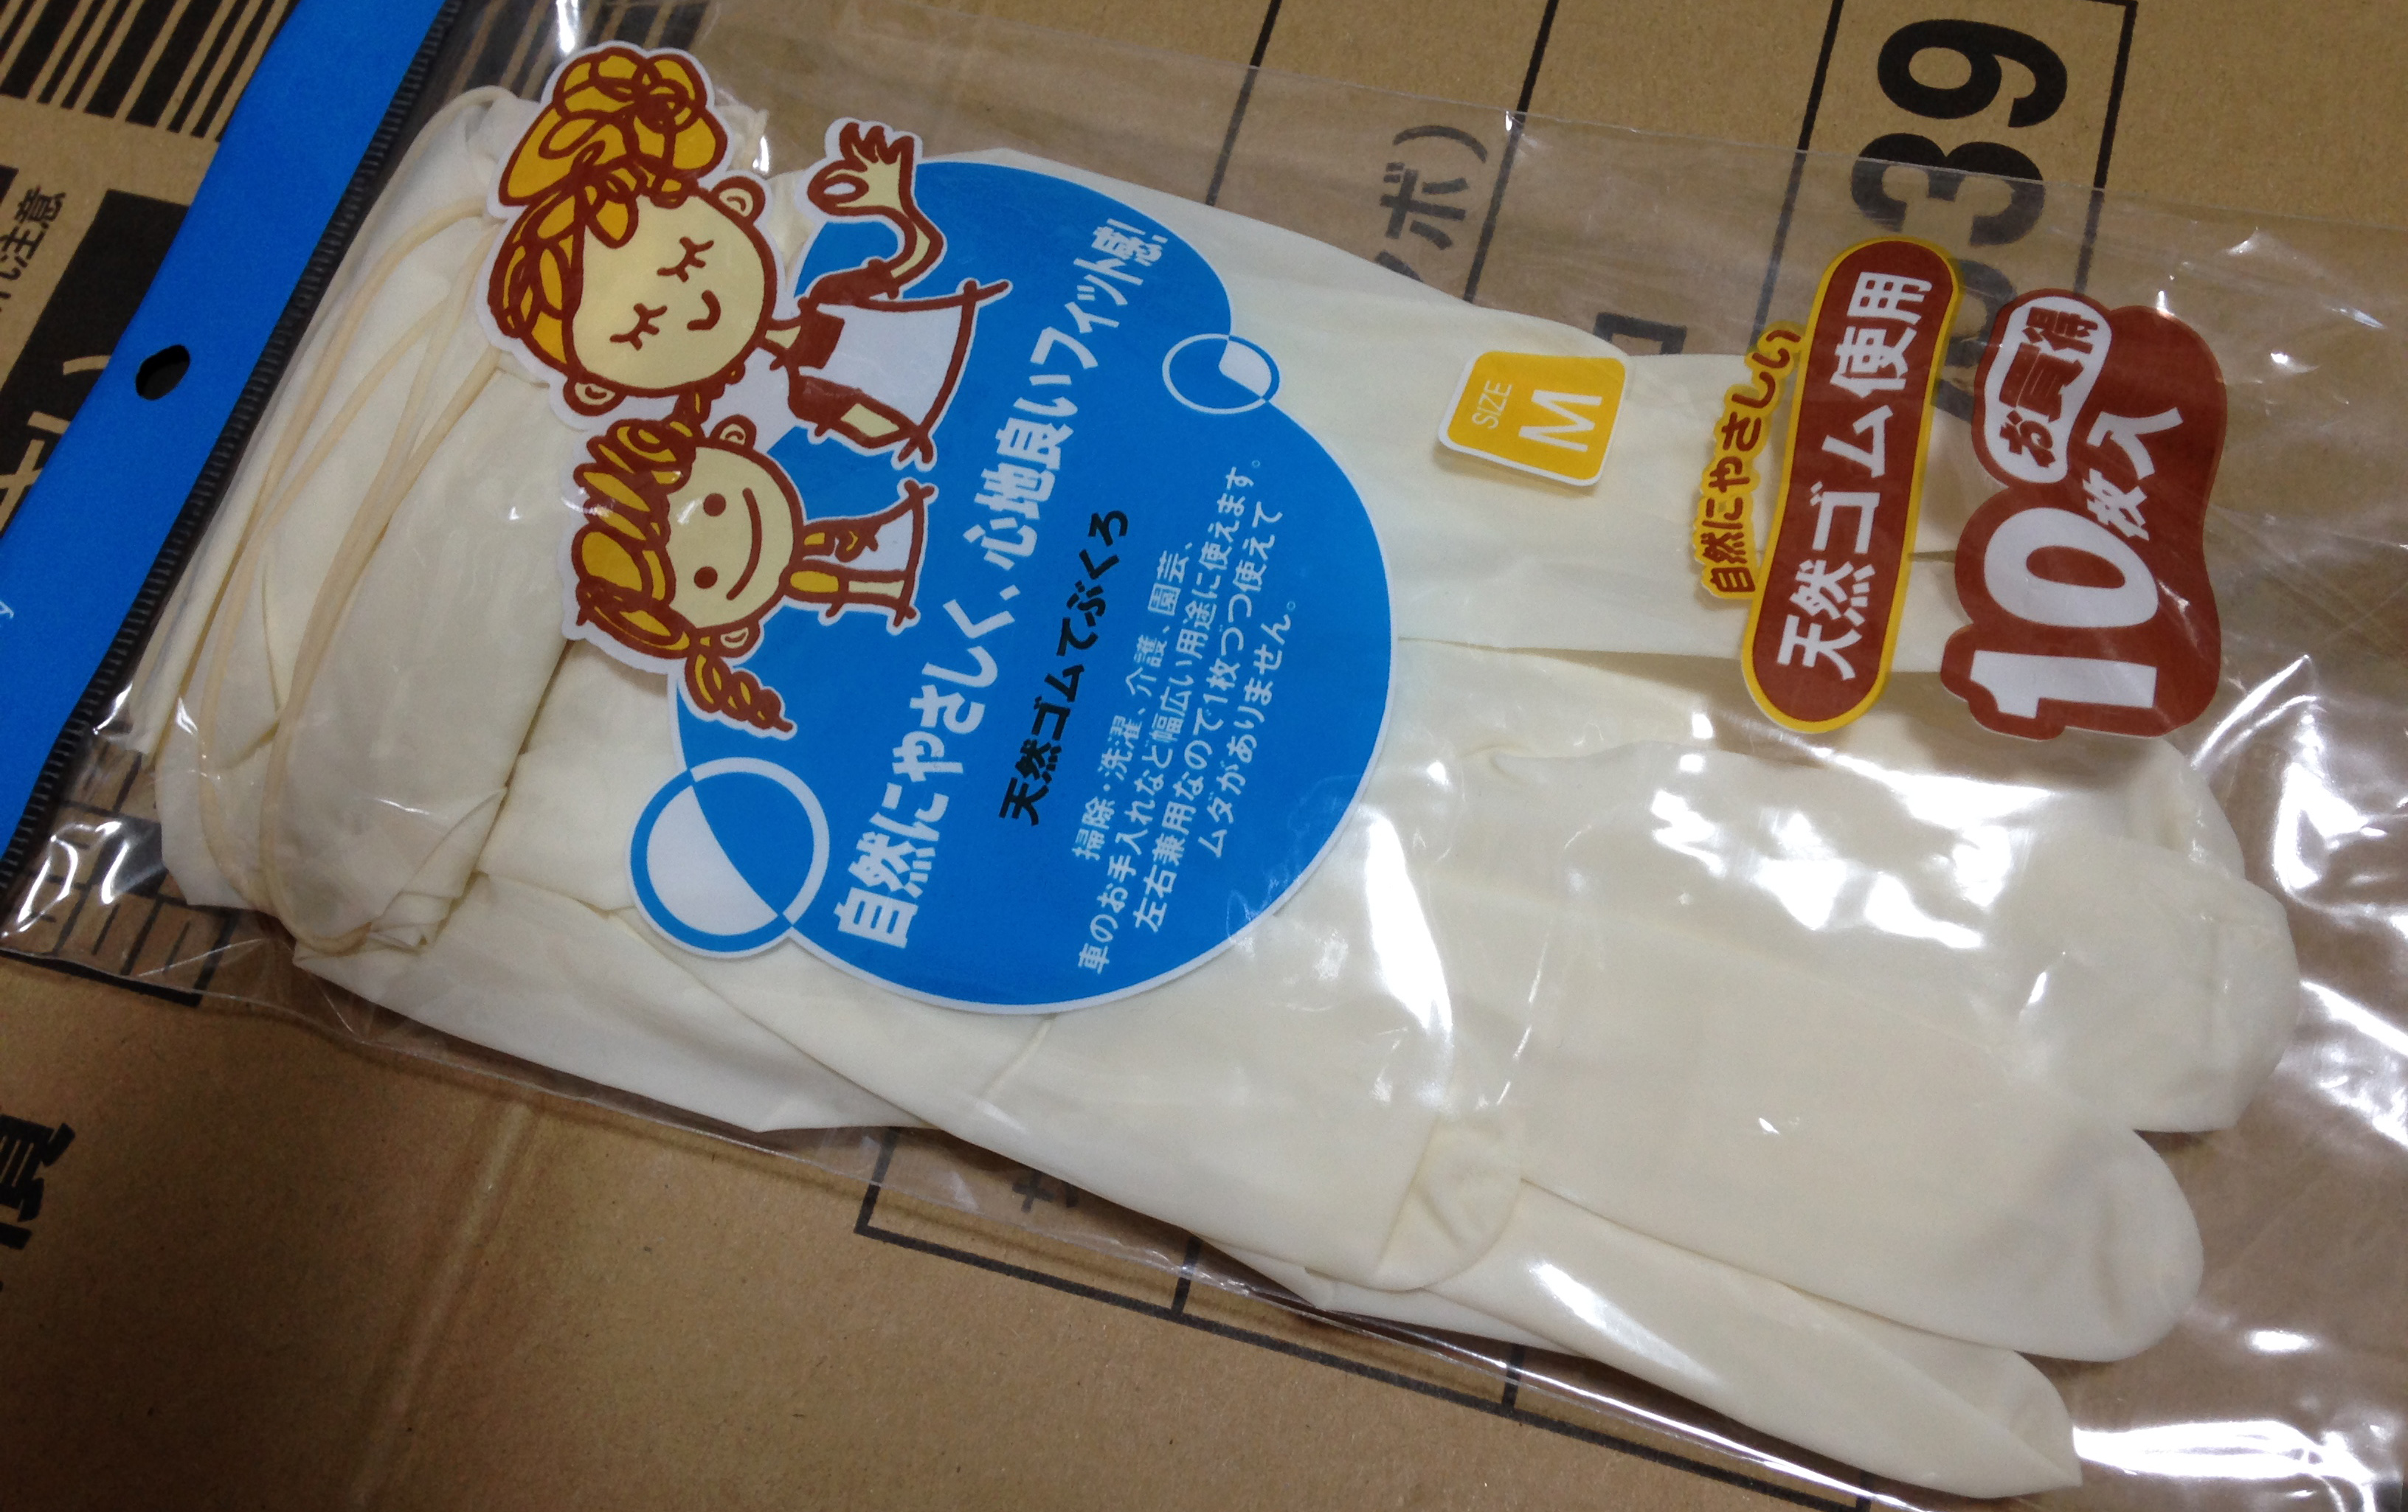
Latex gloves. Use these on one of your hands when you are cleaning so that you won’t contaminate your lens with finger oils. These are also great for protecting yourself from the chemicals that you are going to use as some people might be allergic or sensitive to them.

Lens cloth/chamois. Use these for the wiping the lens elements before you install them so that it will wipe away or absorb any leftover oils and dirt. Never use these to wipe anything else, keep them clean. I always store them inside a zip lock bag to keep them as clean as possible.
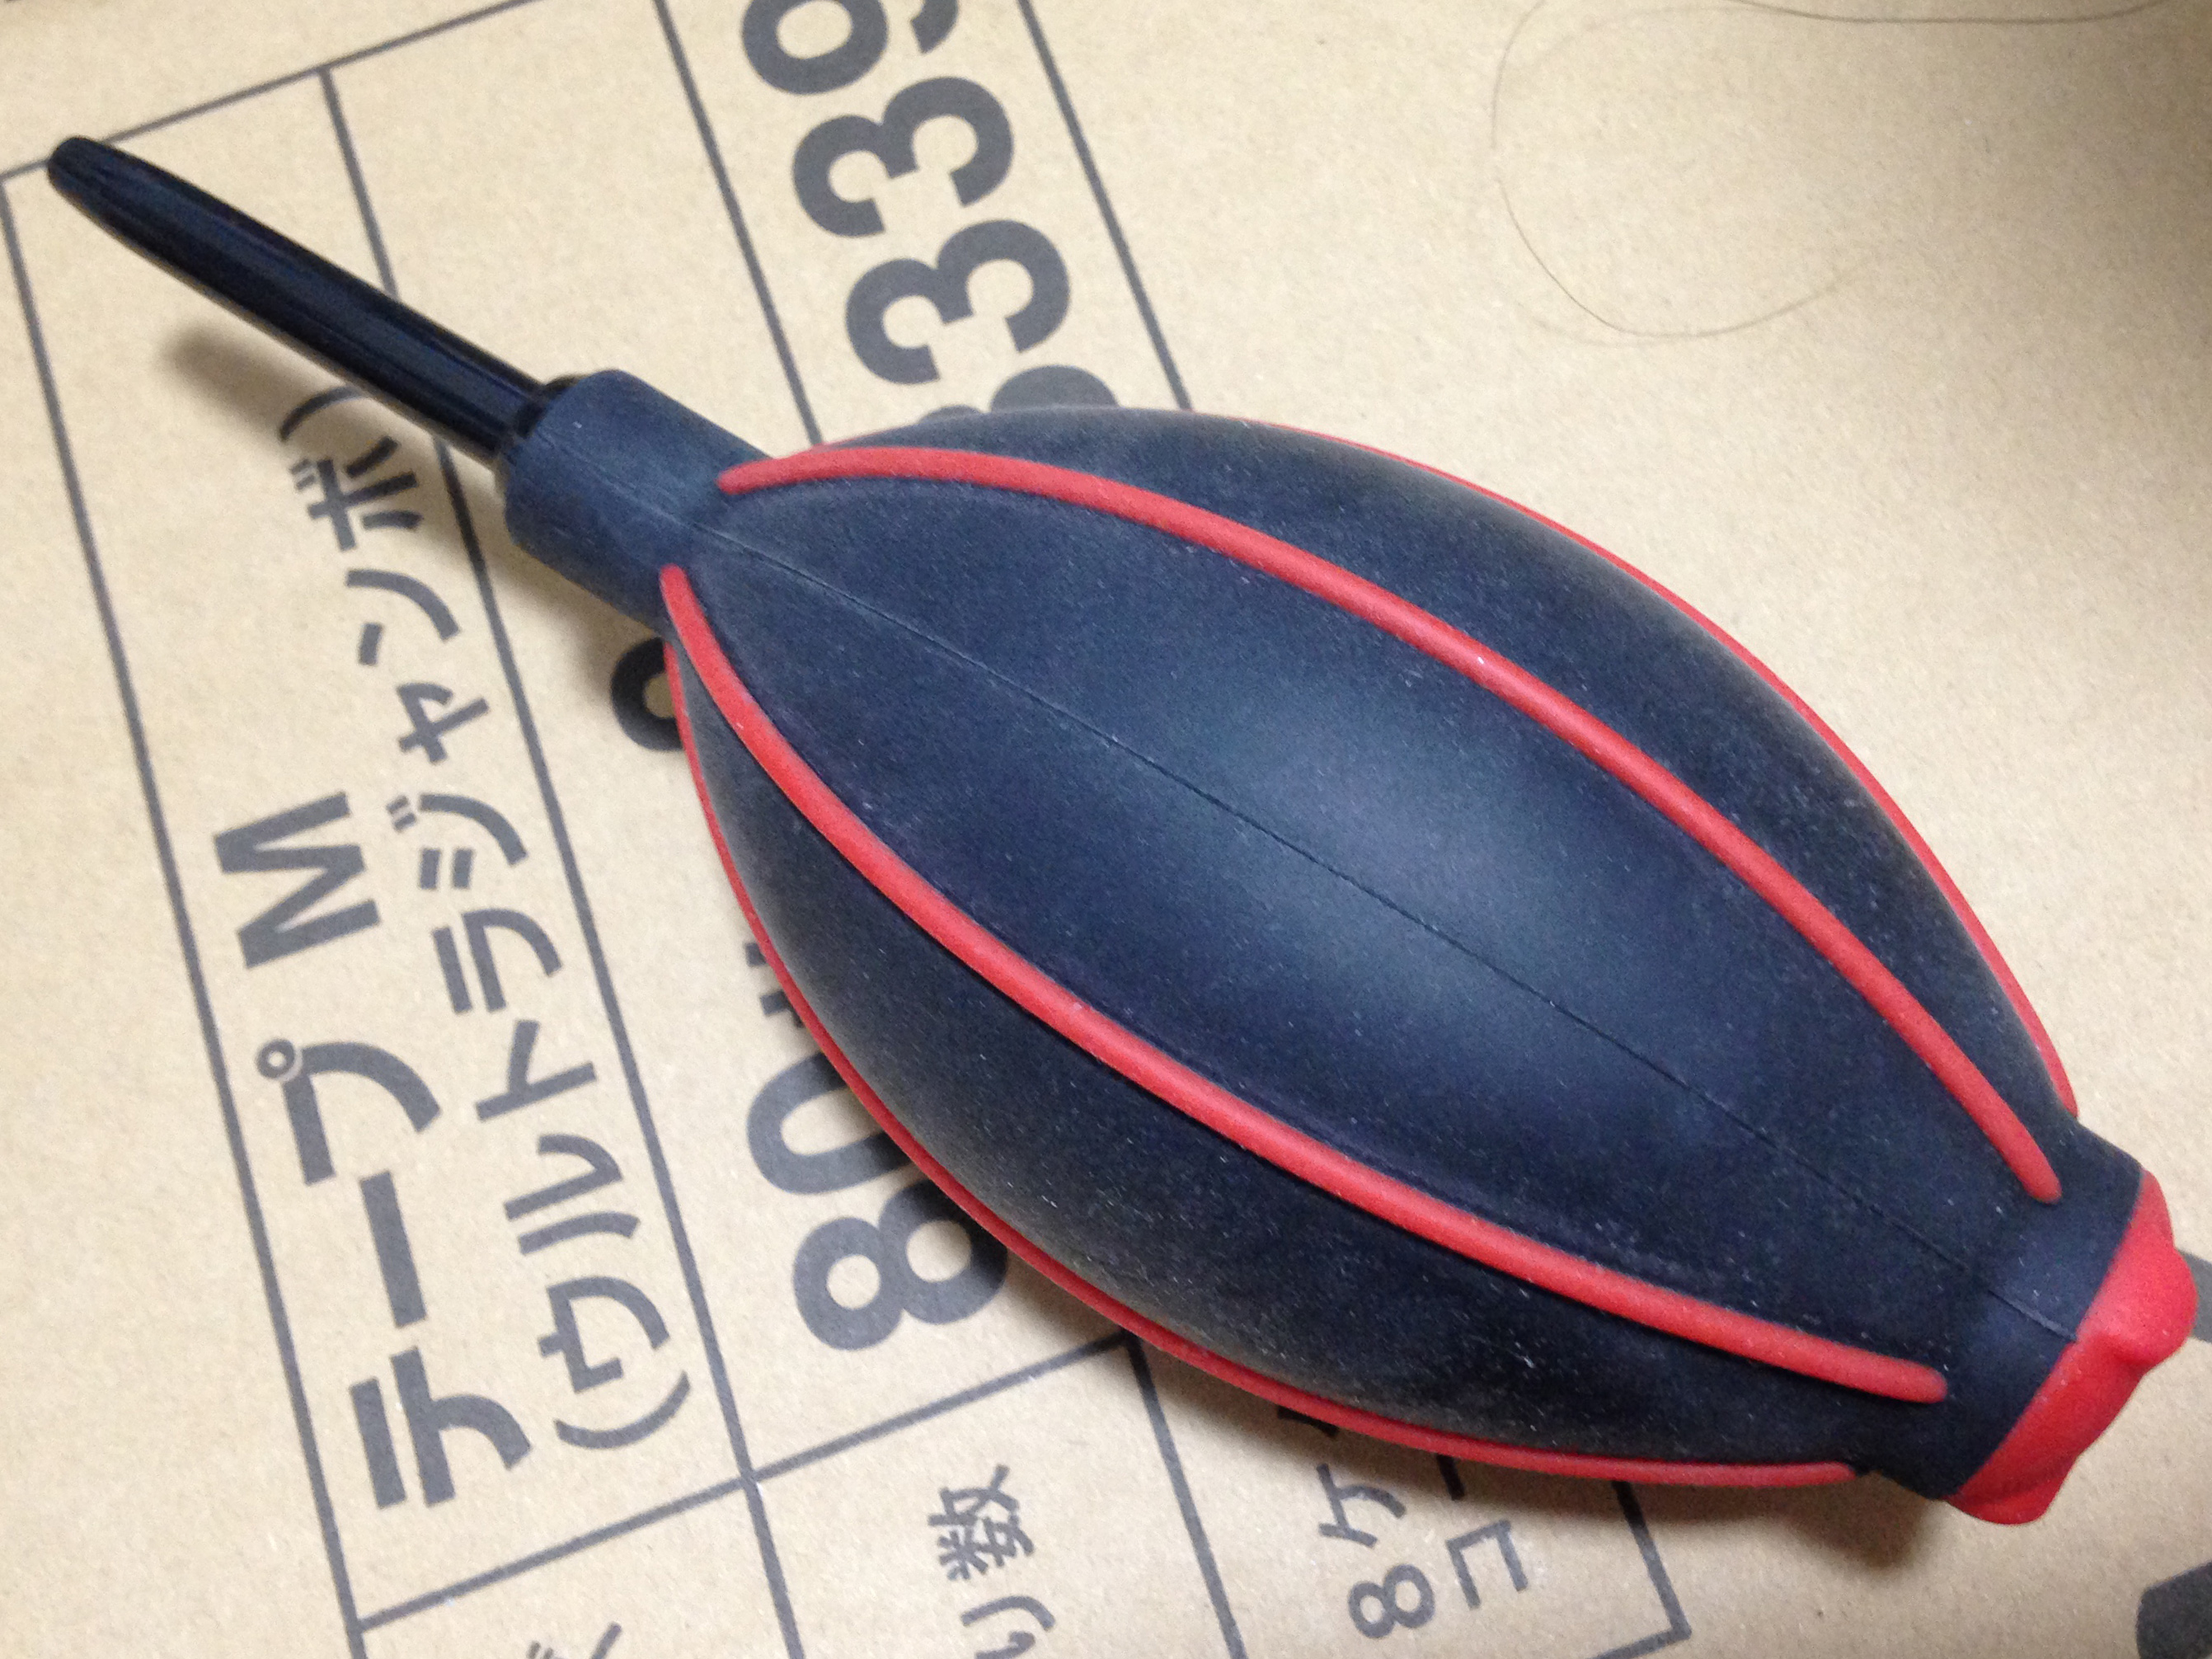
Bulb blower. Go ahead and buy the expensive ones, you only need to buy it once anyway. A good one will not only give you a more powerful burst of air each time you squeeze it, it is also going to be one of your best investments since these usually last a lifetime and even the cheap ones will last you a long time.
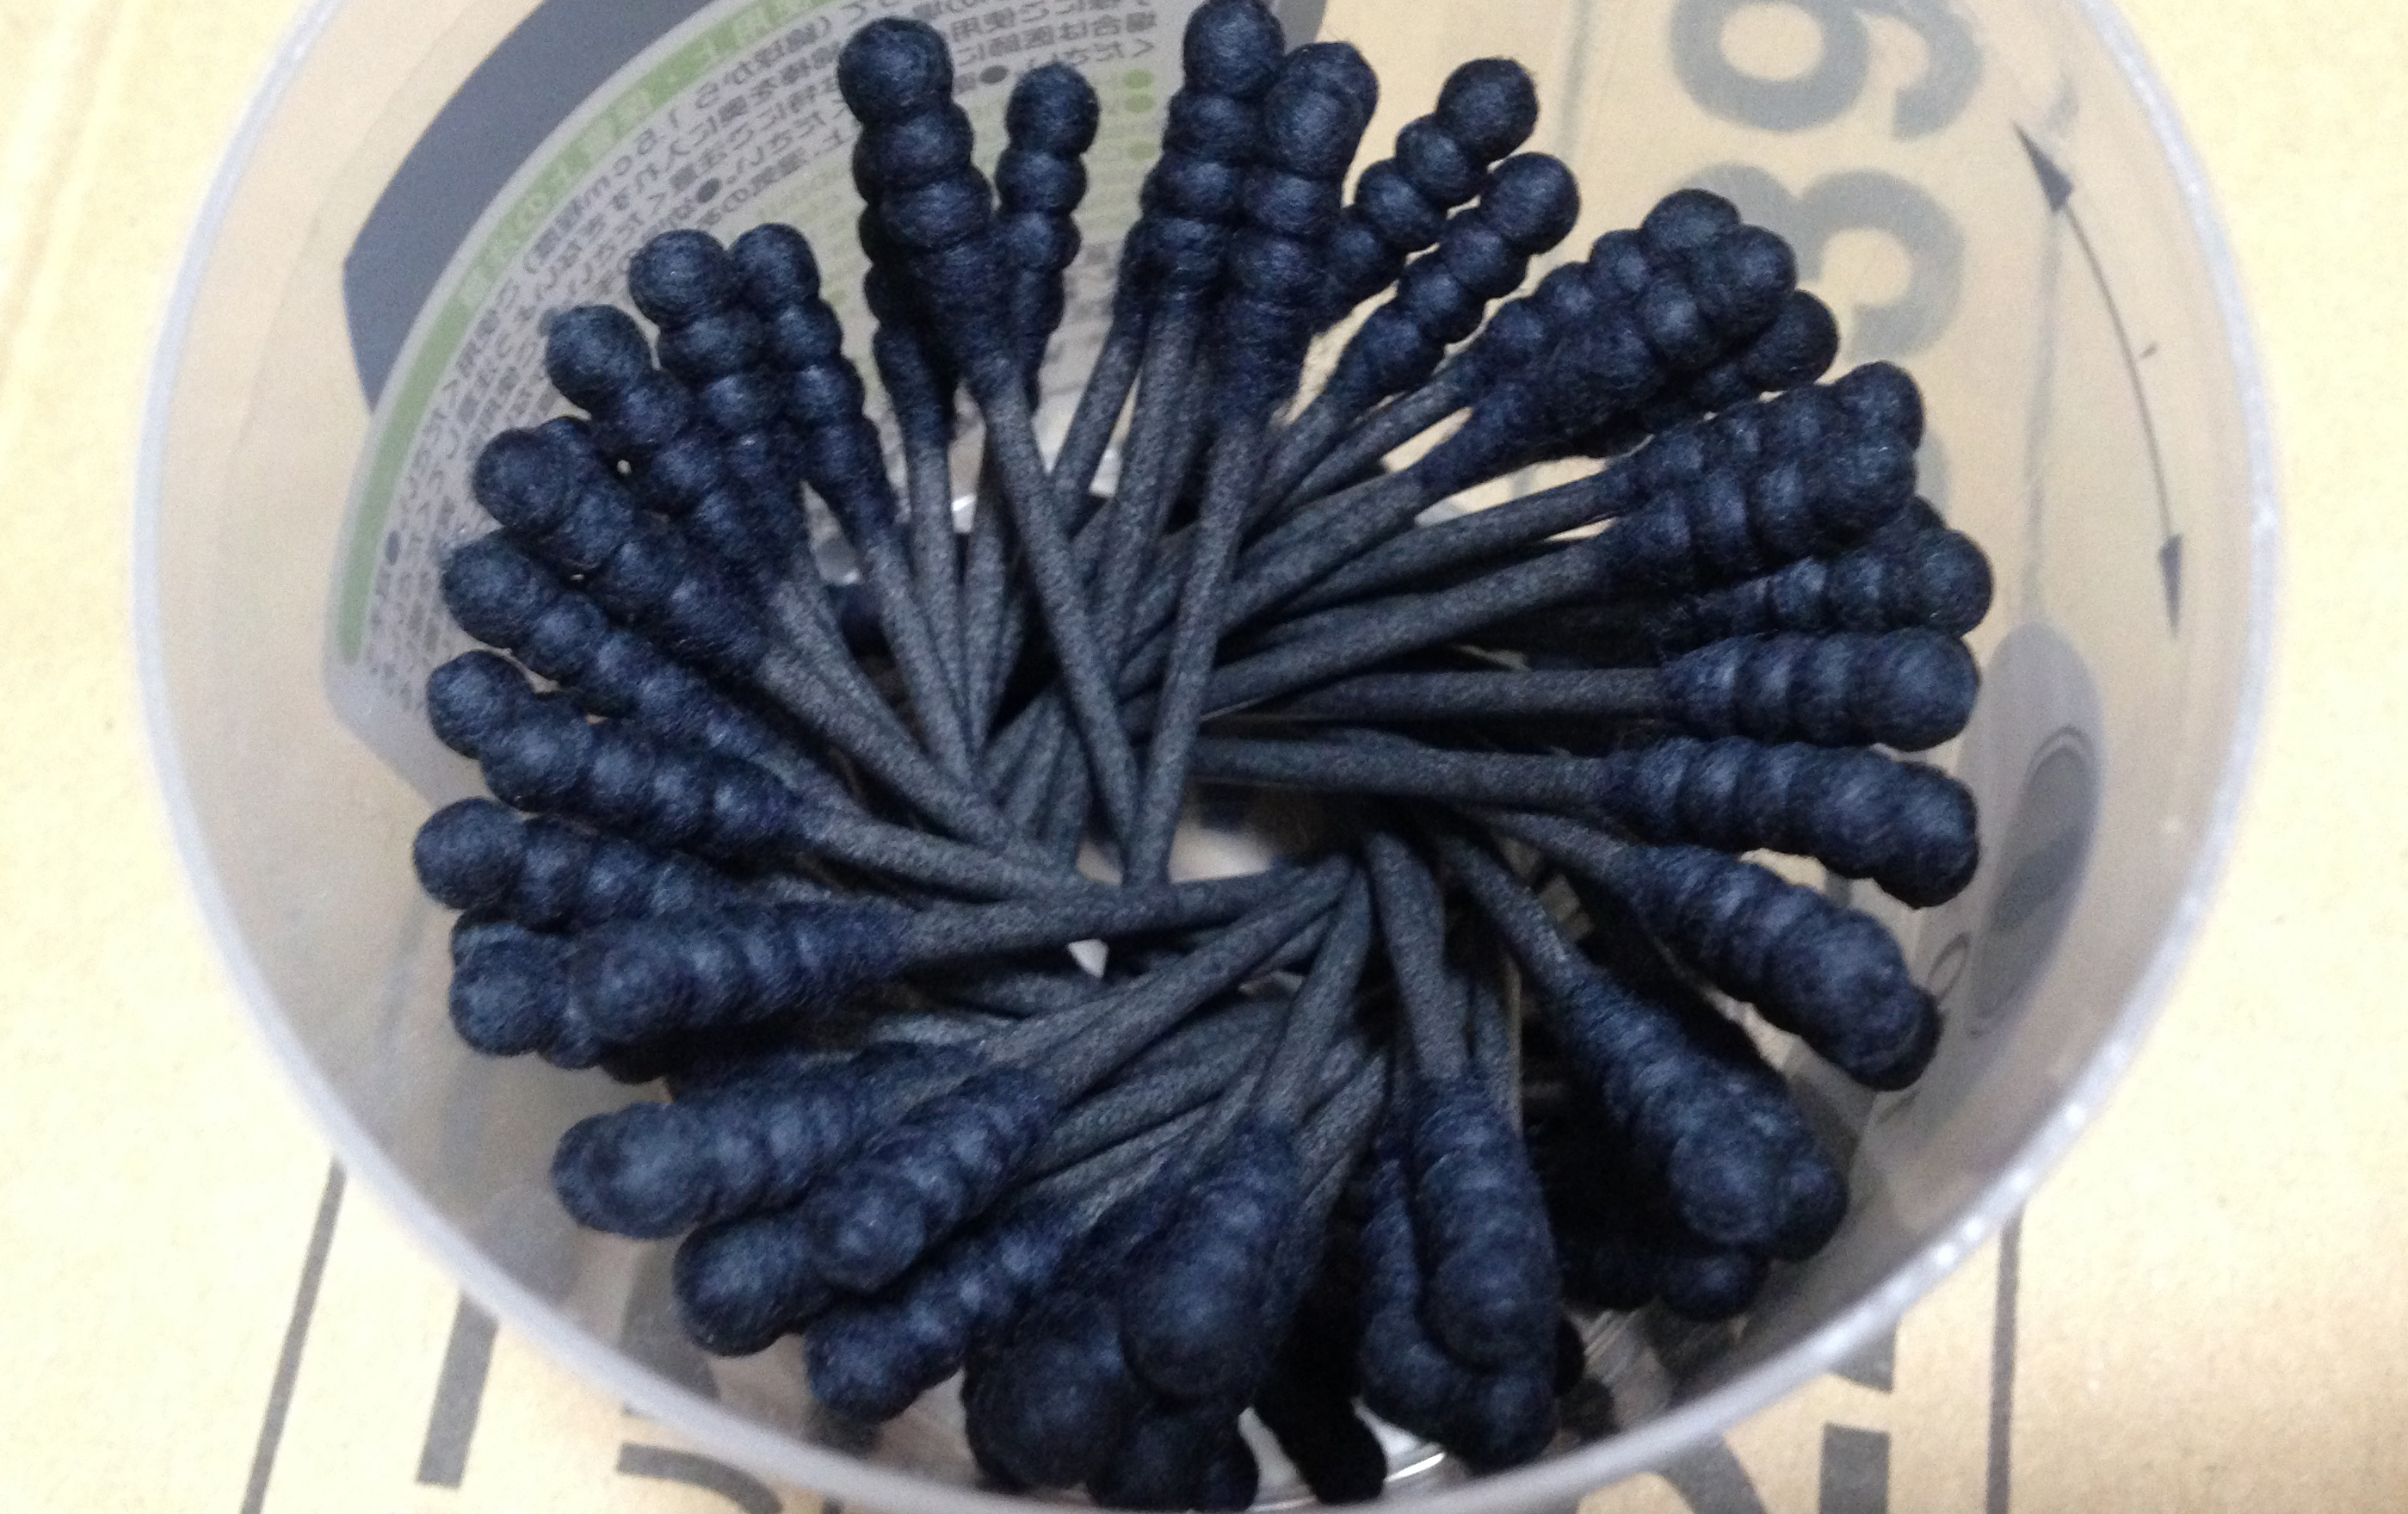
Cotton buds. These are used for cleaning inaccessible corners of the lens such as when it is glued inside a deep metal barrel. Using your fingers to clean these parts can be an annoying task but with these things, you can clean those hard to reach parts easily. I also buy the really small ones that’s used for babies, even the expensive small and sharp ones are very useful. Check your cosmetics section because these are used for shaping eyebrows. Make sure that the cotton is thick enough so that the plastic handle will not scratch the glass. This is important because the handle will sometimes poke through when the cotton is wet. The alternative to this is to just wrap a sheet of cotton to a sharpened toothpick, this is even better because it is easy to customize the shape of the tip.
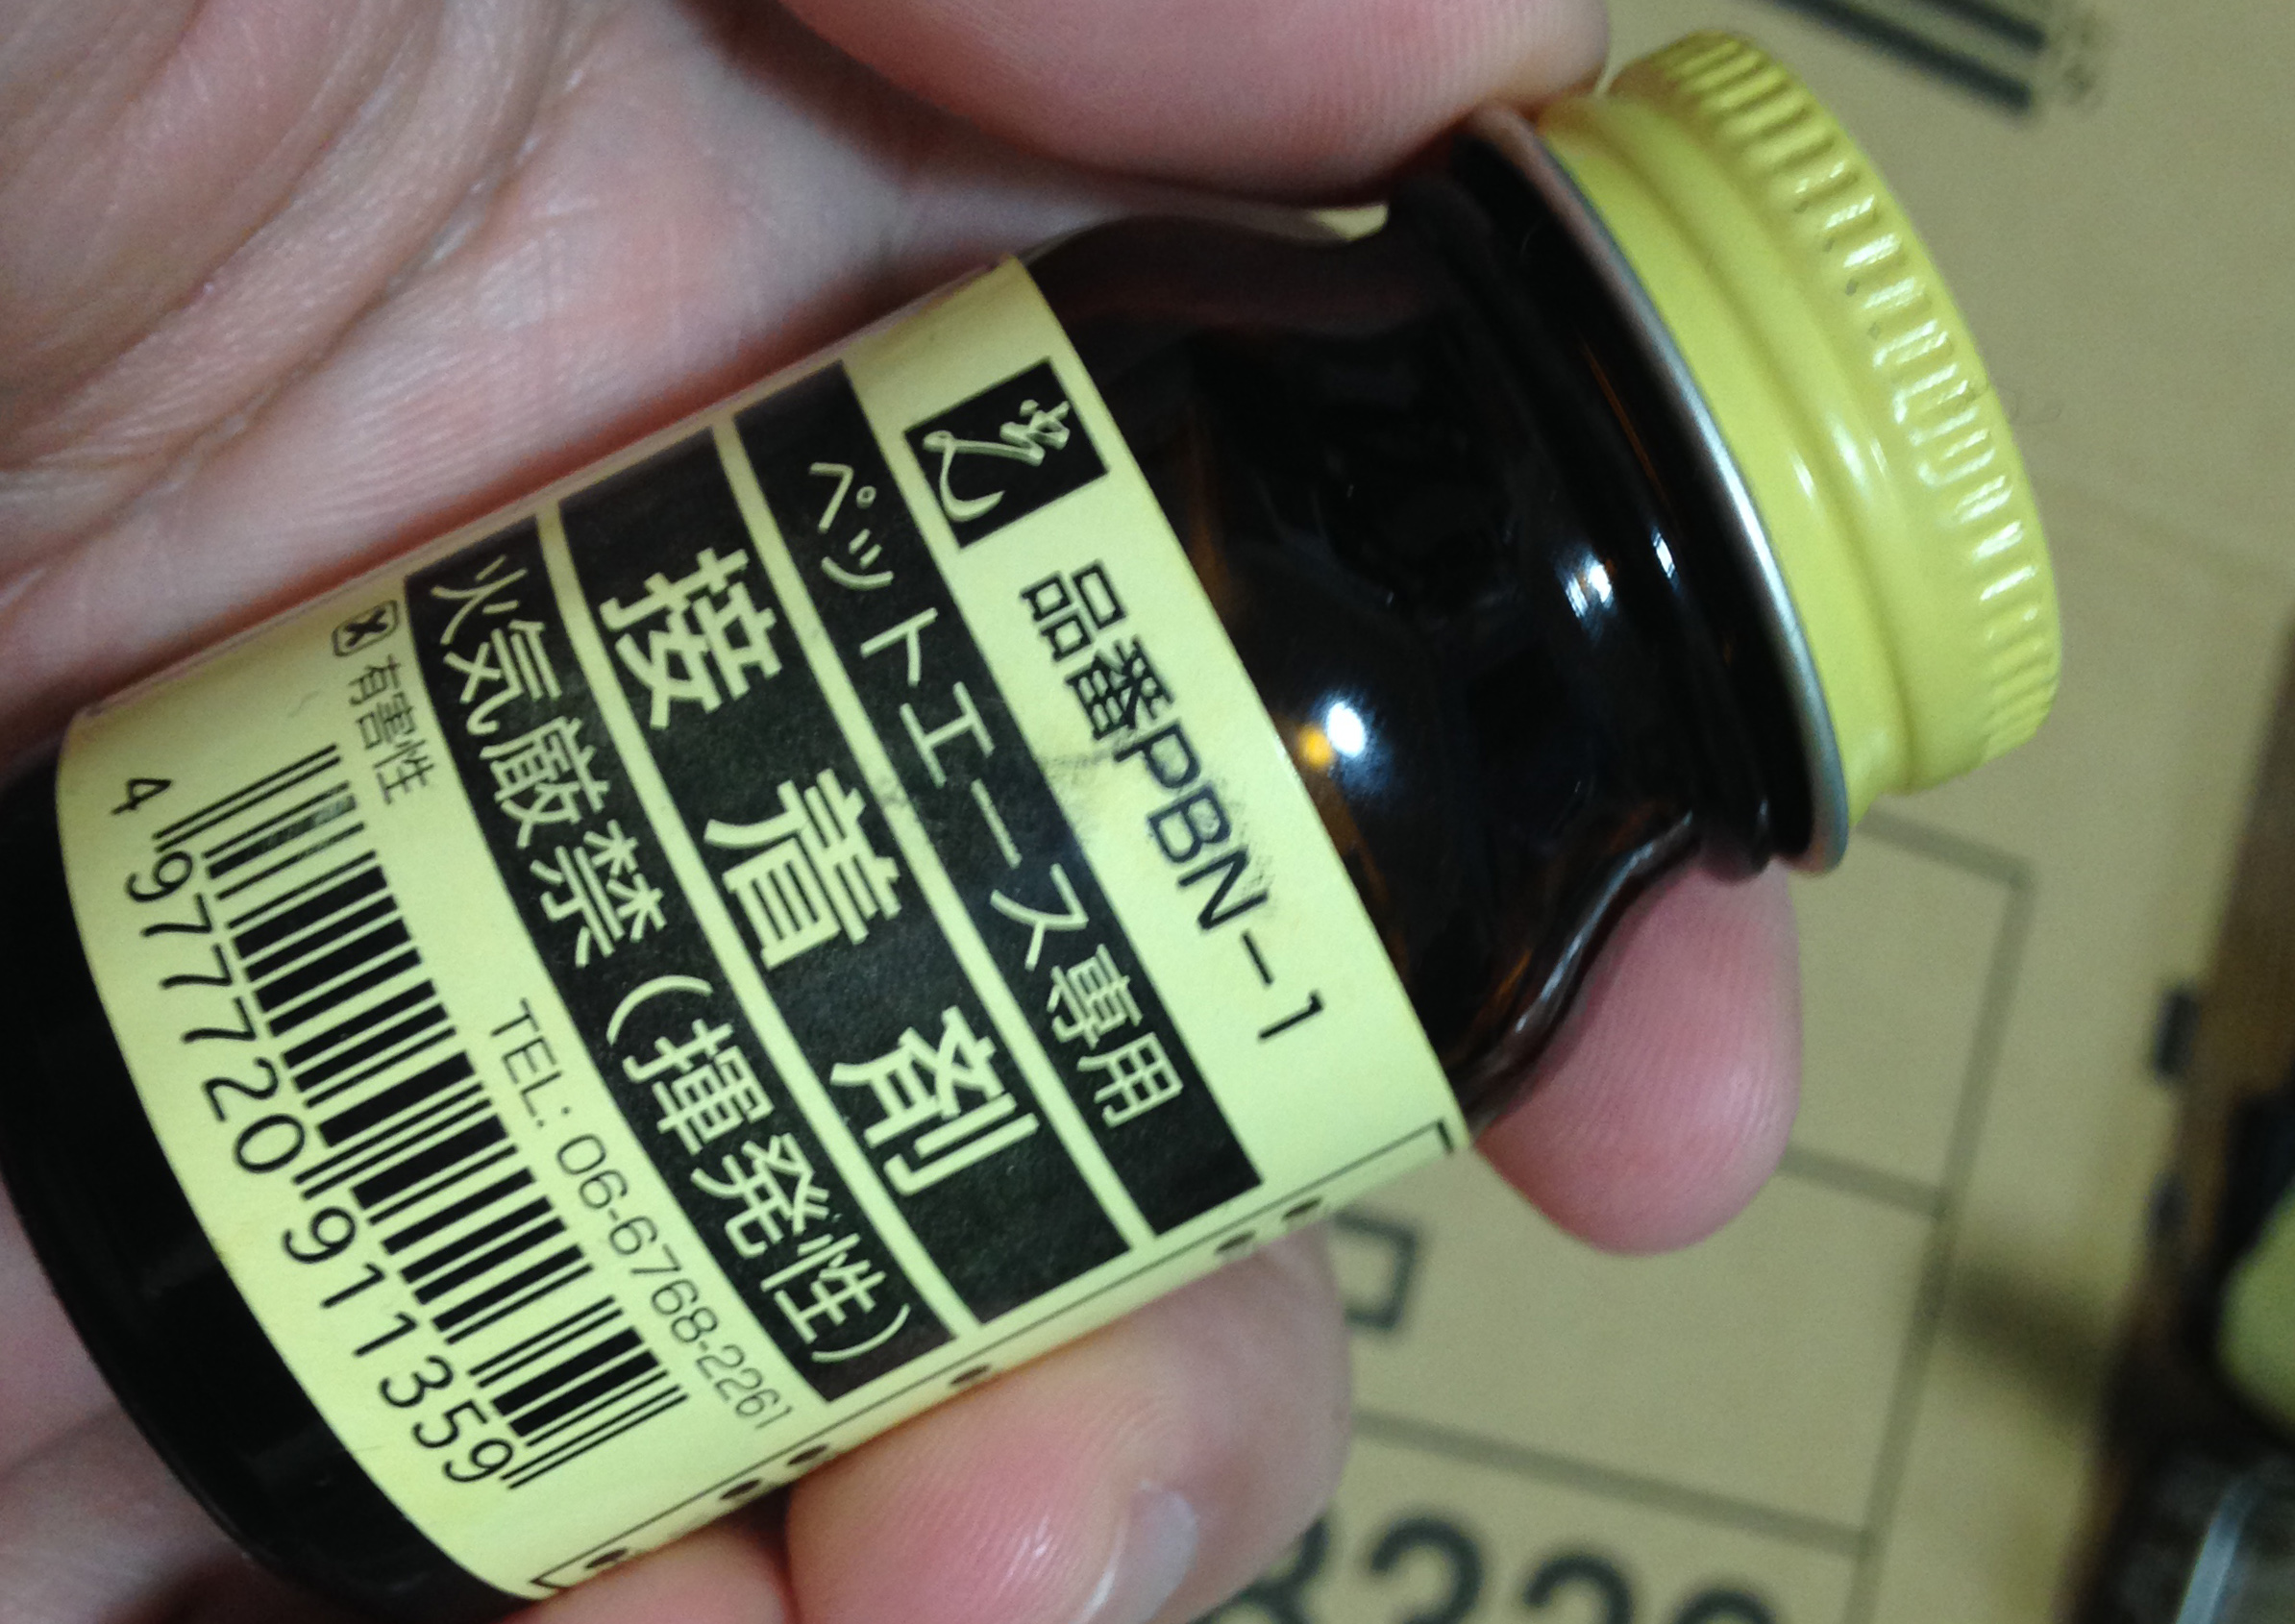
Solvent. This one in the picture is a blend of methyl ethyl ketone (MEK) and acetone. This particular one is branded so it’s a bit pricey.
I use this to soften up any adhesive or thread-lock for securing things. Thread lockers are used to secure threads, collars and the like so that the lens elements are securely mounted in place. If a ring won’t budge the first time you try to unscrew it, put a drop of solvent into the threads and let capillary force spread the fluid. Do not drown it with solvent as you might soak more things than you originally intended!
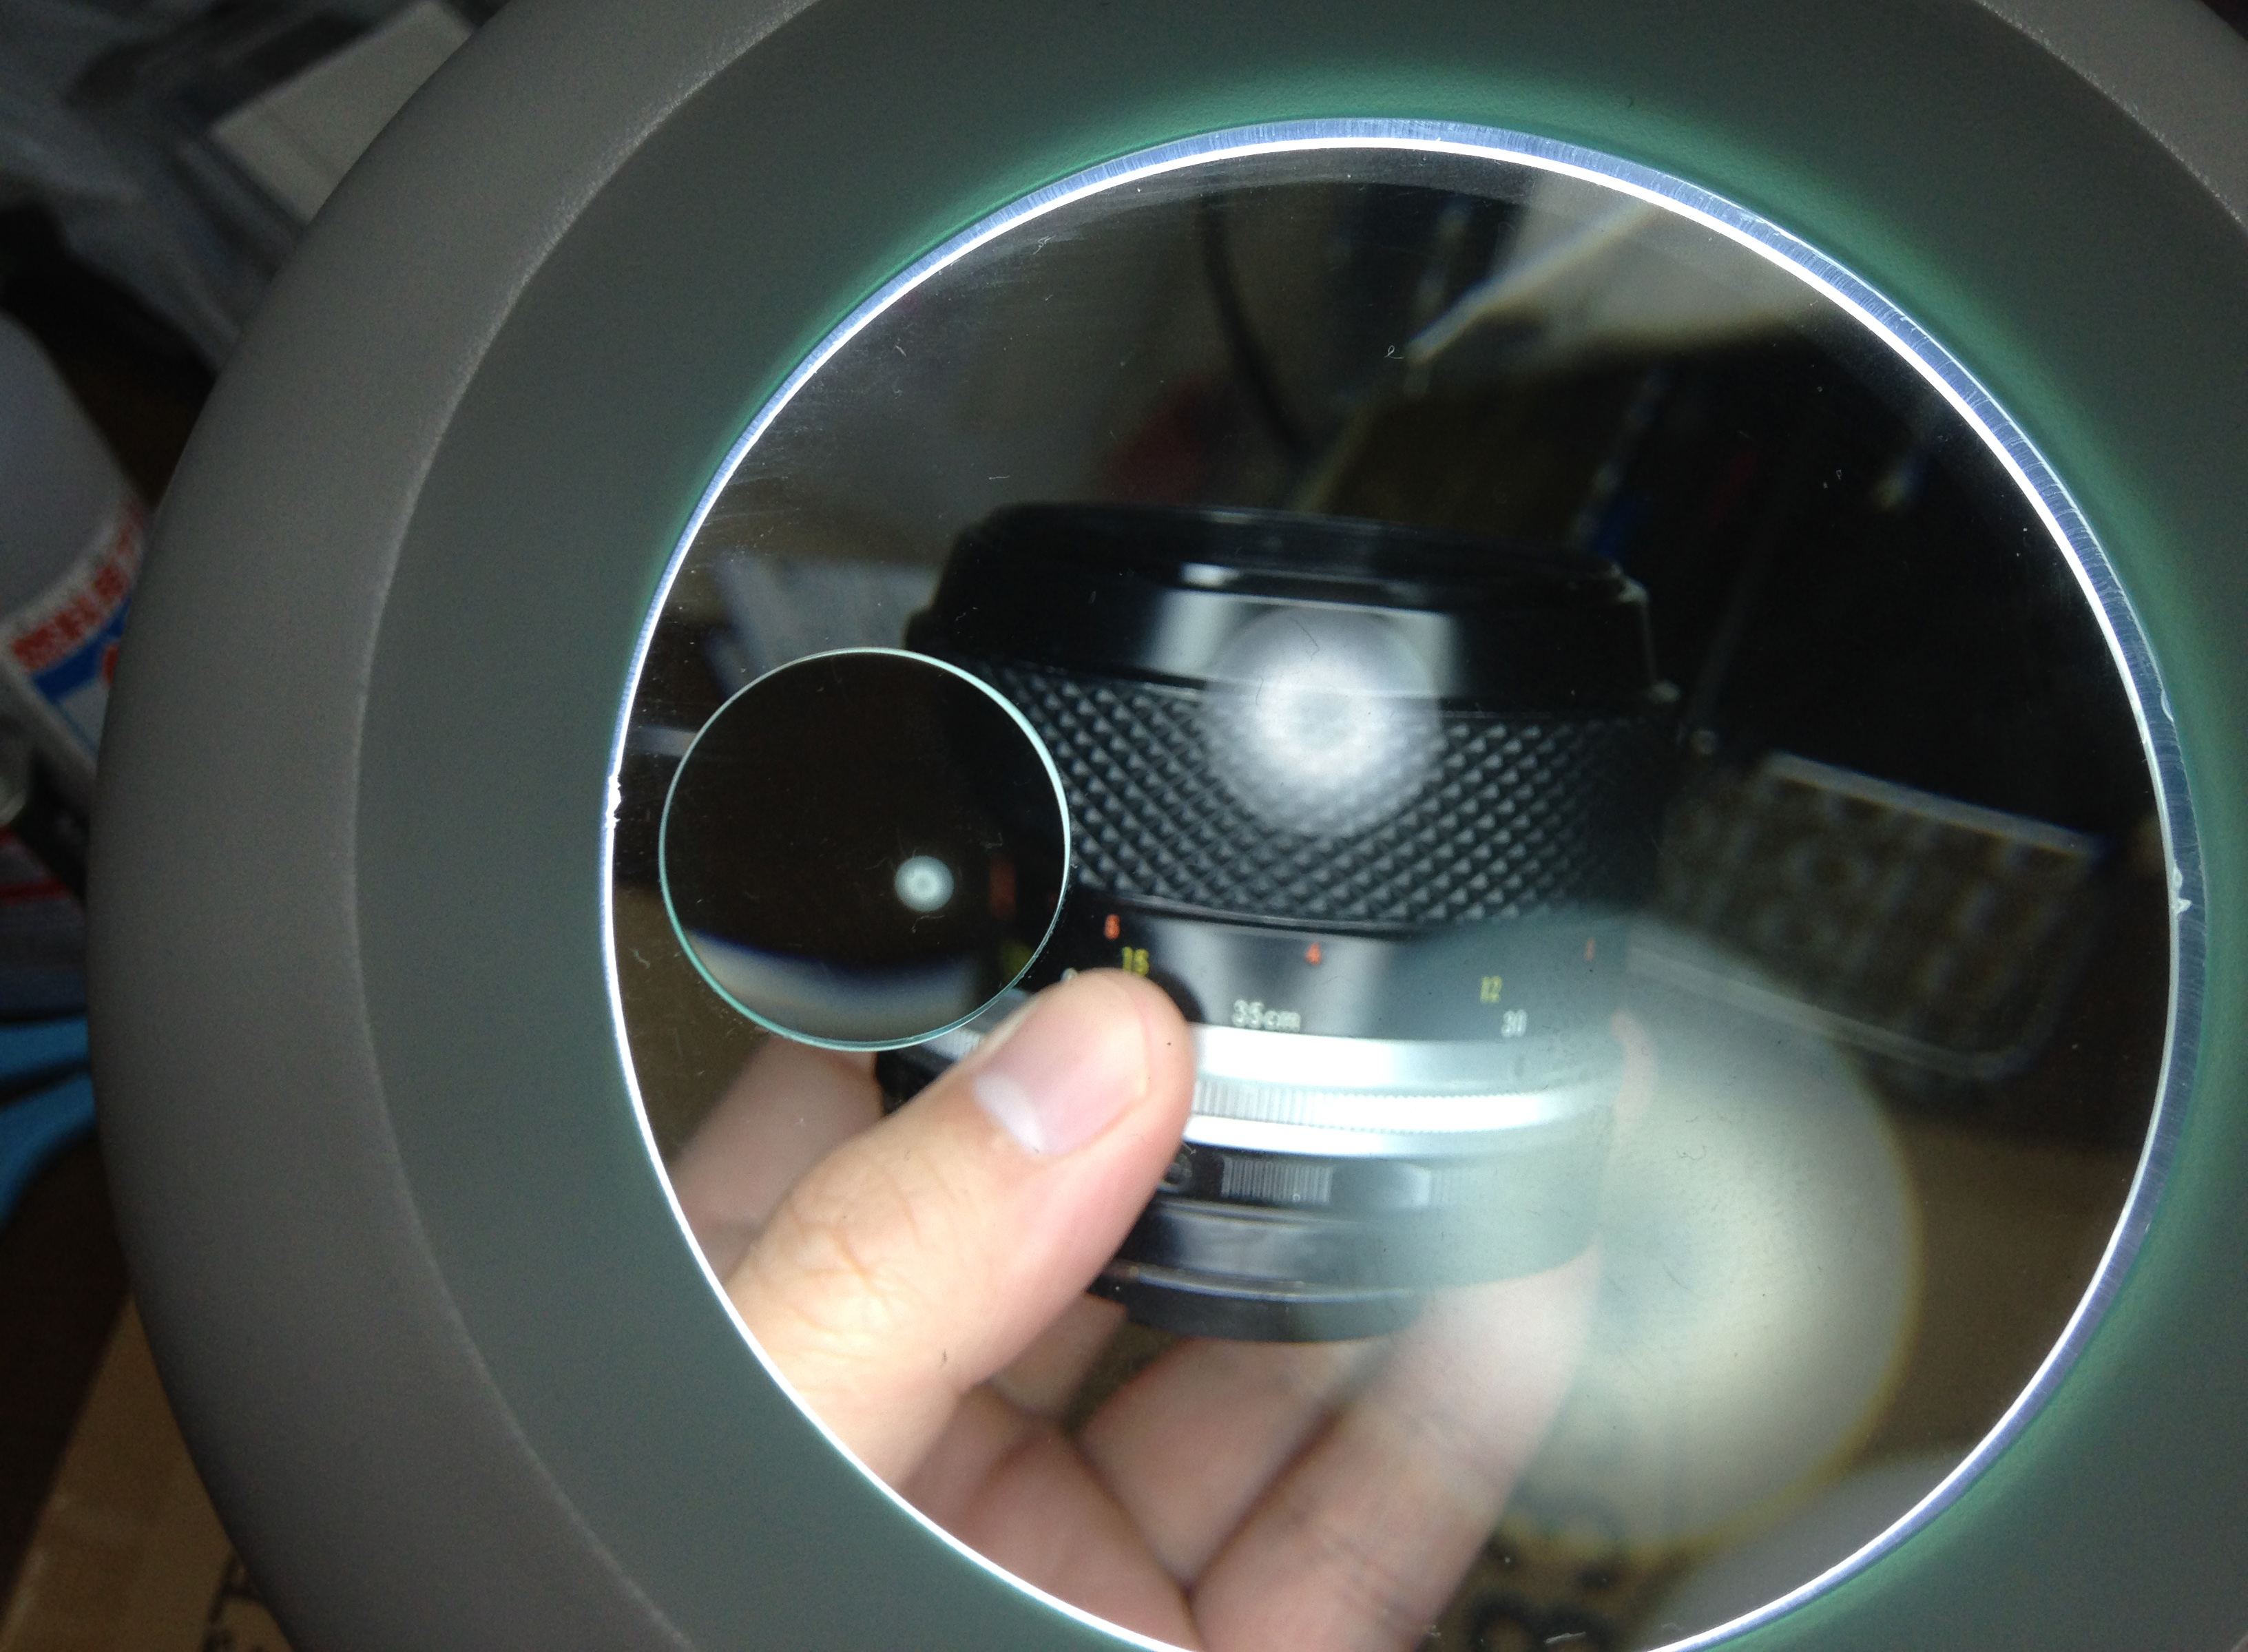
Lamp. I use this lamp to illuminate the surfaces that I am working on. The lamp that you see in the picture is special in that it has a loupe built-in with the lamp housing. Any lamp will do so long as it is bright.
If you don’t have a lamp, a bright LED torch is even better, in fact, it shows anything on the surface of the lens better because LED torches emit concentrated cones of light.
Before We Begin:
If this is your first attempt at opening a lens, I suggest that you read my previous articles regarding screws & drivers, grease and other things. Also read about the tools that you will need.
I highly suggest that you read these primers before you begin (for beginners):
Reading these should lessen the chance of ruining your lens if you’re a beginner. Also, before opening up anything, always look for other people who have done so in the internet. Information is scarce, vague and scattered but you can still find some information if you search carefully. Just be careful since some people will show you incorrect ways of “fixing” things such as the liberal use of WD40 and other amateur ways. If it sounds like a shortcut or hack, then it is most likely amateur work that will make things worse.
Repair Procedure:
First, work in a dry, ventilated and dust-free place. The fumes alone can make some people sick but good thing for me, I am used to the scents and fumes of a workshop. Growing up in a watch repair shop and having scale modeling as a hobby and job has it’s merits, too!
Always work with a clean and dry towel underneath what you are doing. This will prevent any serious damage to the lens elements when you accidentally drop one. I personally use kitchen towels so that I can use it to wipe the table off and discard them.
This section will not have pictures in it since it is difficult to take pictures of the steps when both or your hands are occupied. The steps are easy enough to illustrate without pictures anyway so it should be fine if you just pay attention.
- Remove the affected elements and store them in a safe place. Be sure to mark which direction the elements should face. I usually mark the front edge of a lens so that I’ll know which side should face forward. I use a soft pencil for this since it can be erased with your thumb easily.
- Blow away any debris from the surface of the lens with a lens blower. Be sure not to leave anything hard like sand or bits of paint, wiping the lens with those in it will scratch the coatings, leaving swirl marks and deep scratches.
- Prepare the solution and soak the lens elements in it for a few minutes. Most of the time, the fungus can simply be wiped off without the need to soak it but soaking the lens in the solution makes sure that you give the solution some time to work and kill whatever is in there. Be careful not to leave any lenses with compound elements (glued elements) in the solution for too long. The solution can eat away at the cement (Canada balsam) and this will give you even more trouble and will be impossible to fix economically.
- Remove each element at a time and place them on top of a clean kitchen towel, wiping each one of them using a clean lens tissue while it is still wet with the solution. The fungus should lift away easily. If it is still there, soak it again until it is soft enough. I rarely need to soak it for more than 2 minutes.
- Always wipe in a circular motion while applying gentle pressure against the lens, never wipe a lens’ surface with dry lens tissue. Always use a different part or corner of the tissue so you always use a clean part for wiping.
- Once the glass is clear, use a blower to blue away excess moisture. You can wear a glove on one of your hands so you won’t leave any finger oils as you handle the glass.
- Get a fresh lens tissue and place a drop of lens cleaning fluid on one of the corners. Be sure not to put too much of it, you only want a moist tissue and not something that is dripping wet. Wipe the surfaces of the glass with a circular motion until it is clean and clear. The lens cleaning fluid will dry up really quick so wipe it fast so that it will not leave any marks as it evaporates.
- Get your lens cloth/chamois and wipe each surface of the glass so that they are free from lint and oil. Carefully inspect each surface under a lamp or shine a bright LED light to see if you have left fibers in it. Do not take too much time as there will be times when you will leave small debris on the surface that is too small to see with the naked eye without using a LED light. It is unavoidable and even new lenses will have them sometimes.
- Carefully reinstall the glass. Take care not to scratch or chip the corners of the glass while doing so. When the lens element is secure, blow it some more with your bulb blower and make sure that you do not leave anything there that is big enough to see with your naked eyes under the lamp. Set the assembly aside and cover it with a clean plastic card.
- Repeat the steps until you have completely reassembled everything.
It’s important to note that you should also clean the parts where the glass were attached to so you’re sure that you have cleaned and removed whatever you can before you seal the lens. What I do is I wipe it with the same solution that I use to soak and clean the lens elements with.
From my Dear Readers:
This section is where I put what some of my readers have to say on the topic.
This is from a certain “Andrea B“:
Disinfection, Sterilization and Preservation, 5th Edition, 2001
edited by Seymour Stanton Block
published by Lippincott Williams & Wilkins
See: Page 1076, Figure 54.4 Microorganisms ranked according to their relative susceptibility to chemical disinfectants.
There are 5 susceptibility levels: highly susceptible, susceptible, resistant, highly resistant and extremely resistant.
Fortunately for us, fungal spores are listed as Susceptible to the following disinfectants: some alcohols, aldehydes, biguanides, ethylene oxide, halogens, peroxygen compounds, some phenols.
Now, Mr. “Toby F.” has this to say:
I’ve had good luck with Hydrogen peroxide. I’ve also used 50/50 water/bleach. Always make sure to clean well with water the final clean with 99% isopropyl alcohol to get rid of whatever you use..
From the comment box, “Lloyd” is concerned that MEK is too strong a solvent.
Conclusion:
Cleaning lens fungus is a chore and is something that I would avoid if I can. The only cases where buying a lens with fungus is acceptable for me is when it is being sold dirt-cheap and if the lens has no scratches on the coating or cleaning marks. This gives me the chance to own these lenses while paying a fraction of the price.
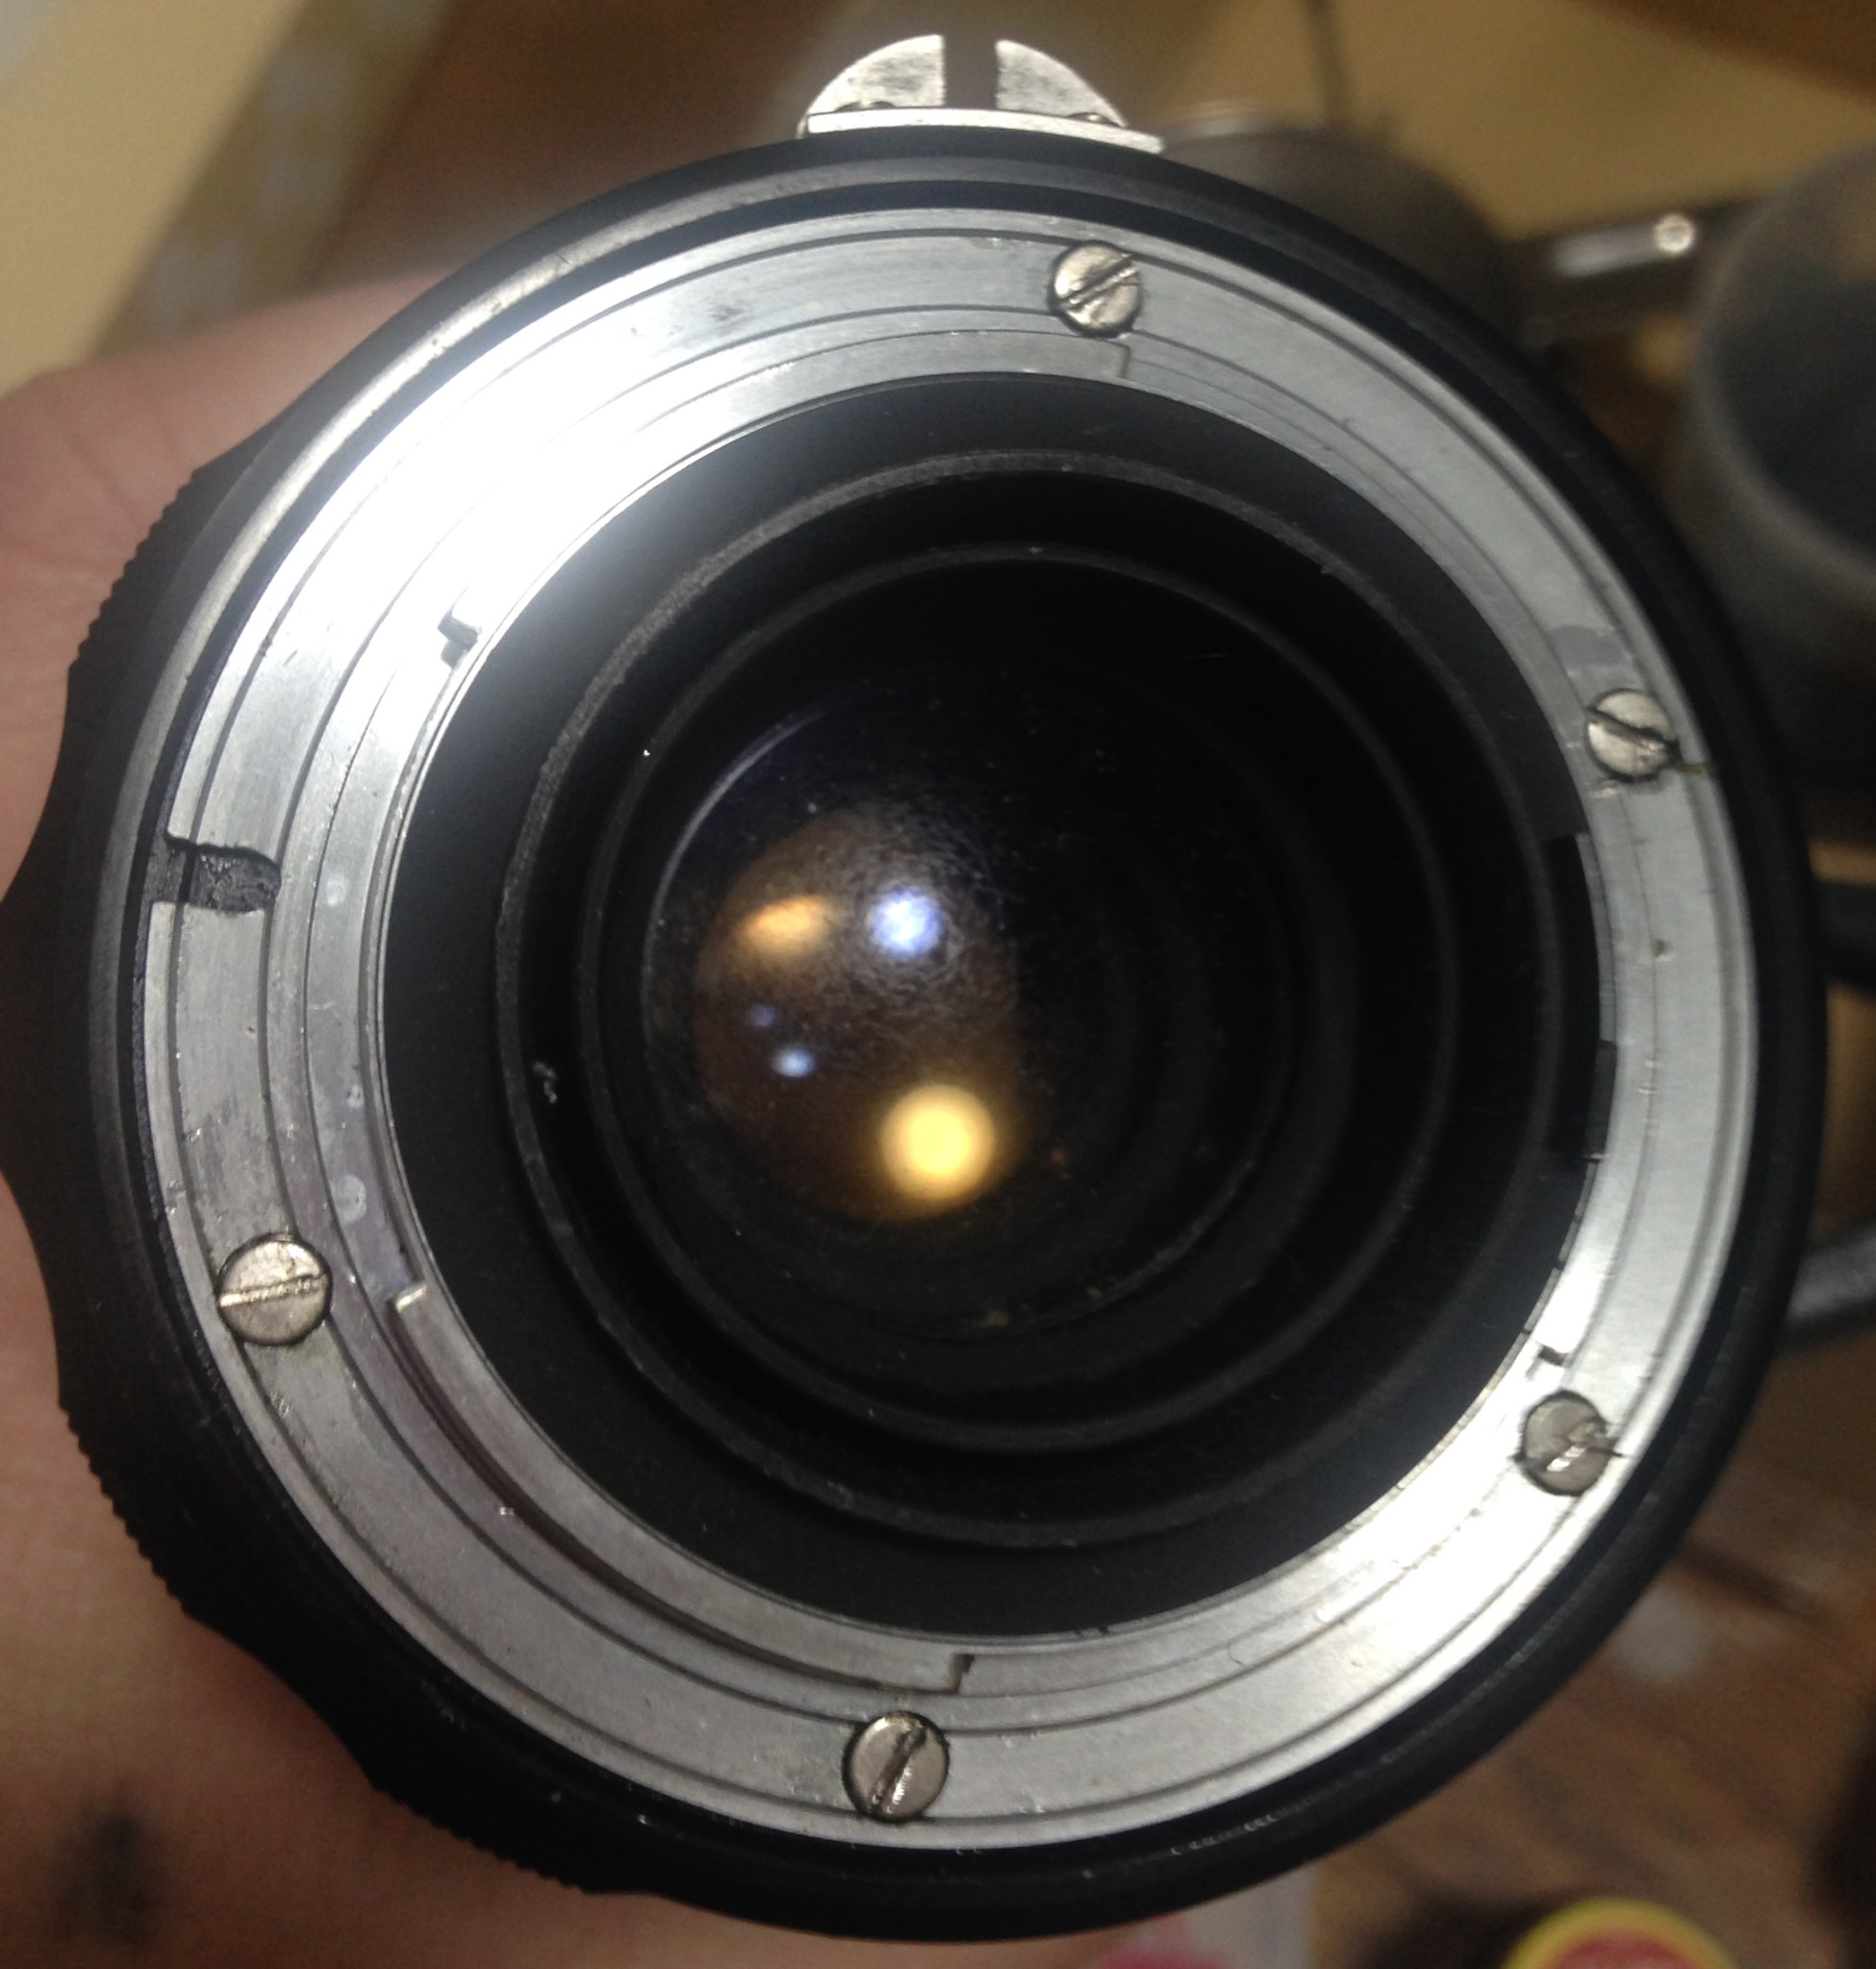
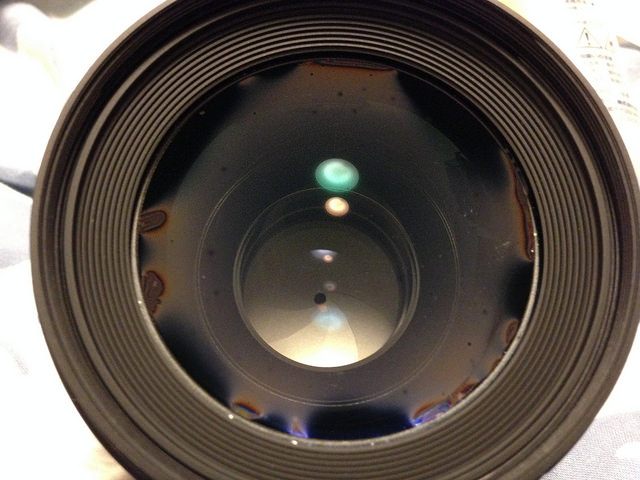
This lens has no trace of fungus now. The fogging you see on the middle element is just trapped moisture and it’s gone after a few hours. Seeing this is scary because you’ll never know if a lens was cleaned before you bought it! Just look at the picture in the introduction and you see get what I mean.
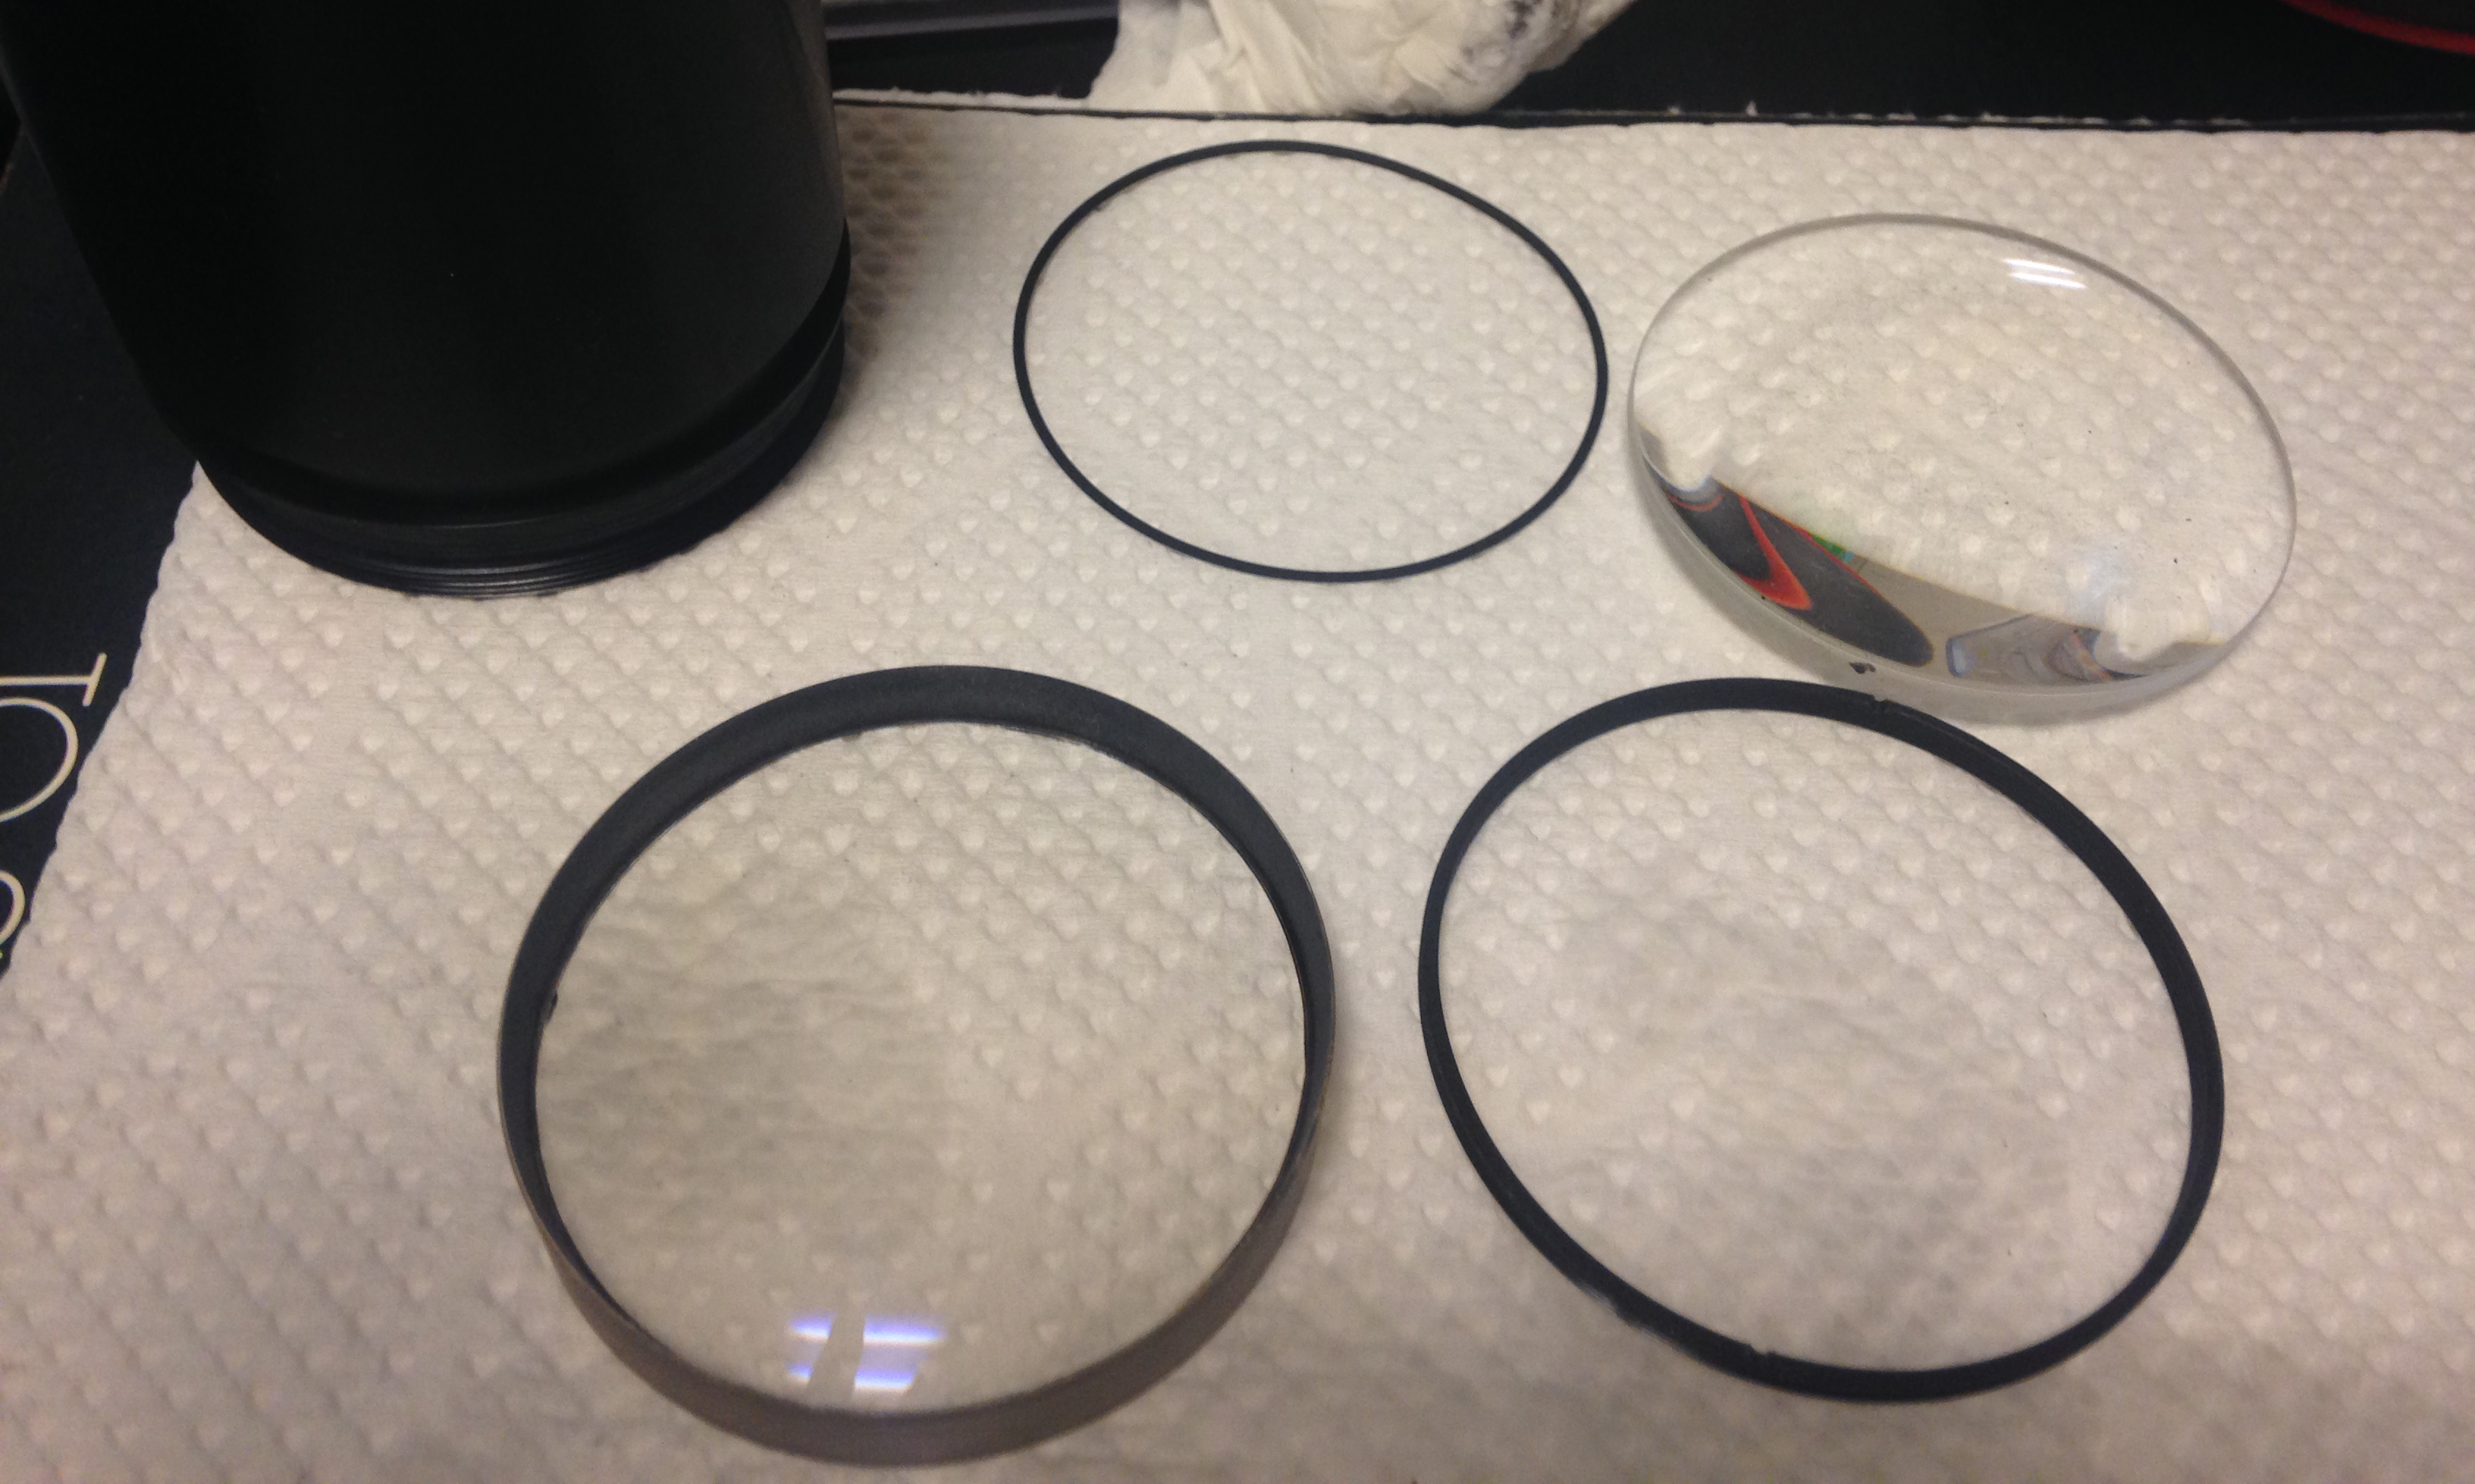
The Nikkor-Q 200mm f/4 Auto‘s elements look really clean as if the fungus problem was never even there!
I hope that you have learned something from this article so that you can start removing fungus from your lens. Even if you don’t have anything to clean, knowing how to prevent it is even better. This knowledge is also helpful for you to assess if a lens is worth saving or not.
Leave me a tip?
Maintaining this site requires resources and a lot of time. If you think that it has helped you or you want to show your support by helping with the site’s upkeep, you can make a small donation to my paypal.com at richardHaw888@gmail.com. Money isn’t my prime motivation for this blog, I believe I have enough to run this myself but you can help me make this site grow.
$2.00
Helping support this site will ensure that it will be kept going as long as I have the time and energy for this. I’d appreciate it if you just leave out your name or details like your country’s name or other info so that the donations will totally be anonymous. This is a labor of love and I intend to keep it that way for as long as I can. Ric.

Mar 27, 2016 @ 17:34:28
Excellent article, but I would make a couple of points. MEK is a very potent solvent, it’s used to dissolve the surface of certain plastics when they are glued together, and it will dissolve many paint finishes. It will certainly dissolve the thread lock adhesives, but neat MEK could do damage to the materials and paint finish. Acetone is much less likely to do any damage, and in my experience is strong enough to dissolve thread lock.
Another safe product for removing fungus is cold cream, the stuff ladies use for cleaning cosmetics from their skin. I apply a layer on the affected lens, let it sit for maybe 30 minutes, then wash it off with a light soap + water. If it needs cleaning after I use the cleaning fluid as you recommend. The cold cream is non solvent and I use it as the first try to remove fungus just incase a solvent damages the lens coatings.
Mar 28, 2016 @ 00:13:48
Hi!!! Thanks for dropping by. Yes, MEK is sometimes too aggressive! it works a lot faster than acetone which I like. the one that you see in the blog is a mix of acetone and MEK so it’s a bit gentler. i used chloroform before. that thing is dangerous. i used it as plastic cement and overall solvent.
Mar 28, 2016 @ 19:22:45
Very informative article, Rick.
Best regards
Tony
http://www.GLOBETROTTER.CO
Mar 29, 2016 @ 00:23:34
Thanks, Tony!
Nov 20, 2020 @ 03:46:14
Hello! So I have fungus/haze in between the first lens group on a Nikon 55-200mm as-f Ed. I took it apart because I thought it was behind the glass but It’s in between the two lenses that are stuck together. Is there a way to get it out or is it a lost cause? Or is there a way to replace it? Any advice is very much appreciated! Thanks so much! And I love the site! Really great information!
Dec 17, 2025 @ 11:06:34
witam, mam ten sam problem, że soczewki są sklejone, jak to rozwiązać góry dziekuje
Aug 30, 2022 @ 07:41:50
Thank you for good information
Mar 30, 2016 @ 22:32:03
Another superb source of info.
Thanks Rick.
Mar 31, 2016 @ 00:46:09
Thanks, Ron! next one will be about helicoids!
Apr 30, 2016 @ 12:56:04
Excellent article. In fact your whole site is brilliant and much needed. I had been looking for something like this last year but could not find this detailed information online.
Question: I have a eseries 100mm f2.8 lens. I have opened it a number of times. It has got some fungus/haze inside the backside of front element. However the inner side is a sealed block. Can you guide how to open that sealed block?
Apr 30, 2016 @ 14:39:48
Thanks!!! I am thinking of overhauling a 100mm but i still cannot find a cheap specimen from the junk boxes. many of the E lenses have sealed elements like the case of the 70-210E where copious amounts of rubber cement was used to entomb the front element. i have removed a lot of the rubber cement but i still cannot unthread the thing!
Jan 07, 2017 @ 19:58:54
Hi
Can I comment on the fungus removal chemicals etc. Just about everyone on the Net gets carried away with vile brews for cleaning. Which seems OK but really only applies to porous materials e.g. wood, bricks & plaster but definitely NOT for totally impervious glass. Even when fungus causes damage it remains superficial and can be removed easily and completely with a strong solution of washing up liquid. This also the perfect degreaser!
Jan 14, 2017 @ 14:08:41
Hello, Norman! Sorry for the late reply. Some people just use naphta or alcohol for that. Ric.
Jan 17, 2017 @ 22:24:07
As do I as the need arises, I was a bit sceptical until I tried it but it works a treat. Your fingers/rubber gloves are totally degreased at the same time so no problems with fingerprints and it seems to cut down on dust (and static?). I just make up a solution in a bowl and rub the surfaces with my fingers, rinse, dry, a puff of air and drop back in the lens – job done!
If you haven’t tried it its well worth a go!
Brilliant site by the way some money on its way.
Jan 25, 2017 @ 11:27:08
Hi,
Need to help to understand that whether i can dip a fungus infected glued lens element in 50-50 hydrogen peroxide and ammonia solution? Fungus has grown inside the two glued elements.
Thanks
Jan 25, 2017 @ 11:33:48
Hello,Paul!
Thanks for asking that. If the fungus is in between the elemwnts and is embedded in the glue then I would not risk it because it may dissolve the glue. I personally haven’t tried this but this sounds scary enough! Best is to kill the fungus by sunlight but do not get the elememts too warm because the glue (canada balsam) is a resin of some kind and it is known to fail when heated. Ric.
Aug 13, 2021 @ 20:25:14
What about ether? Do you have any experience or recommendation about it? My technician said the only way he managed to get rid of a funghi was to soak the element on it for several days. Surprisingly, the glass came back without any trace of the spores… Believe me, it was a really a lost cause.
Thank you for the amazing content. I’ve learned so much! A pair or two of old vintage glass suffered in my hands, but many got rescued after it!
Feb 28, 2017 @ 23:36:43
Excellent article I have also a 50mm sigma art and I have the same problem I dont know hwo i can take off the front element to clean it I really love this lens it’s my favorite one .
Mar 01, 2017 @ 00:12:46
Hello, Nassim.
Check lensrentals.com, I know they have a teardown. Ric.
Mar 01, 2017 @ 00:19:52
Oky thank you
Mar 09, 2017 @ 00:20:40
I have a Nikon 300mm f4ed lens with fungus in the front glass is this a sealed unit and can it be opened.
Mar 09, 2017 @ 01:06:39
Hello, Peter!I am not sure. I haven’t seen that uet. Do you have a picture of the assembly or cell? Ric.
Dec 26, 2017 @ 09:45:07
Excellent article, soo detailed. Very useful info for fighting mold in binoculars too.
Dec 26, 2017 @ 15:32:43
Thanks! Be careful when using this on binoculars you may want to chase it with distilled water. Ric
Feb 20, 2018 @ 00:00:24
Good Morning Richard, I’m conscious of bludging for information, however no where on the Net is there any information on the disassembly of a NIKON EF-Nikkor 150mm f5.6A enlarger lens. Could you pleased help with some advise. The lens has a fungal infection. I have been able to disassemble and clean the rear elements. I have been able to access the outside element of the front. My problem is the rear element of the front group. I can see this lens is accessed from the back side as a retainer ring is apparent under the aperture section. The question is how does one lift off the aperture mechanism? There is a supposedly outer ring up against the selecting aperture ring, but no amount of torque will budge a thread break, which has me wondering whether there is some other route to disassembly. In appreciation. Regards Tony, NZ
May 10, 2018 @ 07:53:12
The big and most frustrating thing about lens cleaning is getting rid of dust when reassembling. l just discovered ‘micro fibre’ cloths which have magical ability to pick everything(!) – even grease. They come in various flavours and prices though my supermarket cheapest seem as good as any at 50p each – a must have!
May 10, 2018 @ 14:33:44
Hello. Yes I do use one but it’s still not enough at times. Ric.
Jun 19, 2018 @ 09:28:40
Hello Richard. I have an old SuperOzek 135mm f2.8mm that got fungus inside. After I read some of your articles I got some courage in asking you if you do some “outside” work… meaning to clean lenses for some other people. If you do, and if you are so kind to help me with this matter, I was thinking of sending you the lens to clean it. I was really impressed how clean the lenses are after you finish the work and I think this 135mm of mine might deserve a new life. All the best for you and looking forward hearing from you.
Bogdan
Nov 27, 2018 @ 12:39:12
The photo that purports to be MEK is actually sechakuzai (接着剤、せっちゃくざい), which is a glue, not a solvent. Methyl ethyl ketone is also called butanone.、commonly sold in 500ml bottles for about ¥1,000. The Monotaro website has it listed. Nevertheless, I would also recommend only acetone; MEK is too strong a solvent.
Otherwise, thank you for your website and information therein.
Also a Tokyo resident, 26 years, and camera nutcase.
Jan 10, 2019 @ 01:16:50
Thanks I probably wasnt paying attention. I shall correct it when I have the time. MEK is OK so long as you dont use too much of it. Ric.
Dec 05, 2018 @ 05:38:17
I was good but i wanted to know if there is an easy way to remove heavy fungus without removing the lens?
Dec 29, 2018 @ 02:52:44
nothing.
Jan 09, 2019 @ 22:40:29
Hi Richard, congratulations on your very interesting site. I bought and should arrive soon a Nikkor 20mm 2.8 with mushrooms on the front lens. I hope to be able to eliminate them by following your precious indications thanks bye
Jan 10, 2019 @ 01:13:31
Glad you liked it. make sure that you have the right tools for it. that is an expensive lens and you dont want to damage it. Ric
Jan 19, 2019 @ 18:44:47
I need a nikon 70-200 2.8 cleaned. I’ve watched a video that lasts more than an hour and really dont feel competent enough. I’m also told that the front elements are in a sealed.
Feb 02, 2019 @ 10:38:16
Hello, it’s best that you send it to a tech for repair. Find a competent one and don’t risk it. Ric.
Feb 02, 2019 @ 13:15:59
Thanks Richard. I’ve sent it to a company for a quotation but it’s £200. Is IPA alcohol good to clean glass?
Mar 18, 2019 @ 22:28:46
Have a Canon 24-85. Discover one of the optic elements are covered with “something”, but not sure if it’s fungus. Looks like grains of salt, or sand, and thin straight lines, like hair. Lens was always carefully treated and never was on a beach, and never repaired. Could be oil spatter? wish to upload a photo, but really don´t know how to take a photo of a microscopic hair :o(. Thanks anyone who can give me some advice.
Apr 06, 2019 @ 20:46:58
Thank you Richard for all the helpful information. I would like to ask you what are the concentrations of the ammonia and hydrogen peroxide solutions you are using for the 50:50 mix. I see that ammonia and hydrogen peroxide come in different solutions in my country and I am not sure which one to use.
Apr 10, 2019 @ 20:42:34
Thank you for alla the useful information. I would like to ask you what are the concentrations of the hydrogen peroxide and the ammonia that you are using to make the 50/50 mix.
Jun 20, 2019 @ 23:38:08
fungus is evil
Dec 21, 2019 @ 00:47:48
Hi Ric, thanks for the great website. Just curious on the strength of Hydrogen Peroxide you use… I can purchase either 3%, 20% or 35%. Would you use 35% in your cleaning solution?
Dec 21, 2019 @ 03:13:56
Hello, Yes. just thin it with distilled water and vinegar. Don’t use something that’s too concentrated, it might etch the coatings
Feb 12, 2020 @ 13:08:36
An excellent source of information, just what I needed as I’m preparing for my first lens clean with a fungal infested Olympus OM-System Zuiko Auto-S 50mm 1:1.8 lens that I bought on Ebay for this purpose. As sort of sacrificial starter lens before I try cleaning anything more expensive.
Jun 07, 2020 @ 04:11:02
Thank you for your suggestions. I’ve used Carl Zeiss and Nikkor lenses for almost 60 years and never had fungus damage. I was lucky. Zeiss says never store cameras in organic cases for long periods. They suggest exposing the front and rear of your lenses to direct sunlight for a few minutes. Ultraviolet will kill any latent fungal spore deposits. Because of the variables, Zeiss does not stipulate the time required for UV remediation. I expose my best lenses for 15 minutes at noon every few months. I store in neoprene foam pouches and never use an airtight sealed container. Carl Zeiss and my techs say once you spot fungus tendril tracks on a lens surface, the damage is done. Why? Because fungus produces hydrofluoric acid which actually etches the optic’s surface. It is not possible to repolish or cover over glass which is etched with fungal acid. I do not recommend the DIY crowd soak any precision optic in any solutions, since it will affect the coating and may creep into cemented boundaries causing separation. Older lenses which are put together with organic Canada balsam, are particularly vulnerable to chemical agents. The top lens makers stopped using organic lens cement decades ago. If you value your lens, send it to a qualified optical lab. Do not attempt to do it yourself at home.
Aug 16, 2020 @ 10:06:09
Hello Sir
Please how can you help me with my 300mm f2.8VR 2 nikon lens which unfortunately has fungus due to improper storage. I sent it to nikon but they could not fix it because there was fungus on all the inner elements. please help as its a very expensive lens.
Feb 16, 2021 @ 12:55:12
Hi and thanks for such useful and thorough explanation of fungus fighting. As for me I recently got a Kodak Ektapro slide projector with fungus in the 100-200 zoom lens and also in the condensor lens. The 100-200 zoom I can abandon since I have better alternatives anyway. The condensor lens I will, easily I think, clean. But can I take the chance of using the projector then? Or do I risk my slides become full of fungus?
Apr 15, 2021 @ 19:00:31
Hi Richard very interresting read! By any chance do you know if there is a manual for opening a zenza bronica 50mm nikkor lens? I have some fungus in there that I would love to clean.. maybe I’ve used the wrong search keys, but I can’t find anything on the web. Maybe you know a solution? Regatds Raymond van der Aa
May 13, 2021 @ 02:44:28
Thanks for the article. I have SIgma 50mm F1.4 Art lens and has some moisture stains inside the front Element. I unscrewed the front ring however unable to open the front glass. Do you know how to open it? I tried checking online videos but its different from 35MM & 24MM. Any Help is appreciated.
Aug 14, 2022 @ 19:13:46
Hi. I’m probably over-reading things but…
The text under the ‘fizzing chemical’ YouTube video says, “Never ever soak your elements in the chemicals for any longer than 3 minutes”.
However, step 3 in your list of procedures says, “Prepare your solution and soak the lens elements in it for a few minutes to HALF AN HOUR…” Is that a contradiction or am I overlooking something?? (Highly probable!!)
Many thanks for your excellent and detailed article
Kind regards,
Lars
Feb 12, 2023 @ 17:11:29
I sent my lens for cleaning. After 7 months I received them. I still see fungus. Does it mean it is shoddy job or some fungus cannot be completely removed?
Sep 19, 2023 @ 12:18:19
do not use acid- fungi like acidic environments, they even produce acid which can etch your lens. use a basic or neutral cleaner like hydrogen perocide
Apr 26, 2025 @ 04:07:14
Hello, i need to know how to unbuild 24mm Canon lens to clean internal fungus, please, how can i take of the ring cover to access the lens?