
Just like most bobbies, you’ll require certain tools to repair or maintain the equipment that you use. I love repairing broken photography equipment, it helps save the planet and I save a lot of money along the way.
I’ll outline to you all the essential tools that you need for repairing lenses so that you don’t waste your time and most importantly, money on gear. Many people will give you the wrong advice on the internet, many from ignorant or arrogant personalities. This has resulted in many people, including me to botch my repairs when I was starting up. I’m neither ignorant nor arrogant, I’m a generous person with experiences to share so you won’t end up being a camera butcher.
Most of the tools that you’ll need can be bought in regular hardware stores. However, some are specialized and can only be bought in specialty stores or online. These are good investments, buy the best that you can afford but do not go overboard and buy something that is insanely expensive but of very limited use.
Luckily, camera repair has plenty in common with watch repair, both deal with precise, small hand-held tools. Going to the watch repair department of your DIY shop can also be fruitful. I grew up in a watchmaking family so the tools and skills are all familiar to me.
I highly recommend that you follow my advice as close as you possibly can because tools like screw drivers seem to be common across the board but in reality they come in different types. Using the wrong driver type can result in a stripped screw head.
I’ll never be held responsible for any broken equipment, tools, gear or your health, please use your common sense and follow safety procedures.
Screwdrivers and Screws:
These are the most-basic of tools but their essential. Never buy cheap ones, I made the mistake a long time ago and bought cheap-Chinese ones, they are flimsy and may harm your gear! I will show you which ones to buy.
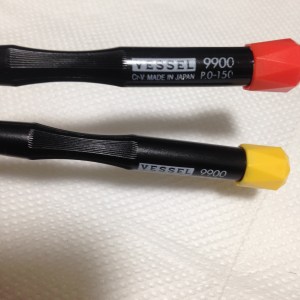
First, you’ll need a set of precision screwdrivers. These things are great for smaller screws. Be sure that you only get JIS (Japanese Industrial Standard) when repairing Japanese equipment. Hobby shops with a mini 4X4 or radio control section should have these and chances are they will be JIS. Japanese brands are also more likely to be JIS (like Tamiya). Never buy cheap-Chinese precision screwdrivers, you’ll use these for a long time, the damage caused by using the wrong screwdriver can be irreversible. If JIS isn’t available, get crosspoint drivers. The Philips drivers look similar but are different, never use Philips drivers with your Japanese equipment. The best brand I know is VESSEL, they’re not expensive and they’re well-made.
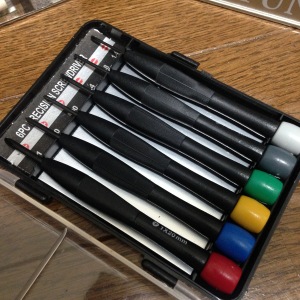
You will also need precision micro screwdrivers. These micro screwdrivers are essential for screw heads that are too-small for regular drivers. Always remember to “use the right tools for the right job”. These are VESSEL-brand drivers. You definitely will want to stick to a brand so I recommend that you stick with VESSEL since they’re reliable, inexpensive and of high quality.
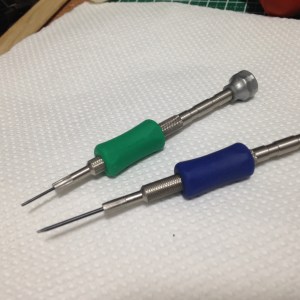
For bigger screws, use regular drivers. Be sure to buy 2 types for each screw type: a long-shafted ones and short shafted ones. The 2 types of screws that you’ll encounter in camera or lenses are crosspoint and flat. They are also called plus (+) and minus (-) drivers. Again, and I can never say this enough: stick with VESSEL. The most useful size for plus drivers is 0. The 00 can also be useful from time-to-time but 0 is what I use the most. These are used for bigger screws like that ones in the bayonet mount. The longer ones are used for larger screws that are too-tight, using the shorter general-purpose ones will just strip the heads even if you use the correct size. The long shaft will give you the leverage that you need, a fatter handle will help give you more torque, too. Camera manufacturers love thread lock (Loctite) a lot and they use this thing copiously. Also, since the lenses that you’ll repair will likely be old, the screw might just “fuse” with the thread due to corrosion, grime and other nasty things and extra torque is required. Read my article on working with bayonet screws to know more about how to handle stubborn screws.
If you think that all flat drivers are the same then think again, the best ones have parallel edges, they will not mark the slots because of this. They aren’t cheap so many people grind the usual ones to make them. I don’t have time for this so I spend around $14 for one of these. They’re a good investment, it is important to buy the best ones that you can afford while making sure the ones that you bought aren’t over-priced.
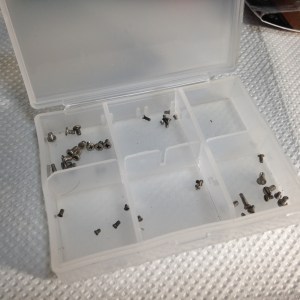
You’ll want to search the screws section of your DIY shop for a collection of screws. I’m not familiar with other Japanese brands but the most common sizes that you’ll find in Nikons and Nikkors should be 2mm (M2) and 1.4mm (M1.4), you’ll occasionally find the odd 1.7mm (M1.7) and other sizes, too. If I didn’t make it obvious, the measurements I just mentioned pertain to their diameter and not length, so an M2 screw is 2mm across.
Buy lengths from 2mm to 4mm. The screws found in the bayonet mount are most likely 2mmX4mm (M2X4). The smaller ones used in the lens are either 1.4mmX2mm (M1.4X2) or the 1.4mmX3mm (M1.4X3). There’ll be rare cases when you’ll encounter the odd 1.7mm (M1.7) screws, these screws are used internally in parts where extra-strength is required like in the helicoid keys or to mount the optical assemblies.
Another important thing to take note is to only buy flat head screws with a very low head since you don’t want the heads to protrude in most cases.
Set screws (grub screws) are those tiny screws that don’t have a flared head. They’re special and should be handled with care. They’re also very brittle as they can break under stress. These cannot be bought easily and can only be bought from special manufacturers.
Specialized Tools:
Repairing cameras or lenses require special tools just like how watch repair requires special gadgets. Most can be made from scrap metal, some will cost you a bit because they’re specialized and the market for them is small. Don’t buy the cheap-Chinese ones from the internet, they have flooded the market recently and they will do more harm than good.

The workman’s compass is used by other trades such as leather-working or engineering. Good ones are expensive, I buy the German ones as they’re the best. Be sure to buy very good ones, cheap ones may slip and cause damage. Make sure that the ones you’ll buy isn’t going to slip and has a good tension locking screw. They’re used to twist open retainers. Anything that has holes or slots at opposite ends indicate that this tool is needed to open it. I usually modify these by bending the tips in-or-out to fit certain tasks. The time may also be rounded with a file to prevent damage. I own several of these, some are long while some are short.
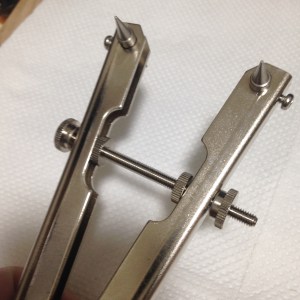
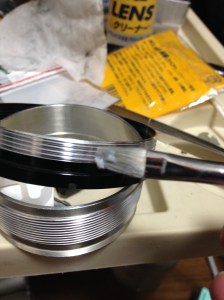
The lens opener or lens spanner is seldom used but is so essential that you will want to buy a good set. The workman’s compass has the same general function but there will be times when a lens opener is the correct tool for a job. The cheap ones can be scary since the locking screws holding the points can be flimsy. If the part that you need to access is inside the barrel or is too narrow for this tool then the workman’s compass is the right tool, not this. I see many cheap-Chinese ones, they’re flimsy and they bend. Avoid them, get the best ones that you can buy like the one you see here. If not, make sure it has a rectangular cross-bar and not circular ones. The circular ones will not hold their shape when you bend them and will skew under pressure.
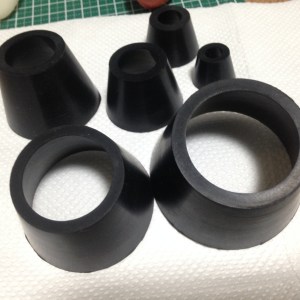
These are called friction wrenches. These are basically just rubber stoppers that come in different diameters with a hollow core. These are used to twist open the metal or plastic front rings holding the front element with friction and torque. While I got these as a set and I strongly recommend that you do the same, you can also fashion some yourself by using the rubber stoppers that hardware stores sell to put on the feet or bases of chairs or metal pipes. Just make sure that the middle part will never touch anything.
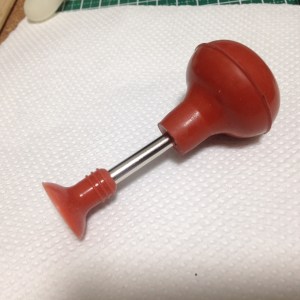
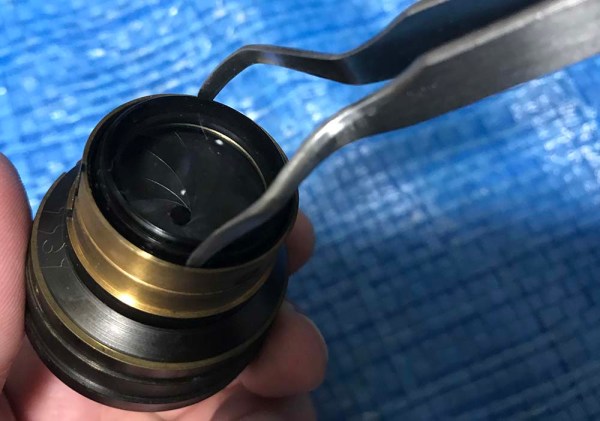
This is a lens sucker. It sucks the glass while you remove or place them into their housings. Some elements that are positioned too-deep into the barrel like the case of longer lenses will require these to access and put them back. Make sure that the rubber part that come in contact with the glass is always clean. This is also a common watch repair tool to hold the crystal.
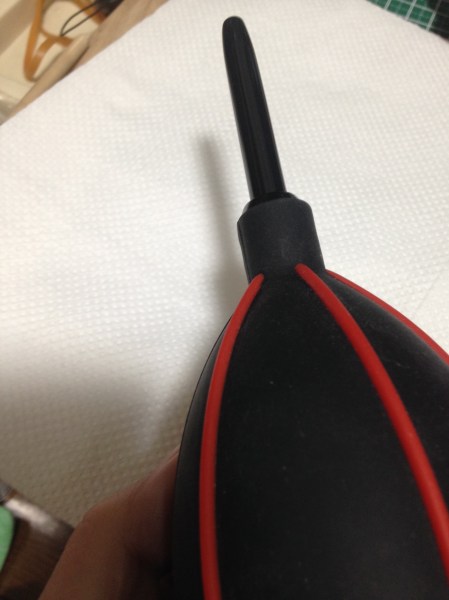
Buy the best blower that you can afford, you’ll want a strong burst of air to clean any fibers from the surface of your lens or to remove junk and bits of metal from whatever that you are milling.
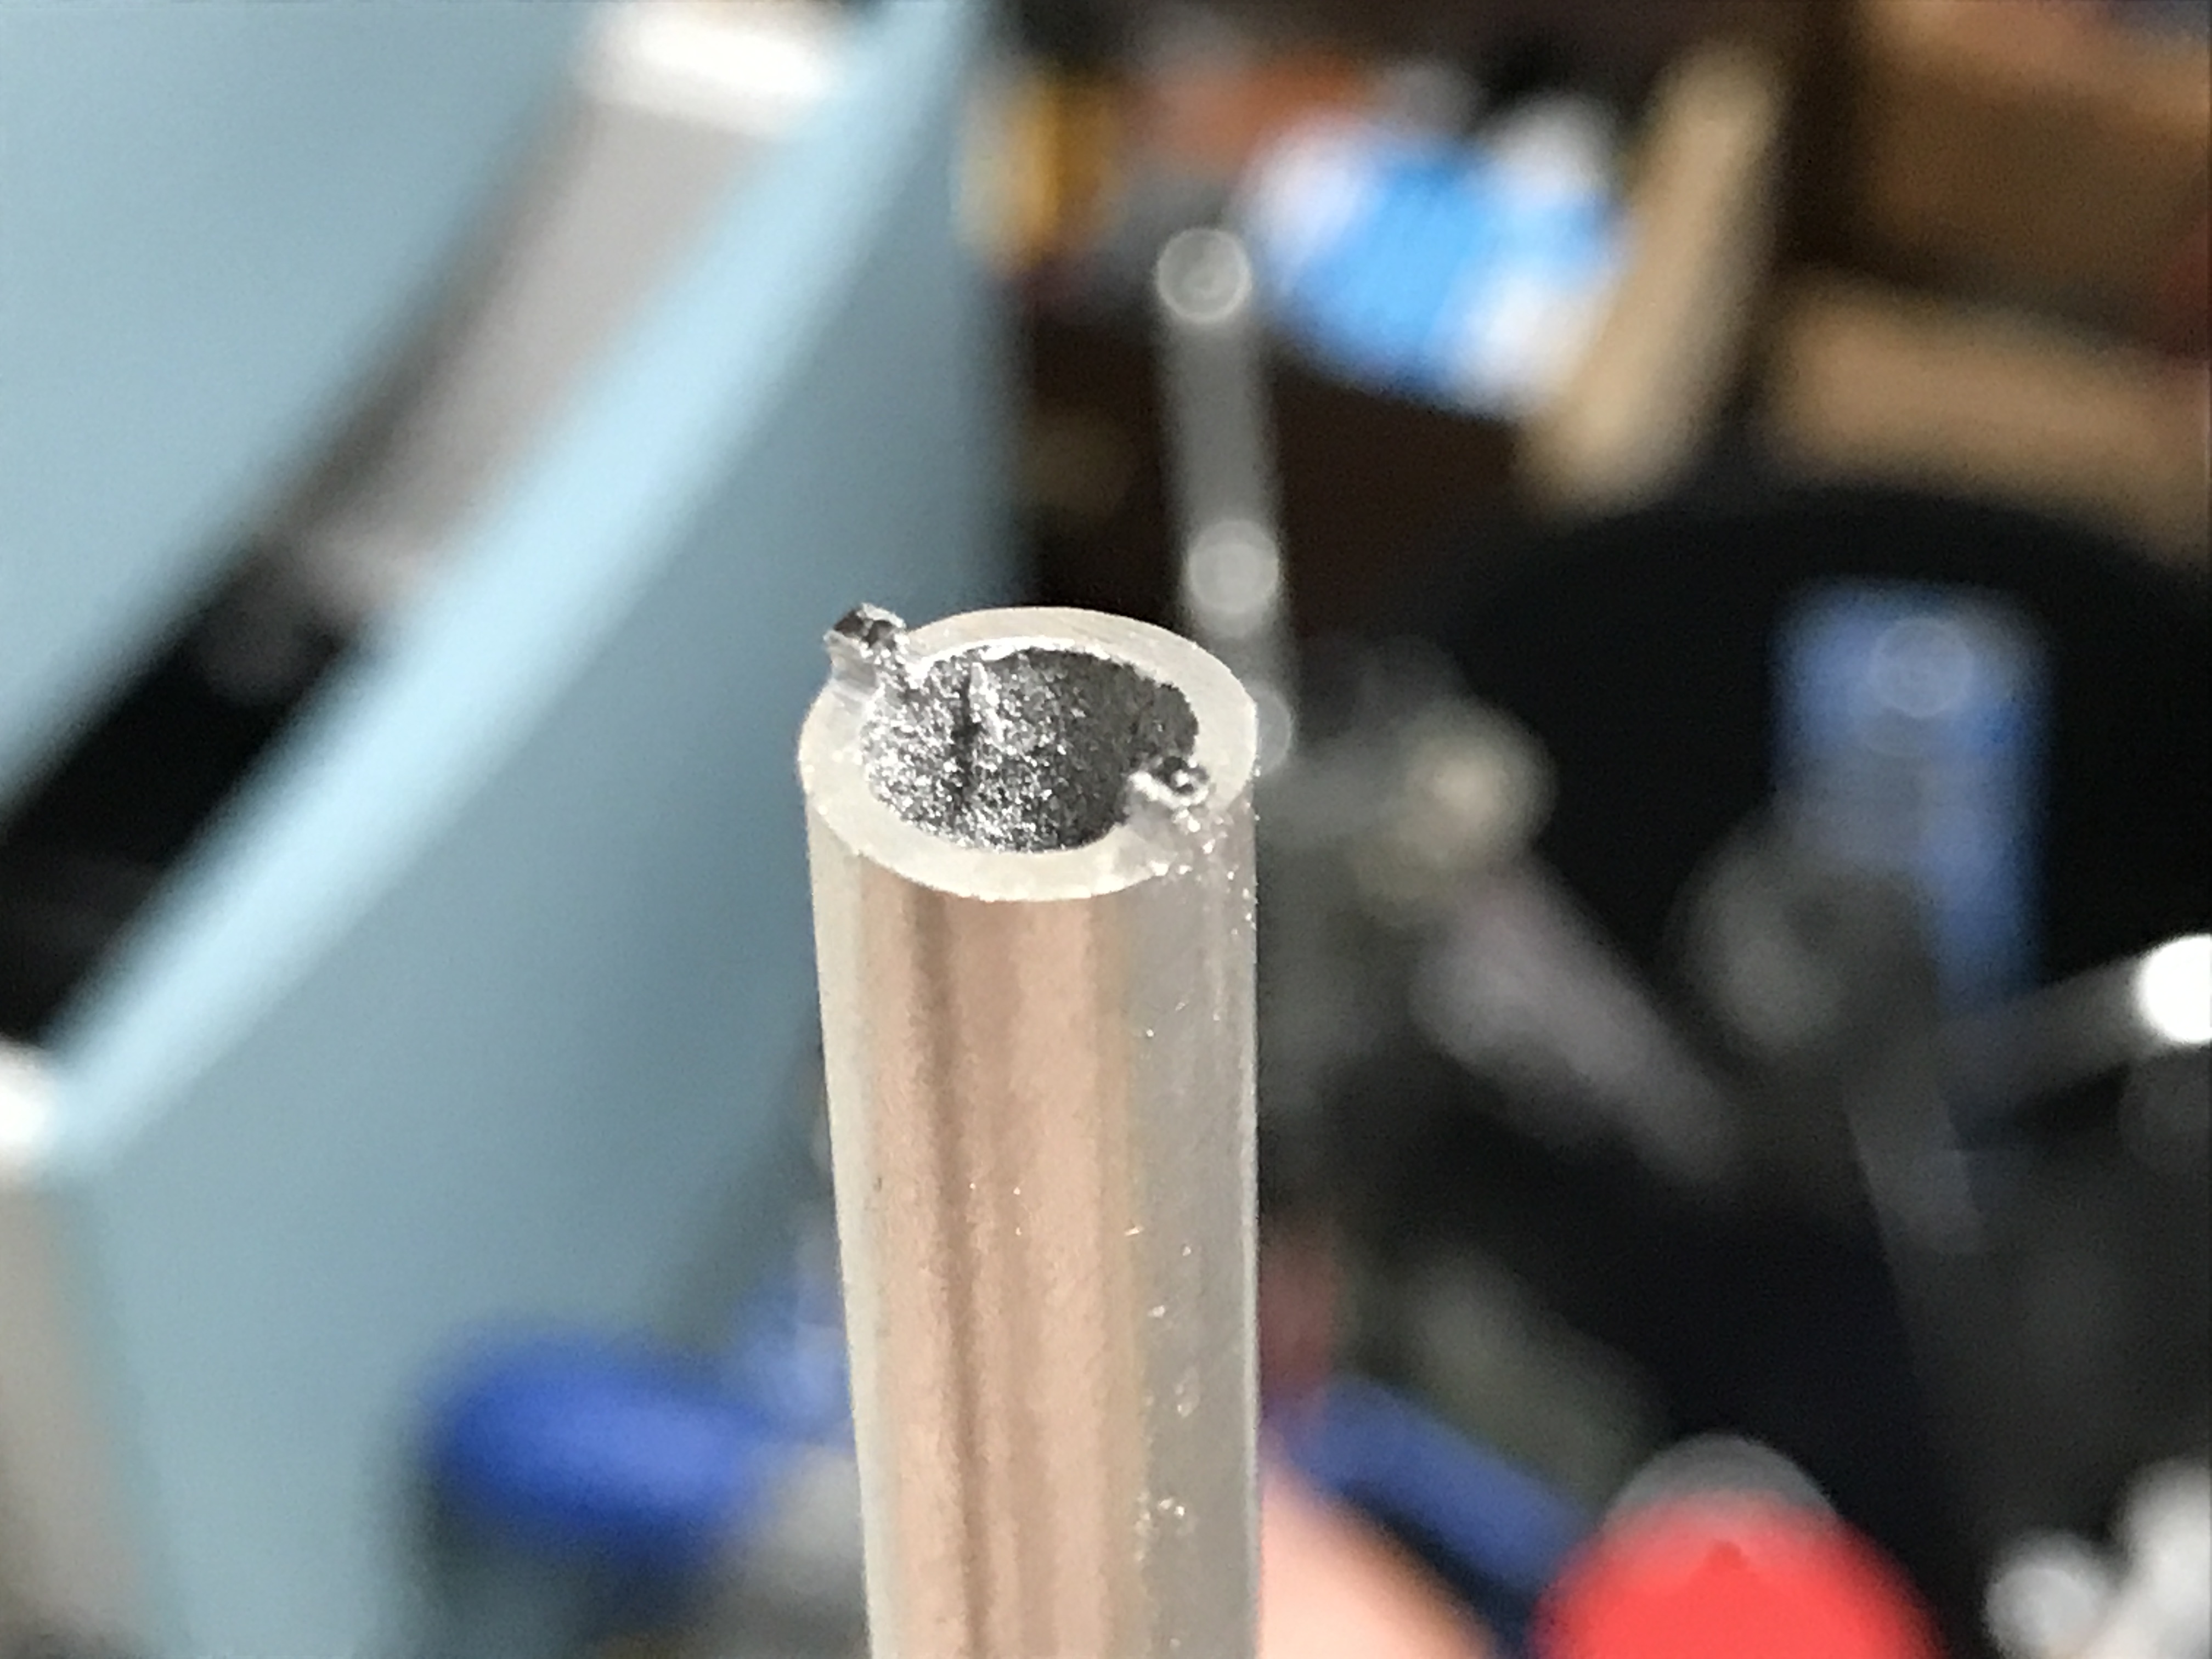
This is a pipe-key. It’s used to turn rings that have slots in them, they’re the best tool for the job but it can be hard to source pipes with the correct size. I usually mill these specially for expensive equipment where I don’t want to leave any marks. It’s important that you make one from brass or any metal that’s strong-enough but isn’t too-hard as to mar the surface of your gear. It is a highly-specialized tool and is usually only used for a certain part of the equipment you’re repairing, it usually can’t be used with other things.
This is an alternative to a pipe-key. This can be easily made and can be used again with anything so long as they will fit. Read this article on how to make a pipe key alternative to begin making one.
A lens vise is used to repair a dented filter ring. Read this article on how to use a lens vise to see how dented front rings are repaired. Alternatively, you can modify a pair of pliers and weld several sections of pipes to achieve the same effect but that’s a bit more risky. I also use a male-female wooden die and whack the broken part with a mallet to bring the dent back-to-shape.
This is DIY lens spanner. It is easily made using scrap materials and can be handy if you need remove a retainer ring seated deep-inside something and is out-of-reach using a compass or you don’t want to scratch anything inside by using a metal tool. Read more about this tool here in this article on how to make a DIY lens spanner!

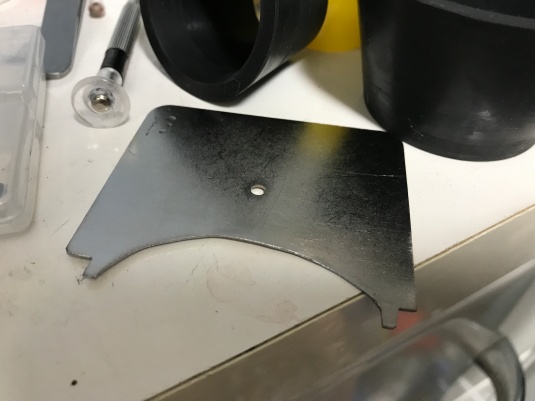
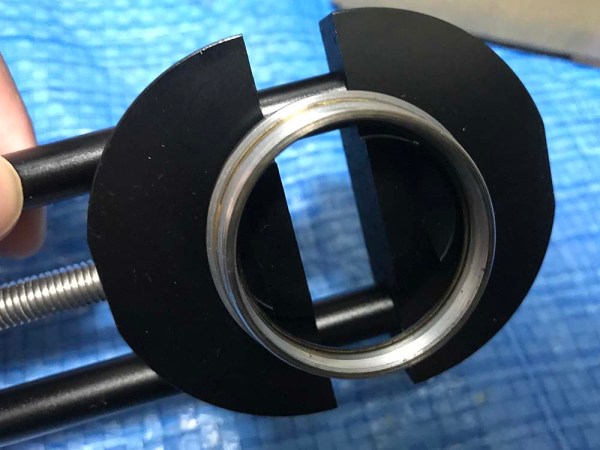
This tool is very important for those who wish to repair earlier Nikons. This A/R ring opener is needed to remove the lock for the shutter button guard. I made an article on how to create and use an A/R ring opener.
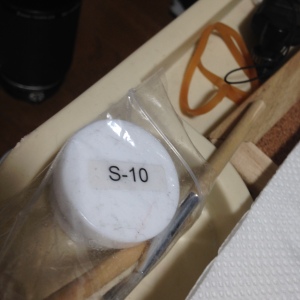
Only purchase grease that’s made specially for lenses, using the wrong type will result in the grease migrating to parts of the lens that don’t need it and may stiffen or run on extreme temperatures. I use 2 types of grease, one for general use like this S10 grease and another one that’s a bit thicker if I want the helicoids to be stiffer. I consider this S10 grease to be a general-purpose grease so I use this for the majority of my lenses.
Always remember that you should never ever mix grease of different types together as this will change the chemistry of the grease. You’ll need to clean any surface from the old grease and other impurities before you apply your new grease. The camera manufacturers use different kinds of lubricants for different parts of the lens but I use the same type of grease that I applied to the helicoids as my general lubricant so that there will never be a chance of anything else mixing with the helicoid grease. Remember never to apply too much grease or your lens will be oily again in no-time. Another rule I follow is to lubricate anything that has metal-to-metal contact and move regularly like the aperture ring, springs, bushings and helicoid keys.
You’ll only need shutter testers when you want to repair cameras. Be sure to buy ones that has at least two sensors at each edge of the frame, one for the opening curtain and another for the closing curtain. Those with one single sensor is only good for lens-shutters or leaf shutters. The one you see in my video only has a single sensor, I use another one with multiple sensors and I cannot recommend the ones like you see in my video. Never ever buy those testers that base their readings on audio, they’re mostly a waste of money. If anybody told you that they can judge a shutter’s timing by-ear, they must be high with something. That’s BS, I want to know what pipe they’re smoking.
These are the more-common tools that I use for camera and lens repair. It’s important to use the correct tool for the job to prevent any accidents. Your collection of specialized tools will grow as you get more involved with this hobby.
Other Tools:
Here are some more equipment that will be useful for your hobby. They are important and you can source them from just about anywhere.

Lens tissue is valuable for cleaning a lot of things. Remember never to use the same tissue that you used to wipe metal surfaces to wipe anything that is glass. Another is to never wipe your glass using a dry tissue. While these are soft, they may be abrasive enough if dry. Also blow it with your blower before wiping. Lens tissue is lint-free, you can also use a soft rag, the same ones used for wiping lenses but those aren’t disposable.
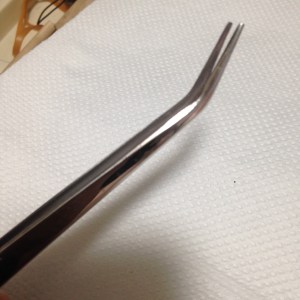
You will need several types of tweezers and you will also want to buy ones that aren’t made of metal. I have several pairs of plastic ones, the good ones aren’t cheap but they’re perfect for handling delicate parts such as the iris.
You’ll need several types of solvents, both polar and non-polar ones. This is a very controversial topic because some people don’t like the idea of using a petrol-based solvent naphtha. I use them because some stuff will only react to a non-polar agent. Just be careful and you should be OK. Alcohol is really good for cleaning things and I have a vat filled with alcohol so I can soak a part that’s dirty to disinfect it. Be careful when handling these, you should never use these with delicate parts such as cemented groups. Always have adequate ventilation when using solvents or you’ll get high.
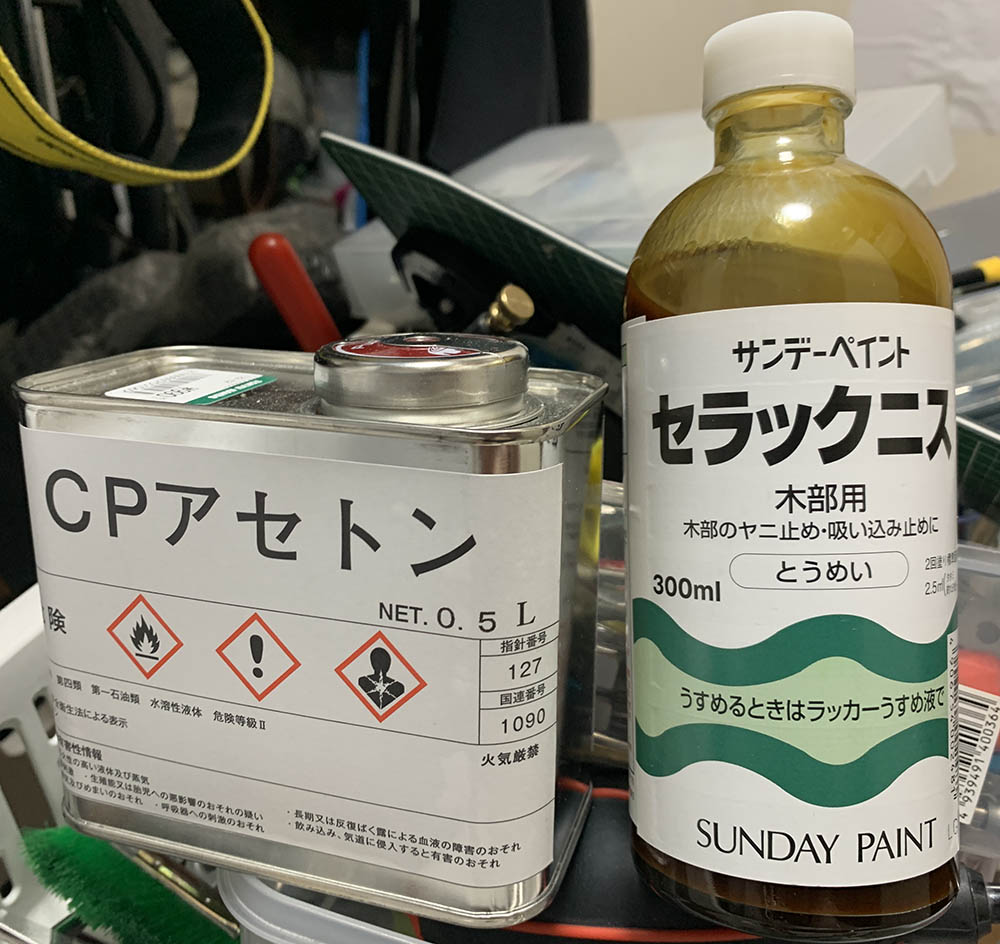
Acetone is invaluable as a solvent, what you see here is definitely too much for hobby-use but it’s industrial-grade and I cannot find a smaller container.
Shellac is great for use as adhesive when bonding leatherette and other soft materials like cloth or felt. I also use it as a sealant and securing parts such as screws. It’s inexpensive compared to Loctite but it isn’t as strong. One way to thicken it is to burn a small amount of it in a metal container or just let the solvent evaporate for some time. You can also apply several coats if you need the shellac to be thin-enough to be brushed to a surface to ensure an even-coat. Old cameras use this to bond curtains to the shutter, it’s tough so long as you know how to use this properly. Like contact cement it is best applied to both sides and cured for a short time until sticky before application.
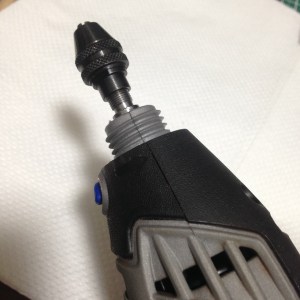
A Dremel and its stand (Dremel Workstation) is handy if you need to drill or grind things. I use it as my grinder when I need to mill new parts or modify existing parts. Sometimes, you’ll need to use this to drill a hole in a stripped screw’s head and use a screw extractor to safely remove a stripped screw. It is worth mentioning that you’ll need special bits for different jobs.
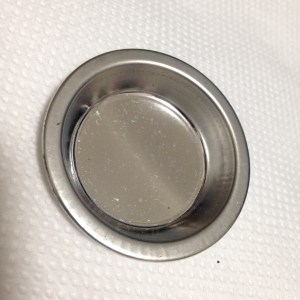
You will also need generic tin containers to put your cleaning fluids or just to organize parts so that they do not get lost.

This is a micro screw-extractor for removing stripped screws. Only buy the type that has a grooved point that bites-into the hole drilled into a stripped screw. Never ever buy any gimmicky screw-extractors such as Moody Tools’ screw extractors, they’re expensive and useless. Only buy the ones that look and function the same as the one in the picture above. This is important.
Here are the other tools that I use:
Drill bits for drilling or for using with hand taps and the screw extractors.
Hand taps for fixing worn threads or for making new screw holes.
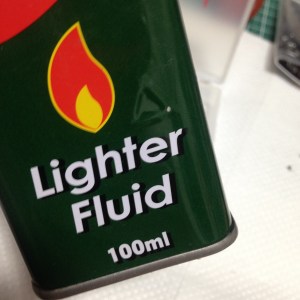
Denatured alcohol for bathing or dipping your metal or plastic parts prior to final wiping to remove lighter fluid residue, lacquer, oil and grime.
Nail polish remover/Acetone is important for softening the seals that the Japanese manufacturers use.
Q-tips for obvious reasons.
Hydrogen Peroxide & Ammonia for killing fungus. Mix in equal parts. You can also add a strong vinegar to make it more potent. Read my post on how to remove fungus from your lens to find out more about this.
Cerium Oxide for polishing scratched glass surfaces.
Lens cloth for doing the final wiping of the glass before reinstalling them.
LED lamp to inspect if you left any fibers in the glass and also to illuminate your work area.
Files and sandpaper for parts modifications and fabrication.
Rubber gloves to help you grip things and protect your hands.
Rubber mallet, because sometimes some things just need a good whack!
Rubber bottle opener, they look like oil filter wrenches but made of some kind of hard rubber. They’re great for unscrewing stubborn lens barrels.
Multi-meter to diagnose electronics.
Hobby knife for cutting things.
Contact cement for gluing leatherette and rubber parts.
Nail polish for securing parts. Lacquer paint is also great for this.
Micro-meter for precise measurements.
That’s all that I can think for now. There are more things that I use but they aren’t what I would call essential. To be honest, most of the things that you see listed here are optional and are only used for certain situations. You’re not going to be needing most of them every time but it’s good to have them handy just-in-case.
Conclusion:
These are just some of the things that I commonly use for repairing broken lenses and cameras. If you’ve been repairing things then chances are you’re already familiar with many of the things that I listed or you may have them in your kit now as you read this. If you don’t, just buy or make them as you move-forward into this hobby and you’ll acquire a collection of tools in no time. Ric.
Help Support this Blog:
Maintaining this blog requires money to operate. If you think that this site has helped you or you want to show your support by helping with the site’s upkeep, you can make a small donation to my paypal.com (richardHaw888@gmail.com). Money is not my prime motivation for this blog and I believe that I have enough to run this but you can help me make this site (and the companion facebook page) grow.
Buy me a roll of film or a burger?
Thank you very much for your continued support!
$2.00
Helping support this site will ensure that this will be kept going as long as I have the time and energy for this. I would appreciate it if you just leave out your name or details like your country’s name or other information so that the donations will totally be anonymous. This is a labor of love and I intend to keep it that way for as long as I can. Ric.

Dec 25, 2015 @ 22:37:02
Thanks for the great info Rick.
I’ll be getting myself a set of those Vessel screwdrivers with the cushion grips.
I’ve been searching for the brand name for ages as I’ve seen several Japanese camera technicians using them on YouTube videos.
Cheers,
Ron.
Dec 26, 2015 @ 00:43:06
Hello, Ron. Just stickbto vessel. Another japanese brand is WERA but vessel is more available to me. Tge german brand WIHA is also good but i would atick to japanese brands. They are cheaper too
May 10, 2016 @ 07:41:28
Hello Rick,
wonderful guides. Repairing old lenses is my hobby. Most of the steps in your repairs are the same as mine. Except the tools(mine are not good). I live in Europe and its hard to find any Vessel screwdrivers here. Also its hard to me to identify them in Ebay (especially the different shafts) . If you could help me and show me some items i will be happy.
Thanks!
May 10, 2016 @ 08:38:15
Hello, Angel! Thank you for finding my site entertaining! WERA (German) is also OK, I believe they have JIS ones but I will just stick with VESSEL because they never fail me.
I believe these are the same as the ones that I use. Amazon sells them however they do not sell the long ones that I use for popping open the lens mount.
Another German brand called WIHA is also good, just make sure you get the JIS ones. Regards, Ric.
May 11, 2016 @ 06:23:46
Thanks Rick, i just bought a set of http://m.ebay.co.uk/itm/291660305645 from Japan. Do i still need the long ones from Amazon?
Btw i dont receive notifications for new comments. I subscribed for it.
Regards
May 11, 2016 @ 08:23:28
Hi, Angel!
I cannot access ebay from my studio. If the one from ebay is the longest one (like what I use) then it should be fine but it can be straining to used a long driver for every screw. In my experience, the long one can also be used on the smallest JIS screw there is. also, you only need the length for the added torque which may not sound much but it means everything.
I am sure that there is a “email me” notification box somewhere. You can reach me at richardhaw888@gmail.com if you need help
May 11, 2016 @ 09:27:54
Here is the same set in amazon https://www.amazon.co.uk/gp/aw/d/B000CED236/ref=mp_s_a_1_2?qid=1462958683&sr=8-2&pi=SY200_QL40&keywords=vessel+screwdriver+set&dpPl=1&dpID=51VFc96XTdL&ref=plSrch
The are short so i will order and the longer set.
About the notification – i just didnt see the confirmation email.
Thank you!
May 11, 2016 @ 16:18:14
Do you use wrench like this http://www.tradecounterdirect.com/custom/images/products/hires/rolson-strap-wrench.jpg
This was the only tool which helped me to open a stuck top ring of my nikkor-s 28mm f3.5.
May 11, 2016 @ 16:46:31
Hello, Angel. Those drivers are too small but they are useful for smaller screws only. The long ones like the one I showed you is the most important one. Using these little drivers to open up bayonet screws and other bigger screws will only ruin the screws head.
May 11, 2016 @ 16:48:23
Yes! I use and i love them! I even have 2! But only use them when you have to. Front barrels like the one you said should come off easily after putting acetone for an hour
Jun 14, 2016 @ 08:06:27
Hi Ric,
Im using helicoid grease HELIMAX-XP (www.ebay.co.uk/itm//271194713421) which is exceptional quality but i found that its too sticky for some helicoids(ex. Micro-Nikkor 55/2.8 becomes a little hard to focus/stiff). Do you know another brand which is thinner. It seems that the heli gap of 55/2.8 is too short and needs different grease.
Angel
Jun 14, 2016 @ 09:19:04
Hello, Angel. How are you? The lenses with crc needs to have a thinner grease used. You cannot use a thick grease on this lens because apart from the 3 helicoids you have a few more helicoids from the crc as well. All those will add up and you will get a hard turning lens. The usual grease that i am using is thin anyway. The first time i greased this, i used a thicker grease and it was difficult to turn. Ric
Aug 04, 2016 @ 12:14:43
Hi Richard, I am trying to find Micro screw extractor for screws of 1mm but cannot find any. What is the size of the one in the picture? Were you able to get those super small sizes?
Thanks and best regards,
Aug 05, 2016 @ 03:50:34
Hi, Pablo! They are being sold in eBay. But its more expensive. Ric.
Dec 16, 2016 @ 23:20:48
Hi Richard,
I really enjoy your site. Great job!
You mention that you are not sure if the tiny screws that hold the front element assembly to the front barrel can be bought.
Could they be these ones? http://www.del-screw.com/(sus)cone_point.htm
INT
Dec 20, 2016 @ 01:40:19
Hello, INT!
I have since found a supplier but they are only open on weekdays and will only accept volume orders of 1000 screws up. This is closer to my home so I may check this out. Thanks!
Apr 28, 2019 @ 09:51:41
Hello Richard
About the screws for the bayonet mount. Those JIS screws.
Do you have a website you recommend ?
Even if the screws are sold by the 1000 it will be better than none.
Thanks
Carlos
May 06, 2017 @ 20:24:15
Hello
Need some help on the tools. I did not follow your advice and I just messed up a bayonet JIS screw with a BAD quality Phillips screw driver…
My mistake, my fault, my tears …
So I need some guidance.
On the picture I was able to Identify the following
Vessel 9900 P0*150
Vessel 9900 3*150
Right ?
I have two questions:
Do I need additional ones ? and … Can I by the short versions that are 100 mm long, rather then the 150mm. The 150 are almost twice the price.
Also it seems that the two rubber grip ones ( blue and green), on another picture, are part of a VESSEL set. It seem to be :
Vessel TD-55 ou TD-56.
Witch one is it ?
Last question. The first picture show a set of 6 precision screw drivers. Do I need them ? If so I was not able to identify them. Can you tell me what is the brand and reference, please.
Thanks
Carlos
May 07, 2017 @ 00:58:04
Hello, Carlos!
Yes, you will need the additional ones. The long ones are the most important ones because they are used for the bayonet screws. The extra length are needed for added torque.
The set of screwdrivers are necessary because they have different sizes suitable for the other screws in the lens. You can be sure if it is JIS by going to a remote control hobby shop and buying it there.
In this craft, you will quickly collect a big set of drivers. I have almost 20 in various sizes and I use them all!
If you have stripped the head then you will need a screw extractor just in case. The only one that works is the one in my site. Ric.
May 07, 2017 @ 15:32:25
Thanks Richard
I was able to find an online shop in the UK with reasonable prices, and bought the “standard” pack you recommend. All VESSEL …
Can you recommend an online shop where I can find the screws ?
It is not easy to find so tiny screen in “local Portugal” shops.
And ..
Is this the S10 grease you recommend ?
http://www.ebay.es/itm/252833910796
Helicoid Grease for Camera lens #10 15ml Made in Japan
Sorry for all the question, but … opening and cleaning this old lens is fun. So fun !!!
Carlos
May 08, 2017 @ 02:04:18
Hello, Carlos!
The screws are not sold online in small quantities. My screws were bought by the thousands from a factory. However, there are replacement screws being sold on the net and all you need is the right specs like pitch and diameter.
Yes, that is the S10 grease that I like to use but for different lenses you would like to use different types of hardness. S10 is not so hard but good for general use.
Be sure to read my previous posts because there are tips scattered here and there just in case. Have fun and just ask, Ric.
May 14, 2017 @ 12:57:45
Hello
On the first picture of this post you have a set of Pro’sKit screws. Do you know if this are JIS ?
Carlos
May 15, 2017 @ 05:29:35
Hello, Carlos.
Yes, they are JIS. Although they do not have the JIS mark, I am pretty sure that they are JIS. Things that are sold locally in Japan by Japanese brands are almost always JIS. So if you go to a RC shop in Portugal and buy a Tamiya brand driver set, you will be sure that it is JIS. To be safe, you can ask the technician or repair guy there and if he doesn’t know about JIS then he should not be in that job hahaha.
These are very handy and I use them all the time. Ric.
May 15, 2017 @ 20:42:21
Hello Richard
Thanks for your help.
I have bought, at a very faire price, the vessel screwdrivers. I bought them online from a UK store.
I have also bought the above set of small vessel screwdrivers, but has isolated pieces. Once again from the same shop. Very faire price. They have arrived this afternoon and they are, indeed, VERY nice pieces of hardware.
Also I have been able to find the screws – bayonet screws ( around 5 euros for 50 pieces). Not sure if they are JIS – don’t think so. I have destroyed one bayonet screw with a Phillips screwdriver. I had read you post, and as probably many of the those that are starting, I did not pay enough attention to your advices. WRONG move …
To all of you out there … follow Richard advice … You will spare yourself a lot to trouble.
🙂
I am now struggling to find the S10 and S30 grease. I have found the 250, 300, etc. But not the 10 and 30.
Once again: Thanks from Portugal.
This is indeed the best blog I have ever seen on Nikon lens repair.
Carlos
May 16, 2017 @ 02:18:29
Glad you liked it, Carlos!
Be careful,though. There are many fake VESSEL drivers coming out from China, the land of the fake merchandise!
As for the screws, yes you have to be careful if the head is JIS or not but most important is the pitch of the thread. If it is wrong then it will destroy your screw hole and you will need to re-tap it.
You can look for JapanHobbyTools in Amazon, they are my supplier for grease. I got some grease, the same ones that Nikon uses but they are not cheap so I use it carefully. Alternatively, you can use Super Lube if you like. Just make sure that you use fully synthetic grease and not petrol grease. Silicon and lithium based grease are the best. Ric.
May 15, 2017 @ 05:37:08
I searched Google and I got this.
May 16, 2017 @ 19:47:41
Hello
I believe I got real VESSEL. I bought them from a online store on UK. They seem to sell just “good” brands. Fortunately the Vessel seem to be the less expensive.
🙂
I will be very carefully with the screws.
I have already contact the JapanHobbyTools because they currently do not have the S10 and s30 on the shop.
When you say you have grease : “the same ones that Nikon”. Do you by any means refer to any of the following ?
SANKOL CFD409Z
FLOIL G-92KA
Carlos
May 17, 2017 @ 01:25:18
Hello, Carlos!
No, I am using Nippeco’s grease. That’s Nippon Petrochemical corporation. 🙂
May 17, 2017 @ 16:59:14
Hello
I emailed JapanHobbyTools and they listed the grease again on ebay. It is already on the way to Portugal.
I will open again my lens and change the grease I had put on them. The focus is more stiff then I like.
I will start looking into second hand stores for cheap lens, because I bought most of mine on ebay. Not cheap and not all people are honest.
Once again THANKS for all the help. I will continue to follow and advertise your blog. Best in class.
Carlos
May 18, 2017 @ 00:54:50
Congratulations, Carlos!
Be sure you have th proper lens openers because these are VERY important. I have to make special ones sometimes. Remember, S10 grease is multipurpose grease for lenses 50mm and up or lenses with a long helicoid throw. S30 grease works best for lenses 35mm and shorter or lenses with a short helicoid throw. Ric.
May 18, 2017 @ 10:16:10
Richard
I understand what you mean about the grease.
I already have a 35, a 50 , a 135, and a 200. Starting Slow.
🙂
What do you mean by lens openers ?
Do you mean this
https://richardhaw.files.wordpress.com/2015/12/img_1491.jpg?w=600&h=600
Carlos
May 18, 2017 @ 12:50:35
Hello, Carlos!
Those are the rubber cups. They are also important. Lens openers/spanners are important. You need at least 2 types. Ric.
May 18, 2017 @ 14:09:55
OK…
I know what you mean.
I already have the “workman’s compass”. It work fine but I have to be very careful not to slip during the operation.
I will order another one equal to the one you have in the pictures above. Indeed working with the right tools is MUCH better.
The rubber cups have just arrived … a couple of minutes ago.
Carlos
Jun 11, 2017 @ 03:39:52
Hi Richard, thank you for your guide, it is most helpful.
Would you happen to have a ebay link to the micro screw extractor?
Many thanks
Jun 11, 2017 @ 05:04:36
Hello, I do not have an ebay link but you can try copying and pasting the name and see what you can find. I remember somebody who got one from amazon. Try it. Ric.
Jun 11, 2017 @ 12:16:57
Thank you Richard. I’ve tried many combinations of the words. As I live in the UK, frustratingly, many of the tools easily obtainable are not available to us, I will keep looking
Jun 11, 2017 @ 20:08:38
I have the same issue finding the micro screw extrator.
If you find them … please post.
Fot the other tools I was able to get all of them. Even some of them in Europa.
Jun 14, 2017 @ 23:28:26
Hi both,
This is the smallest extractor I can find on eBay is from Japan, can be searched under “VESSEL M3 M4 Damaged Screw Remover” .
However, the largest screws on nikkor lenses are in fact M2…
Ric, will this work on an M2 screw?
I have also bought some 1.5mm left hand twist drill bits, apparently these work as screw extractors
Jun 15, 2017 @ 00:14:56
Hello,
Try contacting rebox-web@sumiyoshi.gr.jp and show him the picture from my blog. Ric.
Sep 07, 2017 @ 07:05:08
Thank you for some other informative site. Where else may just
I get that kind of info written in such an ideal way?
I’ve a undertaking that I’m simply now operating on,
and I’ve been on the glance out for such info.
Sep 30, 2017 @ 17:35:38
Nice blog, but it would be a thousand times more useful if 1) you actually posted links to some of the products you use, and 2) you made those links open in a new tab (e.g., target=”blank”) rather than links taking a person away from the page they’re viewing.
Sep 30, 2017 @ 17:40:34
It took me some time, but now I have almost everything.
USE THE RECOMMENDED TOOLS.Otherwise you will make some damage to the lens. I have learned this the wrong way. I messed up some of lens.
Indeed this is a very very very good blog.
Oct 01, 2017 @ 02:01:30
Thank you, Carlos!
Dec 10, 2017 @ 22:36:29
this is ridiculous for someone not starting a lens repair business. most of us want the cheapest basic tools needed to safely repair a few lenses. i have done it before with $1 Chinese mini screwdriver set and a swiss army knife and some ingenuity…. i was looking for something better in the bellow $20 range not invest a $1000 in professional gear. the “essential” part of the title is misleading, as long as we are being absurd, why not buy a lens element melting furnace and lens assembly machinery while you are at it….
Dec 11, 2017 @ 05:54:25
Whatever floats your boat Mike. Nobody’s forcing you to use anything. You can even use a nail clipper if you wish.
Dec 13, 2017 @ 23:38:20
Richard
Thanks for all your advice. I have learned the HARD way, using $1 set, Swiss army knifes and some ingenuity.
Result: damaged a coupe of lens parts.
Now I have the proper tools. Not all of them! This is a hobby to me so I have to manage my budget specially to buy more budget lens.
🙂
Thanks for your help and generosity.
Dec 14, 2017 @ 12:21:25
Some people just say things for the sake of it. 😀
Dec 11, 2017 @ 07:08:09
I read articles on this site and I think your post is very important element and has great information. I need to get a complete set. This is a review of the best precision screwdriver set on the market. All the best.
Dec 11, 2017 @ 08:44:33
Hello. Vessel has been great. They aren’t expensive and they last a long time. Most importantly, they are JIS compliant.
Jun 30, 2018 @ 11:05:37
Dear Richard
Your website is remarkable and only a fool would say otherwise! Thank you for this valuable resource!
A few questions if I may and I’d be really happy to hear back!
I’m repairing an old 28-70 2.8d. It’s aperture is a bit slow to close. So I will begin by cleaning it in lighter fluid to get the old grease off and then apply new grease. Does this sound right? I’m thinking about it in the way that any moving parts or parts that suffer friction, must be regreased after a while.
That aside, I’m also repairing a newer generation of lead-free solder lenses, do you have any tips for these? Has the grease changed since? (18-200 VR)
Lastly, how do I know what helicoid grease I need for these lenses? The 28-70 is a behemoth, so based on your other article, I am guessing S-30? The 18-200 is not such a large lens, so I imagine the S-10 Might suffice. Are these assumptions correct?
Best Wishes
Chai
Jul 07, 2018 @ 17:41:45
Hello.
Glad that you liked the blog. The iris for the 28-70 has to be cleaned the right way. You are going to do more damage to it by flushing it.
as for the 18-200 yes I think the grease has changed. AF lenses use way thinner grease. I have some from NPC but they’re just enough for my own use. Somebody is selling some at ebay but i am not sure if its the same as what I have
AF lenses will need special grease. S10 and S30 are best used for manual lenses. Ric.
Jun 30, 2018 @ 11:07:51
Dear Richard
I’ve forgotten to ask this earlier, but what is the difference between the synthetic lubricating oil and grease offered on Japan Hobby Tool?
Jul 07, 2018 @ 17:43:34
Hello, JHT is my supplier. silicone is a synthetic grease, so is lithium grease. whichever you buy only buy the ones that are made for lenses. cheaper ones from the hardware won’t do because they may evaporate, stink or grow fungi. Ric.
Jan 23, 2019 @ 21:41:14
It’s going to be ending of mine day, but before end I am reading this
enormous article to increase my know-how.
Apr 09, 2019 @ 20:07:37
Hi Richard I bought the micro screw extractor set SK11 No.4 (set of 3 sizes) to try to remove a damaged bayonet screw and the extractor stripped on the first try. I was very suprised that the screw didn’t move at all.
The best thing I’ve found for difficult bayonet screws is to use a micro butane torch to heat the stuck screw. It has worked every time. Now if I can find a good quality extractor set to remove the stripped screw I’d be happy.
Keep up the great work you are doing. I enjoy reading your blog. Thank you.
May 20, 2019 @ 14:56:42
Hi Ric
I wonder if you can help.
My Nikon F2 has a problem. It seems as if whatever speed I set it to, it’s always the same speed that fires. There is no obvious difference in sound or visually between and speed setting. It sounds like it’s firing at around 250th on each setting.
I have the front and top panels off and I have the repair manual but I need pointing in the right direction before I go any further. In your experience what might this be caused by. The camera is clean inside and I can’t see anything obvious.
Best regards form the UK!
Alan
Jul 05, 2019 @ 21:35:44
This design is incredible! You obviously know how to keep a reader
entertained. Between your wit and your videos, I was almost moved to start
my own blog (well, almost…HaHa!) Wonderful job.
I really enjoyed what you had to say, and more than that,
how you presented it. Too cool!
Nov 03, 2019 @ 06:12:02
Hi Rick,
Excellent guide to select the correct tools. I don’t have the experience and confidence to tackle precision jobs like lens and camera repairs. Maybe I’ll start with simple lens cleaning tasks.
I commend and thank you for sharing your knowledge on this forum.
Dec 13, 2019 @ 05:07:52
Thanks for finally writing about >Camera and Lens Repair
Essentials (Tools) | Richard Haw’s Classic Nikon Repair and Review <Loved it!
Jan 05, 2020 @ 15:44:20
I am wondering if anyone knows the size of the screw used in the Nikkor 18mm – 105mm lens for fastening the plastic bayonet mount?
Jun 20, 2020 @ 17:44:45
Hi Richard,
I am a 72 years old analog photographer living on a shoe string
on my cortijo in the Alpujarra mountains in Andalucía Spain.
I use mainly medium and large format cameras, but started using my old Nikons again due to lack of light in churches etc.
I even bought 28, 35 and 85 mm lenses all in f2 to replace slower lenses.
I have a Nikon F photomic and Nikkormat ftn for about 45 year now. Never let me down. They went over land to India, through deserts, bouncing on trucks and sleeping in my sleeping bag on Greek beaches etc.
I also have 3 Nikkormats EL.
Used to look down on them because I could decide my own correct exposure!
Actually they are wonderfull tools.
3 bodies with 28mm f2, 35mm f2, 85mm f2 and sometimes 20mm f3,5.
Works really fast! And much cheaper on film than my Pentax 67….
Now that I fell in love again with my old Nikons I want them all CLA’d.
How much would that set me back?
I am not rich but maybe you would consider free camping on my land between the Sierra Nevada and the Mediterranean sea as part of the payment. Might even take you up into the high sierra for photography in my 4wd.
I live on 1200m myself.
Look at Erik Frans Woudstra http://www.kunstinzicht.nl
Most photoos are made from and on my land.
Take care!
Erik.
Jun 28, 2020 @ 00:58:04
The best blog ever for lenses care. I work with binoculars, telescopes and microscopes in my country, Colombia.
Really helpful all the recommendations
A big hug, and again thanks.
Luis Ocampo
Oct 03, 2020 @ 18:16:49
I’m searching online for a workman’s compass. Is it best to buy one intended for drawing (Staedler 551) or one for measuring mechanical parts (ZAAS brand)?
Oct 06, 2020 @ 10:35:39
Hello Rick,
thank you for sharing your experience with us.
Best regards
Bernhard
Oct 31, 2020 @ 17:39:05
Ric,
I have filter that is stuck to the front of 50mm 2.8/Elmar. Because the filter is thin and the grip on the front of the lens is thin, I can’t get enough torque to loosen it (damn people like to over tighten things).
Suggested tool/tools?
Thanks,
Bob
Oct 31, 2020 @ 17:47:02
Ric,
Never mind. After putting the hood back on, turning the hood brought the filter with and the two separated with ease. A ghost in the machine, I guess.
Jun 21, 2022 @ 14:41:17
I’m hoping that you are still around Rick, these last couple of years have been trying times … You’re blog has been one that I found after wanting to learn lens repair and it has been invaluable to me. Just wanted to say thanks and I’ll find a way to get a hamburger to you 😉
Jan 23, 2023 @ 13:23:36
Hi, thanks a lot for your work.
I need to remove a screw and I saw that this topic was already shared here in comment.
Can you help me to buy somewhere the right screw extractor please ?
thanks in advance for your help
Oct 03, 2023 @ 21:21:45
Hello Richard,
I am coming to Japan in a couple of weeks with my family. I can’t wait to see this incredible country!
Would you please be so kind and give me an address of a store where I can buy some Japanese precision tools, like JIS screwdrivers, lens spanners and other, not necessarily camera-related precision tools.
We are going to travel the country, but we will be based in Tokyo, so I think this would be the best place to mak the purchases.
Thanks in advance!
Michael
Jun 17, 2024 @ 16:10:41
Seattle, USA. It’s great to read a website consisting of thorough, solid information vs so many sites that just contain a bunch of repetitive garbage meant only to increase SEO. Thank you for your efforts. This is how the internet used to be. 🙂